
None
None
-
Add a NAS migration in StorageMAP
Steps to add a migration path.
- Go to the Jobs module and click Migrate as shown in the following figure:
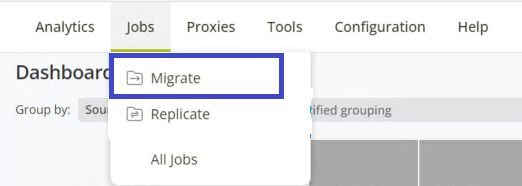
Figure 26. Migration option
2. Go to the Migrations > Dashboard screen and click on the New migration… button in the bottom right of the screen as shown in the following figure to open the Select source path(s) window.
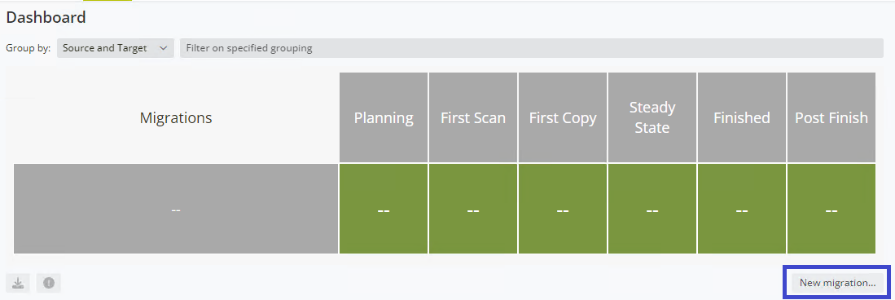
Figure 27. Create a new migration
3. First select the source file server from the drop down at the top (as shown in the following figure), and then select the paths to be migrated.
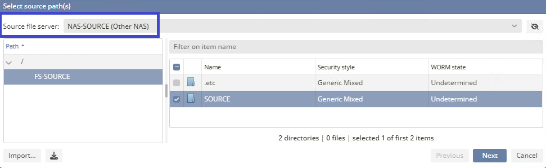
Figure 28. Select a source migration path from the dropdown list
4. Select the path(s) that you want to include in the migration as shown in the following figure. You can migrate at the root level or at any subdirectory level.
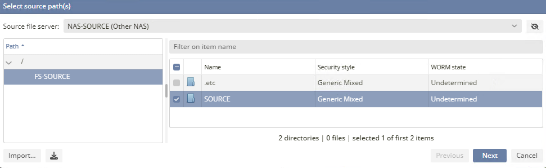
Figure 29. Select a specific source migration path
5. Once you have made your selection, click Next to go to the Select target path dialog. You can select the target file server and location and create additional directories to serve as the root level for the migration data as shown in the following figure:

Figure 30. Select a target migration path
6. Verify that the protocol is selected correctly. In case there are multiple options, you can select the correct protocol using the drop-down in this column. The following values are possible: NFS and SMB Protocol.
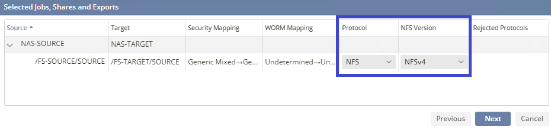
Figure 31. Select protocol type
7. Click Next after verifying that all the values are correct.
8. StorageMAP presents an overview of the job options. Ensure that the relevant job options are selected, then click Next.
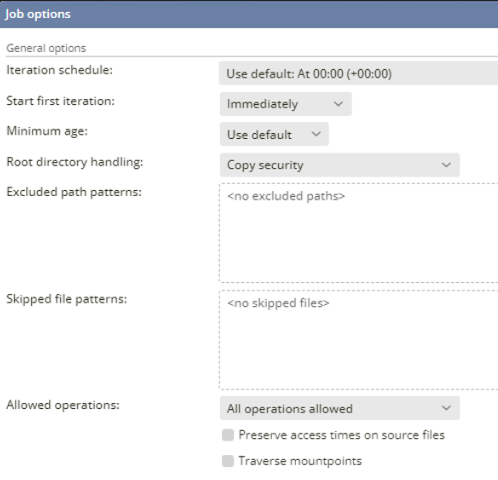
Figure 32. Migration Job options
9. StorageMAP automatically performs several prechecks as shown in the following figure:
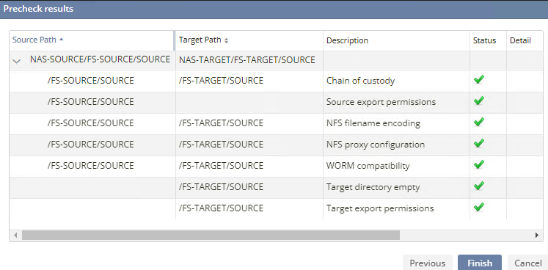
Figure 33. Migration precheck results
10. After reviewing the results, you can change the migration settings if needed or click Finish to start the migration process.
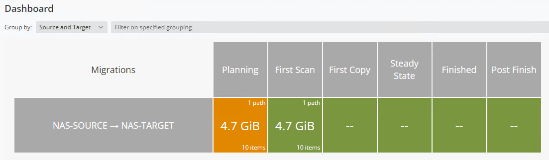
Figure 34. Migration path under the dashboard