
None
None
-
The following steps show how to create the PowerFlex file server at target.
1. Log in to PowerFlex Manager UI and click File > NAS Servers as shown in the following figure:
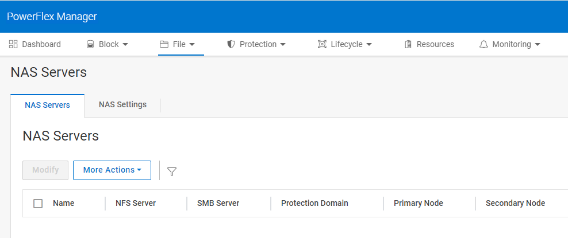
Figure 8. NAS Servers option in PowerFlex Manager UI
2. Click Create NAS Server. Enter NAS Server Name, IP Address and select the NAS protection domain as shown in the following figure:

Figure 9. Create NAS Server
3. Select the Sharing Protocol type: SMB, NFSv3, or NFSv4 as shown in the following figure:
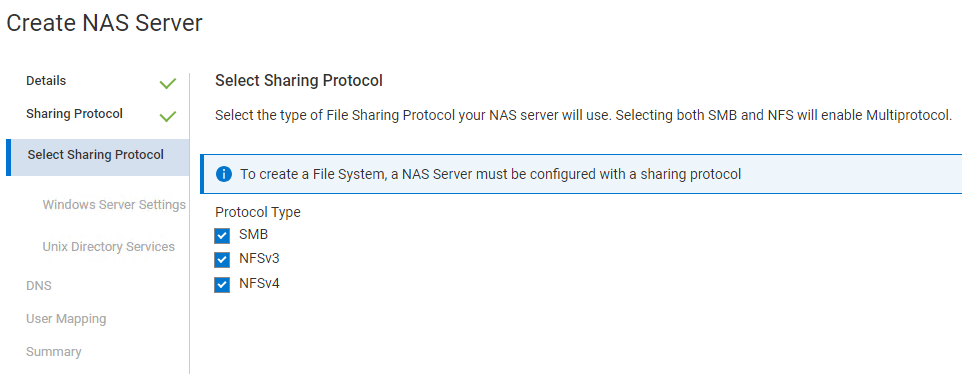
Figure 10. Select Sharing Protocol
4. On Windows Server Settings, select Join to the Active Directory Domain and complete the Active Directory details. Click Next as shown in the following image:
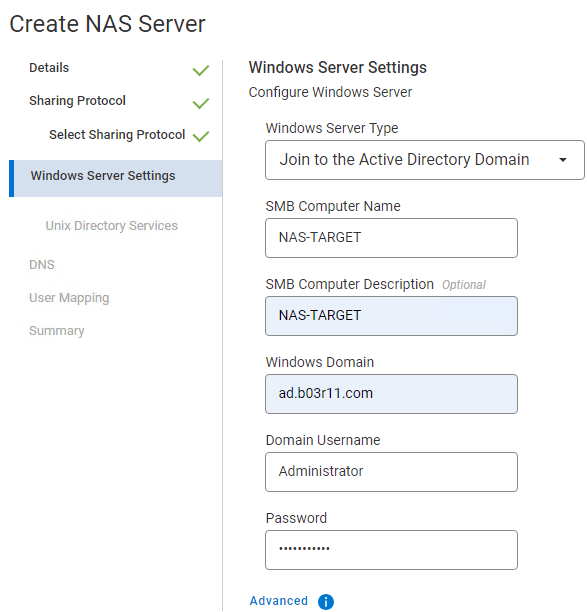
Figure 11. Windows Server Settings
5. Enter DNS IP address and click Add. And then click Next.

Figure 12. DNS details
6. Click Create NAS Server as follows:

Figure 13. NAS File Server created
7. Go to File > File Systems > Create File System as follows:
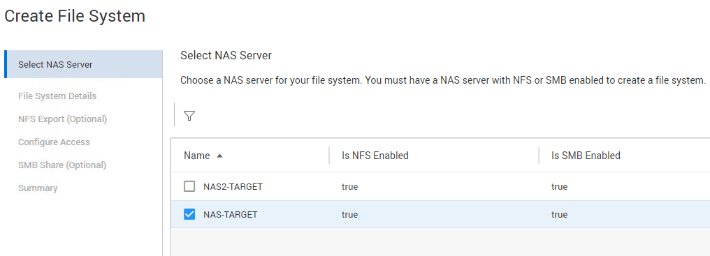
Figure 14. Create File System
8. Select the Storage pool and enter the file system name and size. Click Next.
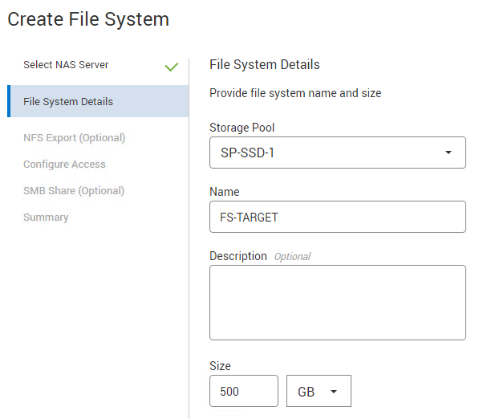
Figure 15. File System Details
9. Enter the NFS Export details.
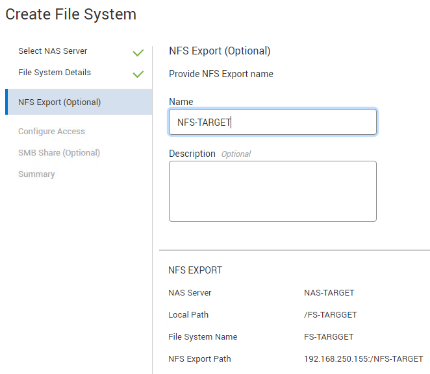
Figure 16. NFS Export Details
10. Configure Access and select the default access to Read/Write, allow root as follows:

Figure 17. Configure Access
11. Enter SMB Share details and click Create File System.
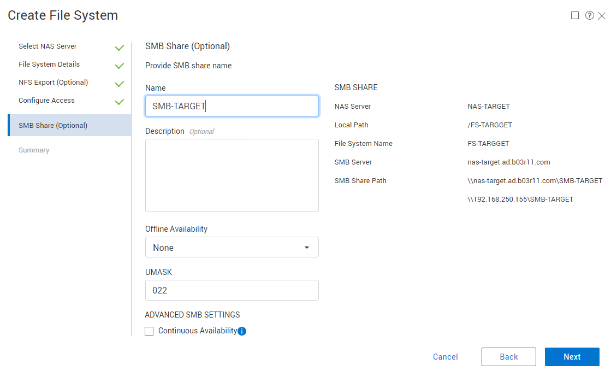
Figure 18. SMB Share details