
None
None
-
Introduction
The following sections include the creation of two storage policies for the Tanzu environment. Both category and tag creation are covered as precursors to the policy creation. A category is required before the user creates tags because tags are assigned a category.
Note: A category can be shared among multiple tags.
Category
- In vSphere, click the hamburger menu (
 ) on the left.
 - Select Tags & Custom Attributes.
- Select NEW under the Tags-CATEGORIES option as shown in Figure 32.
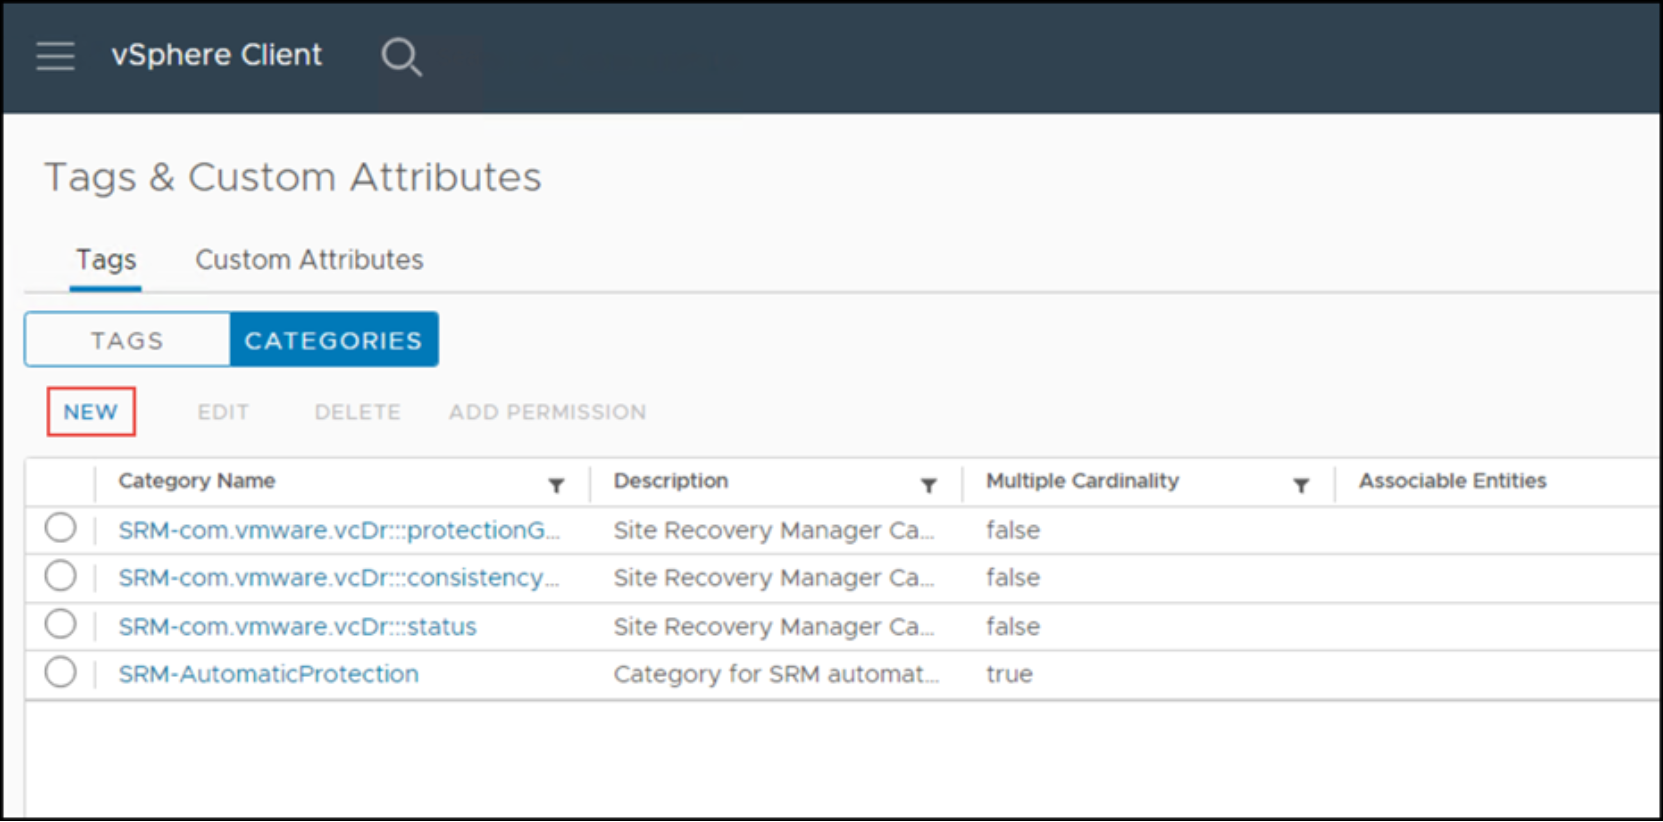
Figure 32. New category
- Enter a Name for the category and choose whether to use one or many tags.
- Optionally, add a Description.
Note: Figure 33 shows an example in which a single tag is used to avoid applying multiple options to the same datastore.
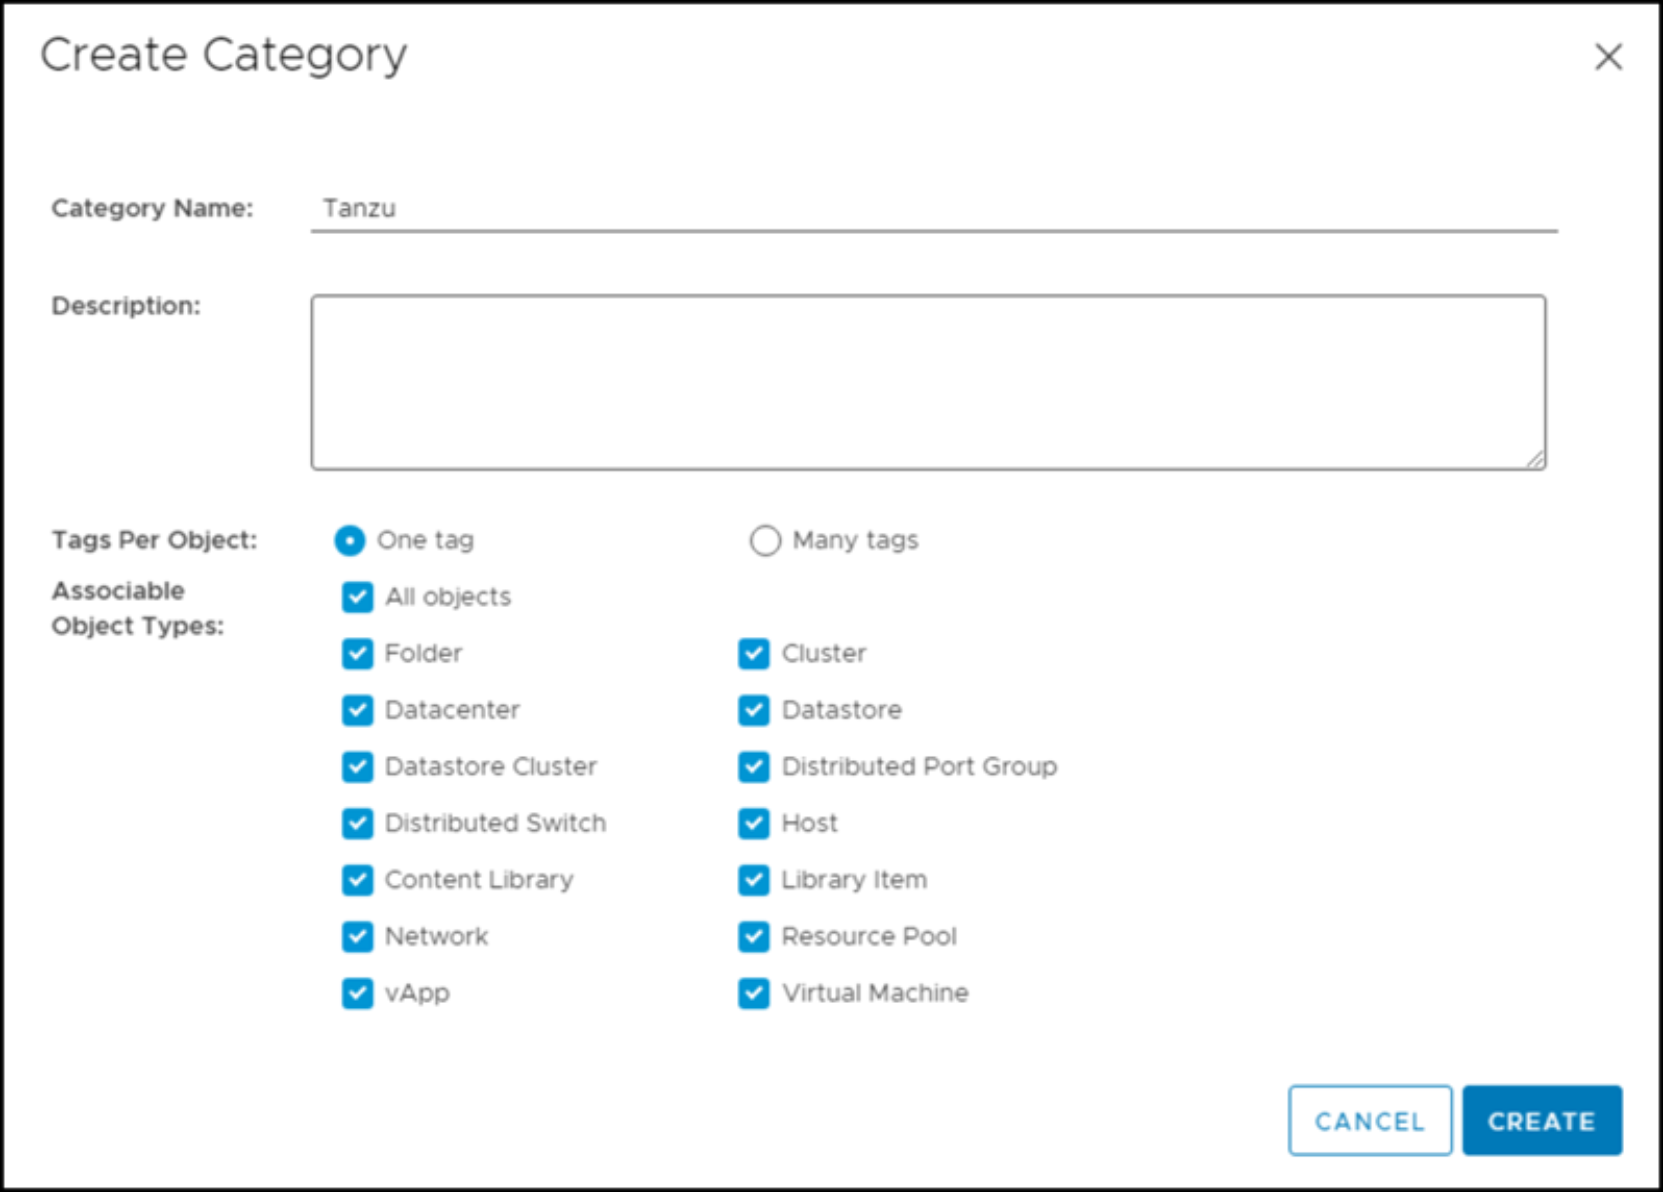
Figure 33. Create a category
Tags
Since both SDC and NVMe/TCP is used for PowerFlex volumes, two tags are necessary.
SDC
- Return to the Tags & Custom Attributes screen.
- Select the TAGS button, and then and select NEW to display the Create Tag dialog window.

Figure 34. Add an SDC tag
- Enter a Name for the tag. This example uses SDC.
- Use the drop-down box to choose the Tanzu category previously created.
- Click Create to complete the tag.
NVME/TCP
- Return to the Tags & Custom Attributes screen.
- Select the TAGS button, and then select NEW.
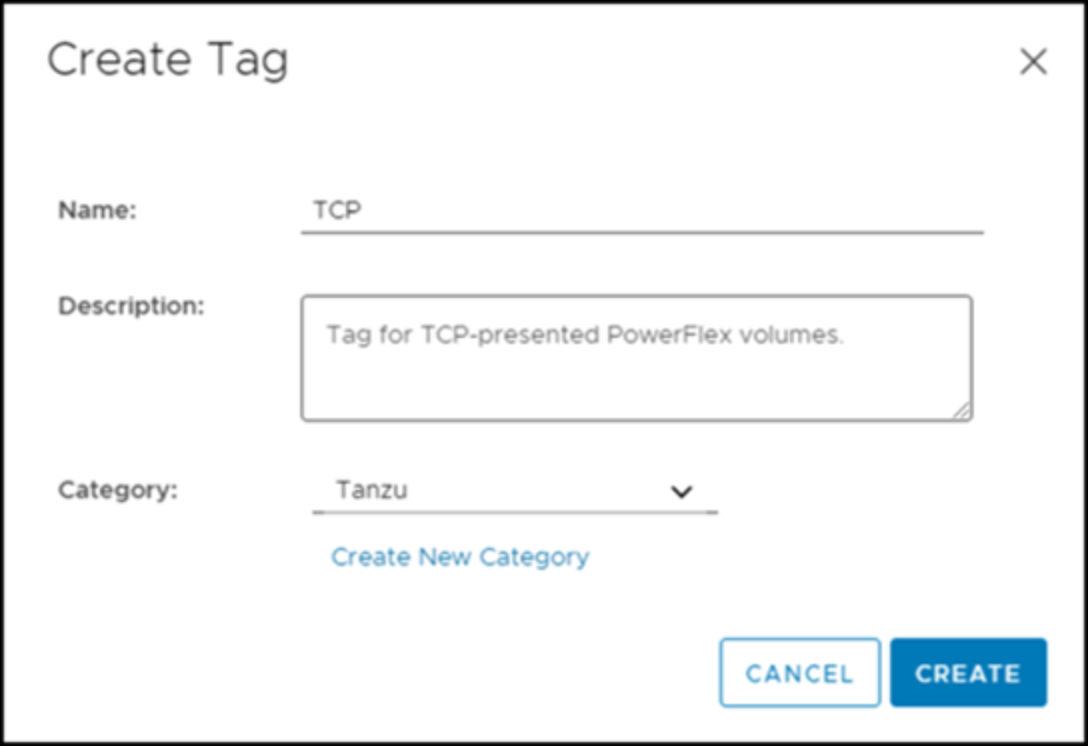
Figure 35. Add a NVMe/TCP tag
- Enter a Name for the tag. This example uses TCP.
- Use the drop-down box to choose the Tanzu category previously created.
- Select Create to complete the tag.
Datastore assignment
You can now assign the tag to the appropriate datastores. This process is manual as explained earlier, because the tags do not inherit any attributes from the array. A tag is whatever you want it to be, and it can be assigned to any number of objects.
Start by identifying the two different types of datastores on the PowerFlex volumes.
SDC
- In vSphere, go to the vCenter Datastores -> Datastores view.
- Right-click the SDC datastore and go to the Tags & Custom Attributes -> Assign Tag… option, as shown in Figure 36.
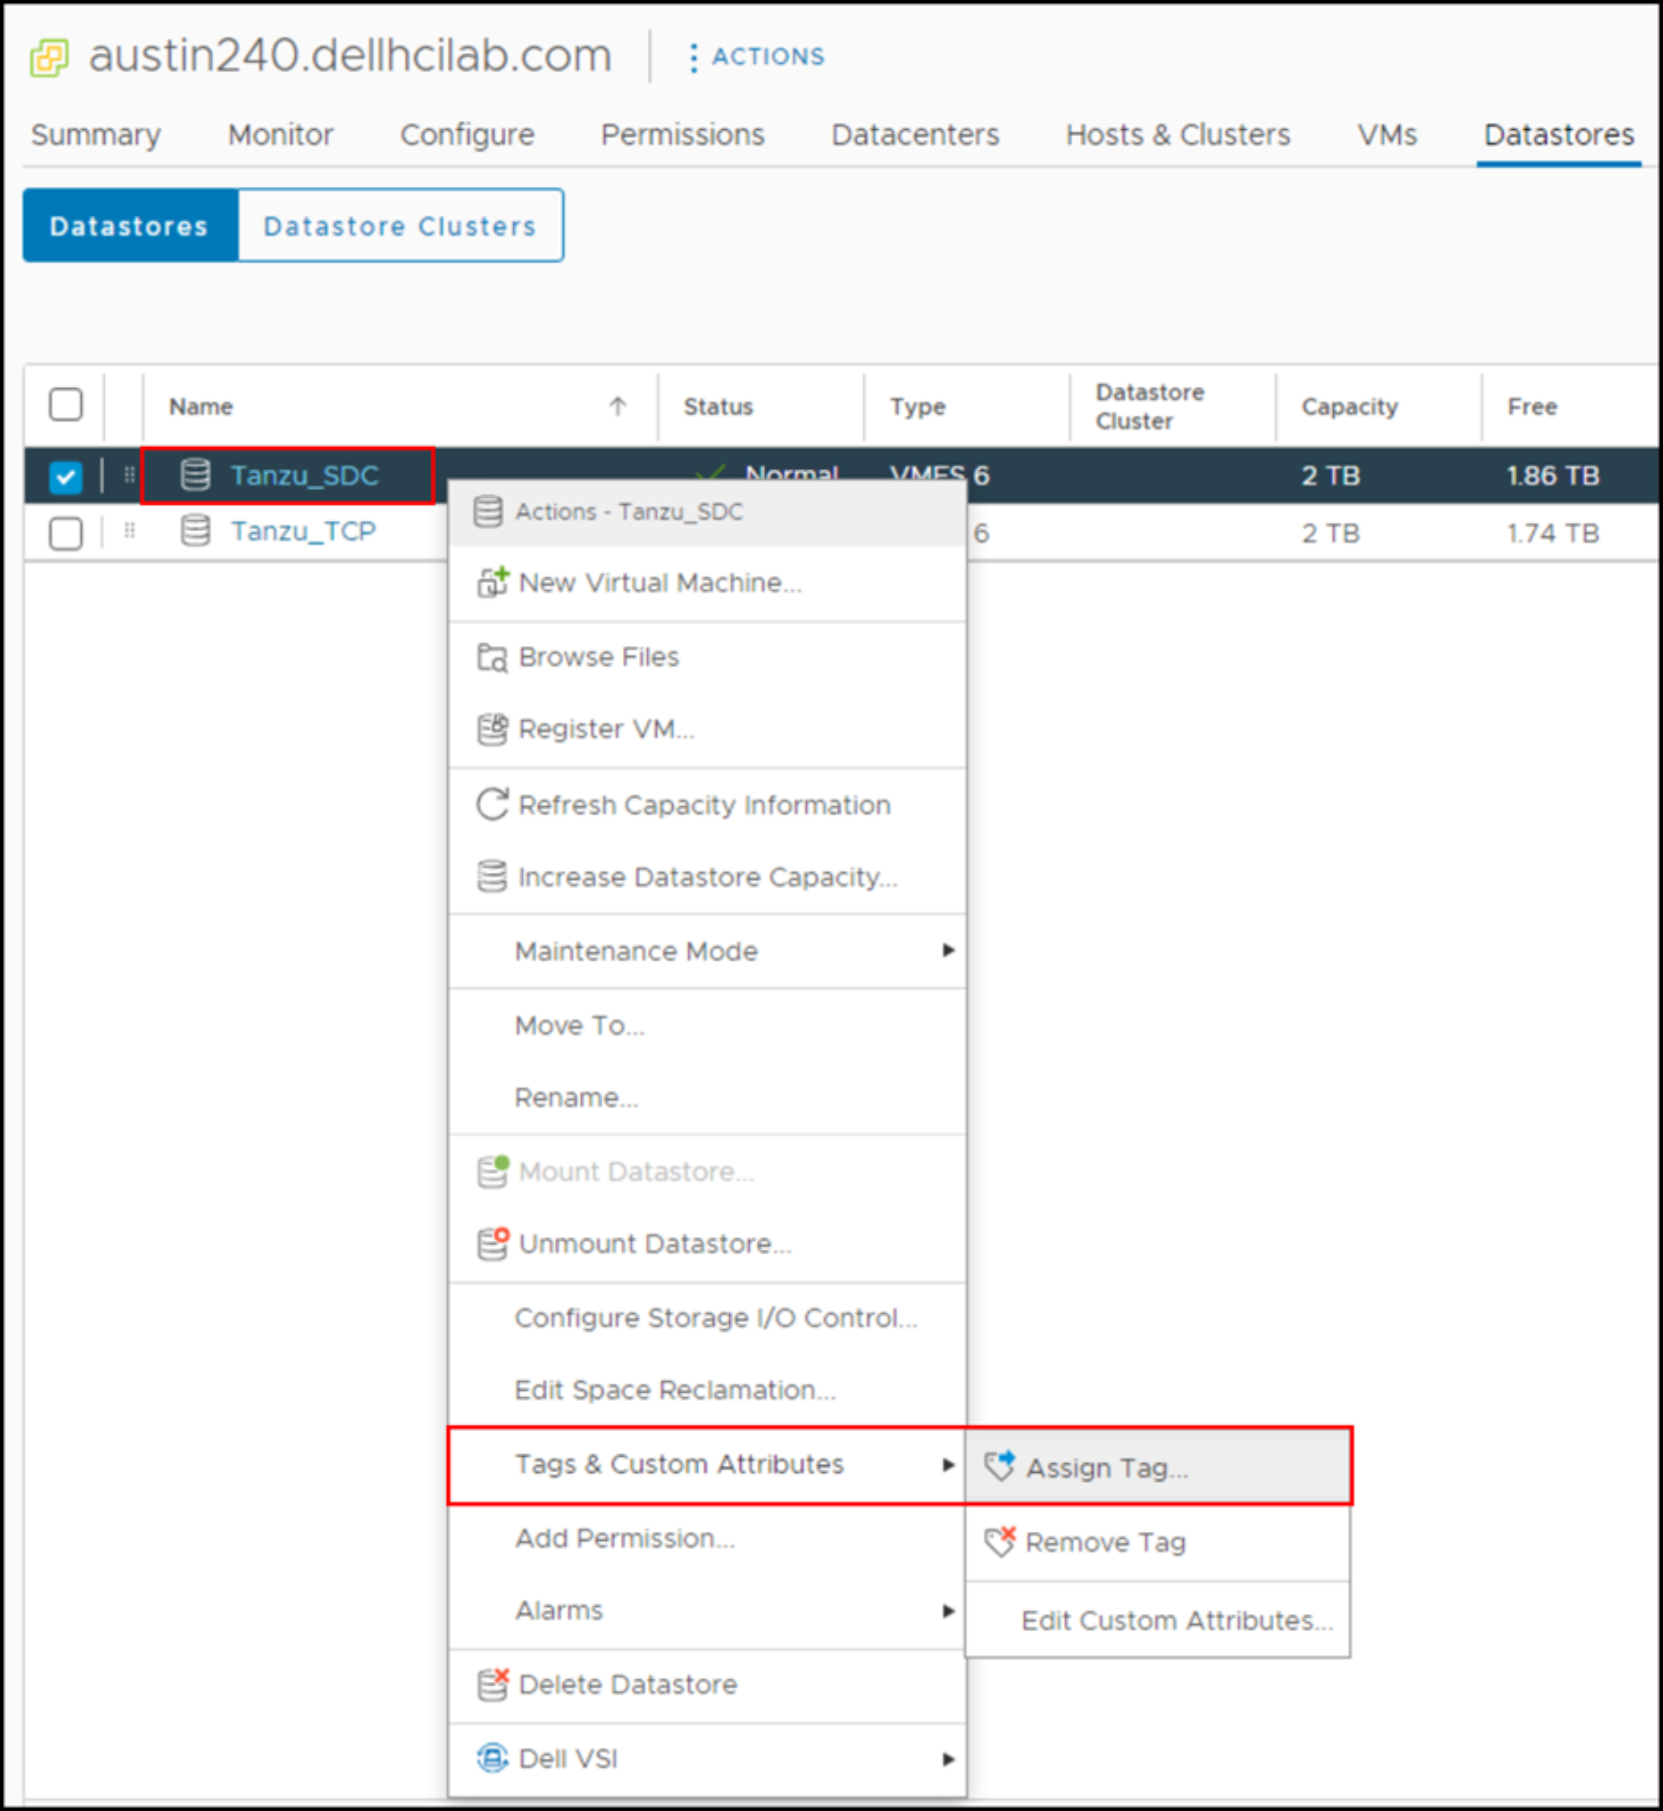
Figure 36. Assign SDC tag – Step 1
- Use the check box to select the SDC tag as shown in Figure 37.
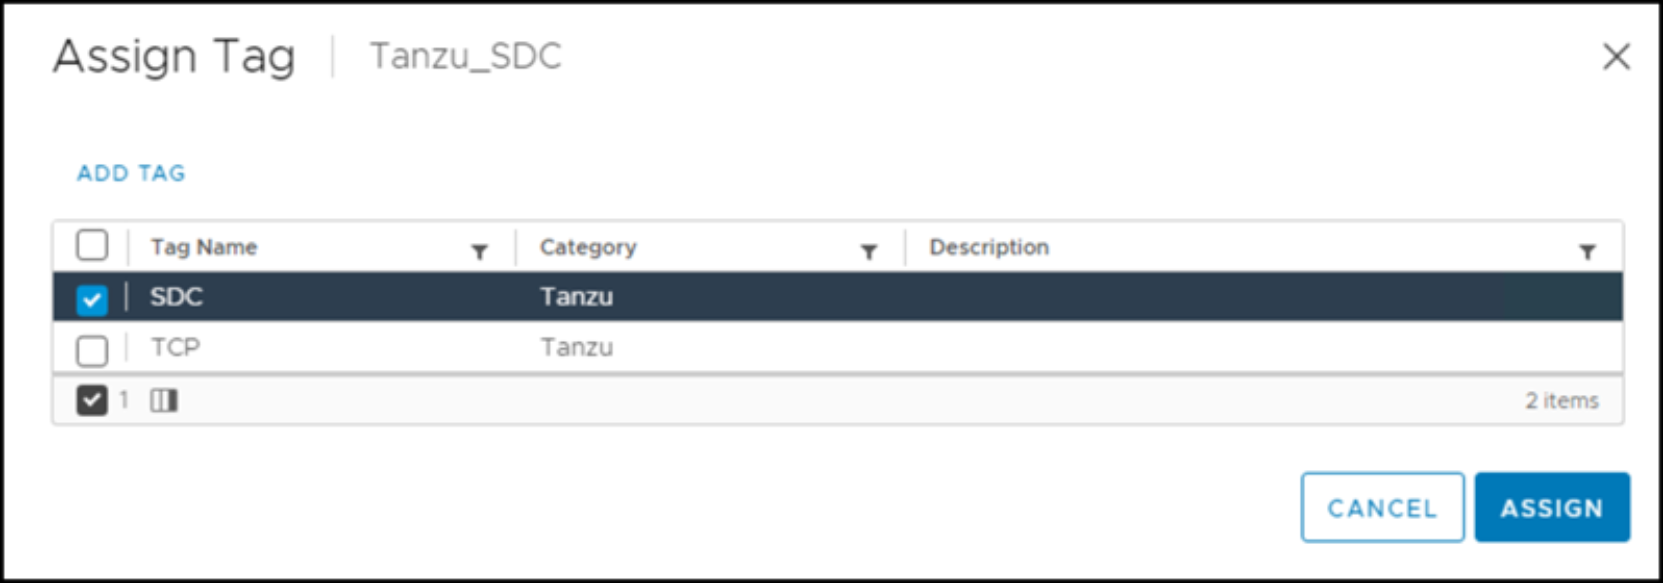
Figure 37. Assign SDC tag – Step 2
TCP
In vSphere, repeat the same process.
- Right-click the TCP datastore and go to the Tags & Custom Attributes -> Assign Tag… option.
- Use the check box to select the TCP tag.
Storage policies
The tag-based storage policy creation is the final step in the process. The SDC storage policy is shown as an example, but the TCP policy is included at the end of the process.
SDC
- In vSphere, click the hamburger menu () on the left.
- Go to the Policies and Profiles menu.
- Select VM Storage Policies as shown in Figure 38.
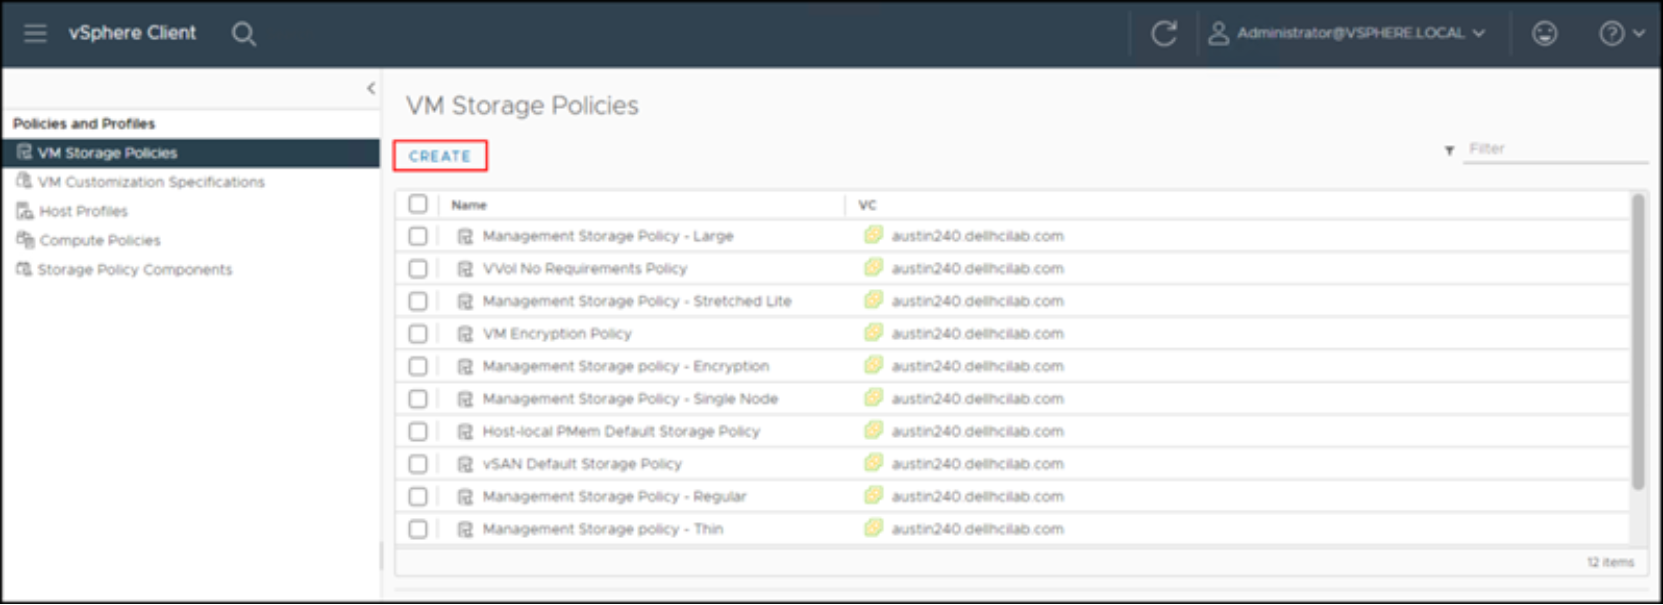
Figure 38. SDC storage policy – Step 1
- Click CREATE.
- Enter a Name (required) and Description (optional) for the policy.
- Click NEXT.
- Under the Policy structure screen, check the box next to Enable tag based placement rules, as shown in Figure 39.

Figure 39. SDC storage policy – Step 3
- Click NEXT.
- Now that tagging is enabled, select the category that was created earlier from the drop-down box as shown in Figure 40.
Note: Doing so enables the BROWSE TAGS button.

Figure 40. SDC storage policy – Step 4
- Click BROWSE TAGS.
- Use the check box next to the correct tag, and then click OK as shown in Figure 41.
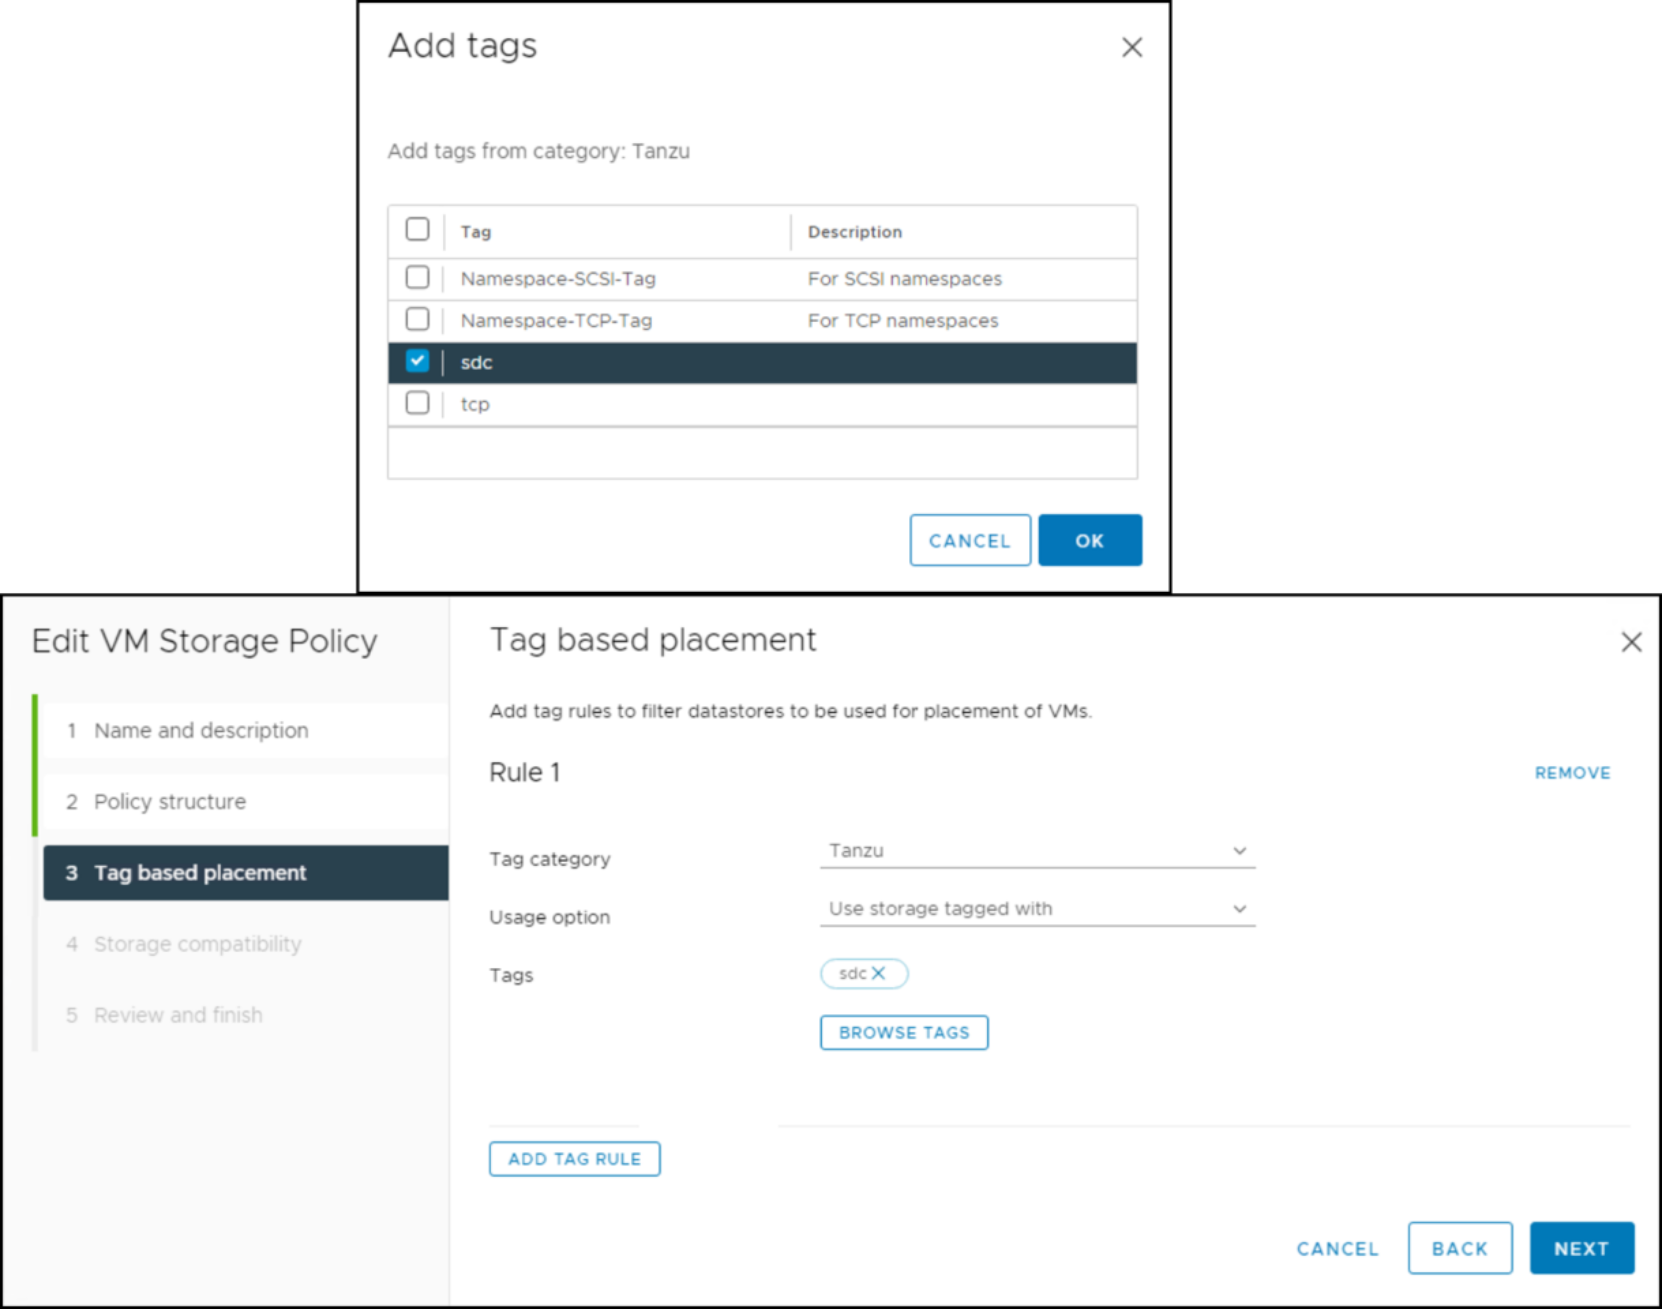
Figure 41. SDC storage policy – Step 5
- Click NEXT.
With the rule applied, VMware lists any datastores that meet the assigned criteria. In this example, the SDC tag was only put on one datastore as shown in Figure 42.
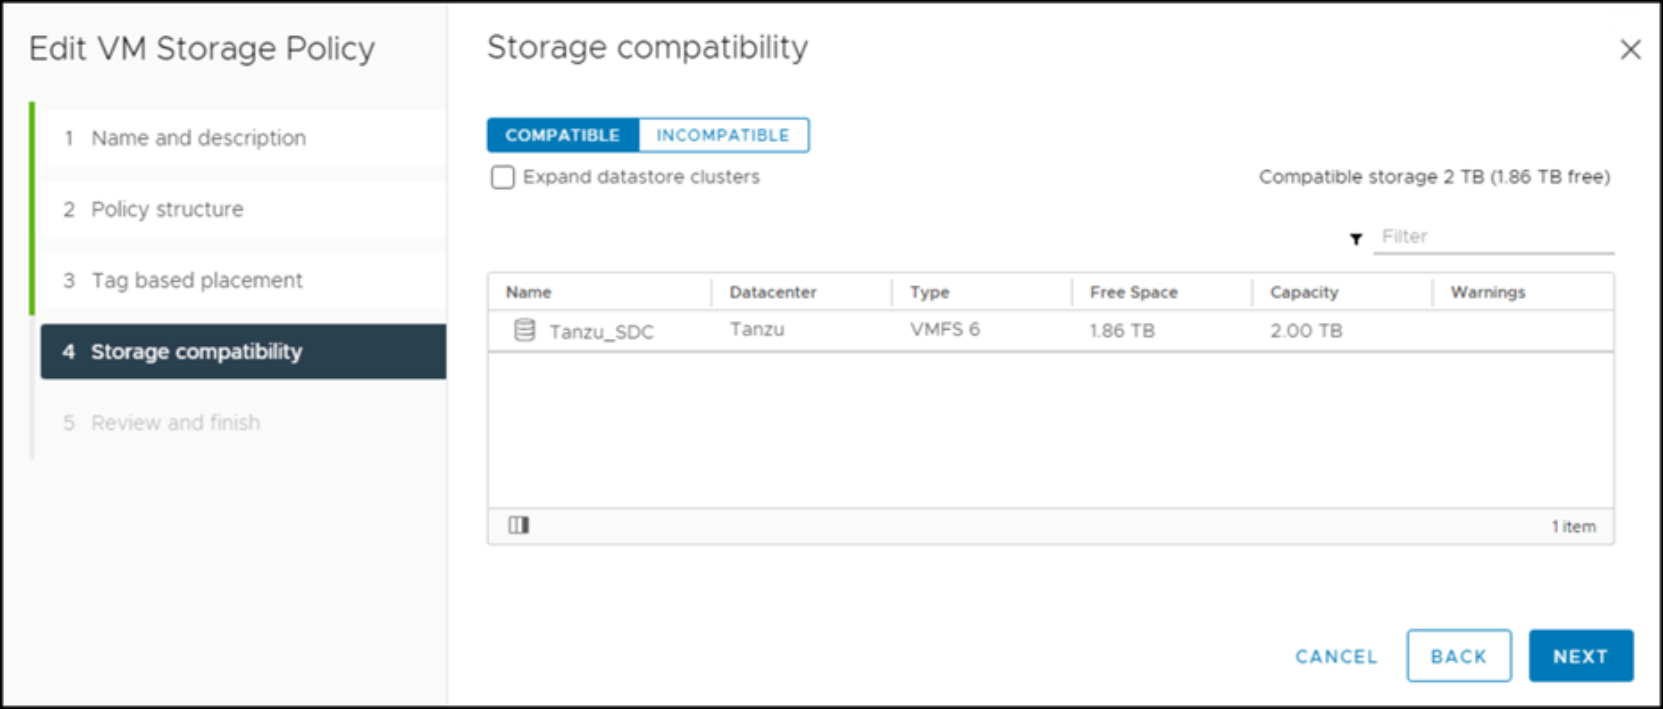
Figure 42. SDC storage policy – Step 7
- Click NEXT to reach the summary page, as shown in Figure 43.
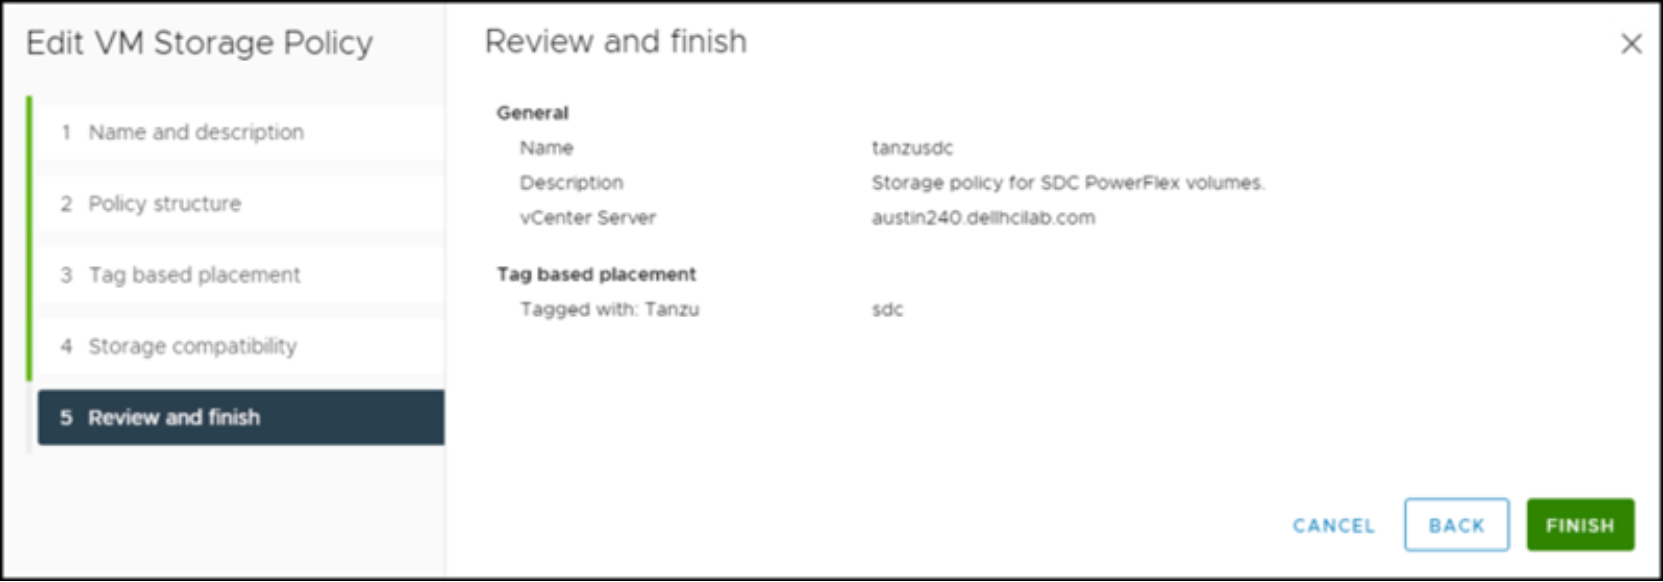
Figure 43. SDC storage policy – Step 8
- Review the selections, and then click FINISH.
TCP
The TCP storage policy is created in the same way as the SDC policy, but the tag is TCP instead of SDC. The TCP policy is shown in Figure 44.
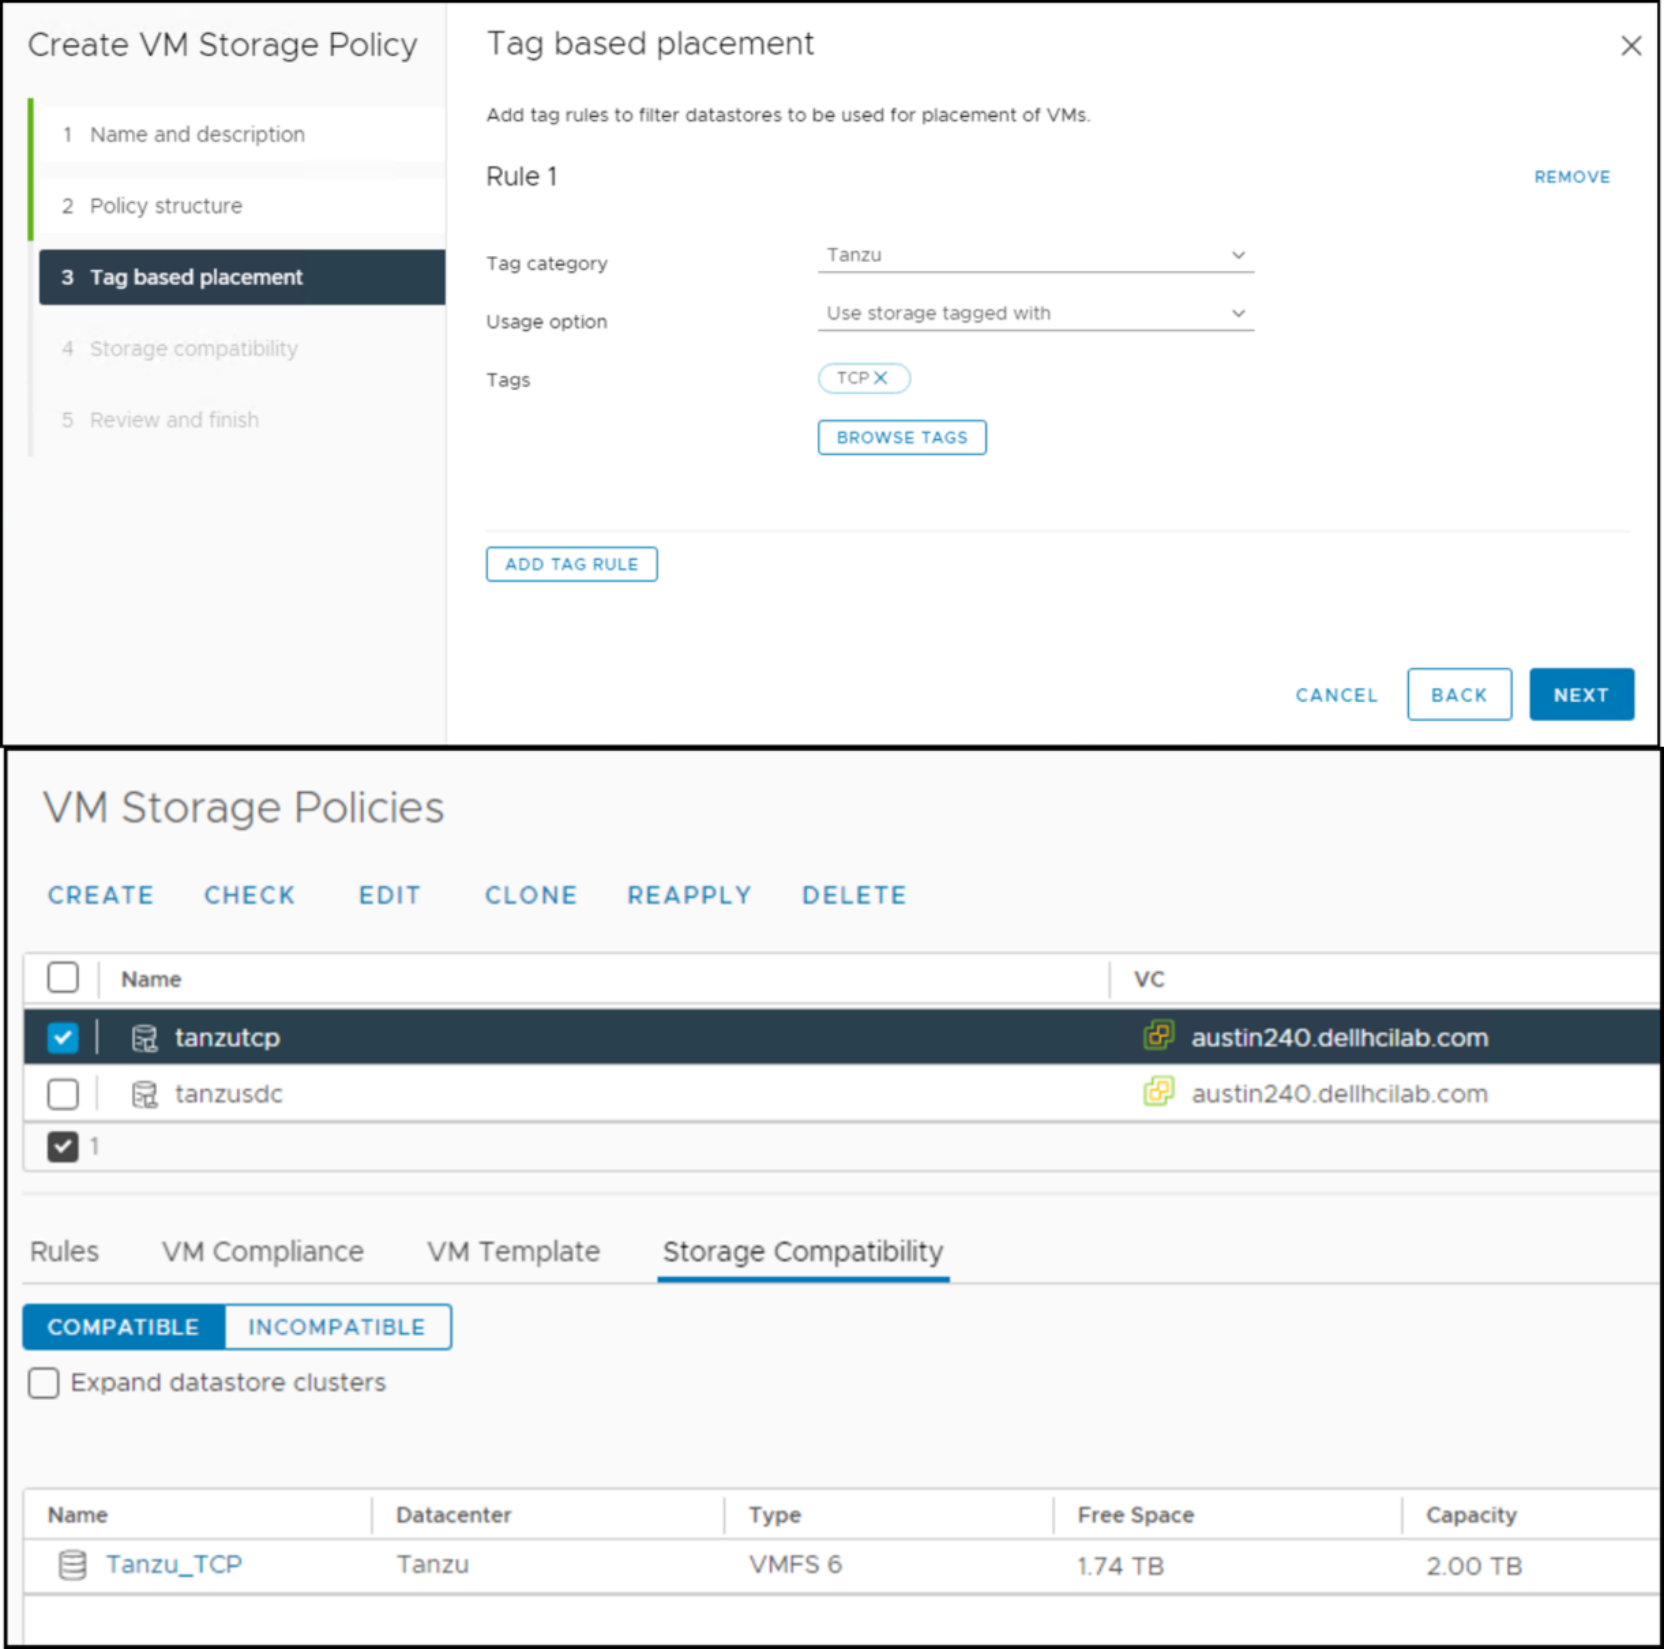
Figure 44. TCP storage policy
- In vSphere, click the hamburger menu (