None
None
-
Introduction
With connectivity to the ESXi hosts established, you can create and map volumes for the VMware datastores. For both SDC and NVMe/TCP this task can be accomplished directly in the PowerFlex UI. However, VSI enables users to provision datastores from the vCenter for SDC mappings. VSI does not support NVMe/TCP (or NFS). An example of each follows, beginning with the PowerFlex UI.
NVMe/TCP datastores
- Log in to the PowerFlex UI.
- Go to Block -> Volumes.
- Select + Create Volume as shown in Figure 22.
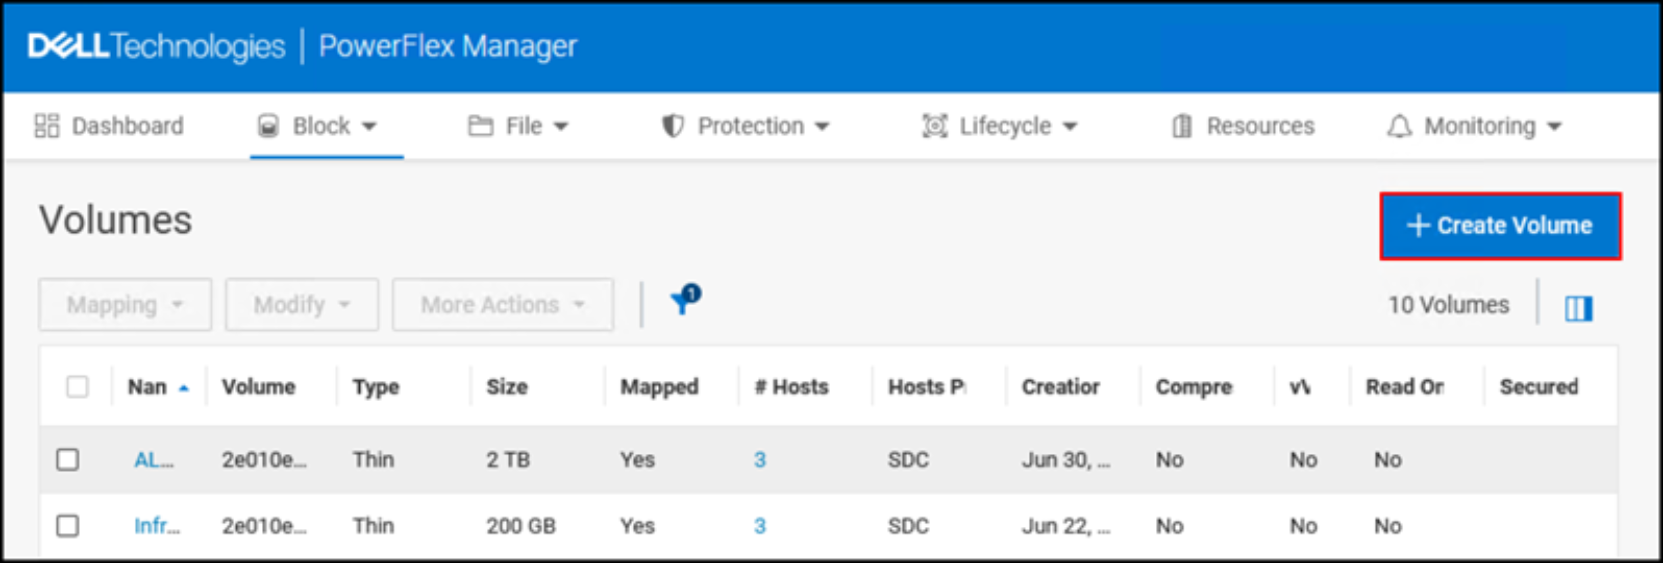
Figure 22. NVMe/TCP datastores – Step 2
- In the Create Volume screen, the Number of volumes defaults to 1.
- Enter a Volume name.
- Leave Provisioning as the default Thin.
- Select a size. This example uses 2 TB.
- Select the Storage Pool.
- Click Create to complete the wizard.
- After volume creation, use the check box to select the new volume.
- From the Mapping menu, select Map as shown in Figure 23.
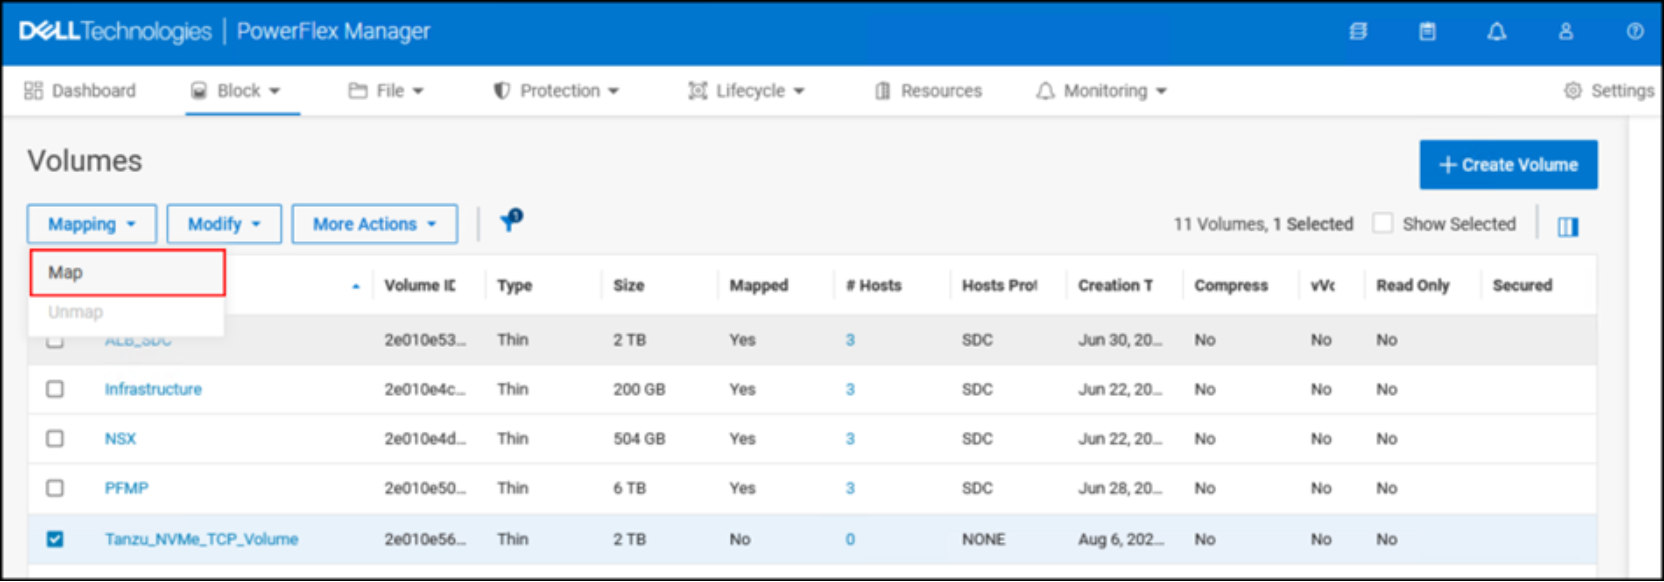
Figure 23. NVMe/TCP datastores – Step 4
- Use the radio button at the top to choose the NVMe protocol.
- Using the check boxes, select the NVMe hosts where to map the volume.
- Click Map.
Note: The volume will be available to the hosts for datastore creation after mapping.
- Go to any of the ESXi hosts.
- Select Configure -> Storage -> Storage Adapters.
- Select one of the NVMe/TCP adapters to view the newly presented device.
- Log in to vCenter.
- From the data center level, go to Datastores, then go to ACTIONS -> Storage -> New Datastore.
- Use the radio button to select the newly presented TCP volume.
- Provide a Name.
- Select NEXT to complete the wizard.
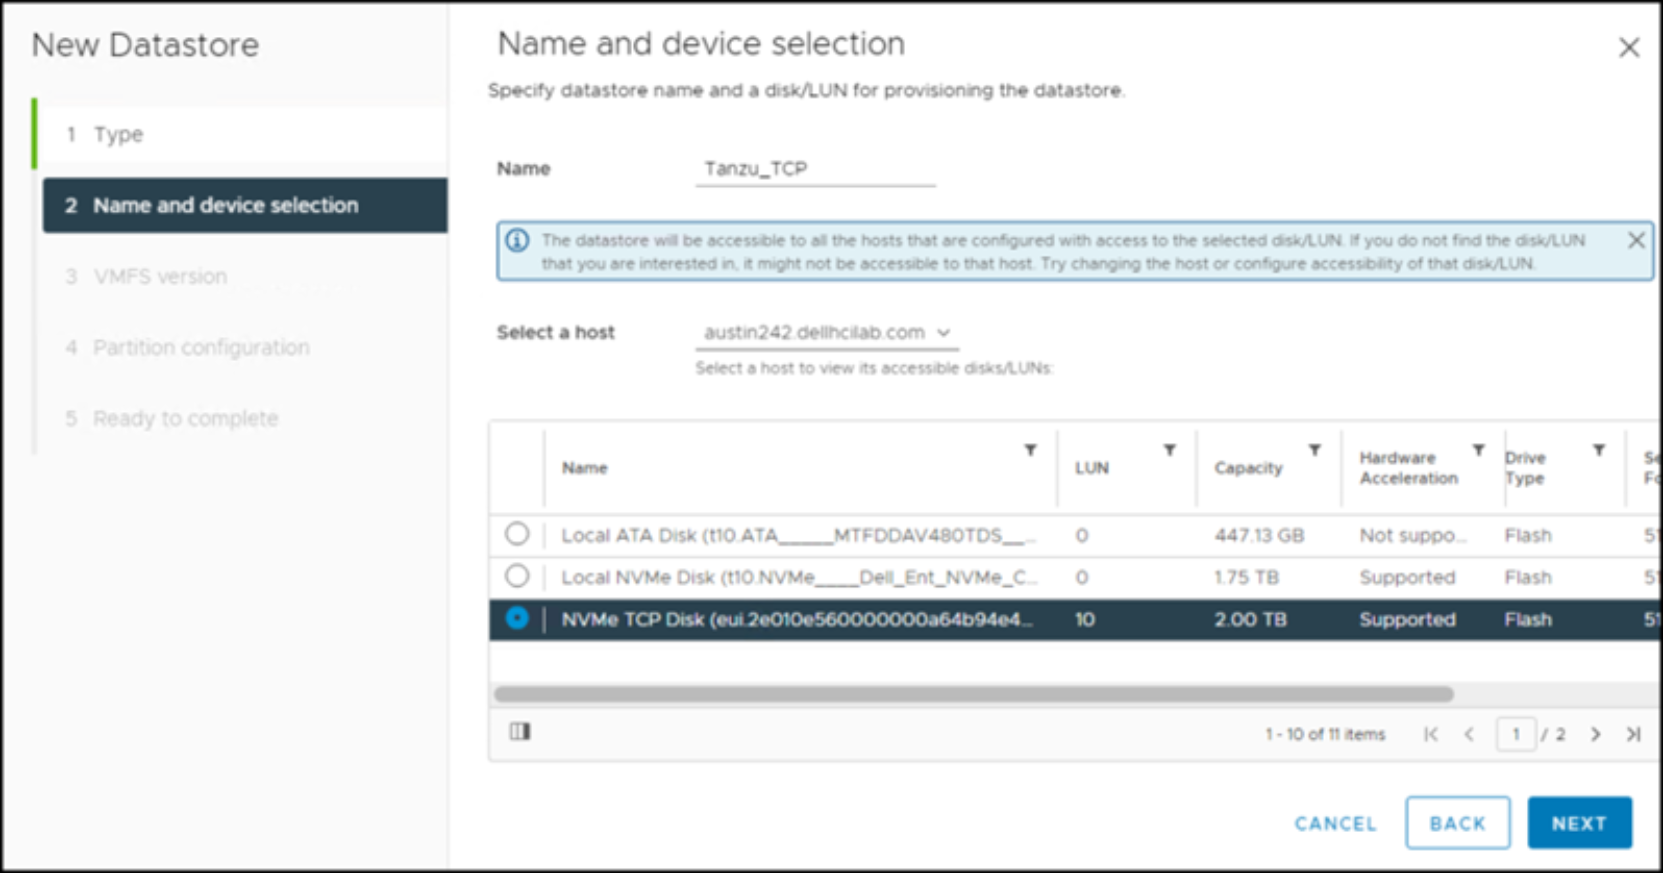
Figure 24. NVMe/TCP datastores – Step 8
The remaining steps are the same for TCP as any other device. The result is shown in Figure 25.
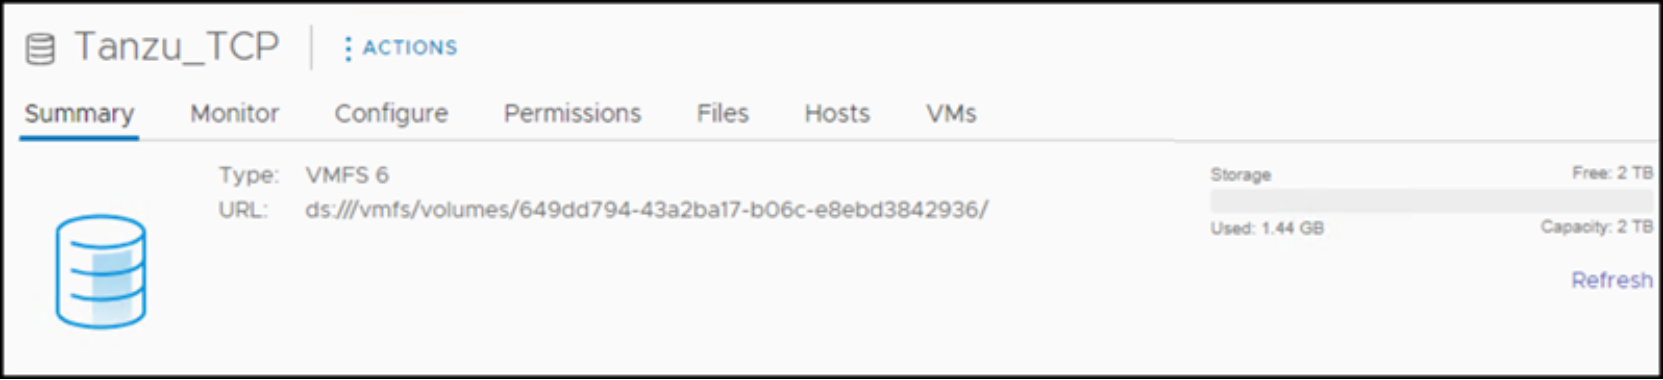
Figure 25. NVMe/TCP datastores – Complete
SDC datastores
For datastores with backing volumes that are mapped to SDC:
- In the vSphere UI, right-click at the data center, cluster, or host level.
- Select Dell VSI -> Create Datastore. This example is shown at the data center level in Figure 26.
Note: This task starts the Create Datastore wizard, which is a combination of VSI and VMware functionalities.
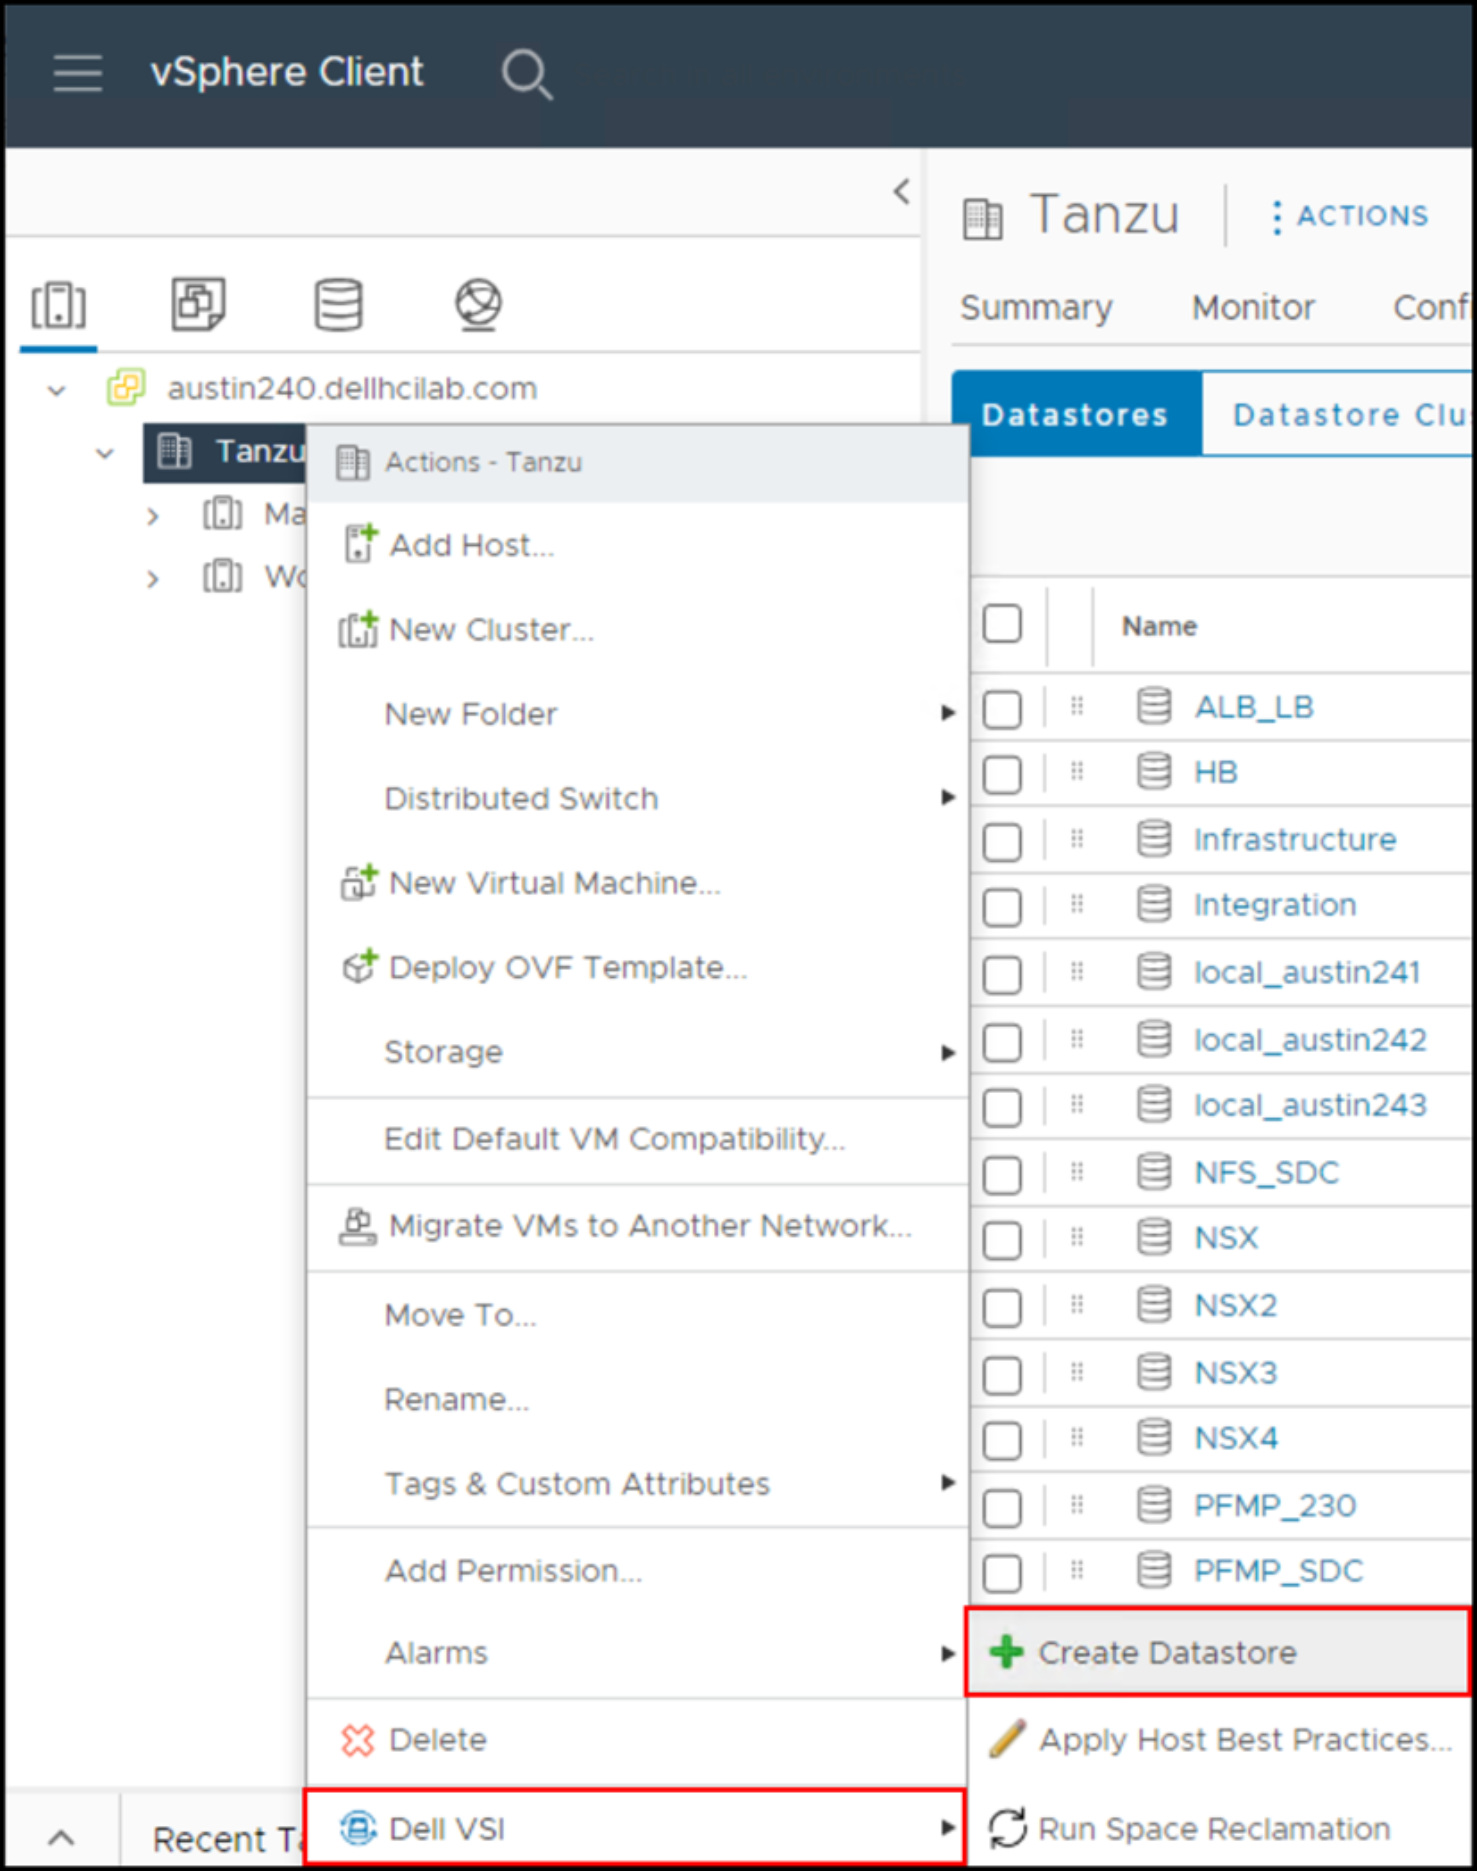
Figure 26. SDC datastores – Start VSI wizard
- Select VMFS for the type of datastore to create, as shown in Figure 27.
Note: VMFS is the only type that is supported for PowerFlex on VSI as of the publication of this guide.

Figure 27. SDC datastores – Step 1
- Click NEXT to continue.
- Enter a Name for the datastore.
- Click NEXT.
VSI displays the available storage systems that the user registered in VSI. These systems could include PowerFlex and non-PowerFlex storage. In this example, there is a single PowerFlex storage system, named PF-Tanzu.
- Select a storage system as shown in Figure 28.
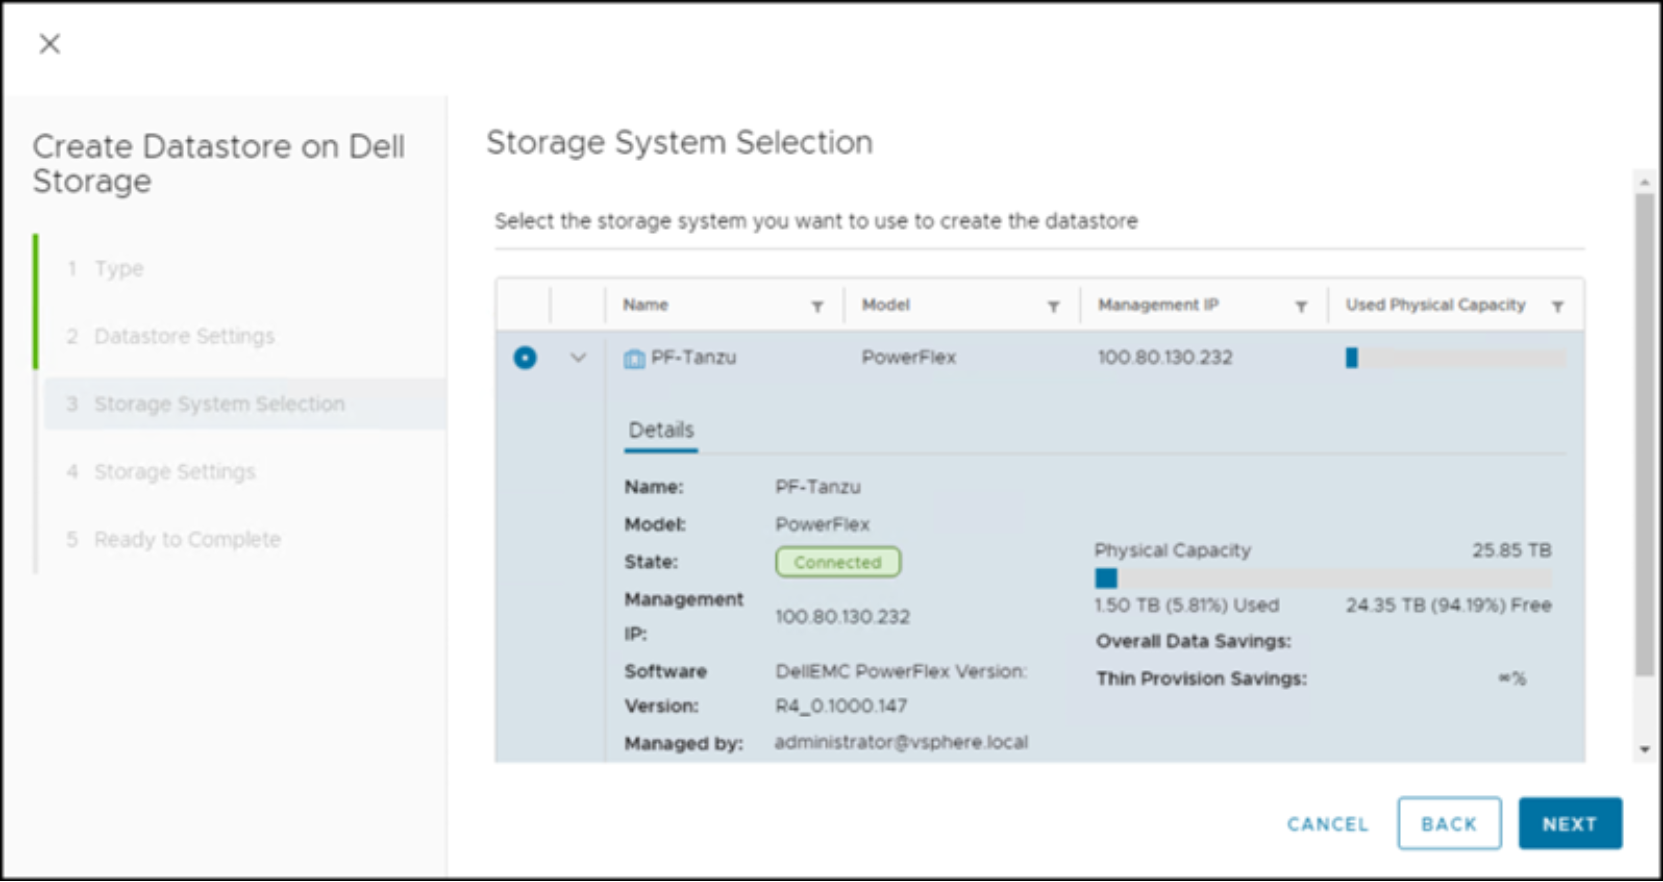
Figure 28. SDC datastores – Step 3
- Click NEXT.
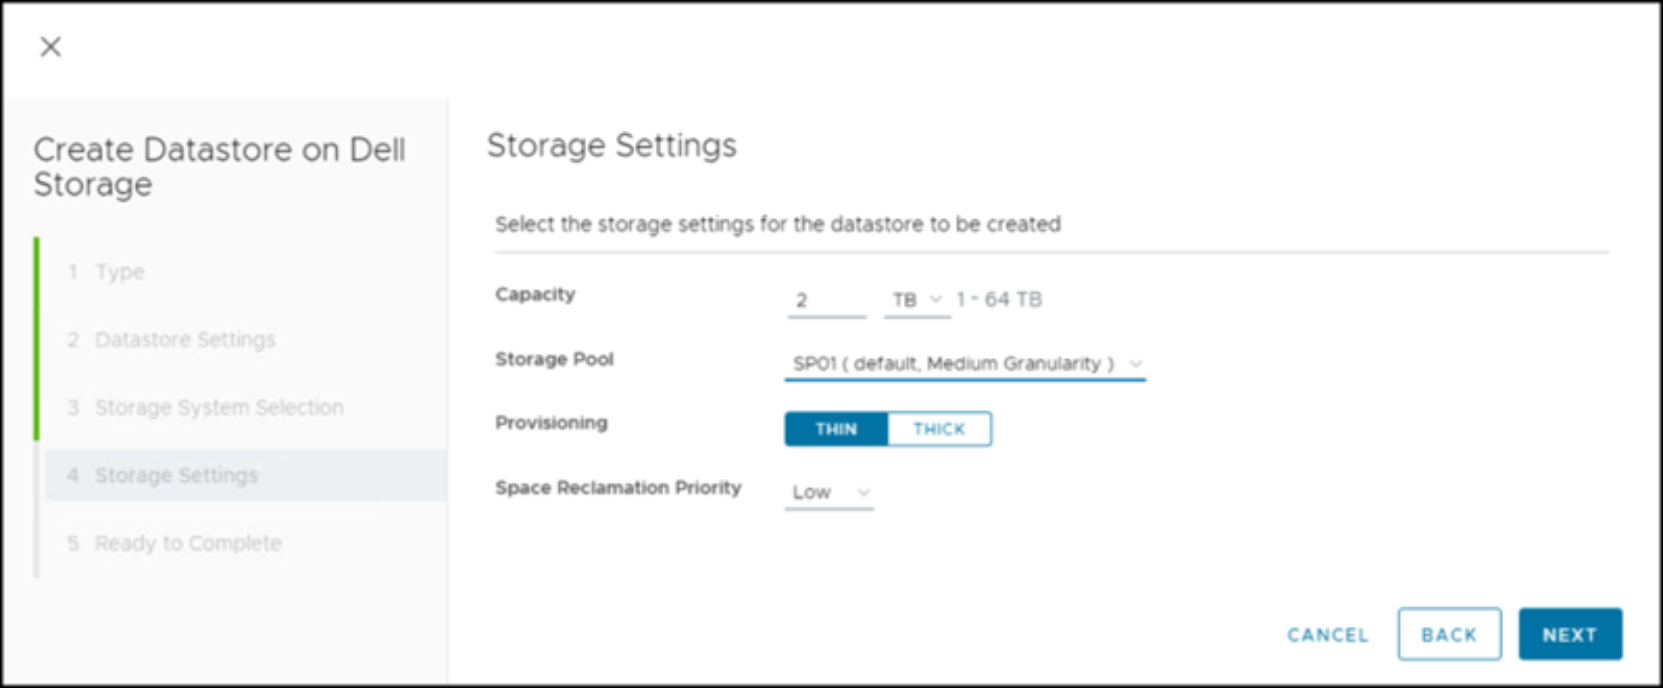
Figure 29. SDC datastores – Step 4
- Under Storage Settings, enter a capacity for the datastore.
- Use the drop-down box to pick the storage pool.
Note: Only one pool is available in this example.
- Click NEXT.
- Review the input information.
- Click FINISH. VSI then performs the following:
- Provisions the volume
- Maps it to all SDC hosts that are part of either the data center, cluster, or ESXi host, depending on what was selected at the start
- Creates a datastore on it
- Find the newly created datastore.
- Go to Configure -> Dell VSI -> Configure Storage.
The Storage Settings tab defaults with information about the volume, as shown in Figure 30.
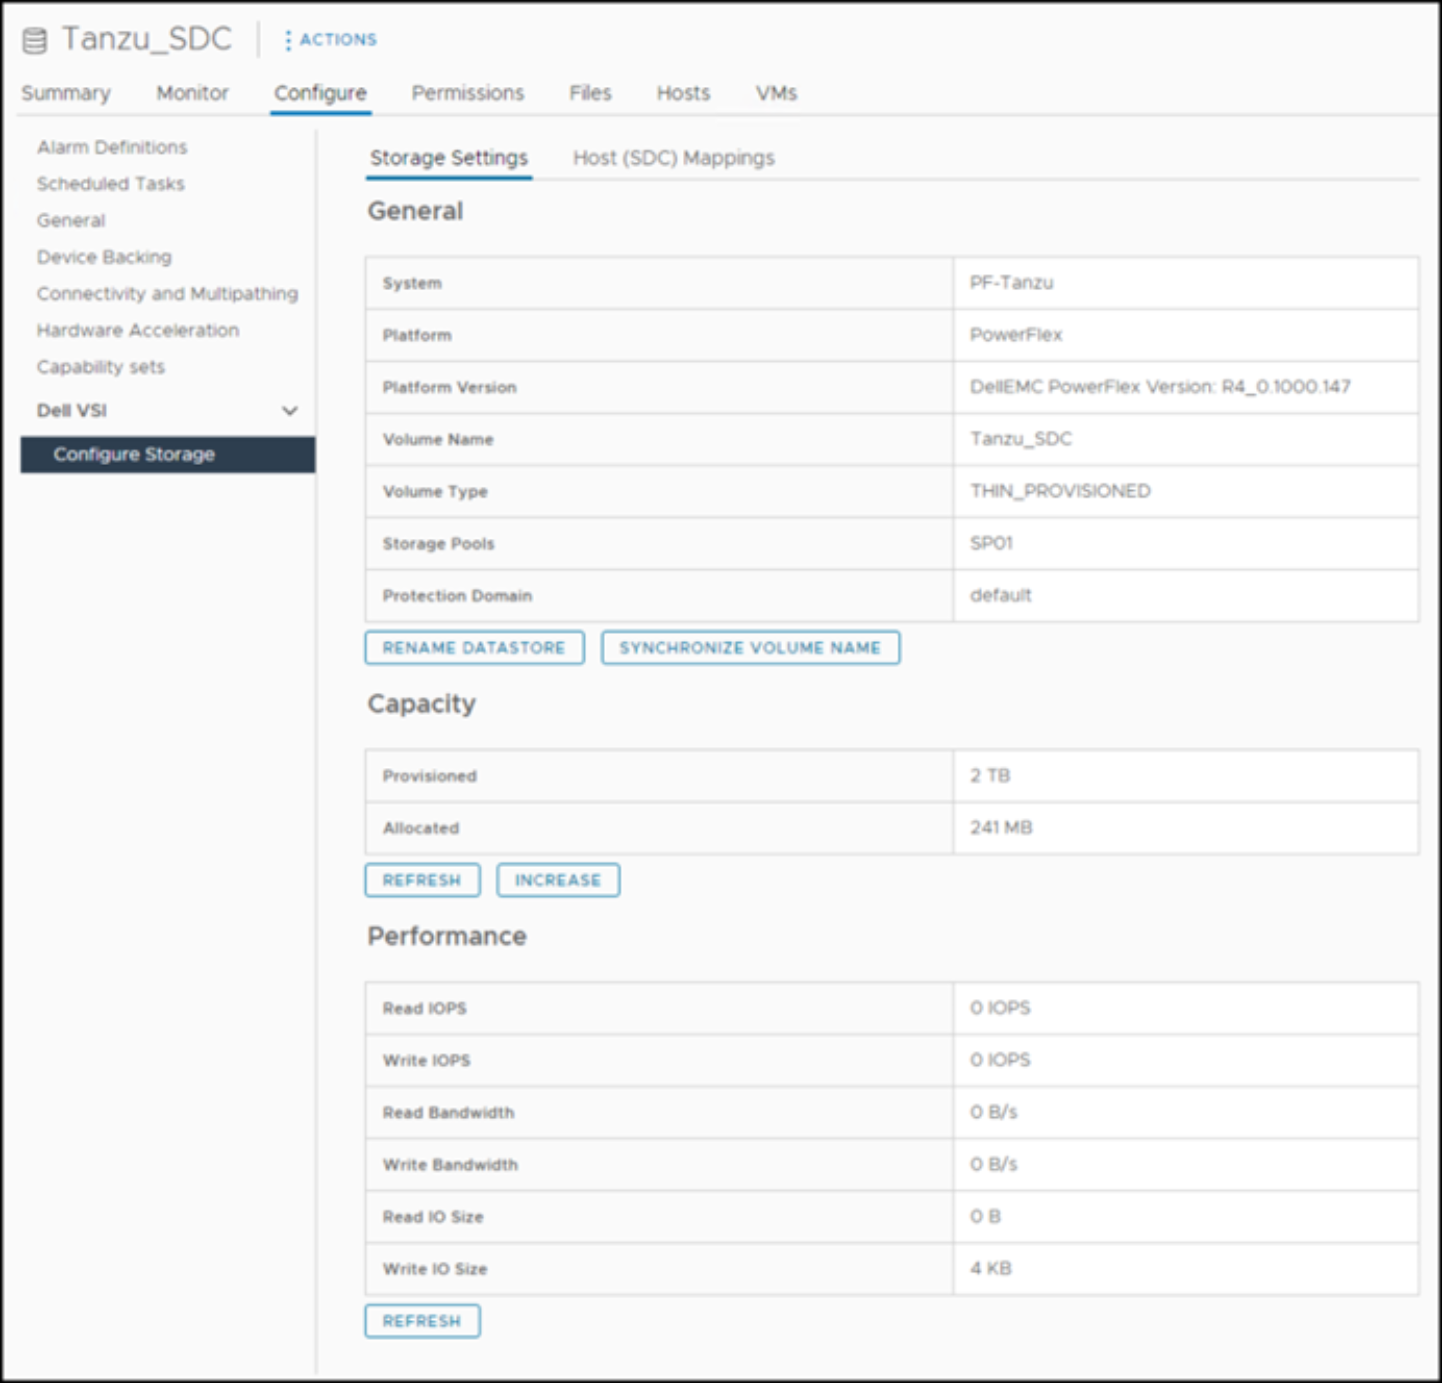
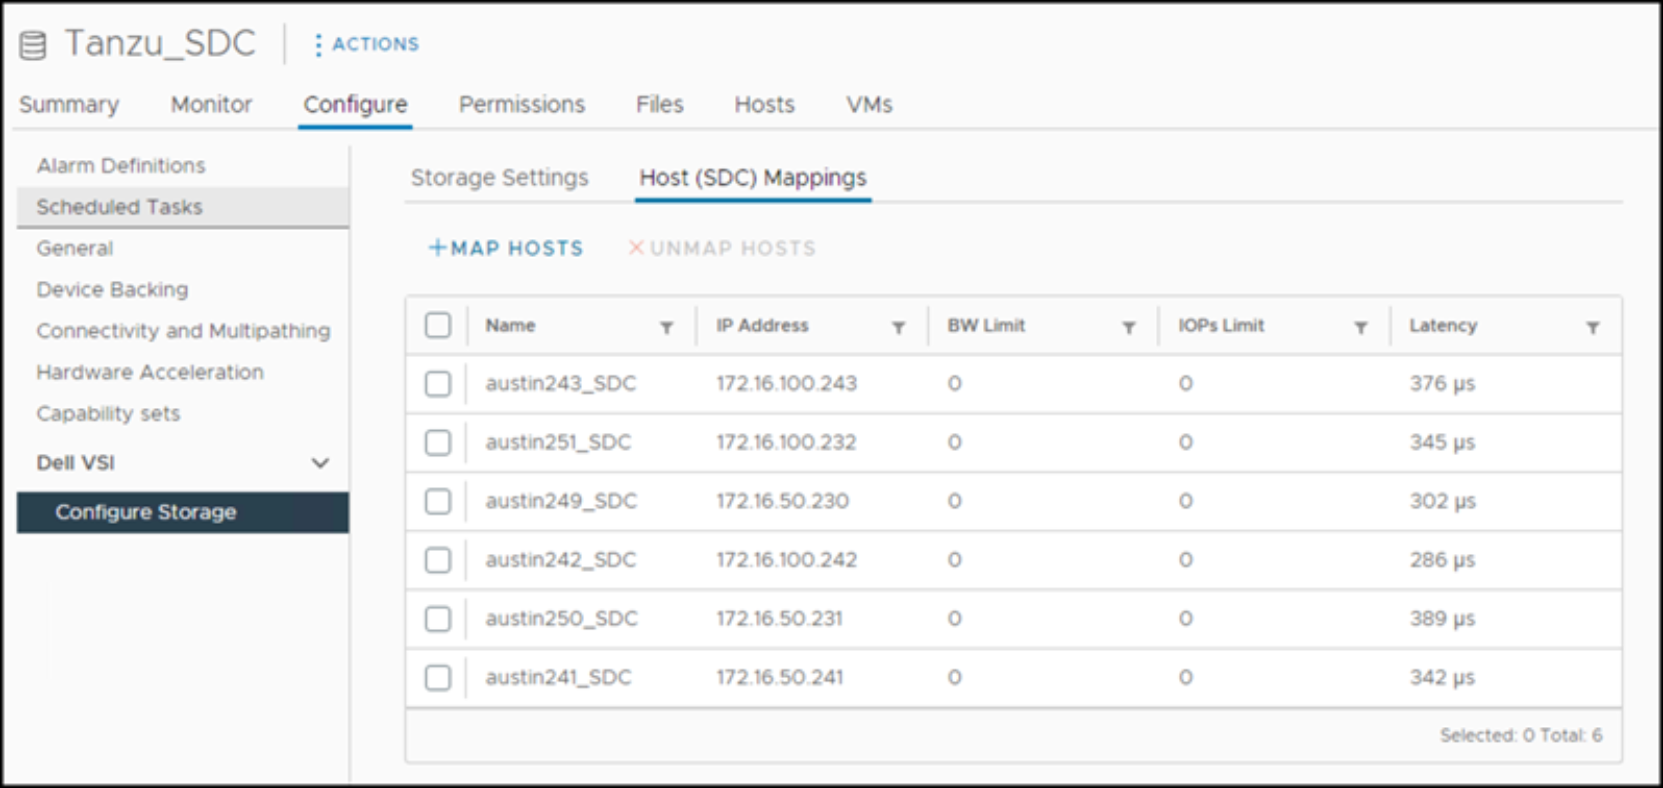
Figure 30. Tanzu_SDC datastore in VSI – Storage Settings
- To see the SDC hosts to which VSI mapped the volume, select the Host (SDC) Mappings tab as shown in Figure 31.