
None
None
-
PowerFlex delivers the SDC as a vSphere Installation Bundle (VIB) that must be installed on ESXi. Although it is possible to do so manually, Dell offers the Virtual Storage Integrator (VSI) which automates the process.
VSI
The following procedures use VSI to add the storage systems.
Add the PowerFlex storage systems
- Register the PowerFlex environment in VSI. In vCenter, go to Dell VSI in the main menu as shown in Figure 8.
Figure 8. Dell VSI
- Select the Storage Systems option as shown in Figure 9, and then click the plus (+) button.
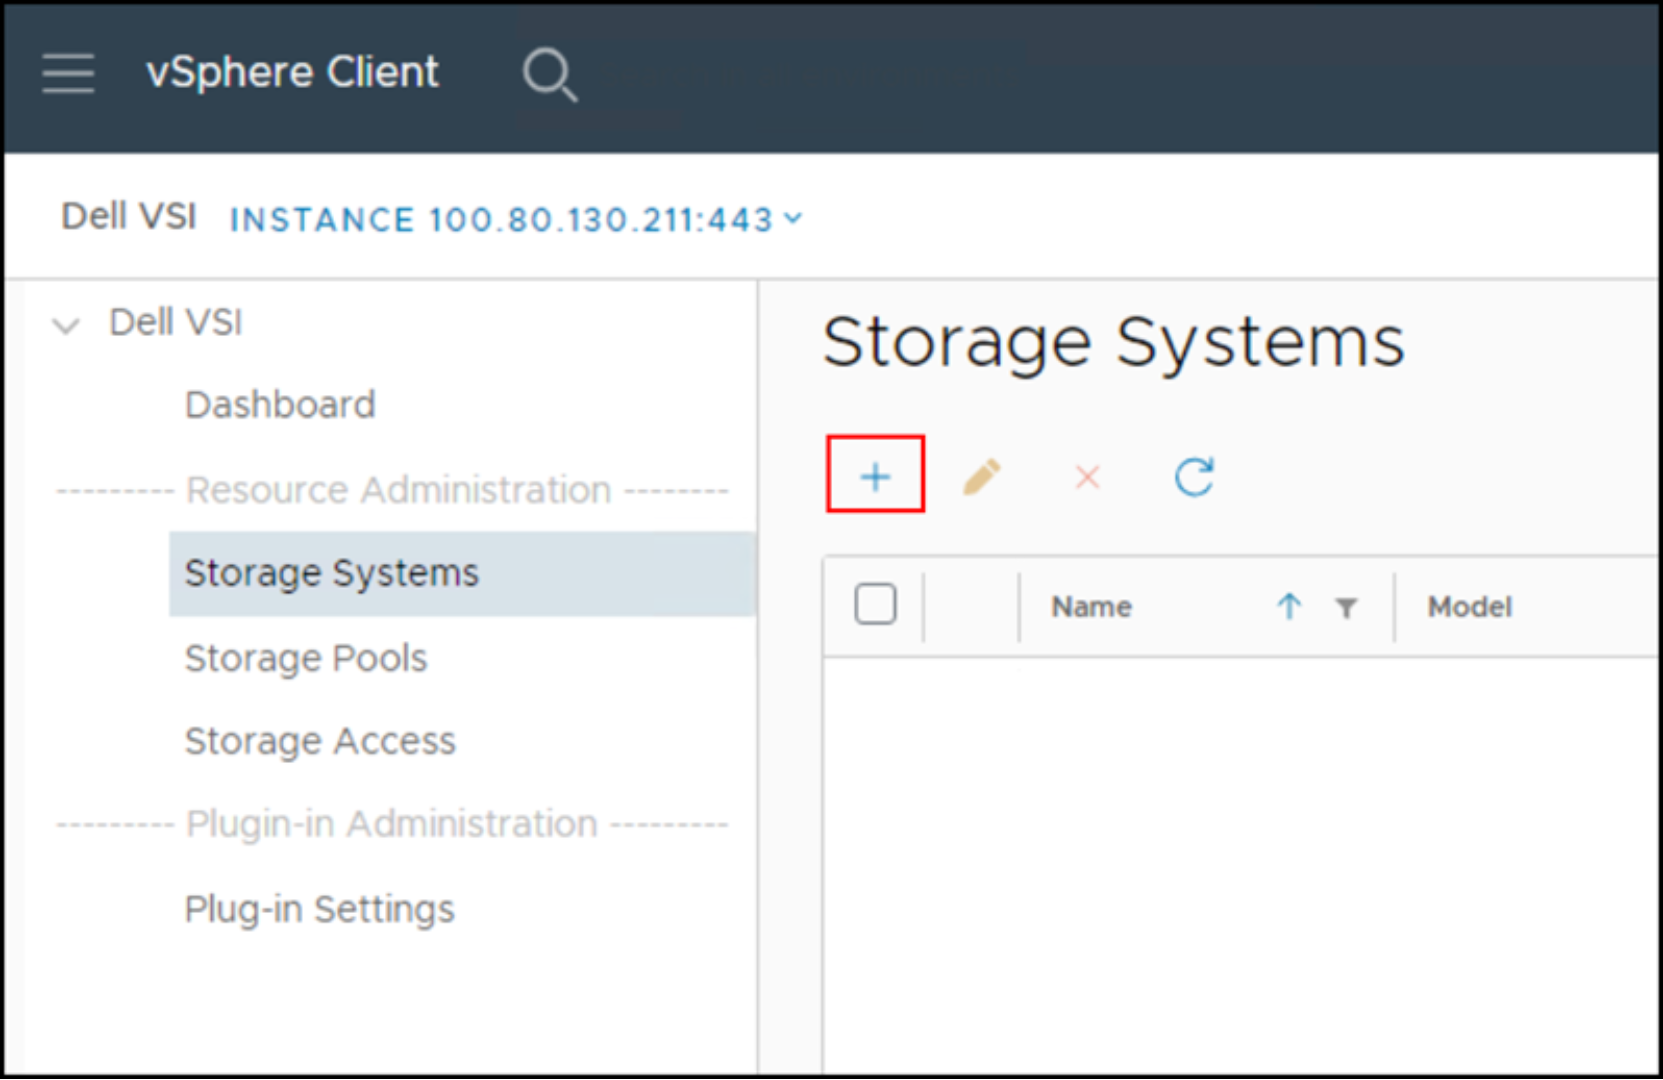
Figure 9. Dell VSI: Add PowerFlex storage system
- Choose PowerFlex from the drop-down storage systems as shown in Figure 10.
- Enter the appropriate information.
- Select NEXT.
Note: The PowerFlex Gateway for 4.0.x version is the same as the UI IP.
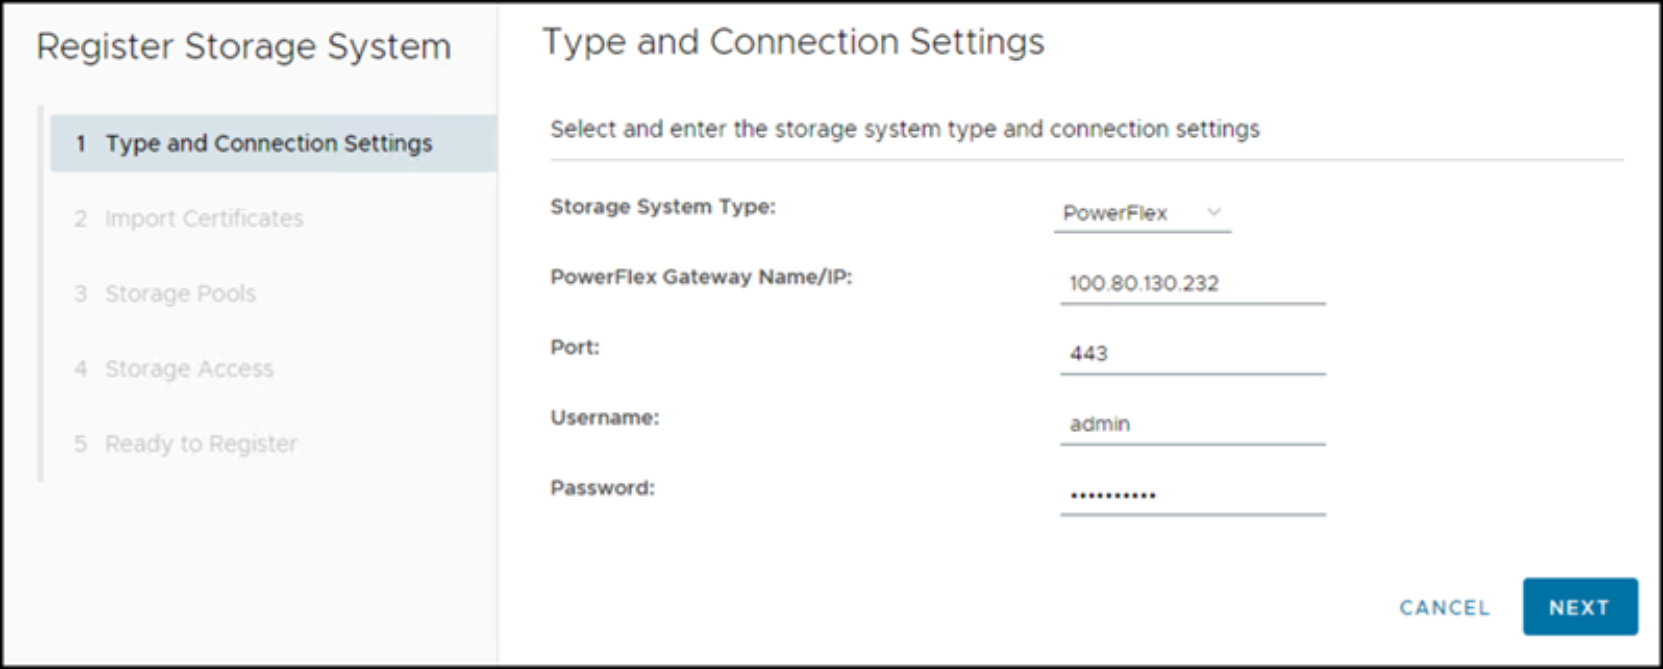
Figure 10. DELL VSI: Add PowerFlex storage system – Step 1
- Choose whether to import certificates.
- Select NEXT.
- VSI then displays all available storage pools on the PowerFlex that are available to select.
Note: Some customers may have separate pools for Tanzu work. In this example, there is only one pool.
- Select NEXT.
- Choose whether any user other than an administrator can use some VSI functionality.
- Select NEXT.
- Review your selections.
- Select FINISH.
- The system is now available in the Storage Systems. Select it to view the details as shown in Figure 11.

Figure 11. Dell VSI: Add PowerFlex storage system – PF-Tanzu
Add the SDC
- After the PowerFlex is added to VSI, select the Hosts tab. Here, in Figure 12, VSI recognizes that three hosts are available for an SDC installation.
- Click the plus sign to begin the SDC installation process.
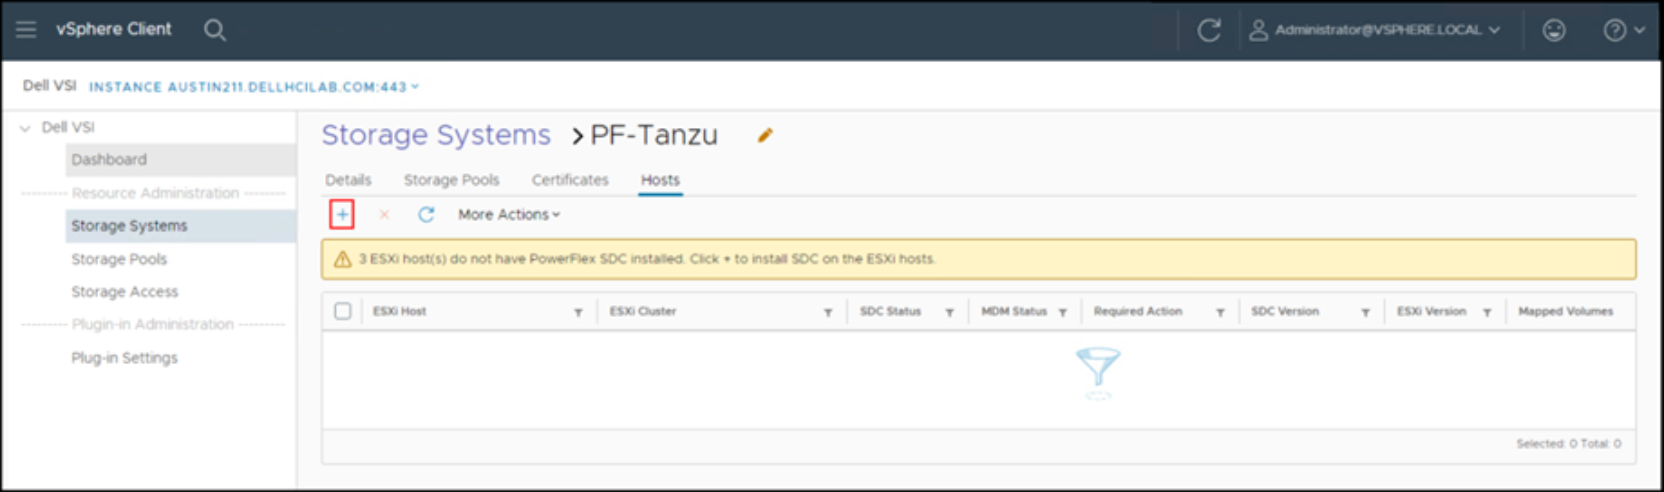
Figure 12. Dell VSI: Add SDC – Step 1
- To install the SDC using VSI, place the .zip file (for example, sdc-4.0.0.1211-esx7.x.zip) in the same location on every ESXi host.
Note: This procedure can be done individually on each host, or by using a shared datastore. The environment may not include other arrays to create a shared VMFS. In these cases, Dell Technologies advises creating a Windows share which can then be mounted as an NFS datastore on each ESXi host. Doing so avoids keeping a copy of the .zip file on each host and guarantees that every host uses the same file.
- Click INSTALL.

Figure 13. Dell VSI: Add SDC – Step 2
- When the installation is complete, VSI displays a message, as shown in Figure 14, stating that the hosts must be rebooted.
Note: VSI does not automatically reboot the hosts.
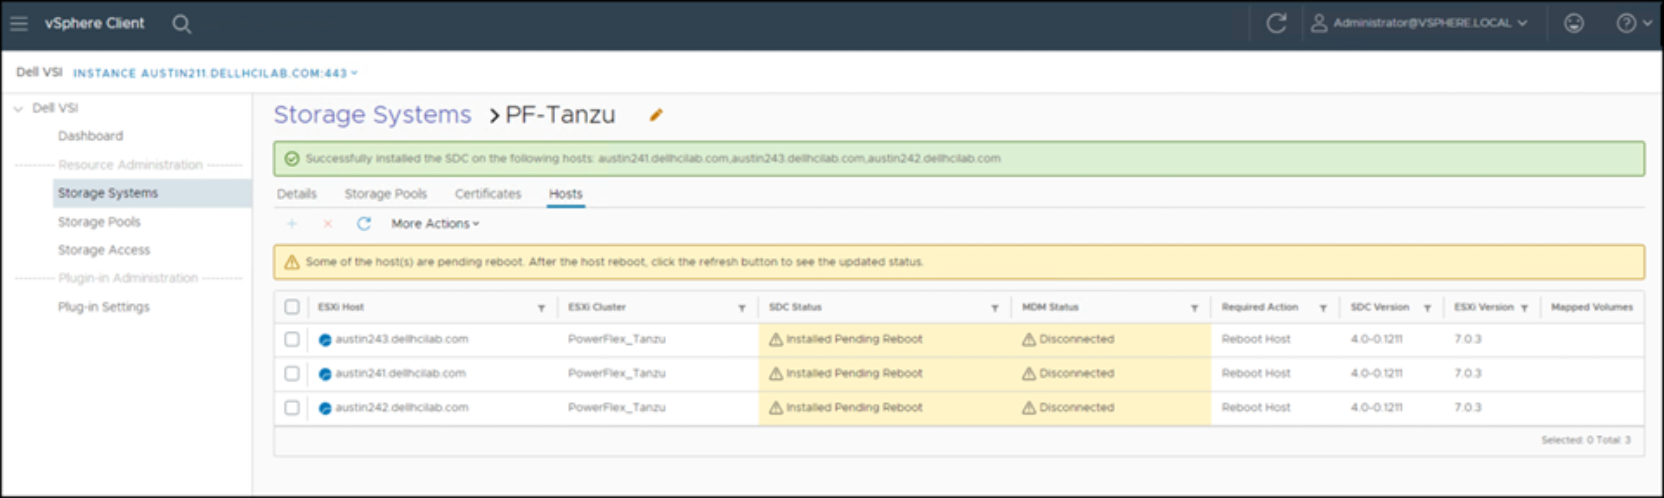
Figure 14. Dell VSI: Add SDC – Step 3
- Reboot the hosts.
- After the host comes back up, return to the Hosts screen to see the updated status, as shown in Figure 15. VSI updates the parameters on the ESXi host in the scini module which connect the host to the registered PowerFlex (MDM) environment.
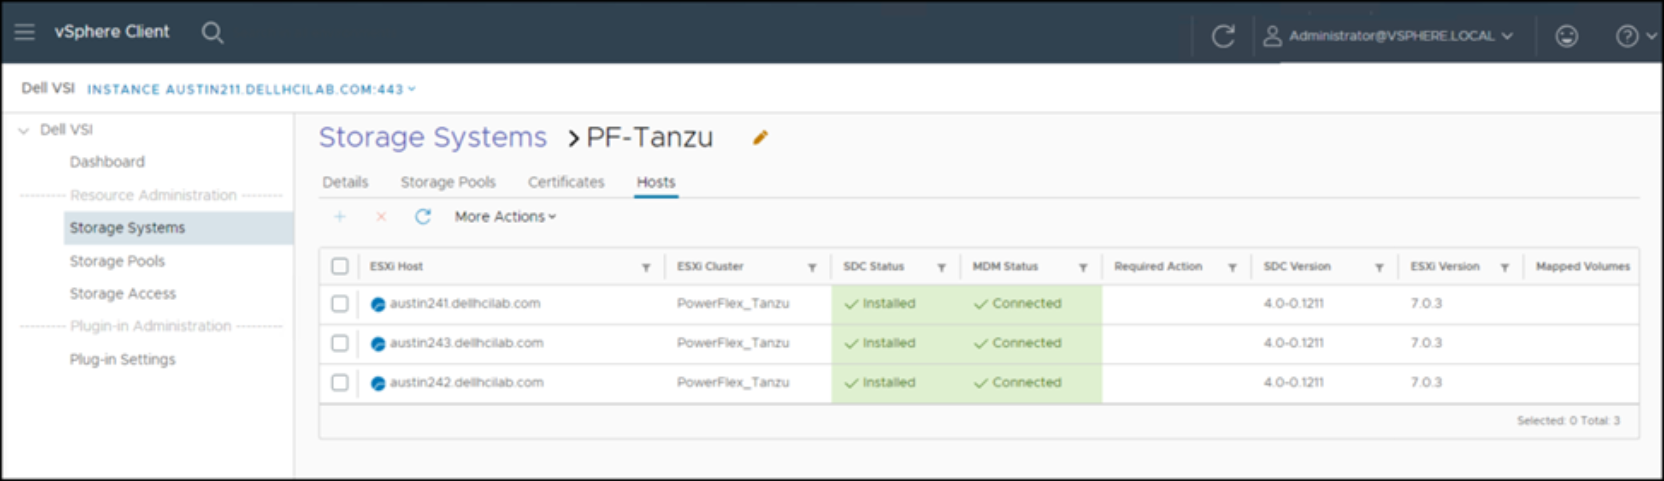
Figure 15. Dell VSI: Add SDC – Complete
Rename the hosts
When the SDC install completes, Dell Technologies recommends renaming the host in the PowerFlex UI for ease of use. Doing so is important if using both SDC and TCP on the same host.
Note: VSI is only a green-field option since it cannot resolve issues that are related to improper installations. If any of the ESXi hosts in the cluster have unresolved SDC components on them already, VSI displays the following error.

Figure 16. Error constructing hostname