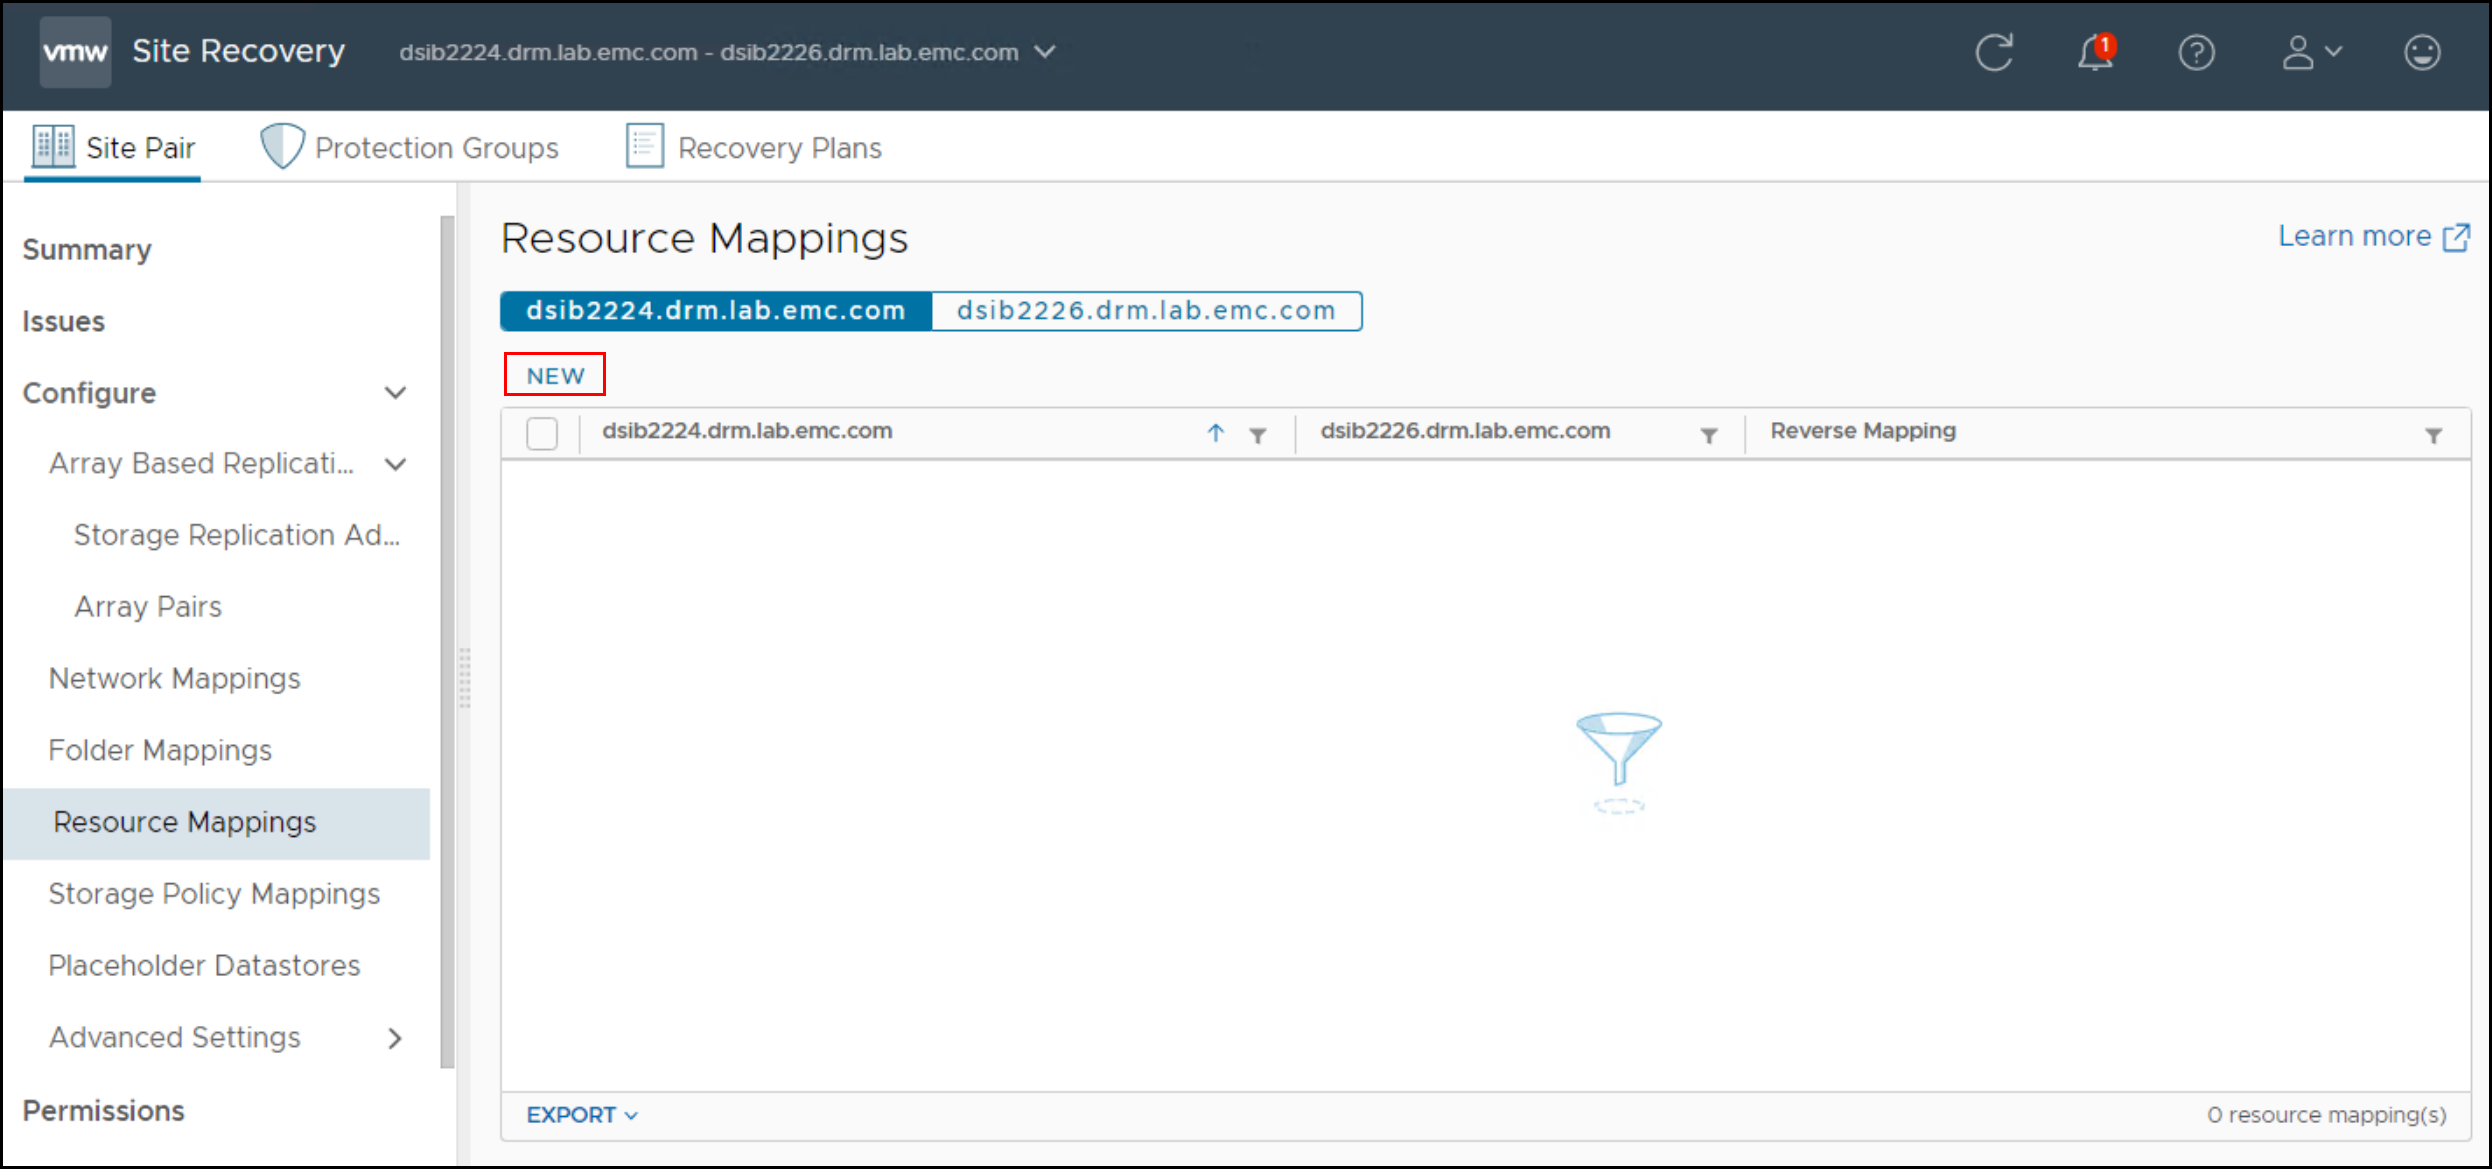
Go to Site Pair > Configure > Resource Mappings. Select NEW in the upper left corner as shown in the figure below, noting which site is highlighted above, protection or recovery.
Figure 64. Resource mappings wizard - Step 1
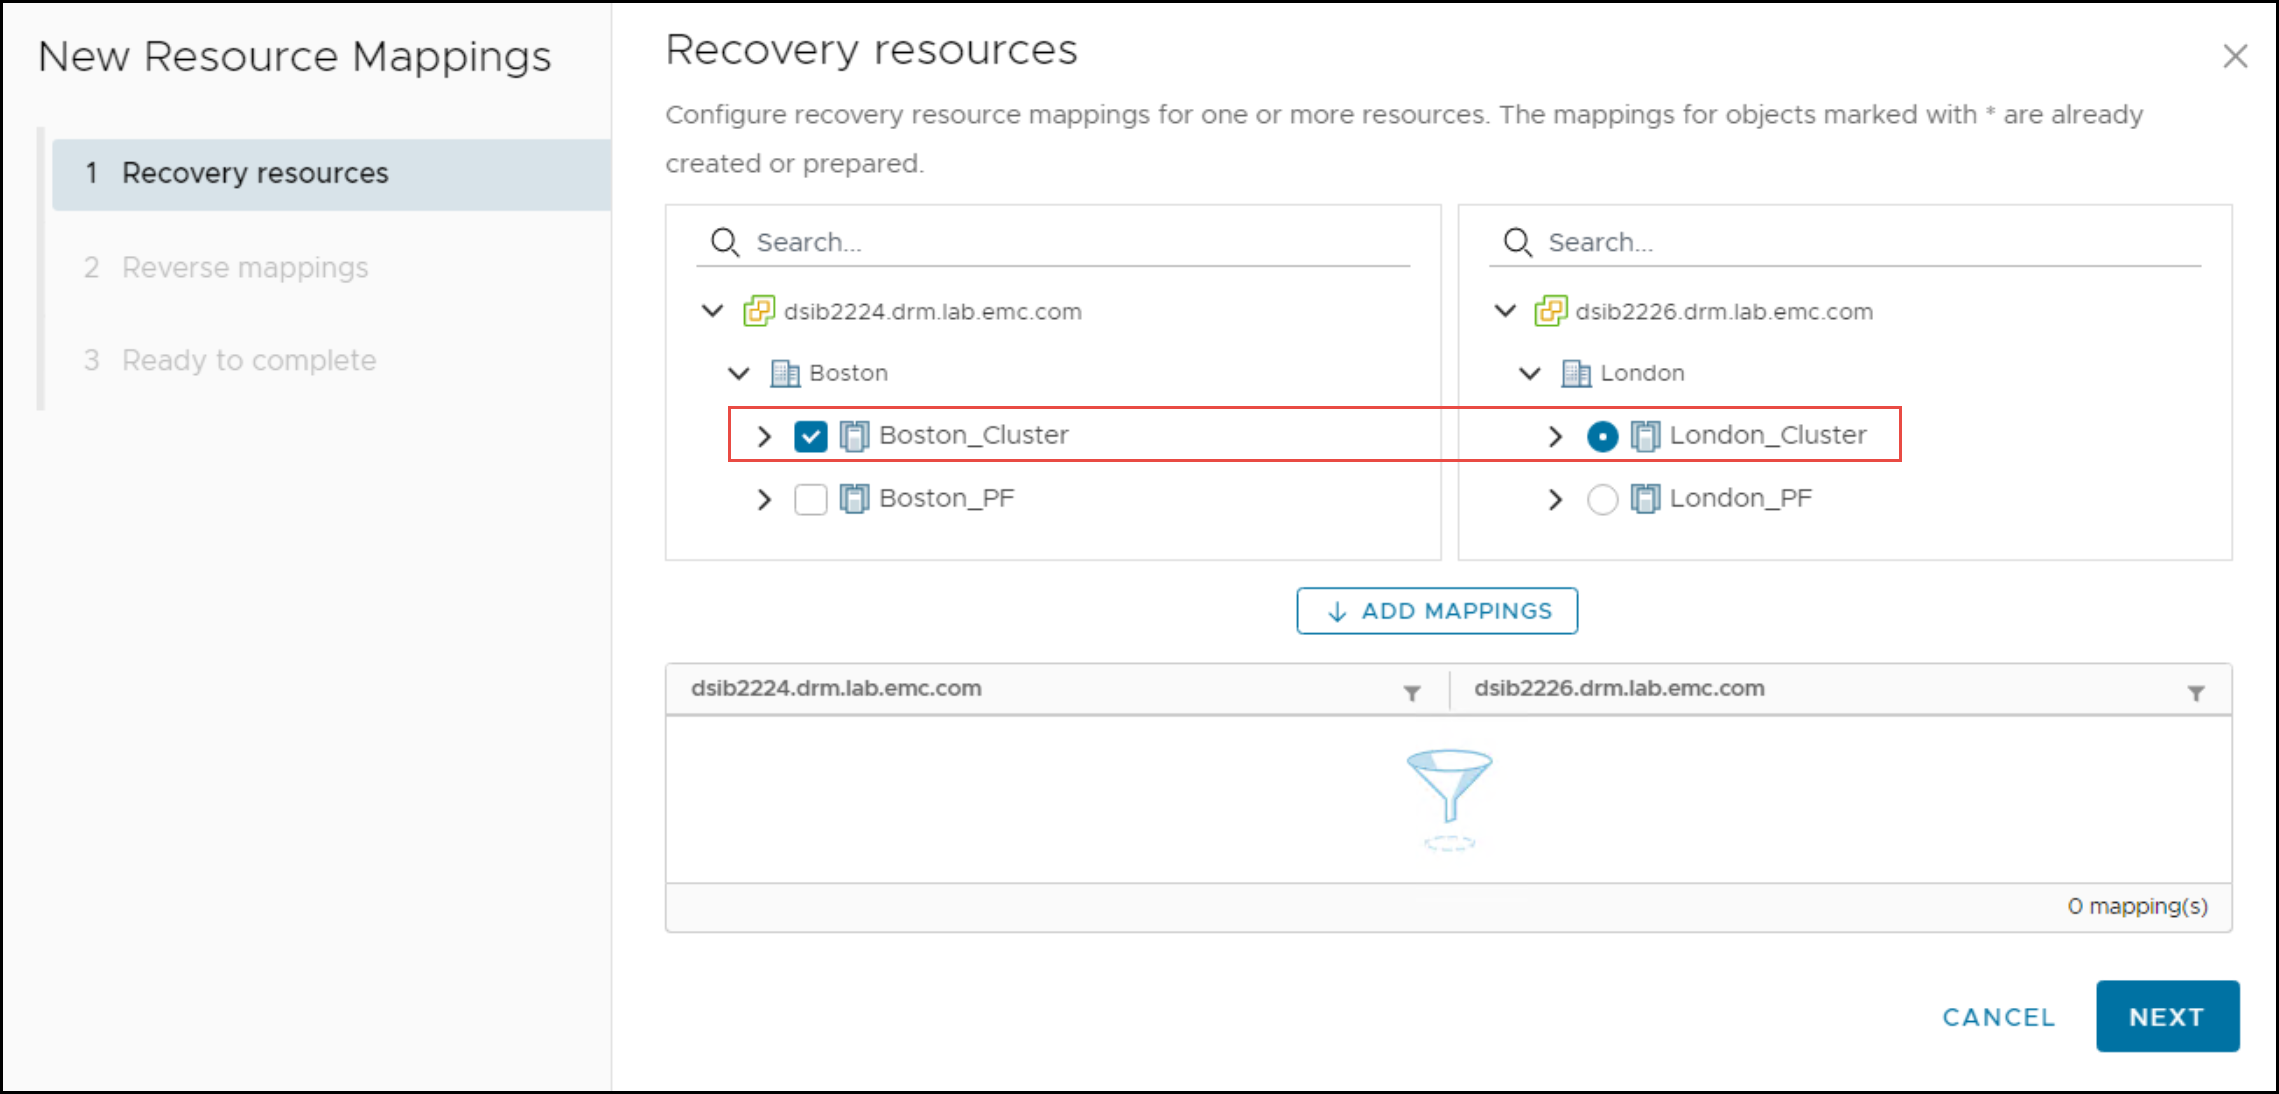
In the next step, as shown in the figure below, use the checkbox in the left panel to choose a resource, and then similarly on the right panel use the radio button to select the matching resource. In this example, the cluster Boston_Cluster is selected on the protection site and London_Cluster is selected on the recovery site.
Figure 65. Resource mappings wizard - Step 2
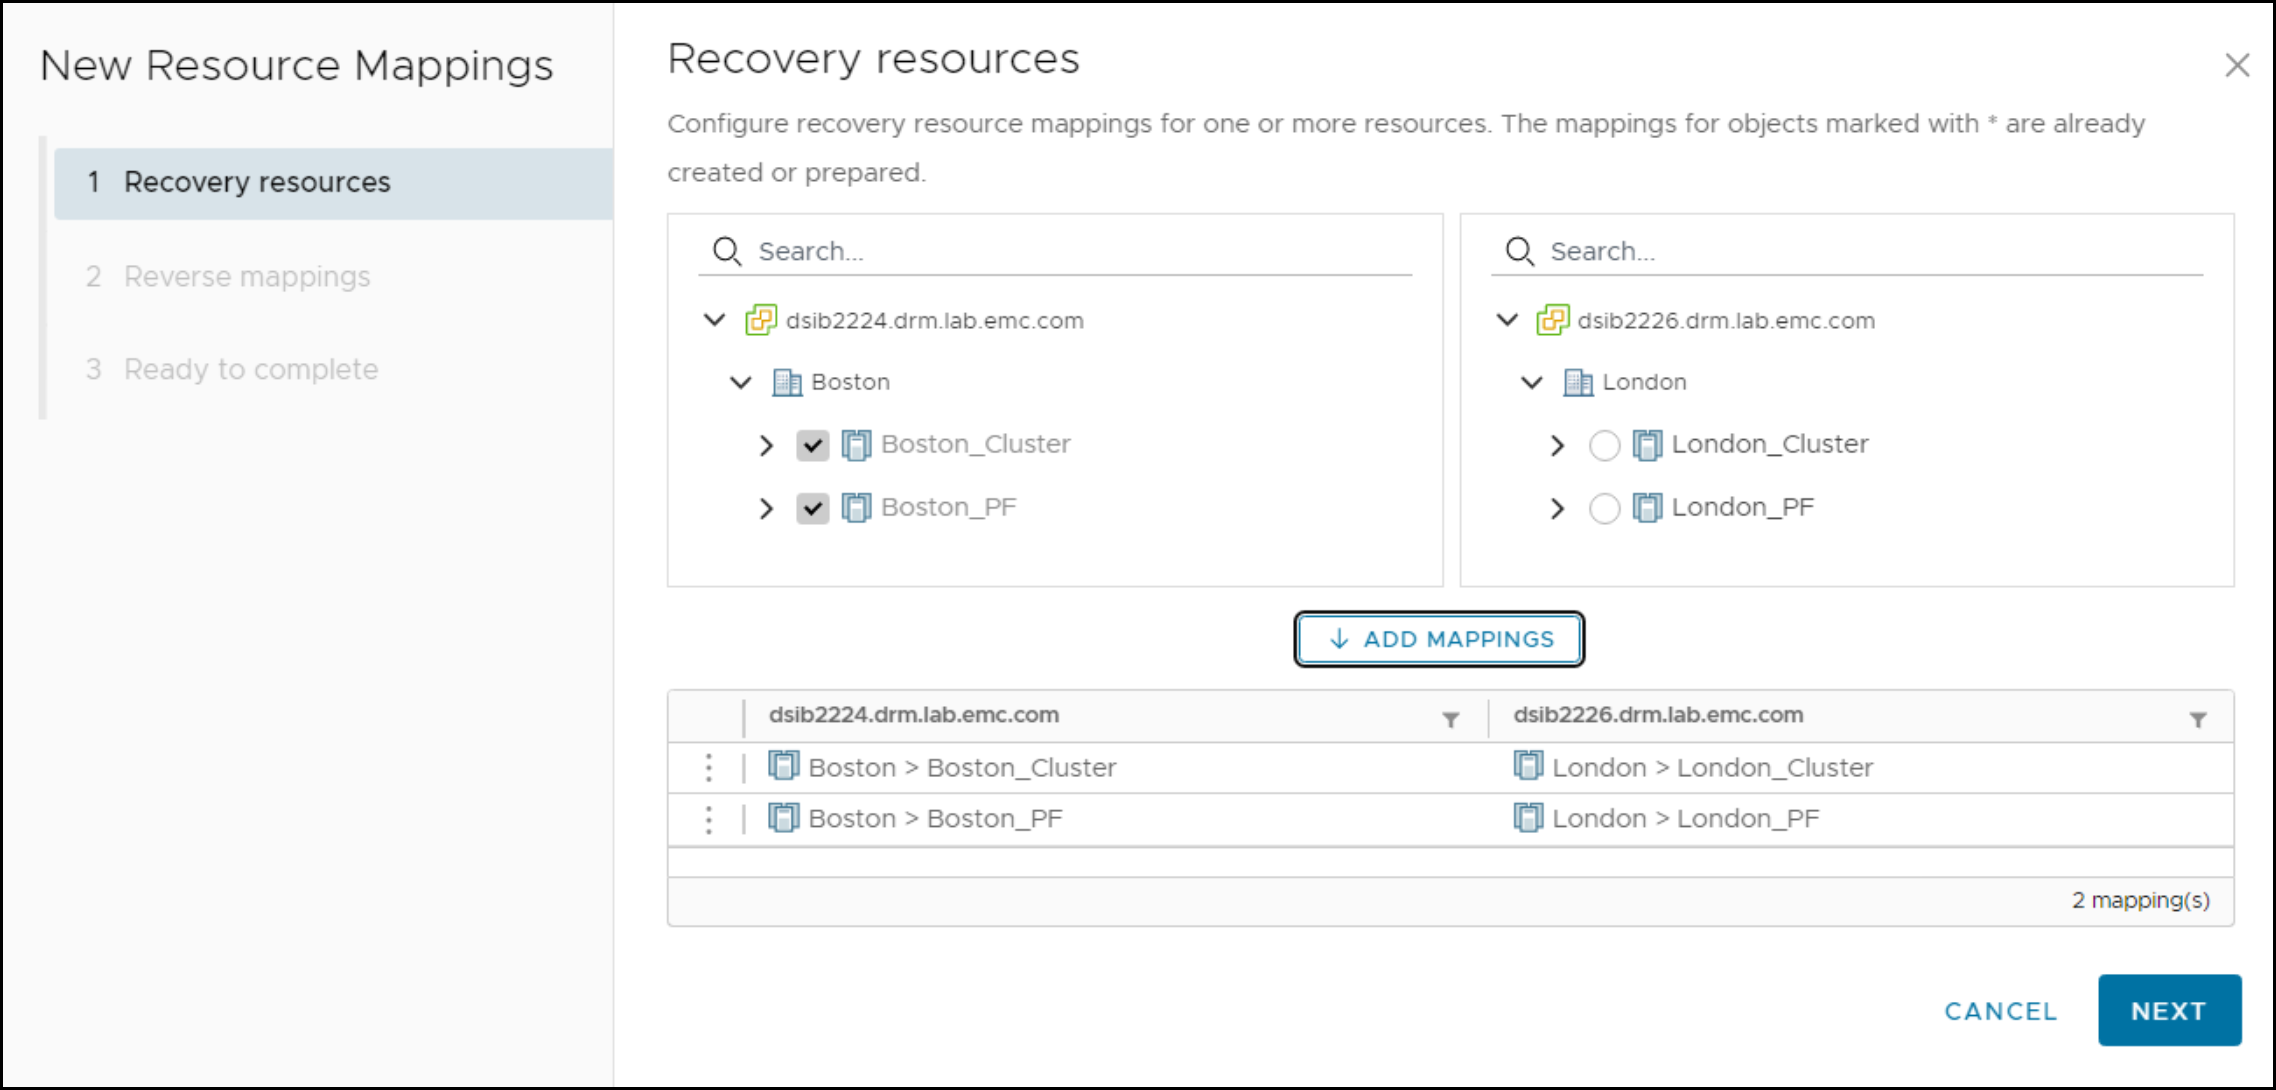
Click ADD MAPPINGS to place the mapping in the bottom panel. Repeat the process for the Boston_PF resource and the London_PF resource. the figure below shows the end result of the step. These new mappings ensure that any VM in the Boston_Cluster is placed in the London_Cluster when a recovery plan is run. The same holds true for the other mapping. Click NEXT to continue.
Figure 66. Resource mappings wizard - Step 3
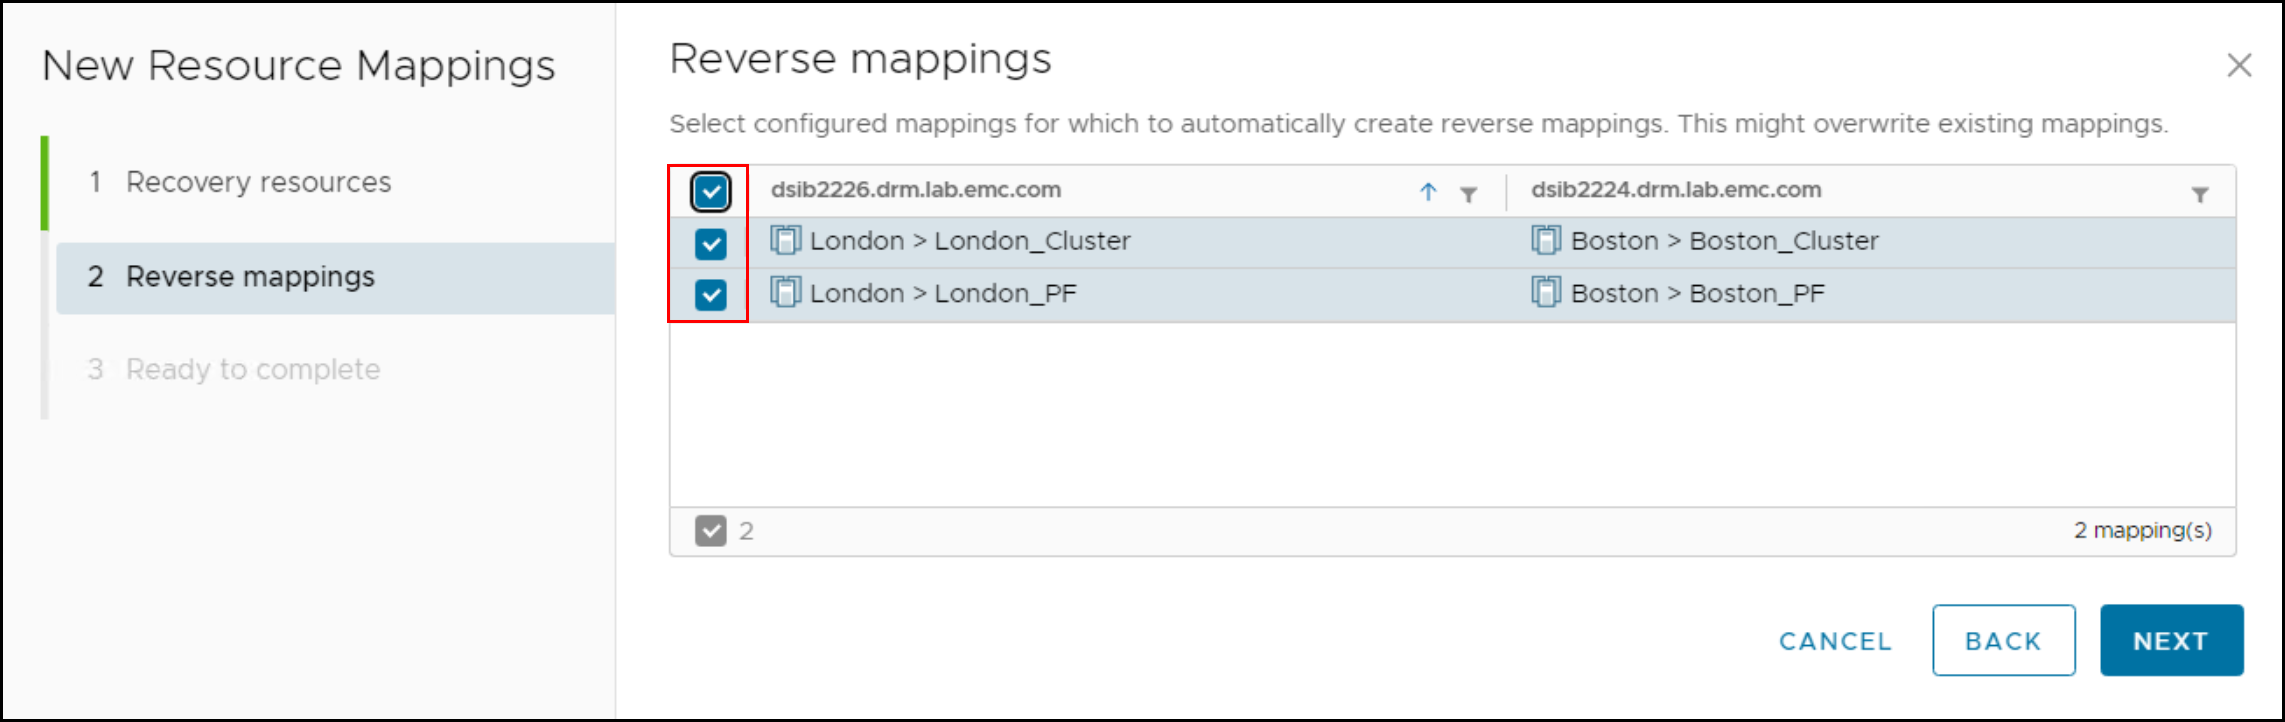
Once the mappings are set, VMware offers the ability to automatically create reverse mappings. In other words, it alleviates the requirement to repeat the mapping process on the recovery site. If this is wanted, check the boxes shown in the figure below to create these mappings. Reverse mappings are mirror images of the original mappings. So, in this case if a recovery plan is run in the opposite direction, any VMs that were in the London_Cluster are placed in the Boston_Cluster. If different mapping is required, do not check the boxes and instead repeat this mapping process on the recovery site.
Figure 67. Resource mappings wizard - Step 4
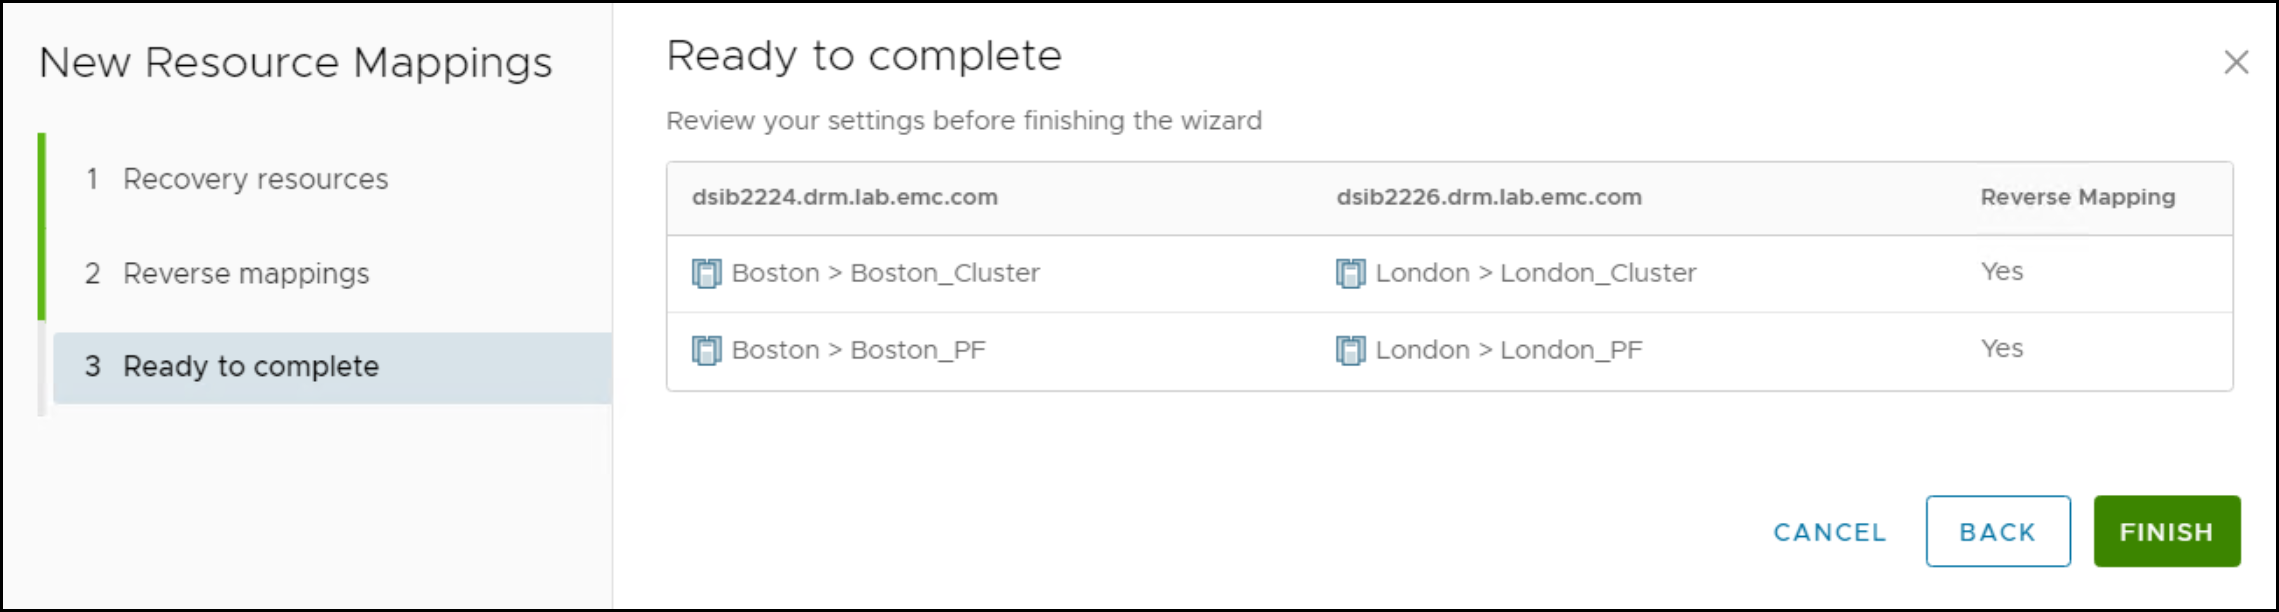
The final mappings should be reviewed in the summary as shown in the figure below before selecting FINISH. VMware always provides the ability to go BACK and fix mistakes in the wizard.
Figure 68. Resource mappings wizard - Step 5
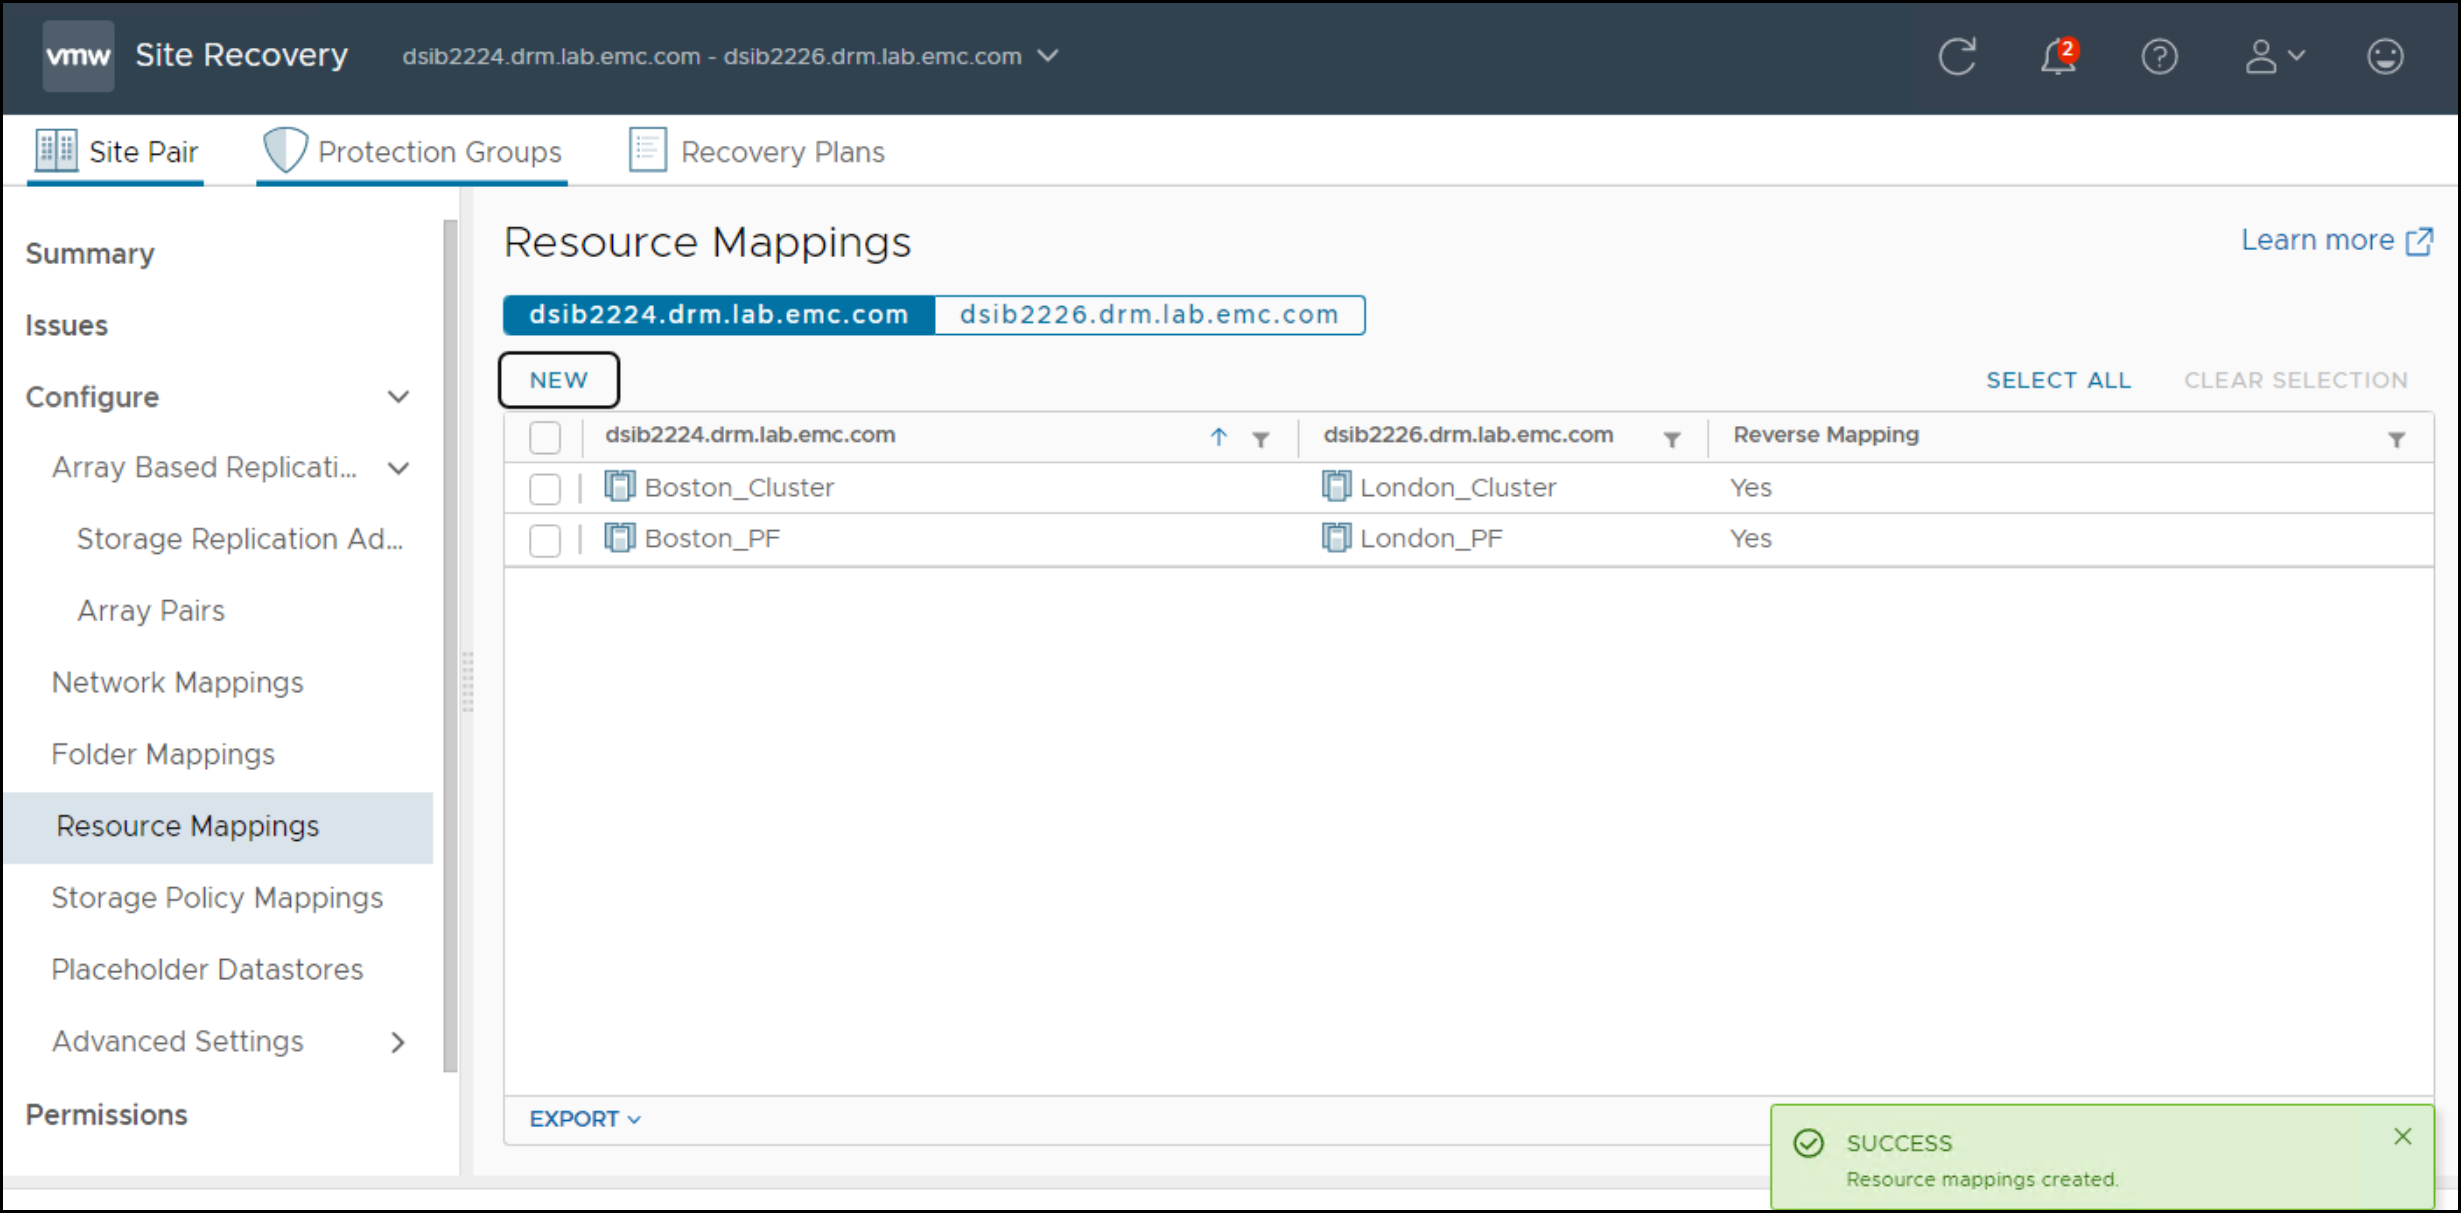
When complete, the SRM displays the resource mappings for the protection site. Note the column Reverse Mapping shown in the figure below indicates if the recovery site also has the mappings.