
Implementation Guide—Red Hat OpenShift Container Platform 4.6 on Dell Infrastructure
Installing the compute nodes
Installing the compute nodes
-
Note: Skip these installation instructions if the cluster is a three-node setup.
To install the compute nodes:
- Connect to the iDRAC of a compute node and open the virtual console.
- In the iDRAC UI, click Configuration and select BIOS Settings.
- Expand Network Settings.
- Set PXE Device1 to Enabled.
- Expand PXE Device1 Settings.
- Select NIC in Slot 2 Port 1 Partition 1 as the interface.
- Scroll to the bottom of the Network Settings section and click Apply.
The system automatically boots into the PXE network and displays the PXE menu, as shown in the following figure:
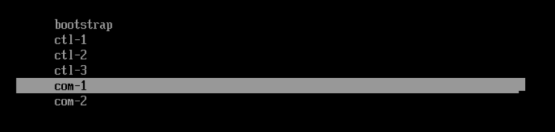
Figure 8. iDRAC console PXE menu
- Select com-1 and let the system reboot after the installation. Before the node reboots into the PXE, ensure that the hard disk is placed above the PXE interface in the boot order:
- Press F2 to enter System Setup.
- Select System BIOS > Boot Settings > UEFI Boot Settings > UEFI Boot Sequence.
- Select PXE Device 1 and click -.
- Repeat the preceding step until PXE Device 1 is at the bottom of the boot menu.
- Click OK, and then click Back.
- Click Finish and save the changes.
- Let the node boot into the hard drive where the operating system is installed, as shown in the following figure:
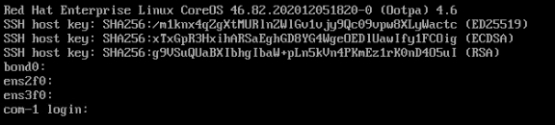
Figure 9. iDRAC console: com-1
- Repeat the preceding steps for the remaining compute nodes.
- As user core in CSAH primary node, approve the CSR to ensure that RHCOS-based compute nodes are added in the cluster.
[core@csah-pri ~]$ oc get csr -o name | xargs oc adm certificate approve
- Verify that all compute nodes are listed and their status is READY:
[core@csah-pri ~]$ oc get nodes
NAME STATUS ROLES AGE VERSION
com-1.demo.lab Ready worker 40m v1.19.0+8d12420
com-2.demo.lab Ready worker 7m19s v1.19.0+2f3101c
ctl-1.demo.lab Ready master 4h30m v1.19.0+8d12420
ctl-2.demo.lab Ready master 4h6m v1.19.0+8d12420
ctl-3.demo.lab Ready master 4h6m v1.19.0+8d12420