
Preparing the CSAH node
Preparing the CSAH node
-
Note: If needed, an additional CSAH node can be added to ensure redundancy.
To install Red Hat Enterprise Linux 8.5 in the CSAH node:
- Connect to iDRAC for installing Red Hat Enterprise Linux by following the steps in the Red Hat Enterprise Linux 8 Installation Guide.
- Under Software Selection, ensure that Server with GUI is selected.
Ansible playbooks that are described in this guide use packages that are installed with the Server with GUI option.
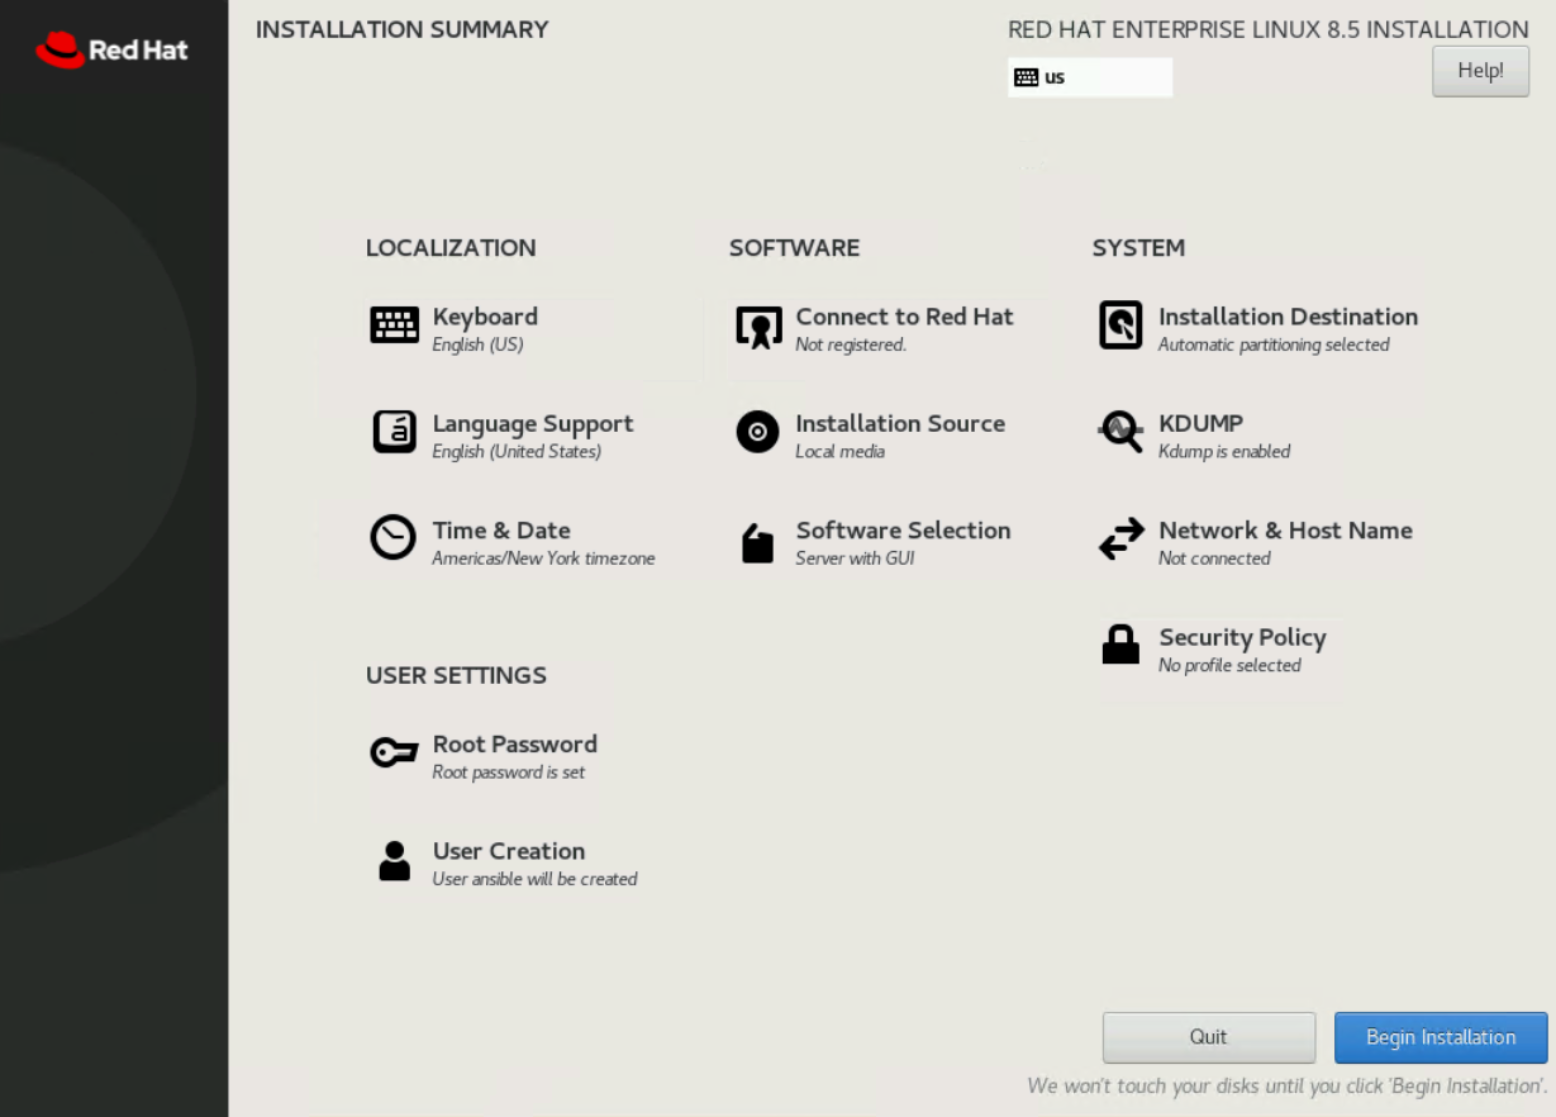
Figure 2. Operating system installation options
- Click Begin Installation.
- After the installation is complete, perform the following tasks in the console as user root:
- Set the hostname to reflect the naming standards:
[root@localhost~]# hostnamectl set-hostname <hostname FQDN>
- Create a bridge interface and a bond interface with bridge as the “master” (or primary) interface. Add “slaves” (secondary interfaces) to the bond and then assign an IP address to the bridge interface, as shown in the following example.
Note: The assigned IP address must be able to reach the Internet, and the DNS must be able to resolve subscription.rhsm.redhat.com. Ensure that the interface names and IP addresses reflect the environment.
# Create bridge interface
nmcli connection add type bridge ifname br0 con-name bridge-br0
# Create bond interface with bridge bridge-br0 as master
nmcli connection add type bond con-name bond0 ifname bond0 bond.options "lacp_rate=1,miimon=100,mode=802.3ad,xmit_hash_policy=layer3+4" ipv4.method disabled ipv6.method ignore master bridge-br0
# Add slaves to bond interfaces, update the interface names in below commands. Run nmcli connection show to fetch available interfaces
nmcli connection add type ethernet con-name bond-slave-0 ifname <if name> master bond0 slave-type bond
nmcli connection add type ethernet con-name bond-slave-1 ifname <if name> master bond0 slave-type bond
# Set IP Address to bridge-br0 interface
nmcli connection modify bridge-br0 ipv4.method manual ipv4.addresses 192.168.32.20/24 connection.autoconnect yes ipv4.gateway 192.168.32.1 ipv4.dns 192.168.31.50 ipv4.dns-search dcws.lab
# Bring up bridge-br0 interface
nmcli connection up bridge-br0
systemctl restart NetworkManager
# Create bridge interface for Mgmt network
nmcli connection add type bridge con-name Bridge-mgmt ifname br0 ip4 192.168.175.9/26 ipv4.dns 192.168.32.10 ipv4.dns-search dcws.lab ipv4.gateway 192.168.175.1 connection.autoconnect yes
# Create a slave vlan using bond device for Mgmt bridge
nmcli connection add type vlan con-name mgmt-vlan ifname bond0.11 dev bond0 id 11 master br0 slave-type bridge
# Bring bridge connection up
nmcli connection up Bridge-mgmt
# Create a bridge interface for iDRAC network
nmcli connection add type bridge con-name Bridge-idrac ifname br1 ip4 192.168.110.29/24
# Create a slave vlan using bond device for iDRAC bridge
nmcli connection add type vlan con-name idrac-vlan ifname bond0.10 dev bond0 id 10 master br1 slave-type bridge
# Bring bridge connection up
nmcli connection up Bridge-idrac
- To enable the ansible-2.9-for-rhel-8-x86_64-rpms and rhocp-4.10-for-rhel-8-x86_64-rpms repositories, run:
[root@csah-pri ~]# subscription-manager register --username <subscription.user> --password <subscription.password> --force
[root@csah-pri ~]# subscription-manager attach --pool=<pool id>
[root@csah-pri ~]# subscription-manager repos --enable=ansible-2.9-for-rhel-8-x86_64-rpms --enable=rhocp-4.10-for-rhel-8-x86_64-rpms
- Install the following Red Hat Package Manager (RPMs):
[root@csah-pri ~]# yum install -y jq ansible python3-netaddr git
- Create a user to run the playbooks.
Note: Do not use the username core. User core is part of the OpenShift Container Platform cluster configuration and is a predefined user in CoreOS. In the CSAH (primary/secondary), user core is created using Ansible playbooks. The remainder of this guide assumes that user ansible runs the playbooks.
[root@csah-pri ~]# useradd ansible
[root@csah-pri ~]# passwd ansible
Changing password for user ansible.
New password:
Retype new password:
passwd: all authentication tokens updated successfully.
- As user root, provide sudoers permissions to user ansible by running:
[root@csah-pri sudoers.d]# pwd
/etc/sudoers.d
[root@csah-pri sudoers.d]# cat ansible
ansible ALL=(ALL) NOPASSWD: ALL
- As user ansible, set up password-less access to the CSAH FQDN:
[ansible@csah-pri ~]$ ssh-keygen (press enter and go by defaults for the next set of questions)
[ansible@csah-pri ~]$ ssh-copy-id <FQDN>
- Download the Ansible playbooks from GitHub and check out branch ecws_ocp410 by running:
[ansible@csah-pri ~]$ git clone https://github.com/dell-esg/openshift-bare-metal.git
[ansible@csah-pri ~]$ cd <git clone dir>/openshift-bare-metal
[ansible@csah-pri openshift-bare-metal]$ git checkout origin/ecws_ocp410
Note: If there is no secondary CSAH node, ignore steps 9 through 11.
- To create a secondary CSAH node, repeat steps 1 through 7. This step is necessary to create a secondary CSAH.
Note: Install Red Hat Enterprise Linux 8 in a CSAH secondary node manually and repeat steps 4 through 7 with necessary modifications. Ignore steps 9 through 11 if there is no CSAH secondary node.
- As user root, add an entry for a secondary CSAH node in the primary CSAH node /etc/hosts file by running:
[root@csah-pri ~]# cat /etc/hosts
<IP Address of secondary csah> csah-sec csah-sec.dcws.lab
- As user ansible, set up passwordless access from the primary CSAH node to the secondary CSAH node:
[ansible@csah-pri ~]$ ssh-copy-id <secondary CSAH FQDN>