
Example of ECS with redundant HAProxy setup
Example of ECS with redundant HAProxy setup
-
The ECS with single HAProxy example in previous section can be extended to add another HAProxy to create a redundant HAProxy setup. In this example, another virtual machine with Mint operating system and HAProxy load balancer was configured. The “keepalived” utility was installed on both HAProxy servers to do health checks between the two HAProxy load balancers. The redundant HAProxy load balancers were configured in an active/passive mode. A virtual IP initially maps to a primary HAProxy and if the primary load balancer fails, then the virtual IP will point to the IP of secondary load balancer until the primary load balancer comes up again. The following figure illustrates the setup for the redundant HAProxy load balancers environment described in this example.
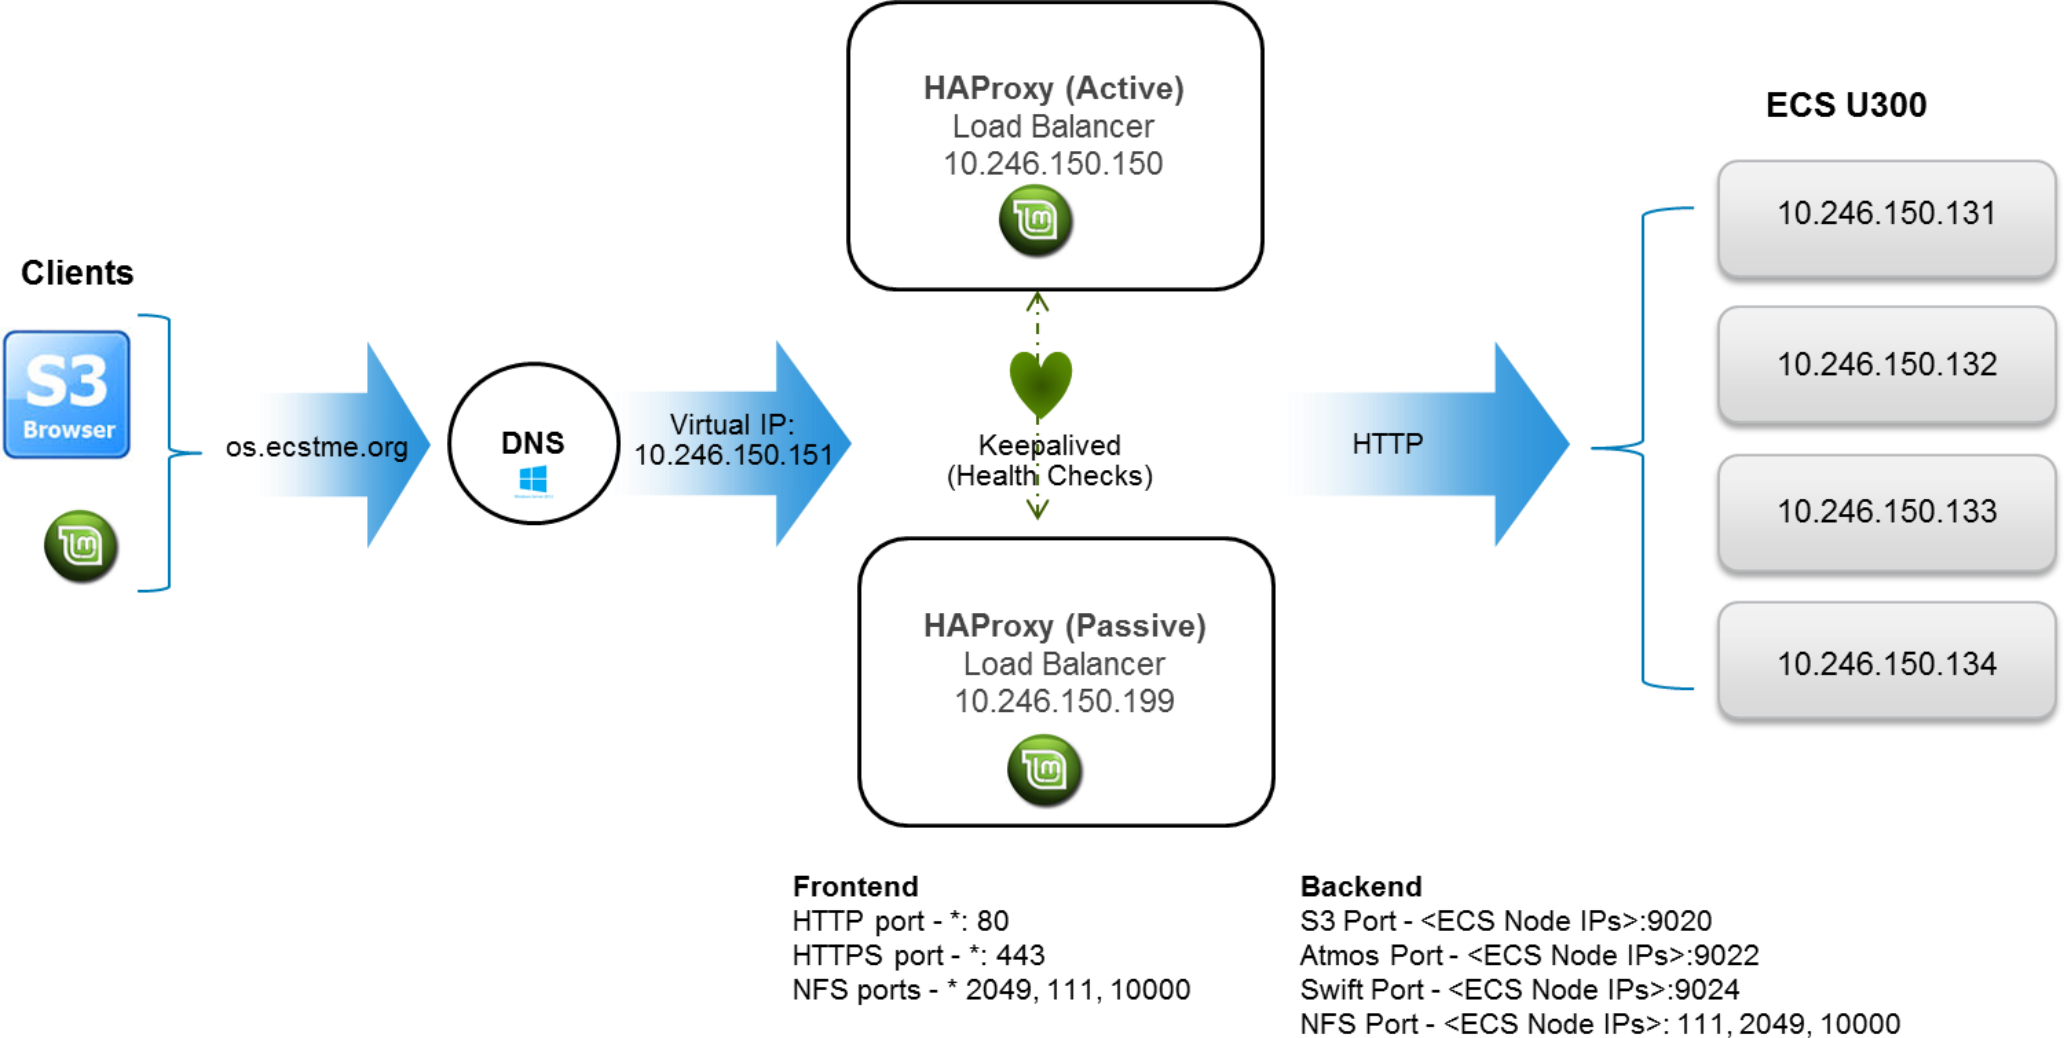
Figure 41. ECS with redundant HAProxy setup example
Virtual IP
On each of the load balancer servers which is hosted on a virtual machine with Mint installed, modify the “net.ipv4.ip_nonlocal_bind” to 1 in the kernel file /etc/sysctl.conf to allow HAProxy to bind to a shared IP address which is 10.246.150.151 in this example. With an editor, such as “vi”, add the line shown in the following figure.

Figure 42. Add to "/etc/sysctl.conf"
Run “sysctl –p” command to have this setting take into effect without the need to reboot as shown in the following figure.

Figure 43. Command to enable the setting modified in /etc/sysctl.conf file.
Keepalived
The keepalived utility is a routing software package available on Linux. It is written in C and its main purpose is to provide health checks between systems. Install the keepalived utility on both load balancers. The following figure provides the commands to install keepalived.

Figure 44. Example of command to install keepalived
In both load balancers, edit or create a keepalived.conf file in “/etc/keepalived” directory with entries as shown in the following two figures. The difference between the two files is the priority value, where 101 represent the primary and 100 is secondary. Also note that eth0 is set to the virtual IP. For more information on keepalived, refer to the Keepalived website: http://www.keepalived.org/.
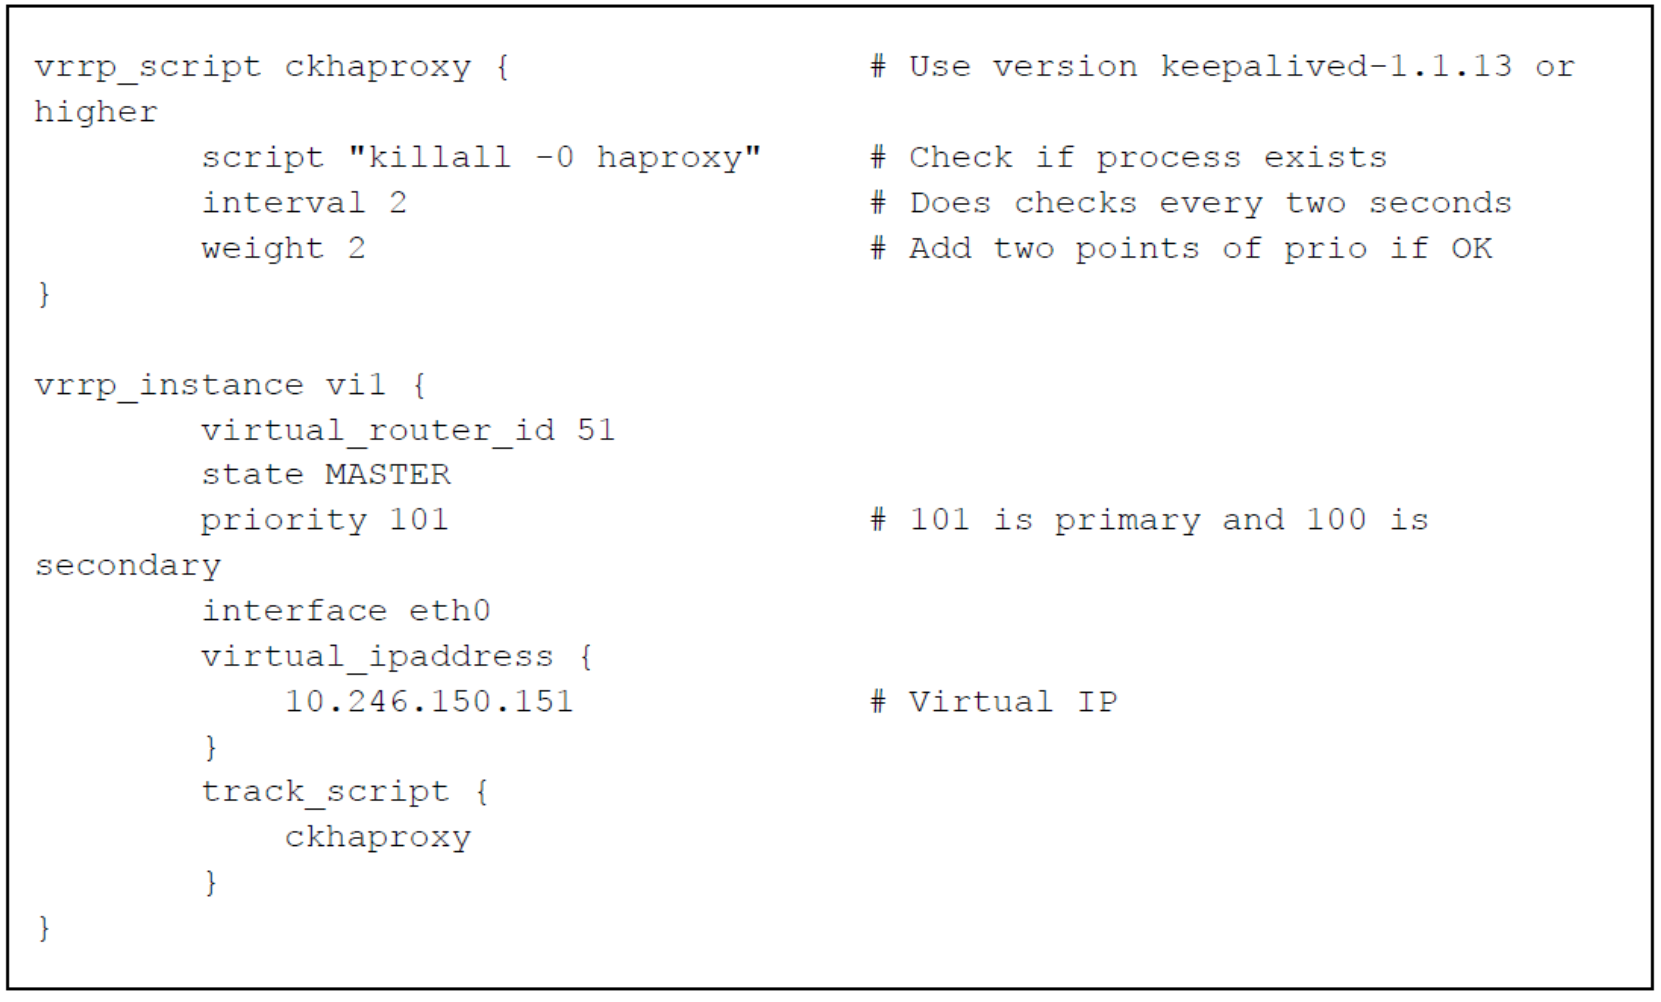
Figure 45. Example of keepalived.conf for primary load balancer
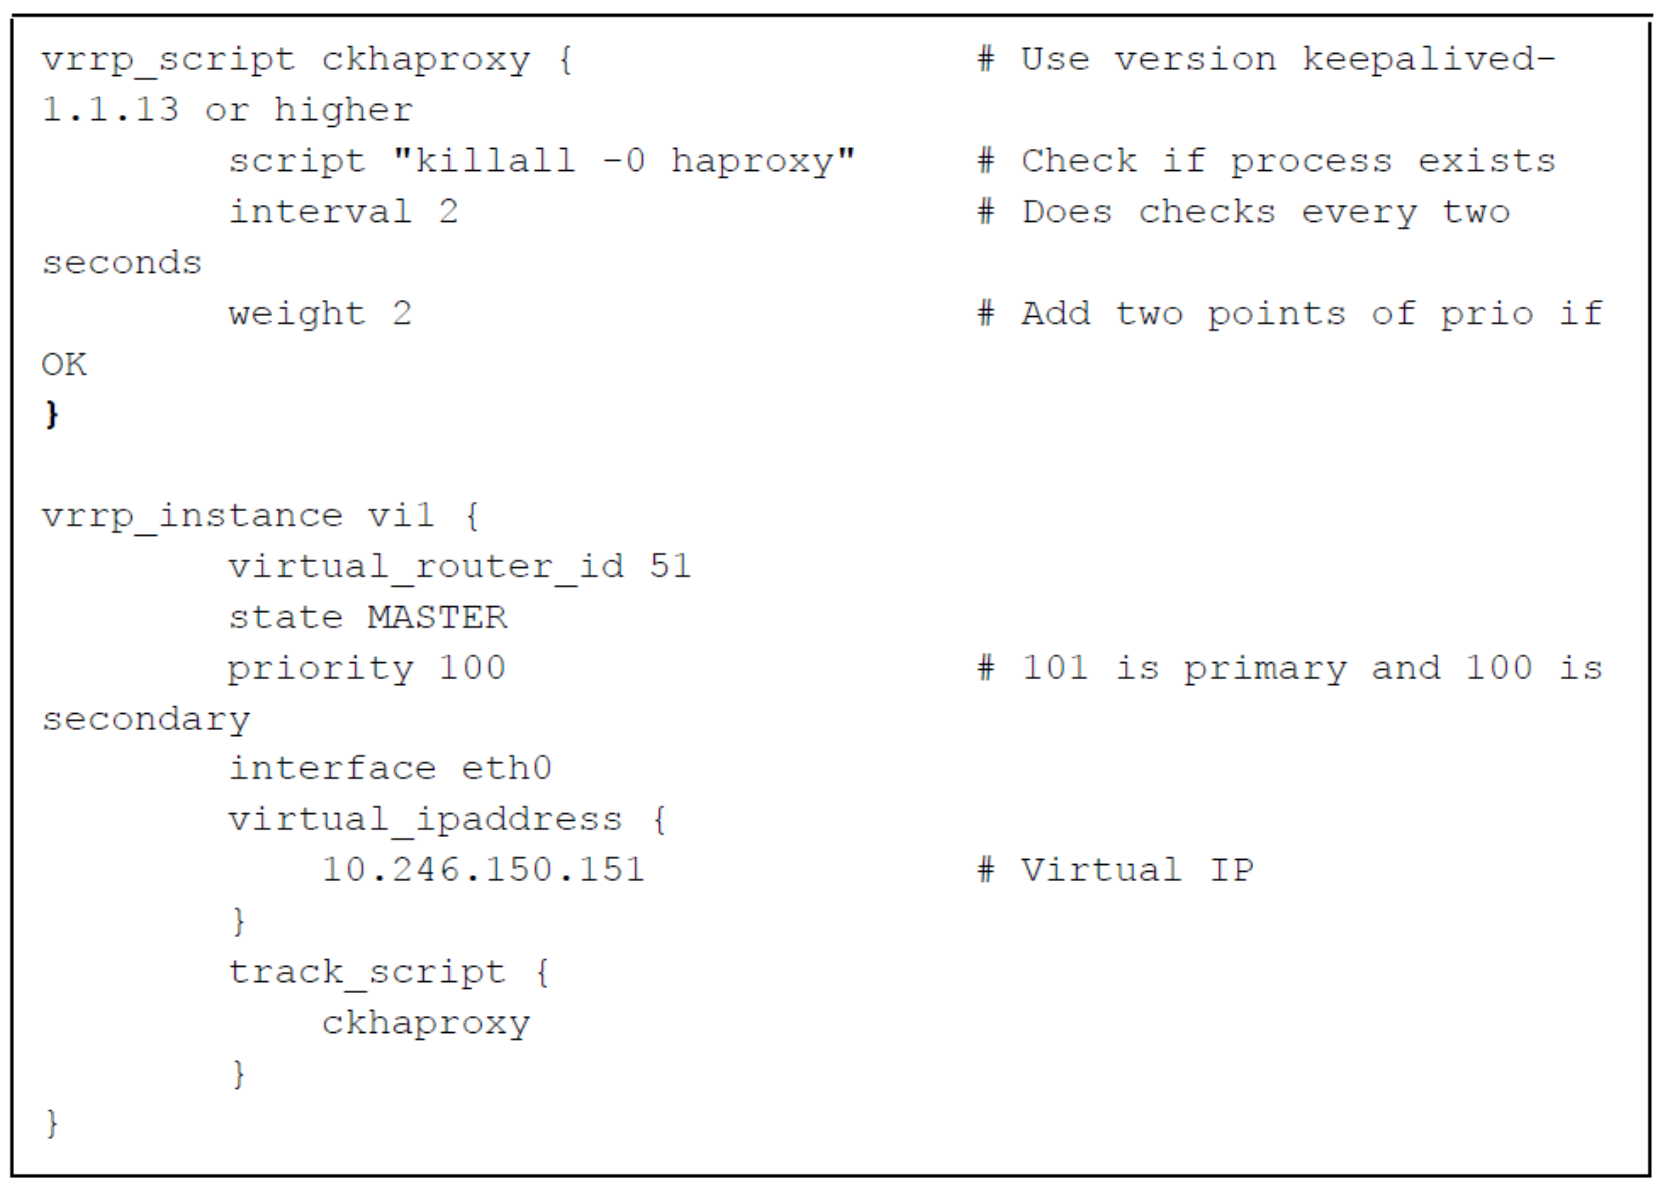
Figure 46. Example of keepalived.conf for secondary load balancer
Prior to starting the service, it is recommended as a best practice to validate that the virtual_router_id is not already being used on the same network. Running tcpdump command (i.e. tcpdump -i eth0 host 224.0.0.18) on primary and secondary HAProxy hosts can provide information on whether the identifier is being used. To further secure your virtual IP from being taken over by a primary router or prevent devices to use the same identifier, setting a virtual router redundancy protocol (vrrp) password is another option.
Afterwards, start the keepalived service on each load balancer server as illustrated in the following figure.

Figure 47. Example of command to start keepalived
Then, check that the virtual IP is on the primary load balancer server as highlighted in the following figure.
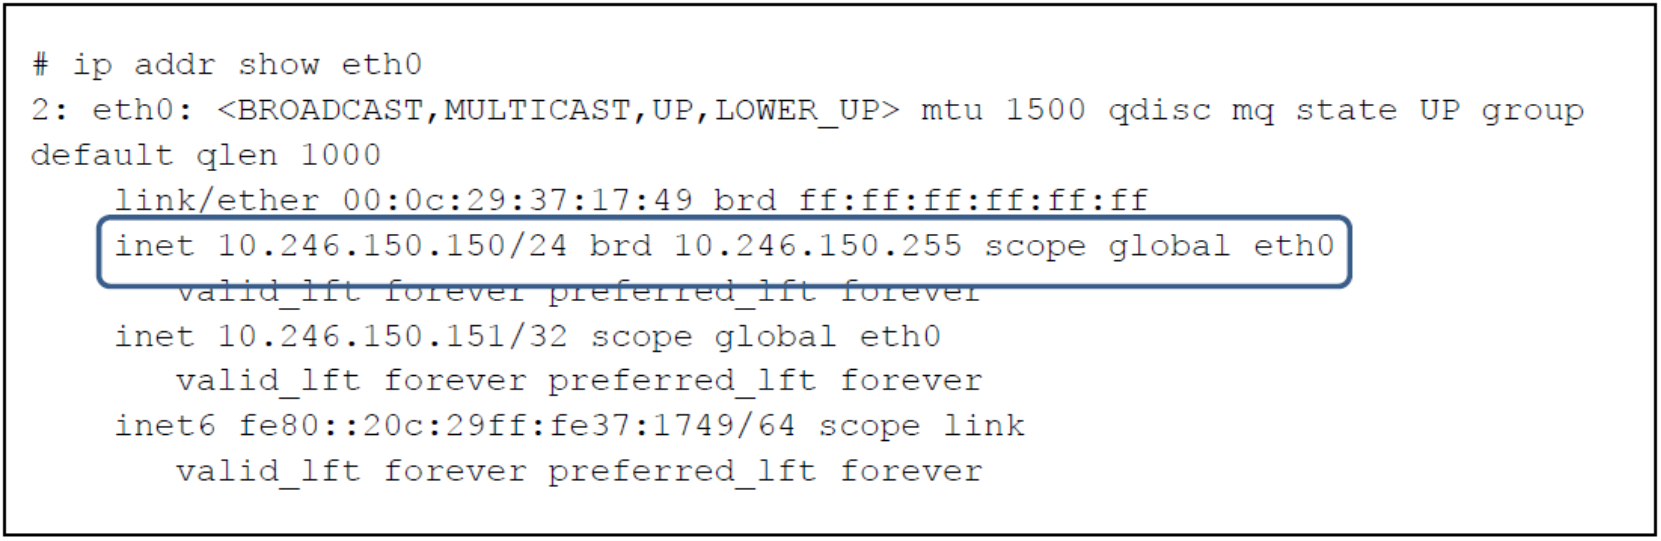
Figure 48. Virtual IP on Primary Load Balancer Server
Redundant HAProxy and DNS
On the redundant HAProxy load balancer server, copy the haproxy.cfg file and the SSL certificate created on the other HAProxy load balancer described in the previous example and place in the /etc/haproxy directory and start the haproxy service. For the SSL certificates, DNS names in the SANs should be used as opposed to IP addresses so the same certificate file can be used on both systems. Then modify the DNS as pictured in the following figure to point the os.ecstme.org A-record to the virtual IP defined in the keepalived.conf file, 10.246.150.151 in this example.
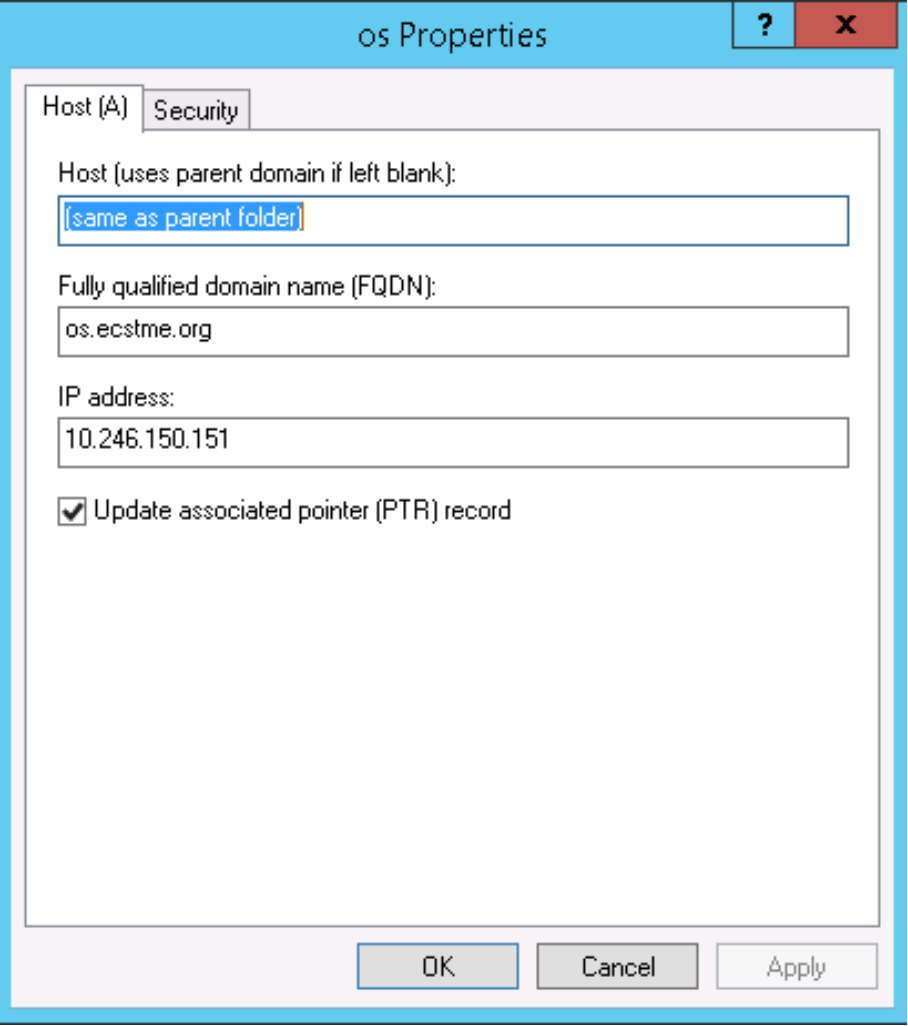
Figure 49. Virtual IP set in DNS
Validation
Start the S3 Browser to validate the setup. Since the S3 browser is utilizing the DNS entry name, “os.ecstme.org”, no additional modifications are needed. Afterwards, shutdown the primary HAProxy load balancer to validate the redundant setup. Once the secondary HAProxy load balancer recognizes that the primary is down, the secondary will pick up the Virtual IP as exemplified in the following figure. Access to the objects on ECS should still be available via S3 Browser since the secondary HAProxy load balancer is handling the requests.
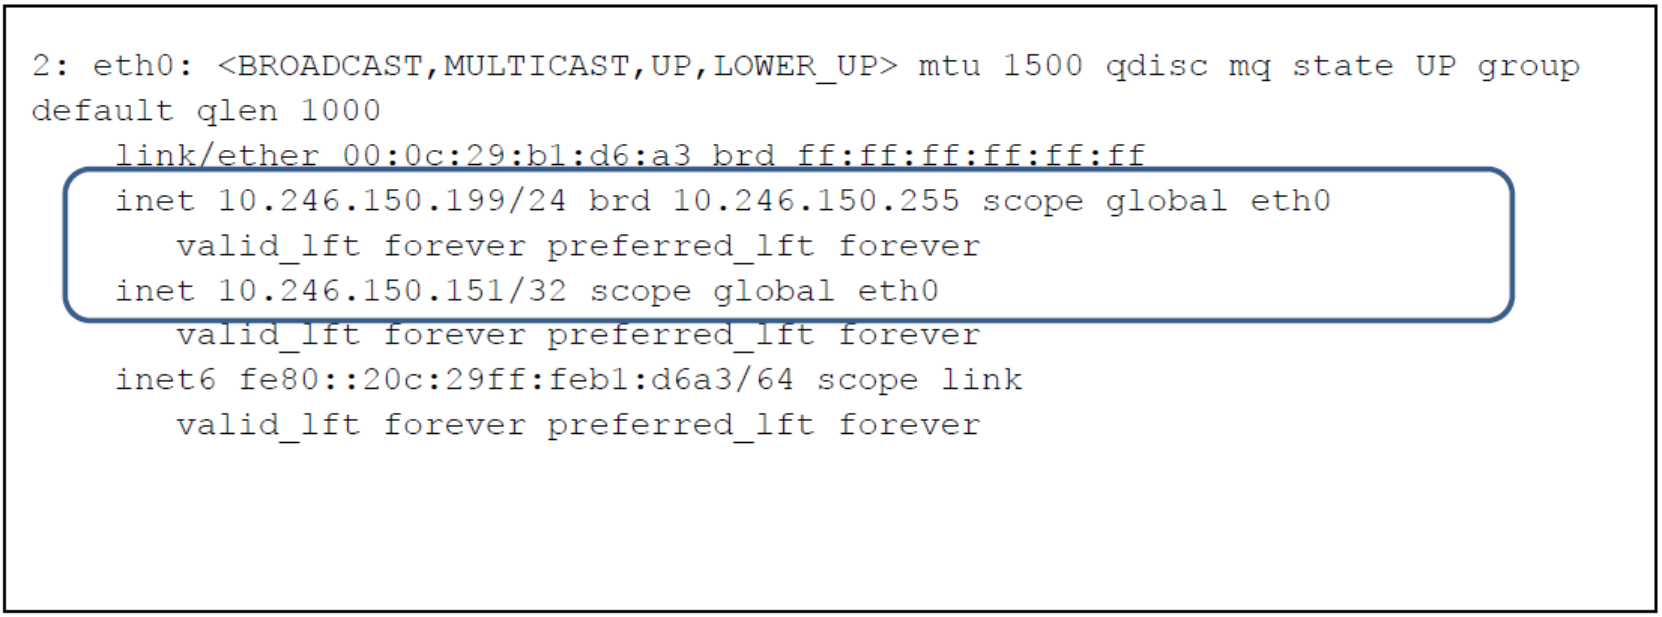
Figure 50. Virtual IP on secondary load balancer server