
Design Guide — Oracle Big Data SQL on Dell EMC PowerFlex
Introduction
Solution architecture
Solution components
Phase I: Infrastructure design and deployment
Network design
Phase II: Storage design
Phase III: Oracle 19c database design and deployment
Hadoop cluster design and deployment
Configuring Big Data SQL
Oracle NoSQL design and deployment
Microsoft SQL Server design and deployment
Oracle Gateways design and deployment
Generate and load data
References
Appendix A
Configuring Cloudera Hadoop from Cloudera Manager Server
Configuring Cloudera Hadoop from Cloudera Manager Server
-
We followed these steps to configure Cloudera Hadoop from the Cloudera Manager Server:
- We accessed the Cloudera Manager IPADDR from a browser to install Cloudera Hadoop.
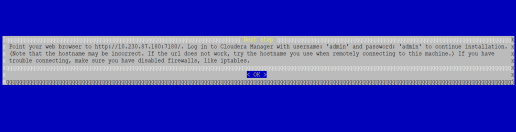
Figure 8. Access Cloudera Manager IPADDR
- We selected Cloudera Enterprise edition and proceeded as described by the wizard.
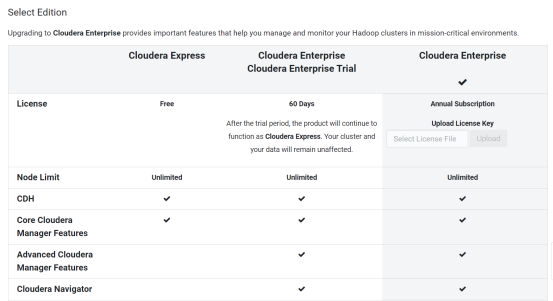
Figure 9. Select Cloudera Enterprise edition
- We specified the hostnames for Hadoop clusters.
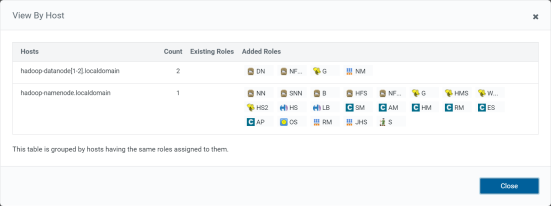
Figure 10. Specify hostnames for clusters
- We selected a custom repository.
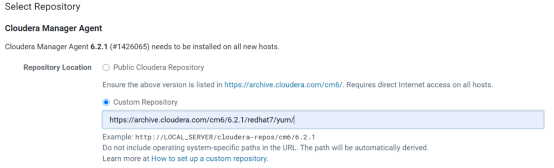
Figure 11. Selecting the custom repository
- We selected Use Parcels (Recommended) and continued.
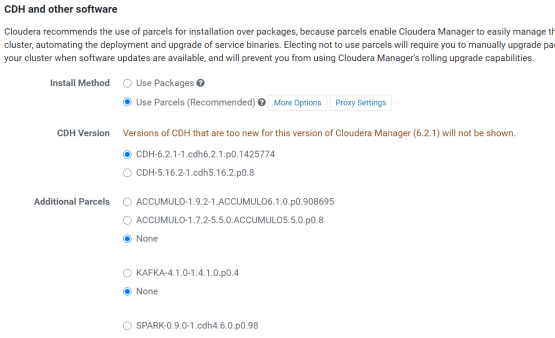
Figure 12. Use parcels for installation
- We accepted the JDK license and continued.

Figure 13. Accept JDK license
- We entered login credentials for the user “root”.
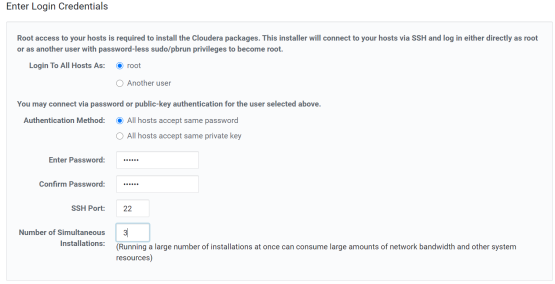
Figure 14. Enter your login credentials
- The following screen appeared, indicating that installation was successful.
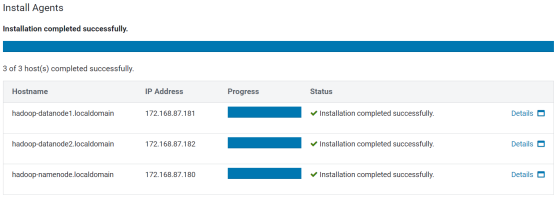
Figure 15. Successful installation
- From the Select Services screen, we clicked Essentials.
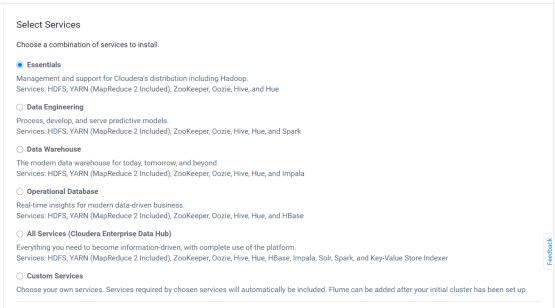
Figure 16. Select essential services
- We distributed the roles for Hadoop “Namenode” and “Datanodes” as shown in the figure below:

Figure 17. Distribute roles for hosts
- We provided all the configuration information for Hadoop and reviewed the changes.
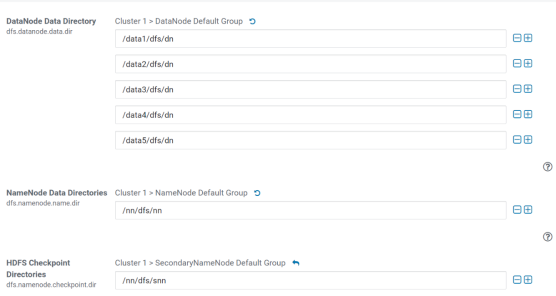
Figure 18. Review and confirm information
- The following screen shows that the Hadoop configuration was successful and that all necessary services were running.
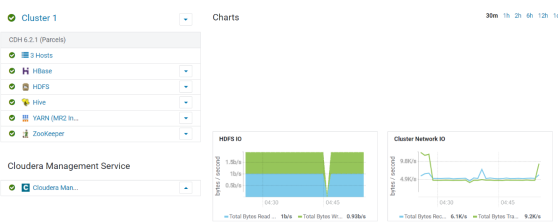
Figure 19. Successful Hadoop configuration