
Digital Assistant Solution components deployment
Digital Assistant Solution components deployment
-
The following are high-level steps involved in deploying the digital assistant solution components:
1. Install the pre-requisites.
2. Deploy a vector database to store document vectors.
3. Deploy a file server to host knowledge base documents.
4. Create and schedule a data science pipeline for data ingestion.
5. Prepare a model serving environment and deploy the model.
6. Deploy the digital assistant application.
Pre-requisites
Below are the pre-requisites for deploying solution components:
Note: Some of the pre-requisite operators for OpenShift AI are pre-installed on Dell APEX Cloud Platform for Red Hat OpenShift as part of cluster deployment, which includes OpenShift distributed tracing platform operator, Kiali operator and Red Hat OpenShift Service mesh operator.
• Install Node Feature Discovery operator from Operator Hub
• Install NVIDIA GPU operator from Operator Hub
• Install Red Hat OpenShift Serverless operator from Operator Hub
• Install Red Hat OpenShift Pipelines operator from Operator Hub
• Install Red Hat OpenShift AI operator from Operator Hub
• Clone digital assistant GitHub repository using OpenShift CLI
git clone https://github.gtie.dell.com/S-Ranjan/dell-digital-assistant.git
Vector Store
PGVector:
The Container file builds a PostgreSQL 15 + PGVector image (PGVector is built from source). You can then deploy this container as any other PostgreSQL image.
A prebuilt image is available at https://quay.io/repository/dellbizapps/ai/postgresql-15-PGVector-c9s.
Go to “dell-digital-assistant/02-vectorstore/PGVector/” from the local clone.
cd dell-digital-assistant/02-vectorstore/PGVector/
Note: Change database name, user and password details in 01-db-secret.yaml.
Apply the files using OC apply to deploy PostgreSQL+PGVector server. Once deployed PGVector will be accessible at postgresql.<your-project>.svc.cluster.local:5432.
The PGVector extension must be manually enabled in the server. This can only be done as a Superuser. Follow the below steps to enable PGVector extension.
- Connect to the running server Pod, either through the terminal view in the OpenShift Console, or through the CLI with:
oc rsh services/postgresql
- Once connected, enter the following command. Replace vectordb with your database name:
psql -d vectordb -c "CREATE EXTENSION vector;"
If the command succeeds, it will print CREATE EXTENSION.
Your PGVector database is now ready to use.
Redis:
From the Operator Hub, install the Redis Enterprise Operator.
You can install the operator with the default value in the namespace you want to create your Redis cluster. To create a Project in the OpenShift cluster, run the following:
oc new-project redisdb
Go to “dell-digital-assistant/02-vectorstore/redis/” from the local clone.
cd dell-digital-assistant/02-vectorstore/redis/
Create Security Context Constraints using 01-redis-scc.yaml:
oc apply -f 01-redis-scc.yaml
Provide the operator permissions for Redis Enterprise Operator and Cluster pods:
oc adm policy add-scc-to-user redis-enterprise-scc-v2 system:serviceaccount:redisdb:redis-enterprise-operator
oc adm policy add-scc-to-user redis-enterprise-scc-v2 system:serviceaccount:redisdb:rec
Create a Redis cluster using 02-redis-cluster.yaml:
oc apply -f 02-redis-cluster.yaml
Once you can deploy a database to host the vector store. The important parts in our scenario are to enable the search module and set enough memory to hold the initial index capacity. Here is an example:
Create the secret for the Redis database using following 03-db-secret.yaml definition as an example. Update the username and password before applying this manifest:
oc apply -f 03-db-secret.yaml
Create the redis database using following 04-redis-db.yaml definition as an example. Change the search module version as per your deployment.
oc apply -f 04-redis-db.yaml
Once the database is deployed, you will have:
- A secret named redb-my-doc (or the name you mentioned in the YAML). It holds the password to the default user account for this database.
- A service named my-doc-headless (or the name you put in the YAML). From this service, you will get: 1. the full URL to the service from within the cluster, such as my-doc-headless.<namespace>.svc.cluster.local, 2. the port that Redis is listening to, such as 14155.
With the above information, when asked for your Redis URL in the different notebooks or applications on this repo, the full URI you can construct will be in the form: redis://default:password@server:port.
File Server
Below are the steps involved in deploying the file server:
- Run the below command to create a new project for the file server:
oc new-project fileserver
- Go to "dell-digital-assistant/03-file-server" from local clone and run the following command to deploy the file server:
oc apply -f deployment/
- Validate if the pod is up and running fine
oc -n fileserver get pods
- Use the following command construct to copy/sync files and folder structure to the file server container.
oc rsync <source> <destination> [-c <container>]
- Use the below command to copy index.html to the file server container. While running the below command, change the pod name and container name as per your deployment:
oc rsync index.html httpd-frontend-86bfbd7d9b-8sbmv:/var/www/html/ -c httpd-rhel7
- Sync PDF files to a file server:
oc rsync /home/user/pdf/demo httpd-frontend-86bfbd7d9b-8sbmv:/var/www/html/pdf -c httpd-rhel7
- Go to the route section under the file server namespace you can see the link to access the file server.
Data science pipeline
A data science pipeline is leveraged to build a data ingestion workflow, which can be manually triggered or scheduled to run at specific time intervals.
Pipeline server is a server that is connected to your data science project which hosts your data science pipeline artifacts. The artifacts are stored in S3 compatible object storage, in our case it is Dell ObjectScale.
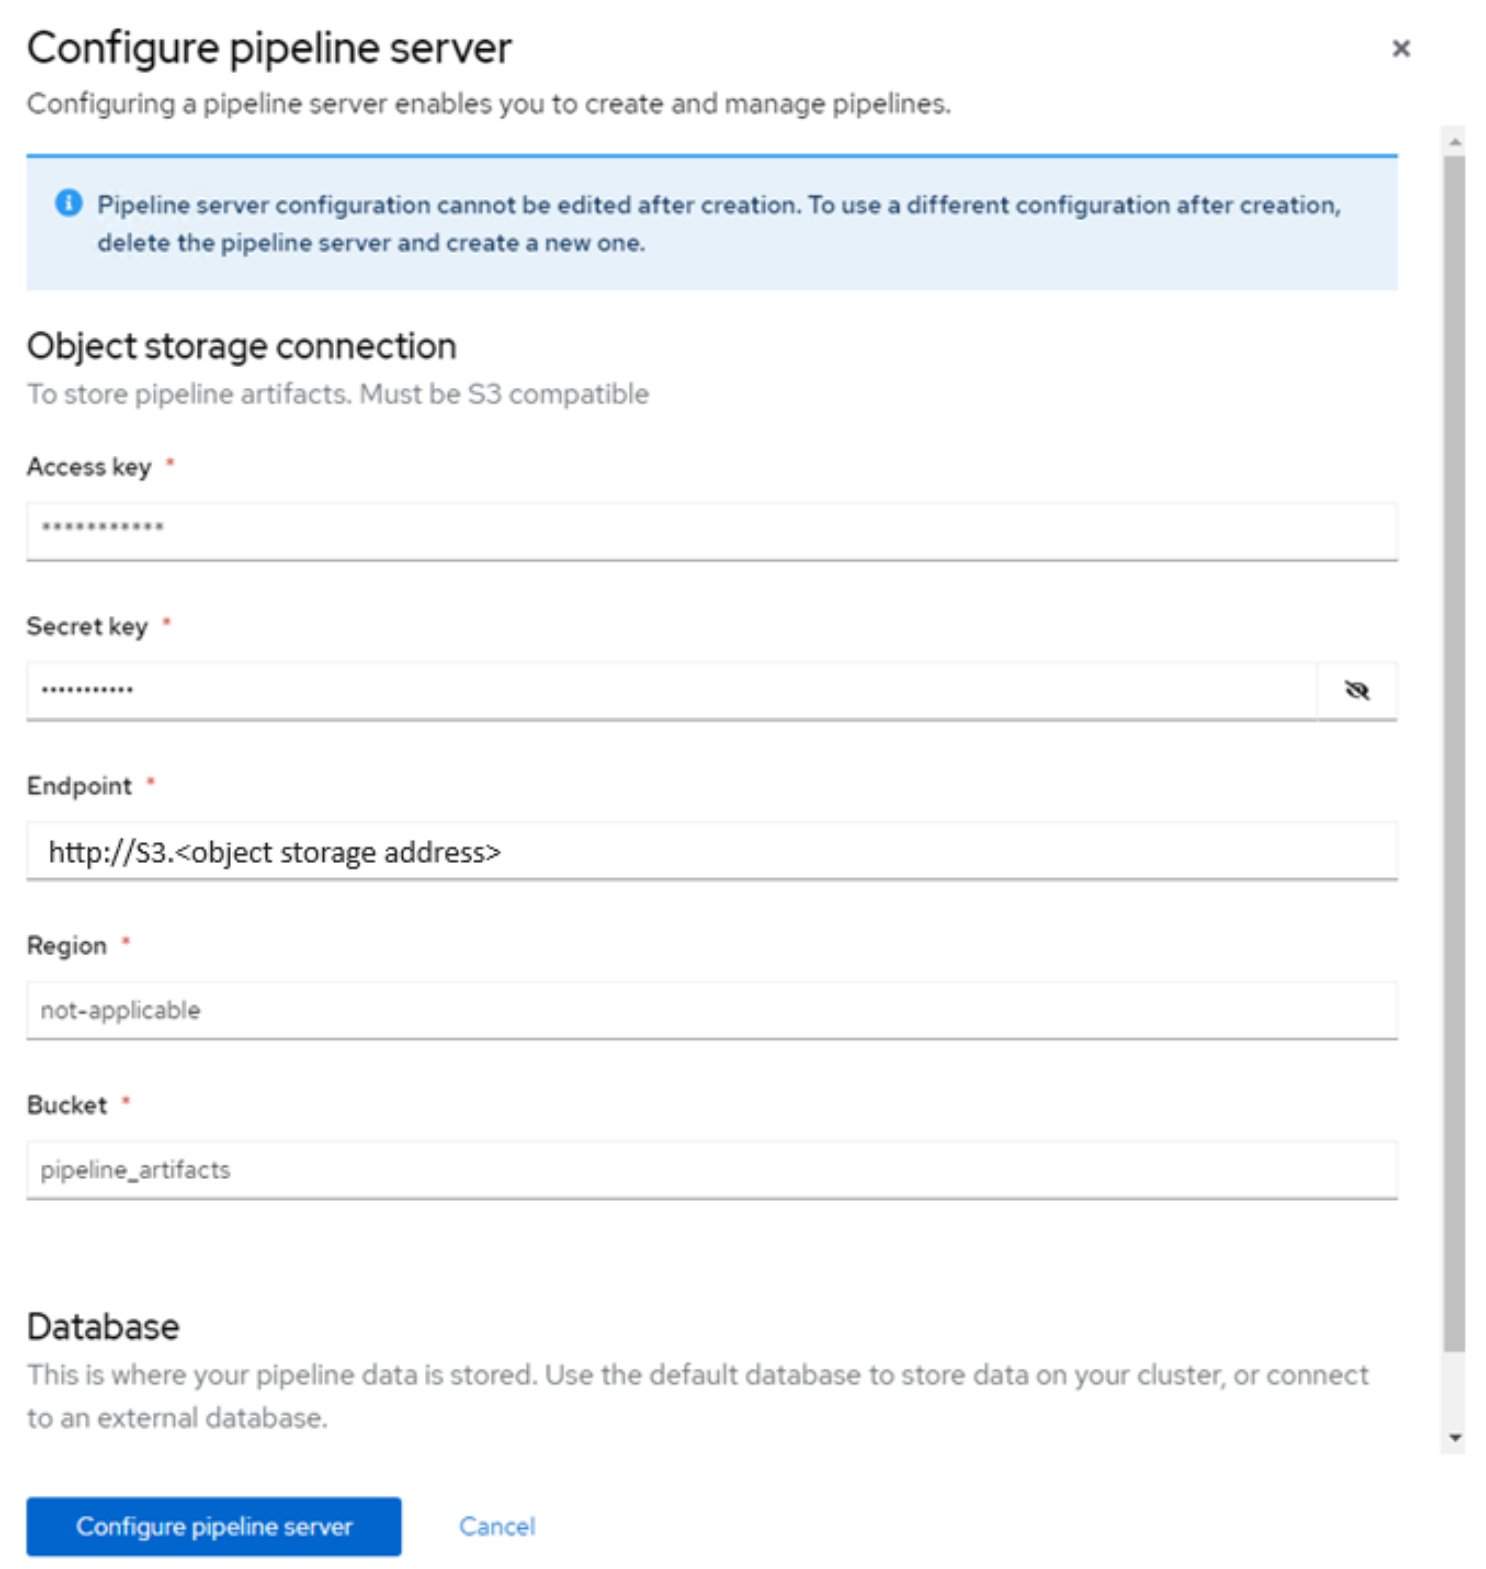
To configure a Pipeline server, go to OpenShift AI -> Pipelines -> Configure pipeline server -> configure pipeline server details.Figure 8. Pipeline server configuration.
Below are the steps to create and trigger a Data science pipeline:
- Log in to your OpenShift AI workbench.
- Clone the Dell Digital assistant GitHub repository within the workbench using terminal.
git clone https://github.gtie.dell.com/S-Ranjan/dell-digital-assistant.git
- Go to “dell-digital-assistant/04-datascience-pipeline/" using file browser.
cd dell-digital-assistant/04-datascience-pipeline/
- You will find all the necessary notebook files to create a data ingest pipeline.
Note: Change database connection details according to your database configuration.
- Create a new Elyra file using new launcher -> Elyra pipeline editor -> drag and drop the notebook files and create a pipeline.
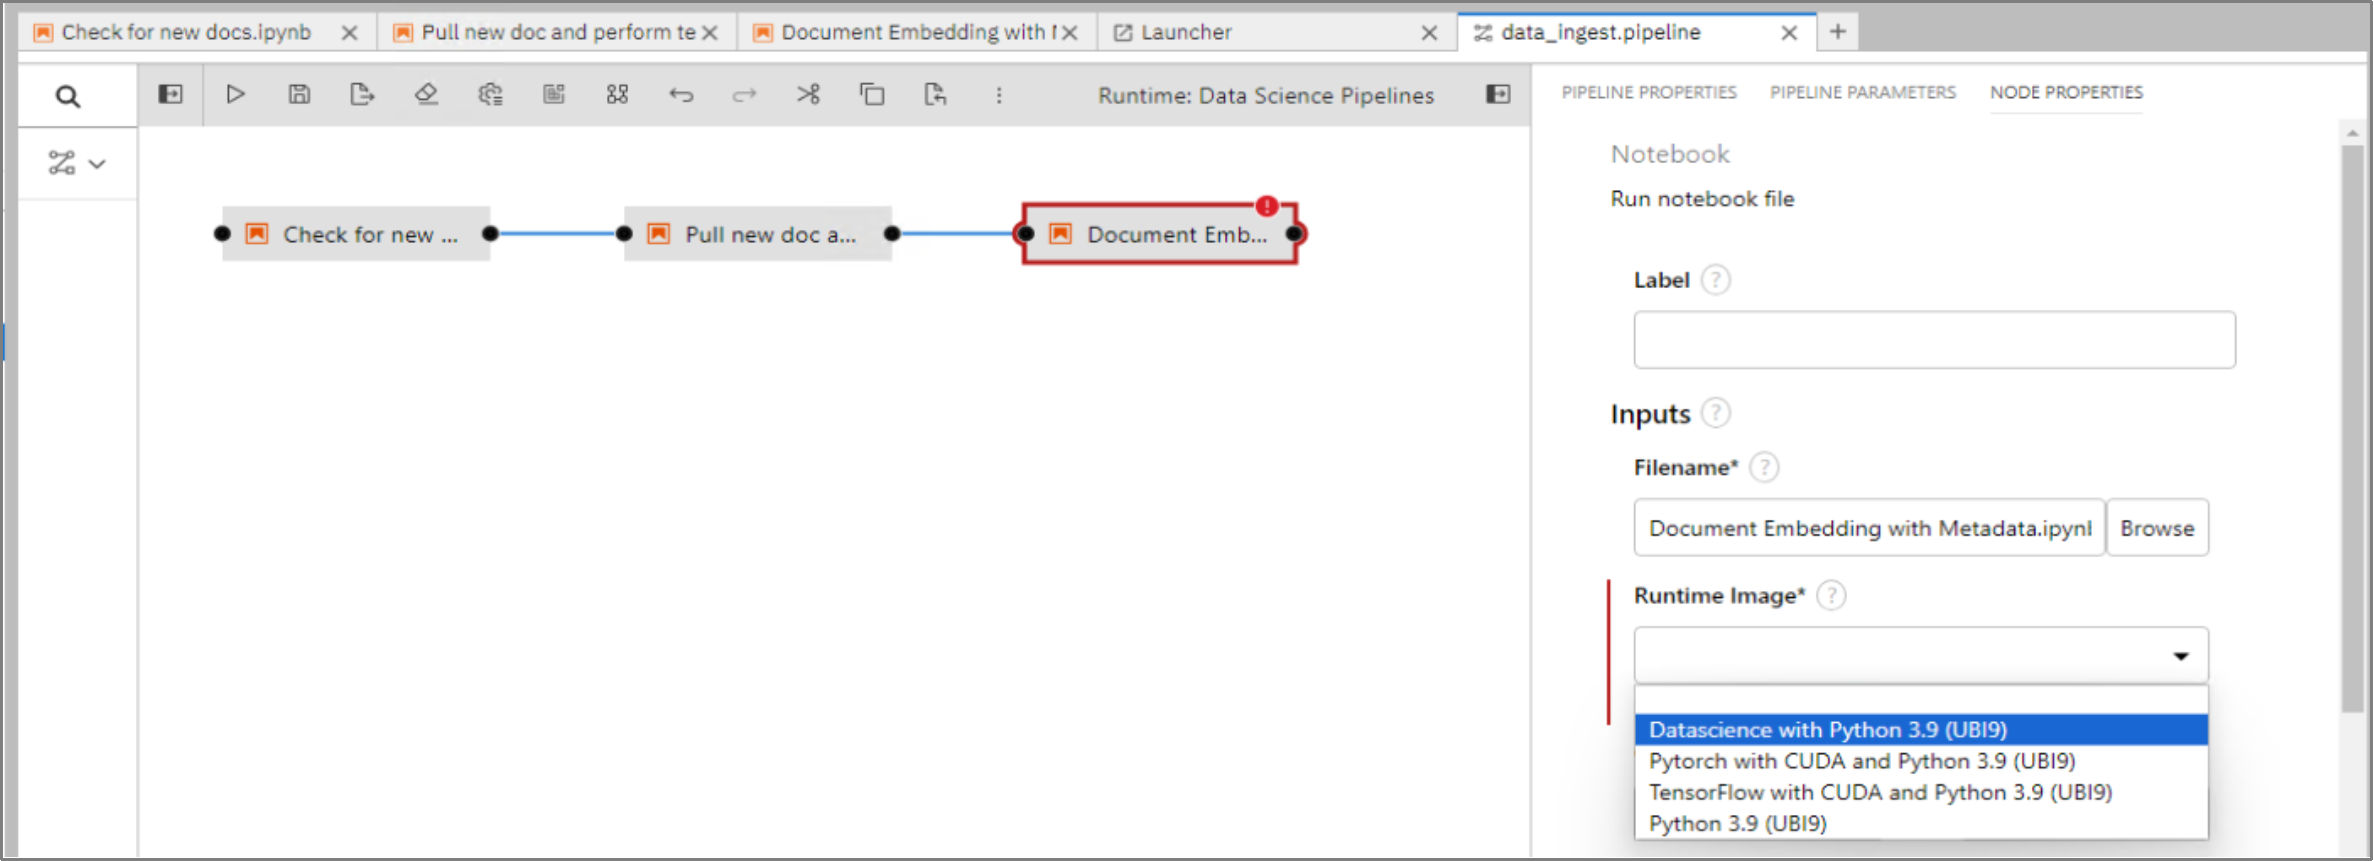
Click each node, open properties, and choose the runtime image to use.
Figure 9. Elyra pipeline runtime image configuration.
- Each node in the pipeline saves information such as new files, cleaned up text files, and so on, in a persistent volume, which will be shared among the nodes in the pipeline.
Create a PVC within the project that the data science pipeline would be configured.
Go to Red Hat OpenShift Dashboard -> Storage -> PVC -> Create a new PVC.
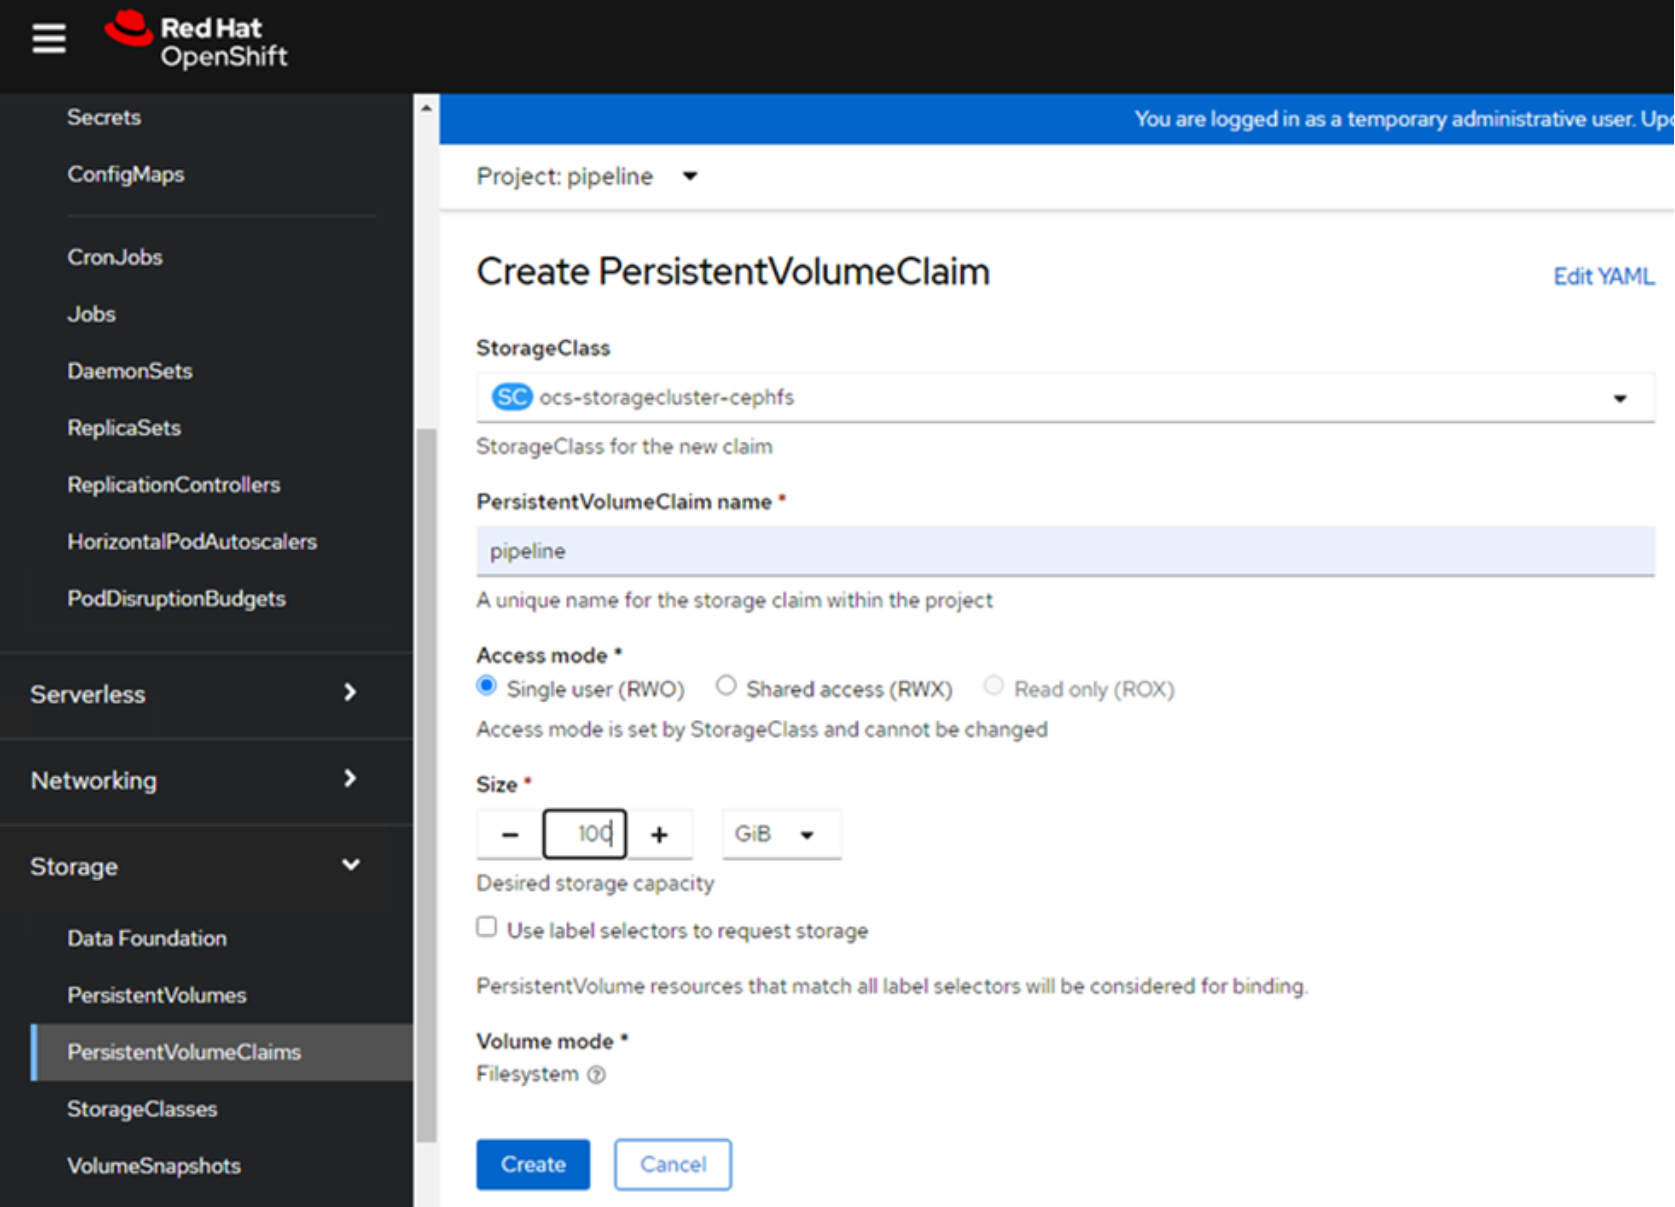
Figure 10. PVC creation for Data Science Pipeline
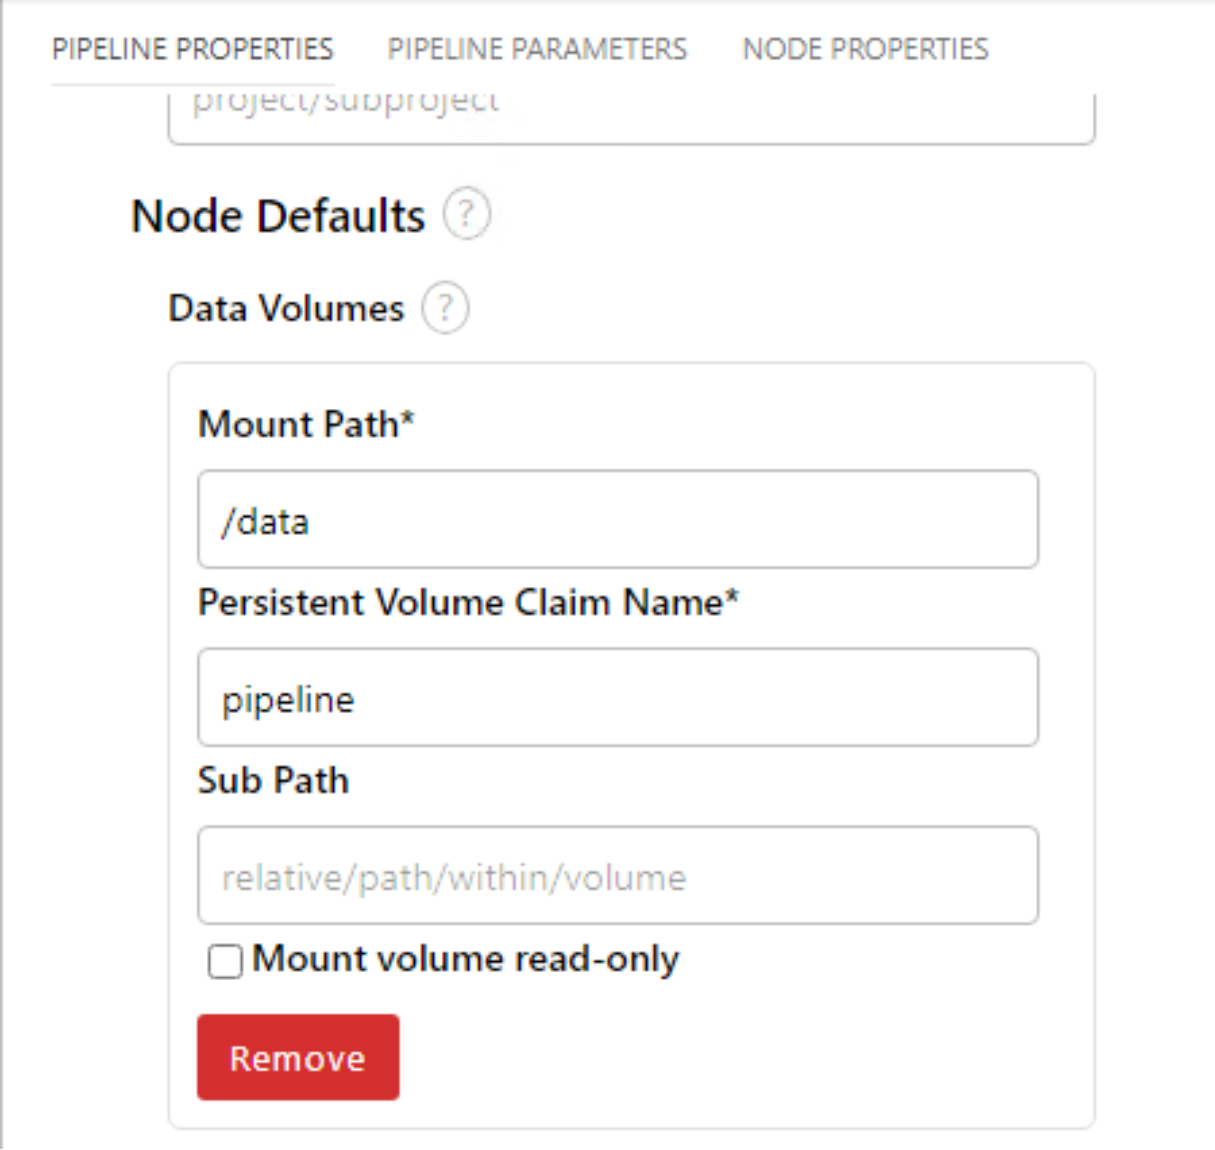
Once PVC has been created successfully, Mount the PVC to pipeline nodes by going to pipeline properties -> node defaults -> Volumes.Figure 11. Data Science Pipeline PVC volume mount.
- Save and run the pipeline, give this pipeline a name, and choose the runtime configuration as “Data Science Pipeline”.
- Go to OpenShift AI dashboard -> Data Science Pipelines -> Pipelines, verify if the pipeline we triggered in the previous step is listed here.
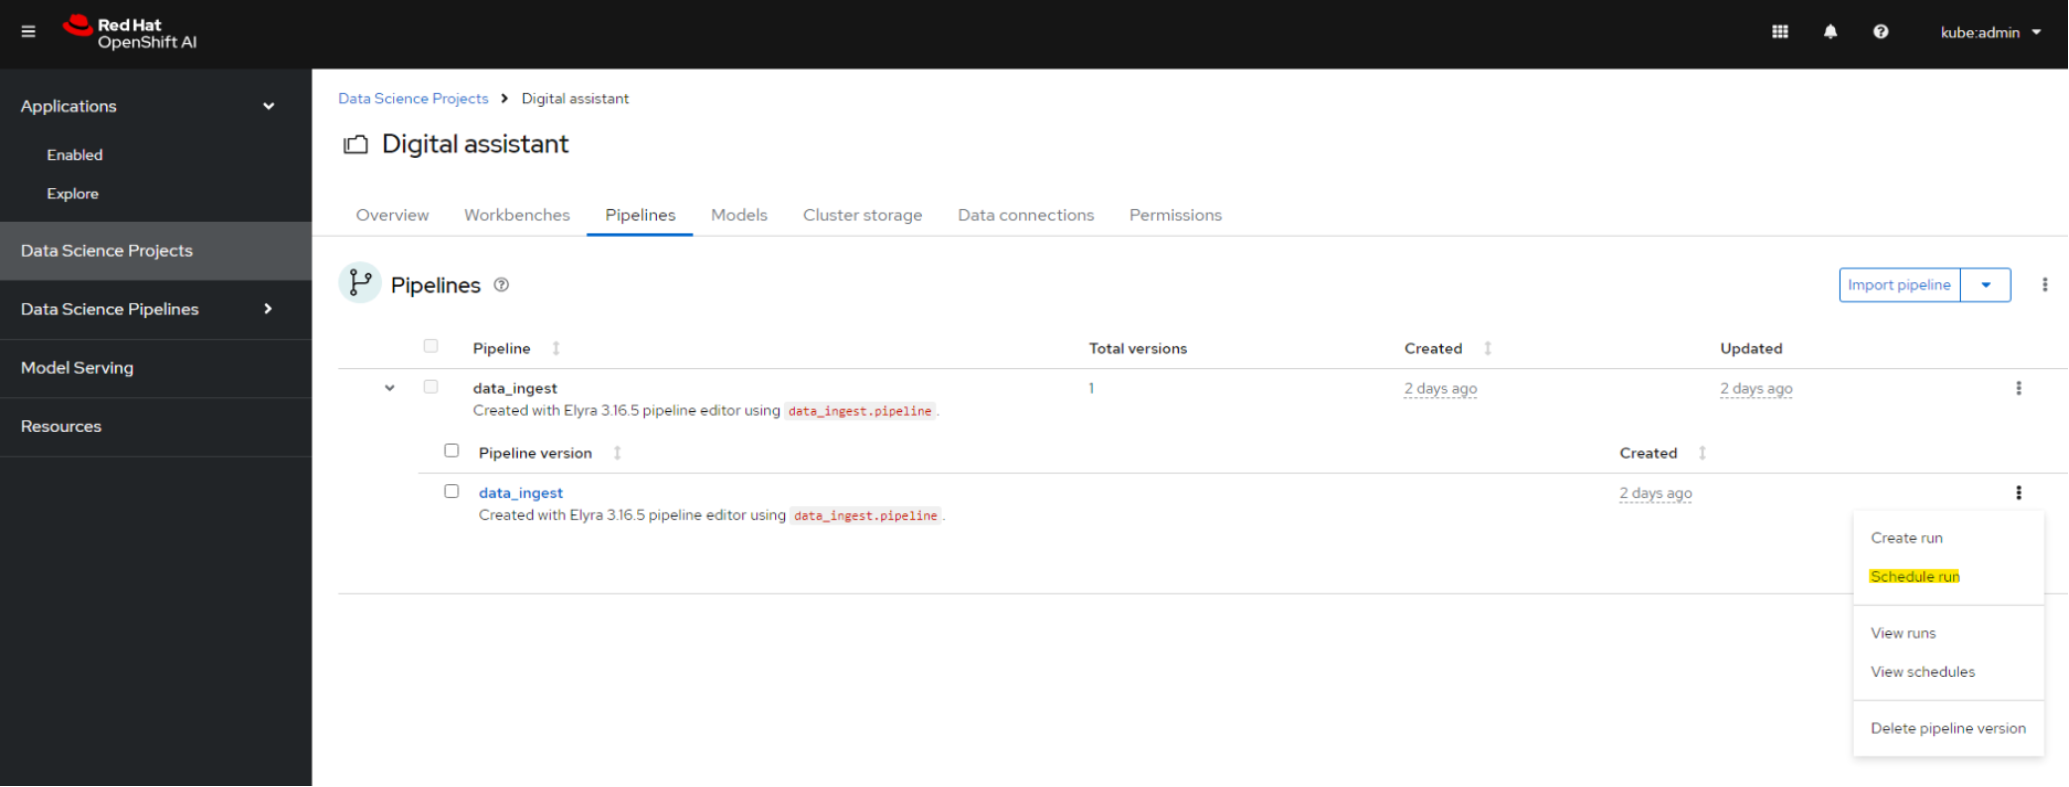
Schedule the data ingest pipeline to run in the periodic interval of your choice.
Figure 12. Data Science Pipeline scheduling
vLLM Model Serving
For deploying large language models such as Llama 2, Red Hat OpenShift AI includes a single model serving platform that is based on the KServe component. KServe provides a Kubernetes Custom Resource Definition for serving predictive and generative machine learning (ML) models. Follow the below steps to deploy Llama 2 model on vLLM serving runtime leveraging the single model serving feature of Red Hat OpenShift AI.
Installation: First ensure that you have properly installed the necessary component of the Single-Model Serving stack, as documented here.
Once the stack is installed, adding the runtime is straightforward:
- As an admin, in the OpenShift AI Dashboard, open the menu Settings -> Serving runtimes.
- Click Add serving runtime.
- For the type of model serving platforms this runtime supports, select Single model serving platform.
- Upload the file vllm-runtime.yaml from the current folder, or click Start from scratch and copy/paste its content.
Note: vllm-runtime.yaml can also be found in dell-digital-assistant/05-model-serving/ local clone folder.
The runtime will now be available when deploying a model.
Model Deployment: This runtime can be used in the exact same way as the pre-installed serving runtime in Red Hat OpenShift AI:
- Copy your model files in an object store bucket.
- Deploy the model from the dashboard.
- Make sure you have added a GPU to your GPU configuration, that you have enough VRAM (GPU memory) to load the model, and that you have enough standard memory (RAM). Although the model loads into the GPU, RAM is still used for the pre-loading operations.
- Once the model is loaded, you can access the inference endpoint provided through the dashboard.
Usage: This implementation of the runtime provides an OpenAI compatible API. So, any tool or library that can connect to OpenAI services can consume the endpoint.
Python and curl examples are provided here.
Also, vLLM provides a full Swagger UI where you can get the full documentation of the API (methods, parameters), and try it directly without any coding. It is accessible at the address https://your-endpoint-address/docs.
Note: With Red Hat OpenShift AI version 2.10.0, vLLM serving runtime is available as pre-installed and fully supported by Red Hat.
Digital Assistant
Follow the below procedure to deploy the digital assistant:
A pre-built container image of the application is available at: quay.io/dellbizapps/ai/dav2:v0.7
The deployment folder includes the necessary files to deploy the application.
Create a new project in the OpenShift cluster using the following command:
oc new-project dell-digital-assistant
Go to "dell-digital-assistant/06-digital-assistant/" from the local clone and run the following command:
oc apply -f deployment/
The "oc apply -f deployment/" command deploys the entire application configuration, including all necessary resources and settings, from the YAML files in the deployment/ directory.