
Dell PowerStore: Microsoft Hyper-V Best Practices
Change a disk ID with diskpart
Change a disk ID with diskpart
-
Follow these steps to change a duplicate disk ID. You can also use PowerShell.
- Log in to a stand-alone Windows Server (with or without the Hyper-V role installed) that is available in PowerStore. This server must not be a member of the Hyper-V cluster.
- Open a command window with administrator rights.
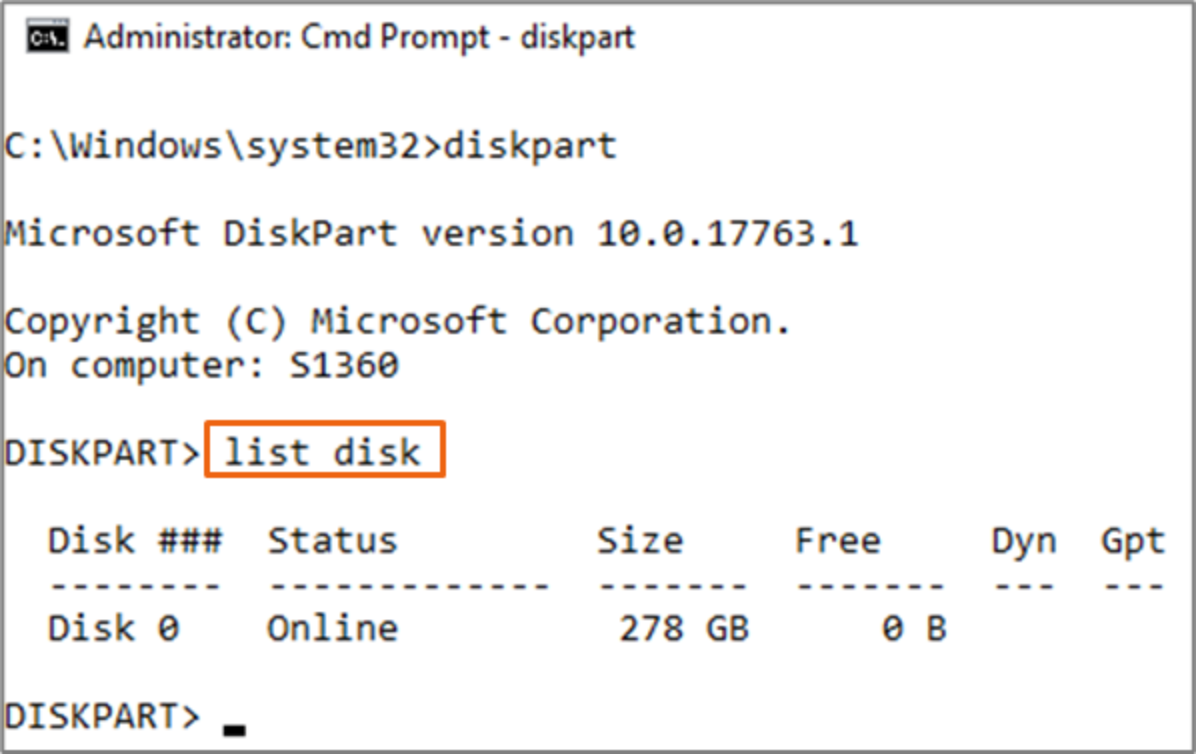
- Enter diskpart.
- Enter list disk.
- Note the current list of disks. In this example, Disk 0 is the only disk.
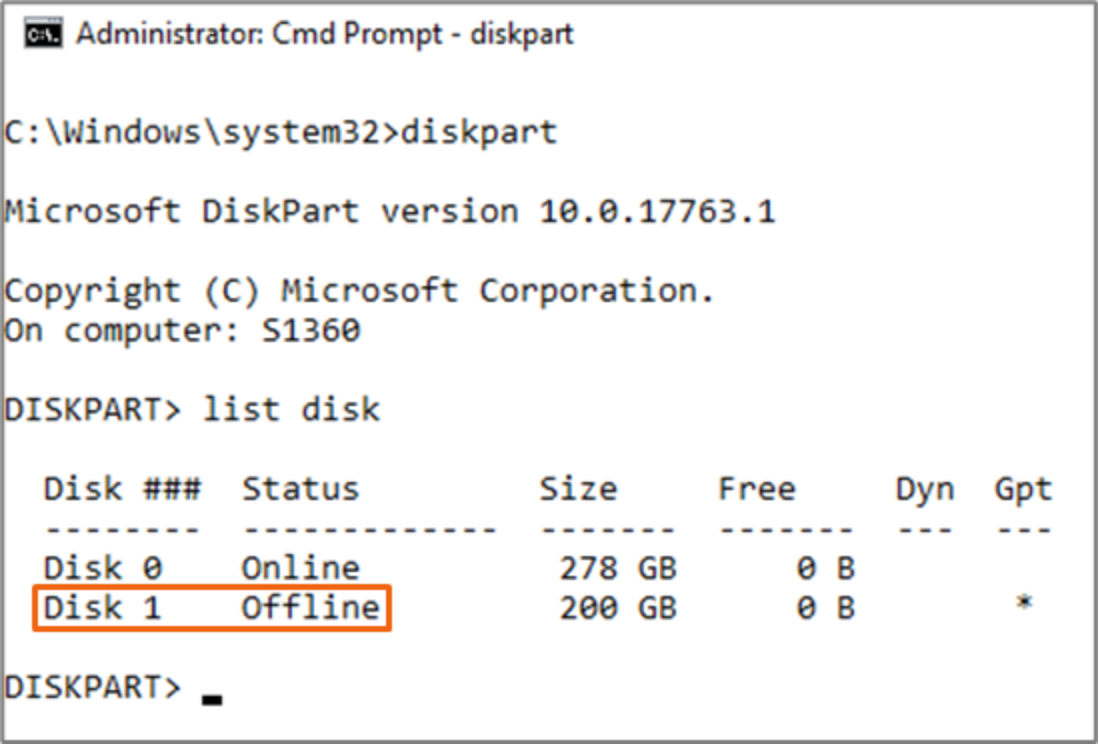
- Use PowerStore Manager to map a thin clone of the cluster disk to this host.
- From the diskpart command prompt, enter rescan.
- Enter list disk.
The new disk (the thin clone) is listed in an offline state.
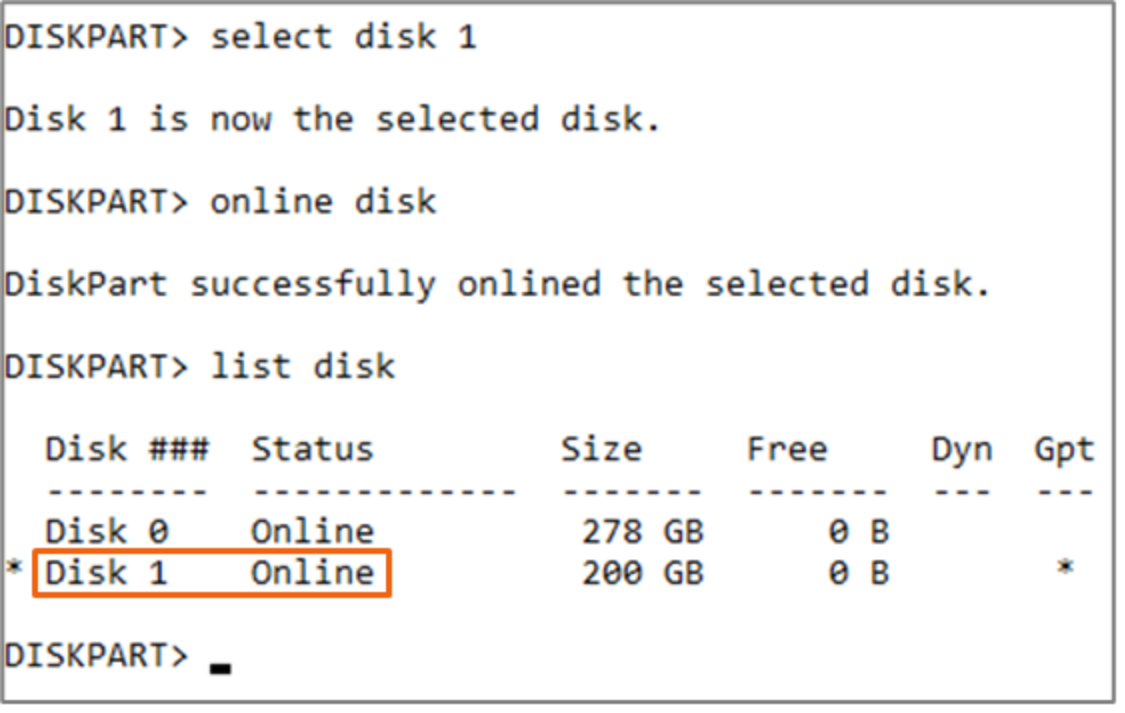
- To select the offline disk, enter select disk <#>.
- Enter online disk to bring it online.
- Enter list disk to confirm that the disk is online.
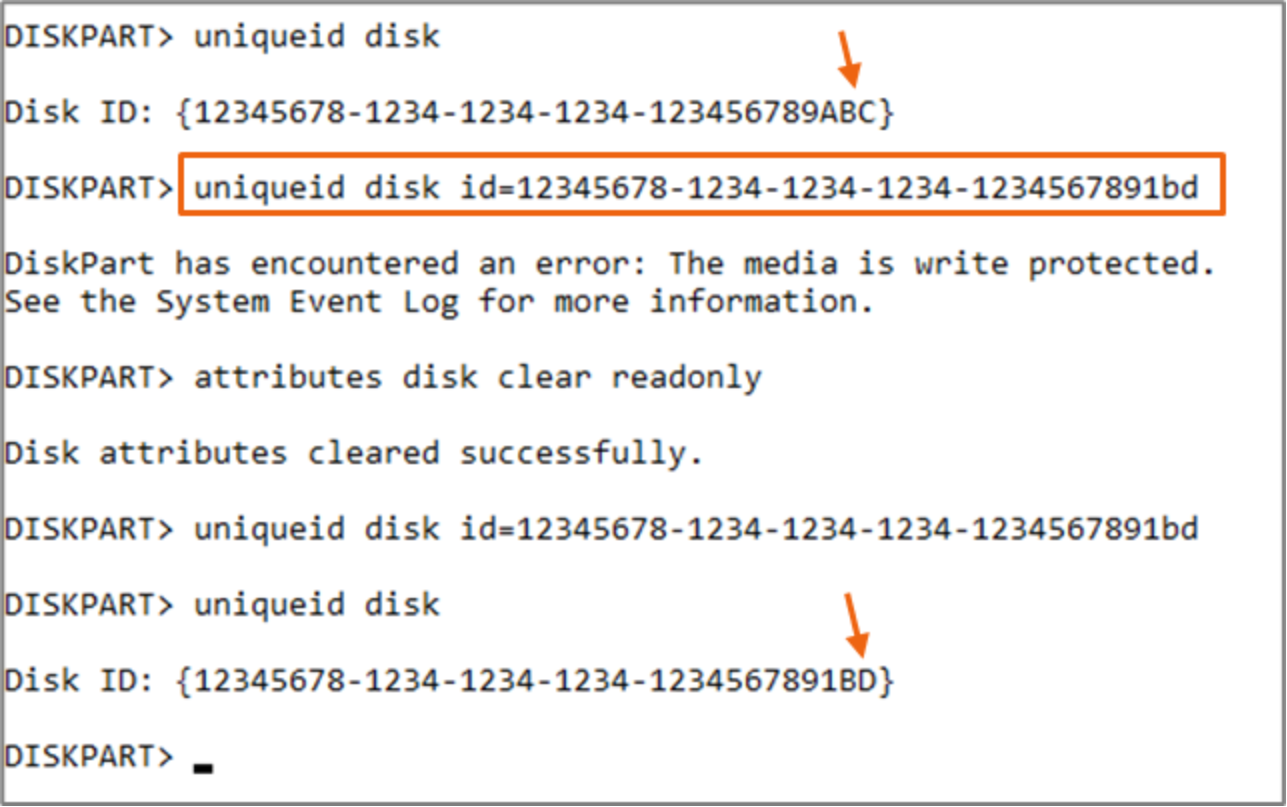
- Enter uniqueid disk to view the current ID for the disk.
- To change the disk ID, enter uniqueid disk ID=<newid>.
- For an MBR disk, the disk ID is an eight-character string in hexadecimal format.
- For a GPT disk (shown in this example), the disk ID is a longer Globally Unique Identifier (GUID) that is also in hexadecimal format.
- Change at least one character to make the ID unique.
Note: If a disk is read-only, the disk ID cannot be changed (you will receive an error message). If a disk is read-only, enter attributes disk clear readonly to clear the read-only attribute and repeat this step.
- Enter uniqueid disk again to verify the new ID.
- Now that the thin clone has a unique disk signature, exit from diskpart.
- Use PowerStore Manager to unmap the disk from the stand-alone host server, and map the disk to the specified Hyper-V cluster.
- Perform a rescan disk on all nodes of the Hyper-V cluster and bring the disk online. If Windows has automatically assigned a drive letter to any volumes on the disk, remove the drive letters, and return the disk to an offline state.
Note: Disable automount as a best practice. Automatically assigned drive letters can interfere with Hyper-V recovery operations. See Disable automount for details.
- Clear the cluster reservation attribute on the volume. Perform this action with PowerShell.
- Open a PowerShell window with administrator privileges.
- Clear the cluster reservation on the disk so that failover cluster manager can discover and import the disk.
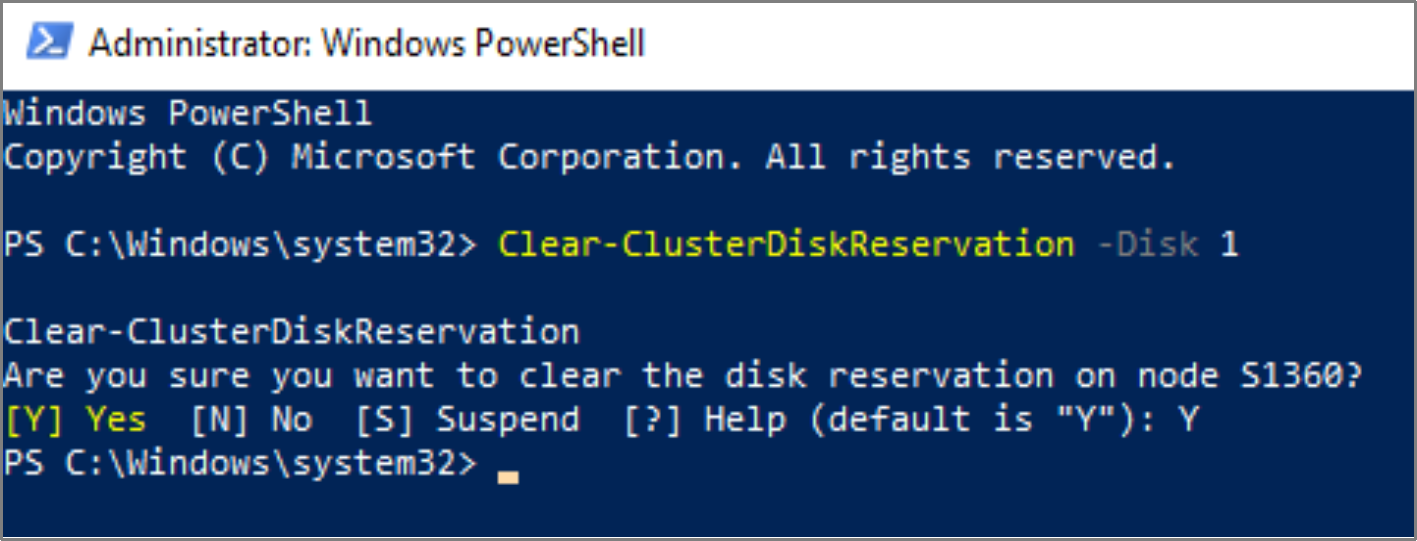
- Close PowerShell.
- Place the disk in an offline state and perform a rescan disk on each node in the Hyper-V cluster. Failure to do a rescan on all Hyper-V nodes will interfere with disk discovery in the next step.
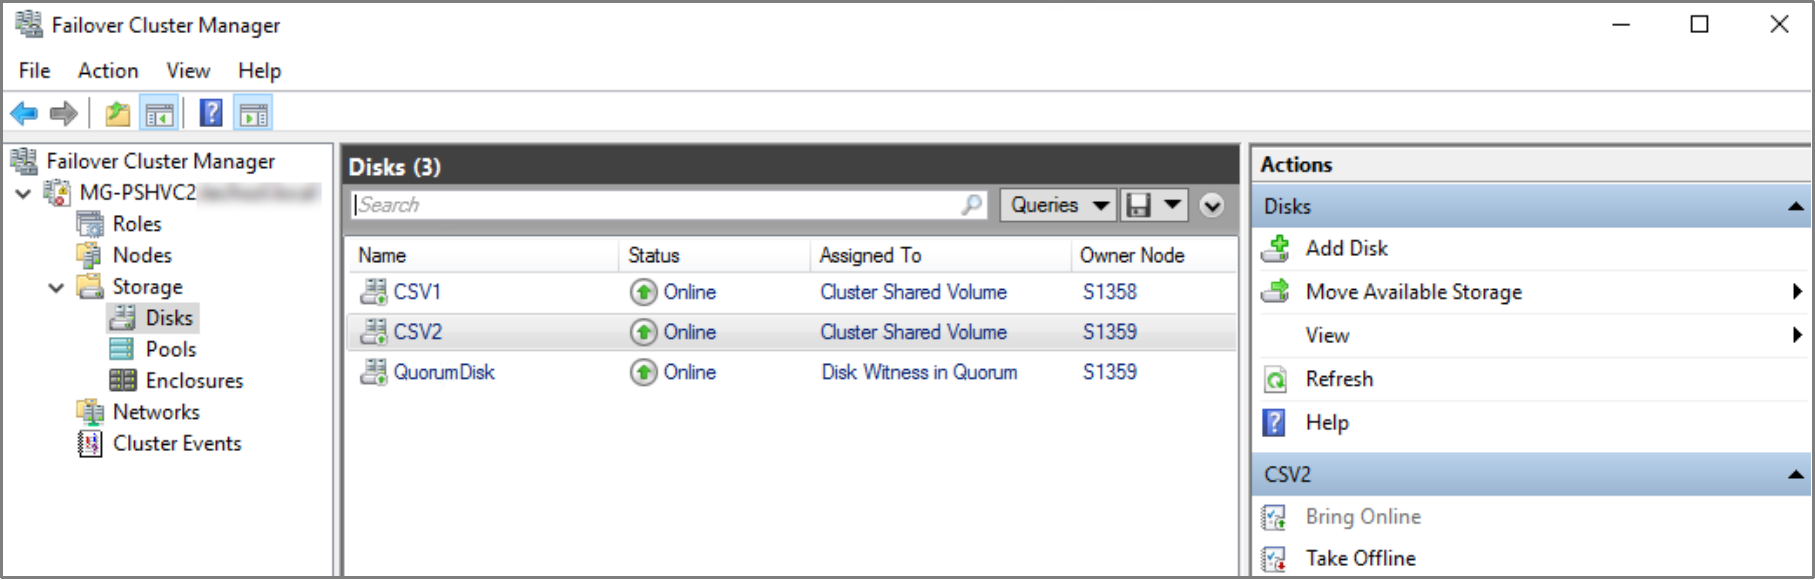
- Add the disk to the Hyper-V cluster. Use the Actions menu in Failover Cluster Manager to convert the disk to a cluster shared volume if the original disk was a CSV.
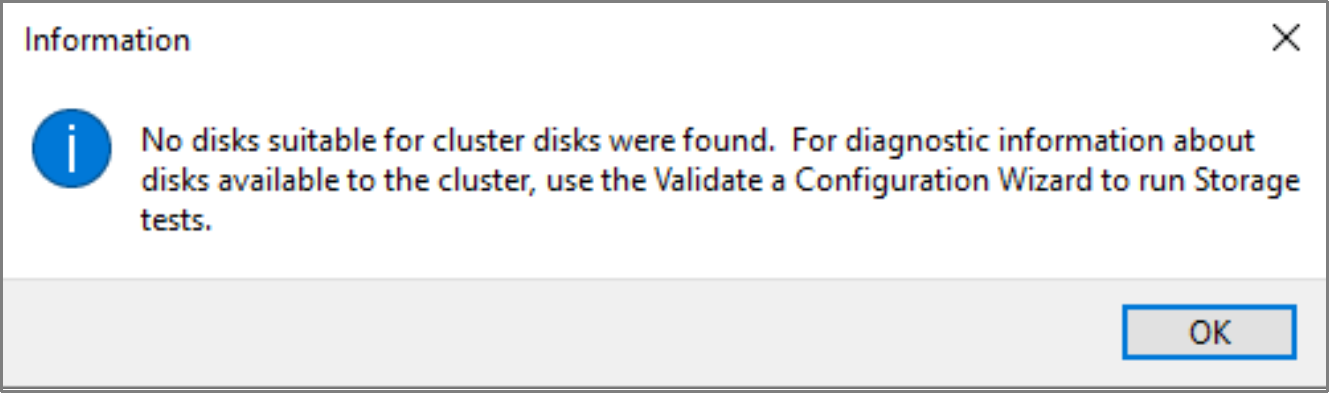
Note: If the cluster is unable to discover the disk, run cluster validation and examine the report for disk errors. Resolve any errors and attempt to add the disk again.
- After the volume is online, complete the wanted steps or VM recovery steps.