
Install PowerStore CSI driver from Rancher App Catalog
Install PowerStore CSI driver from Rancher App Catalog
-
This section outlines the steps to install the CSI driver from Rancher App Catalog:
- Create a new namespace for the CSI driver,
The CSI driver will be installed in a separate namespace. On the left-side menu, navigate to Cluster > Projects/Namespaces and create a new namespace and name it csi-powerstore. Optionally, you can set the Container Resource Limit and configure Pod Security.

Figure 11. Create Namespace for PowerStore CSI driver
- The CSI driver requires the array connection and credential information. Create a secret to store this information for PowerStore systems. From the left-side menu, navigate to Cluster-Name > Storage > Secrets.
- Create an Opaque (generic) secret in the csi-powerstore namespace and name it powerstore-config.
- The secret should contain a single key-pair value with the key named config. In the value field, it stores the PowerStore systems information. See Error! Reference source not found..
- An example of the values is provided below. For a more detailed explanation of these parameters, see the sample secret.yaml file on PowerStore CSI driver GitHub repository.
arrays:
- endpoint: https://{powerstore-management-ip}/api/rest
globalID: {powerstore-global-id}
username: admin
password: {powerstore-admin-password}
skipCertificateValidation: true
isDefault: true
blockProtocol: iscsi
nasName: PS6-NAS-srv1
nfsAcls: "0777"
- endpoint: xxxxx
globalID: xxxxx
username: xxxxx
password: xxxxx
skipCertificateValidation: xxxxx
isDefault: xxxxx
blockProtocol: xxxxx
nasName: xxxxx
nfsAcls: xxxxx
endpoint: Specify the PowerStore system REST API end point.
globalID: Specify the PowerStore system Global ID. You can find the Global ID by going to the PowerStore Manager UI > Settings > Cluster > Properties page. See Figure 13.
Username, password: Specify credentials for the PowerStore Manager user account, which must have administrative privileges.
skipCertificateValidation: Indicate whether to perform certification validation. Set to True if using a self-signed certificate.
isDefault: Indicate whether to use the PowerStore system as the default system when no system is explicitly specified.
blockProtocol: Define the block protocol to use.
nasName: Provide the NAS server name on the PowerStore system if you are provisioning storage on the NAS server.
nfsAcls: Set the default file permissions on the NFS server.
You can include multiple PowerStore systems in the same secret. Add additional PoweStore systems to the list under arrays.
- Navigate to Cluster-Name > Apps > Charts and select the CSI driver. Click Install to begin the guided installation process.
- Select csi-powerstore as the namespace.
- The installation page pre-populates the driver configuration in key/value parameters. Review and modify the configuration to suit your requirements. Click ViewChart Info to find the detailed explanation about these parameters. See Figure 14.
- A copy of the values.yaml file that the installation uses is available on PowerStore GitHub Repository.
- Click Install to begin deploying the CSI driver in the cluster.
- When the installation begins, you can monitor its progress by navigating to Cluster-Name > Workloads > Deployments and clicking powerstore-controller deployment. Here you can watch as various pods and resources are being created and initiated. The UI offers convenient access to log files to help troubleshoot issues or review deployments. See Figure 15.
- After completing the installation, navigate to the Cluster-Name > Apps > Installed Apps section on the left-side menu. You will see the PowerStore app listed there. Click powerstore to view its resources. See Figure 16 and Figure 17.
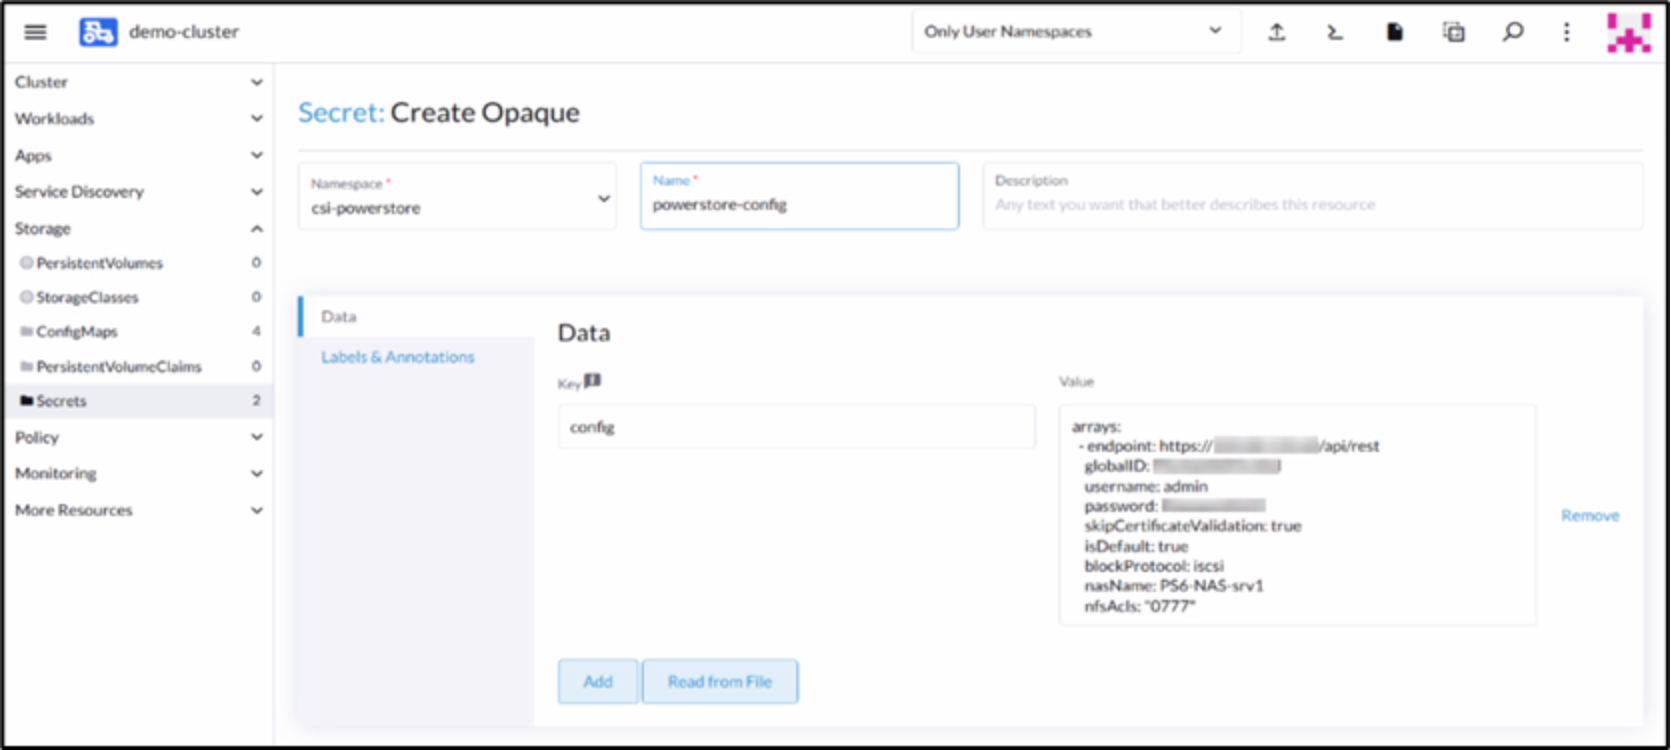
Figure 12. Create Opaque Secret for PowerStore systems
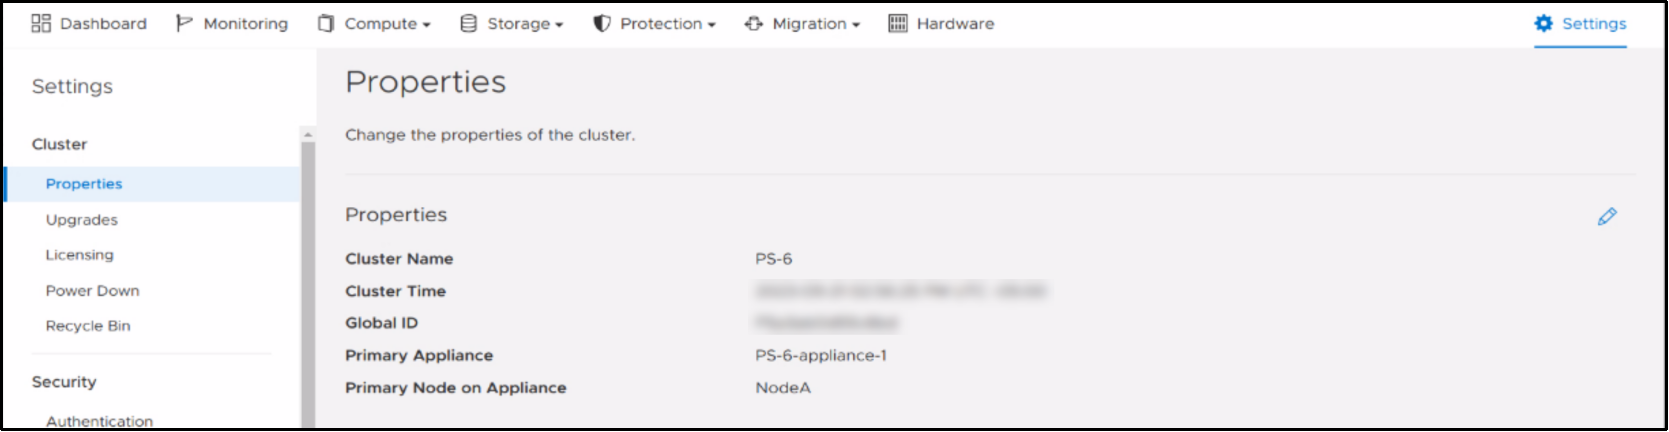
Figure 13. PowerStore system Global ID
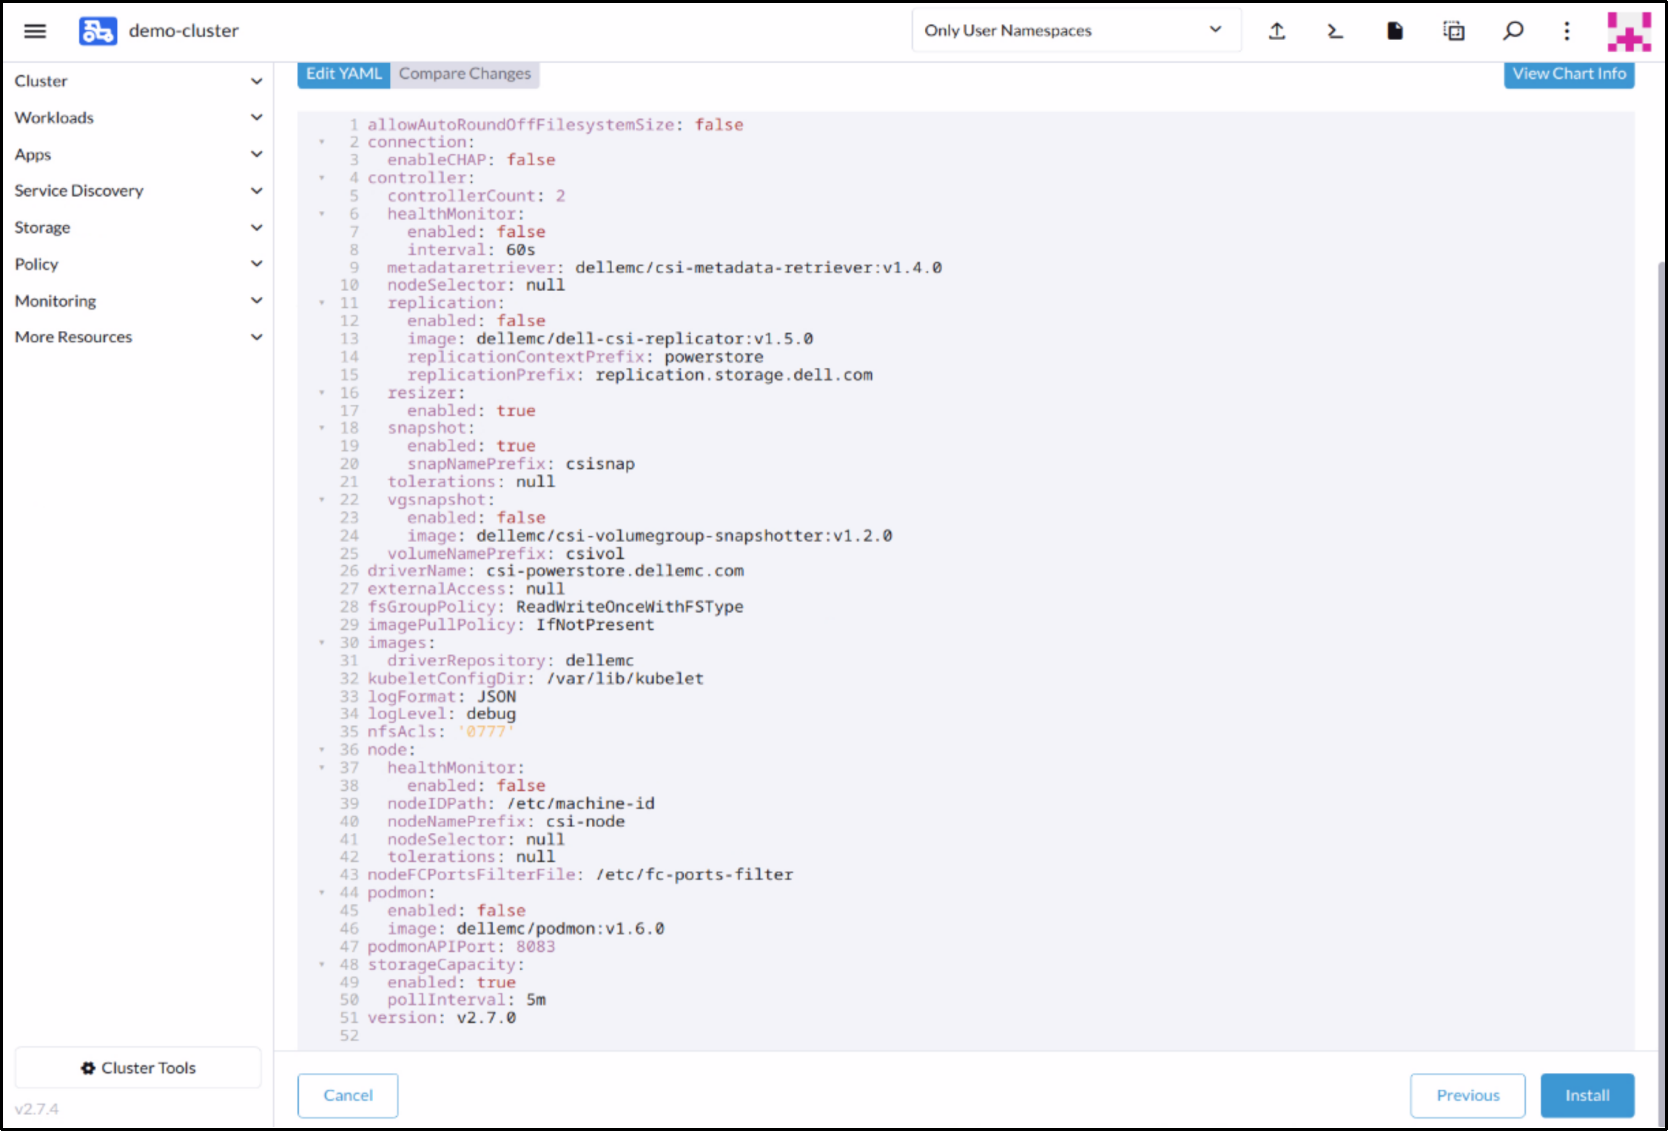
Figure 14. PowerStore CSI driver Helm Chart values
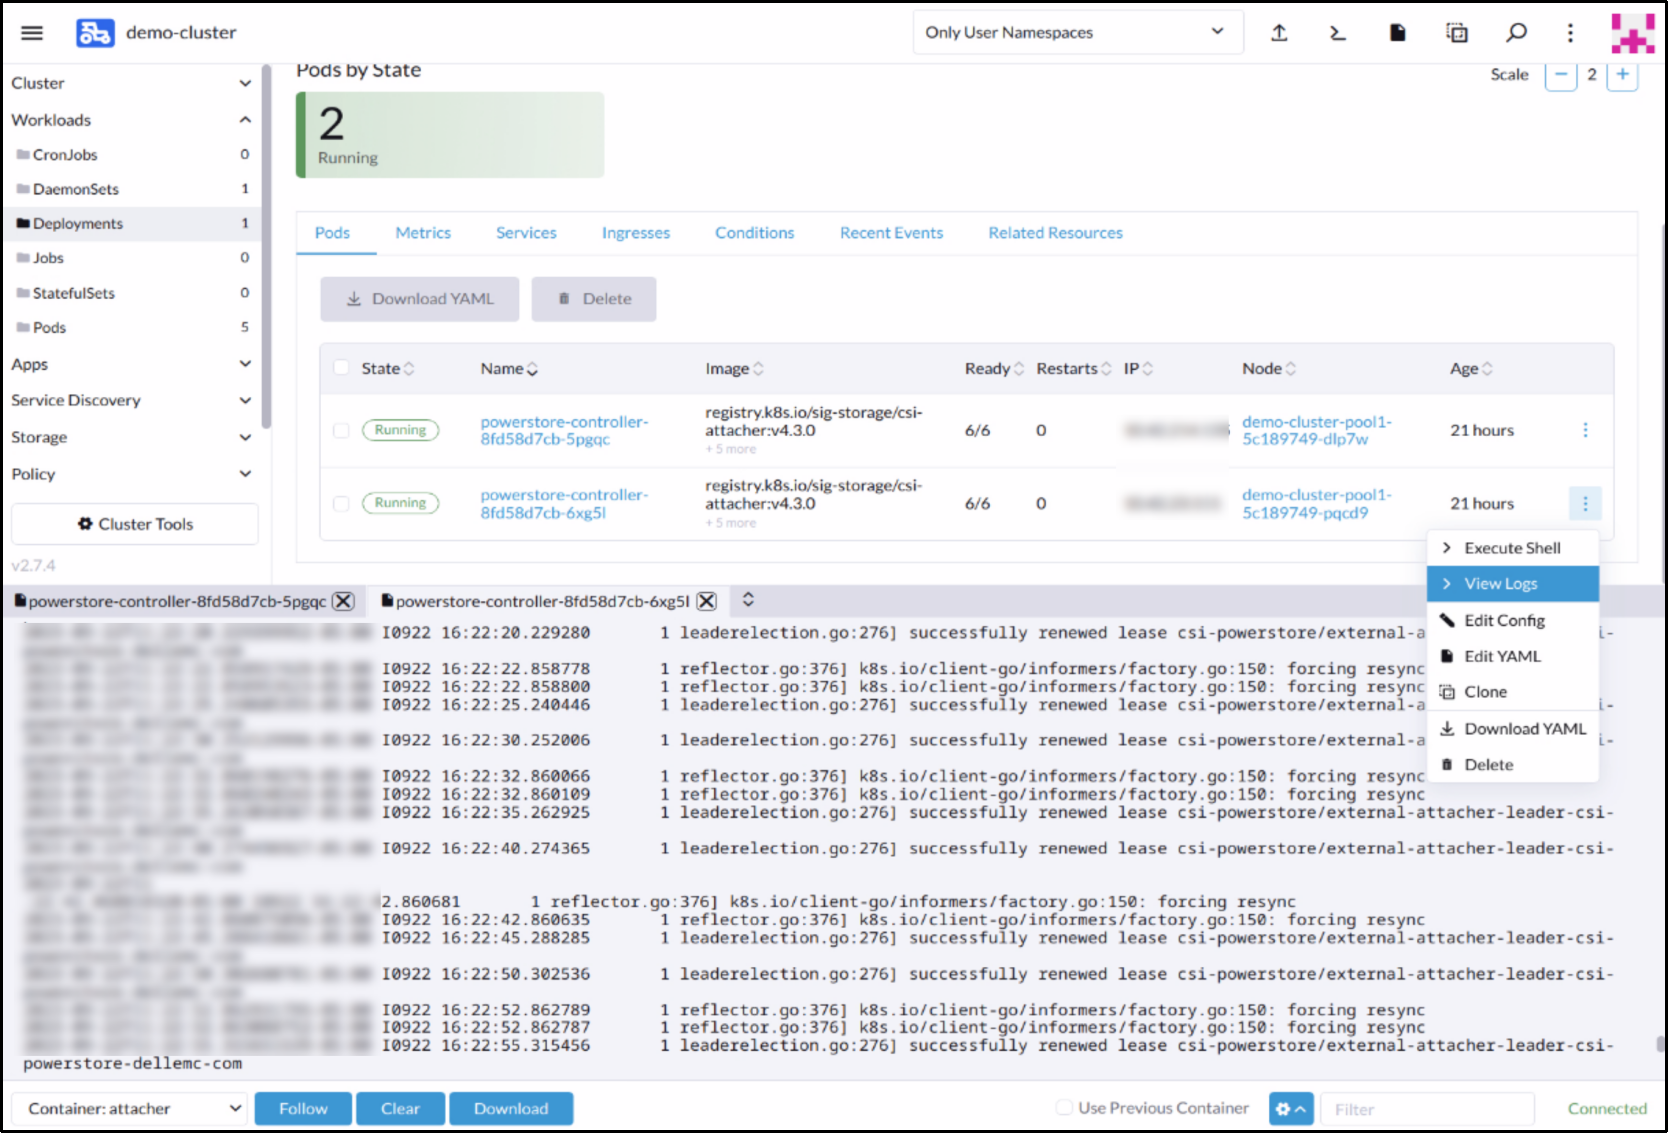
Figure 15. Examine PowerStore Controller pods log files
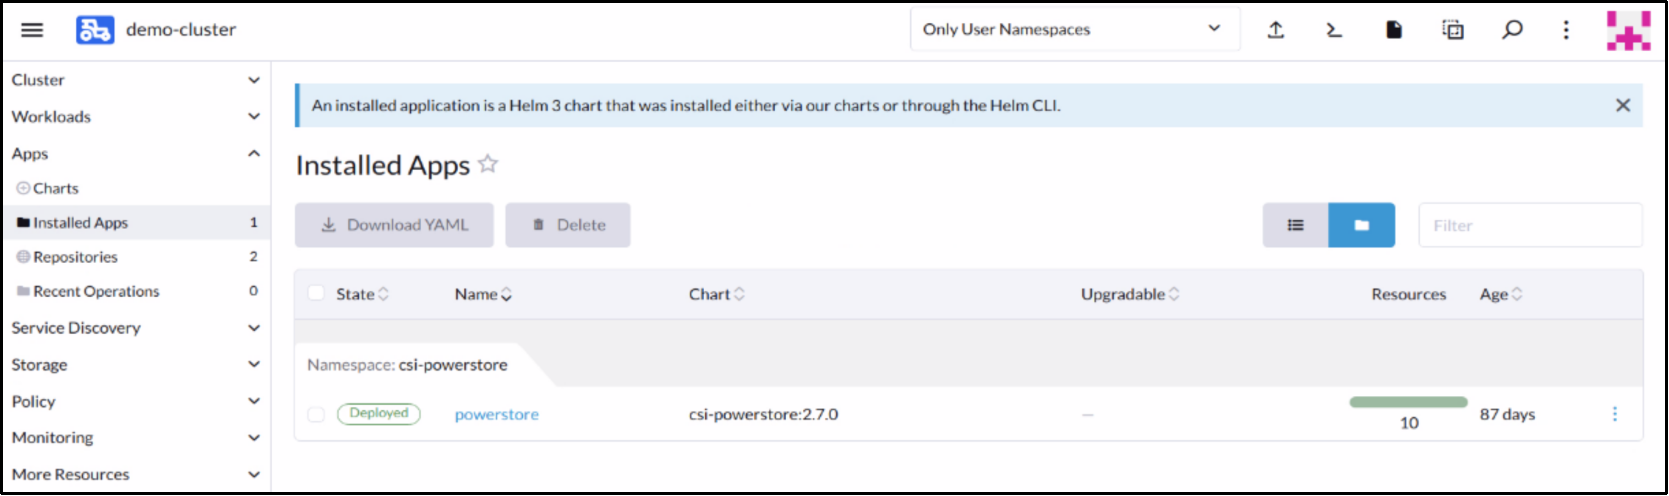
Figure 16. Show all installed apps
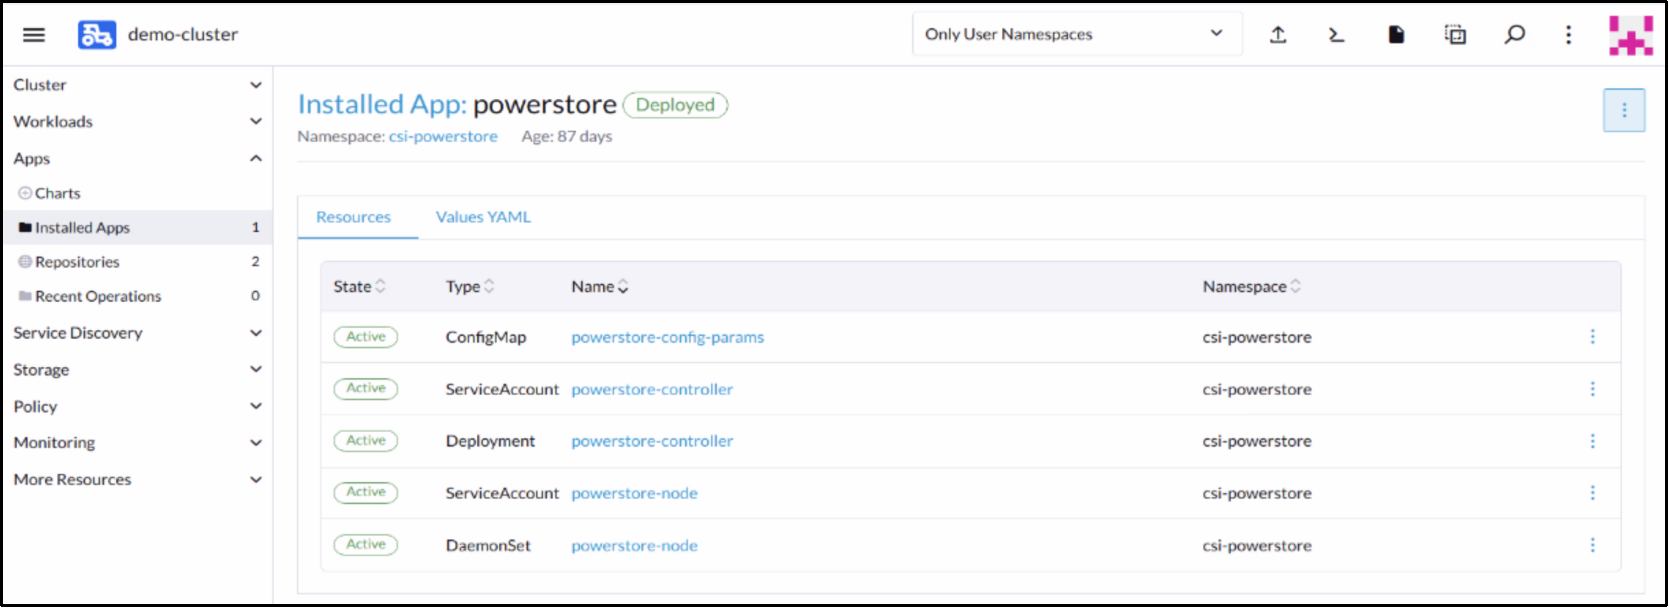
Figure 17. Showing the PowerStore CSI driver resources