
Create a Kubernetes cluster using Rancher UI
Create a Kubernetes cluster using Rancher UI
-
Rancher simplifies the process of deploying a downstream Kubernetes cluster, whether it is on-premises or on one of the supported cloud providers. This section outlines the steps for creating a new RKE2 cluster on VMware vSphere.
Pre-requisites
- You have an existing VMware vSphere environment that Rancher can access.
- To enable Rancher and vSphere for automatic Kubernetes node provisioning, ensure that you have a suitable virtual machine template ready. See the section Prepare a virtual machine template for instructions.
Note: It is crucial to enable the cloud-init and cloud-final services within the template to allow Rancher and vSphere to customize and configure the virtual machines.
Create a cloud credential to store vSphere/vCenter credential details
Rancher requires access to VMware vSphere to create and customize virtual machines for Kubernetes nodes. Ensure that you have the vSphere or vCenter credential information ready, including the vCenter or ESXi Server hostname/IP address, management port, username, and password. The user account should have administrative privileges.
- Navigate to the Cluster Management section in Rancher from the left-side menu.
- Select Cloud Credentials.
- Click the Create button.
- A list of available cloud providers appears. Choose VMware vSphere.
- Input the required credential details.
- Click Create to finalize the process.
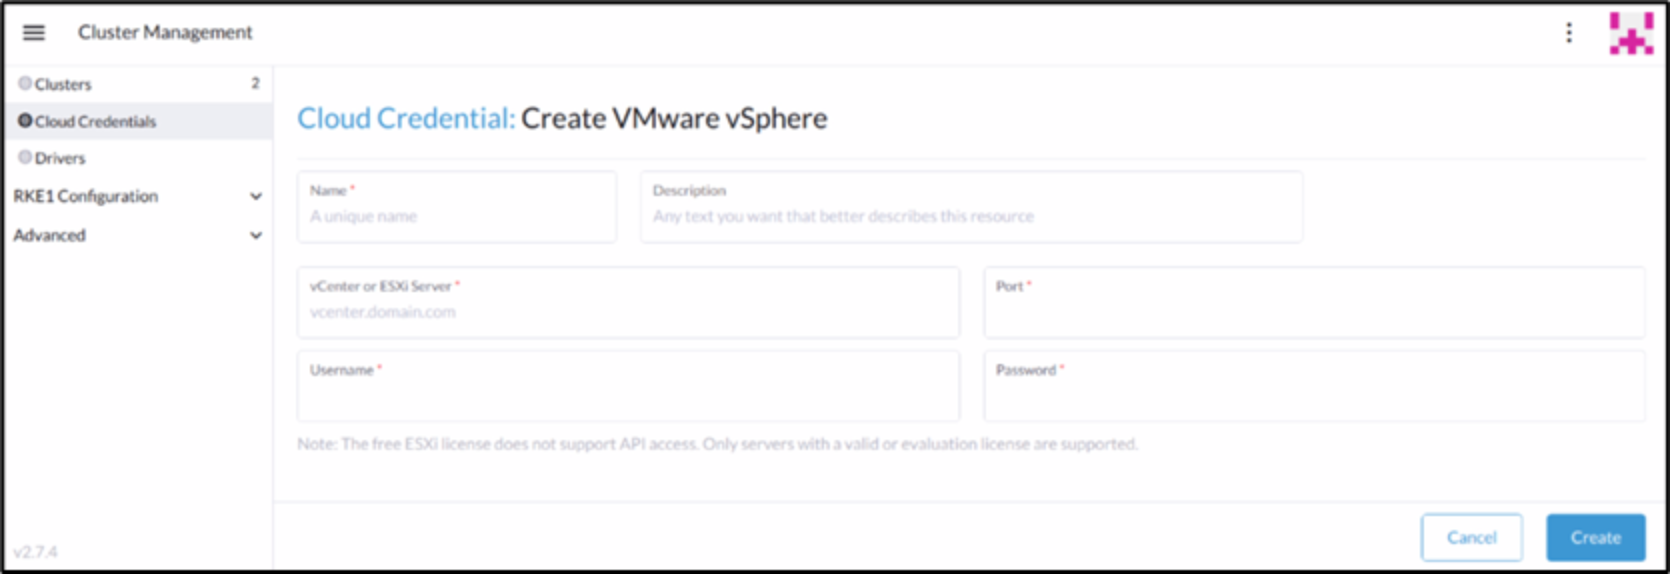
Figure 4. Create VMware vSphere cloud credential in SUSE Rancher
Deploy a RKE2 cluster on vSphere
- Navigate to the Clusters Management section in Rancher from the left-side menu.
- Select Clusters.
- Click Create on the right.
- On the Cluster: Create page, make sure the RKE2/K3s toggle is on. Select VMware vSphere provider. See Figure 5.
- From the Cloud Credential drop down menu, choose an existing vSphere credential. See Figure 6.
- Complete the fields on the Create VMware vSphere page. See Figure 6, Figure 7, and Figure 8.
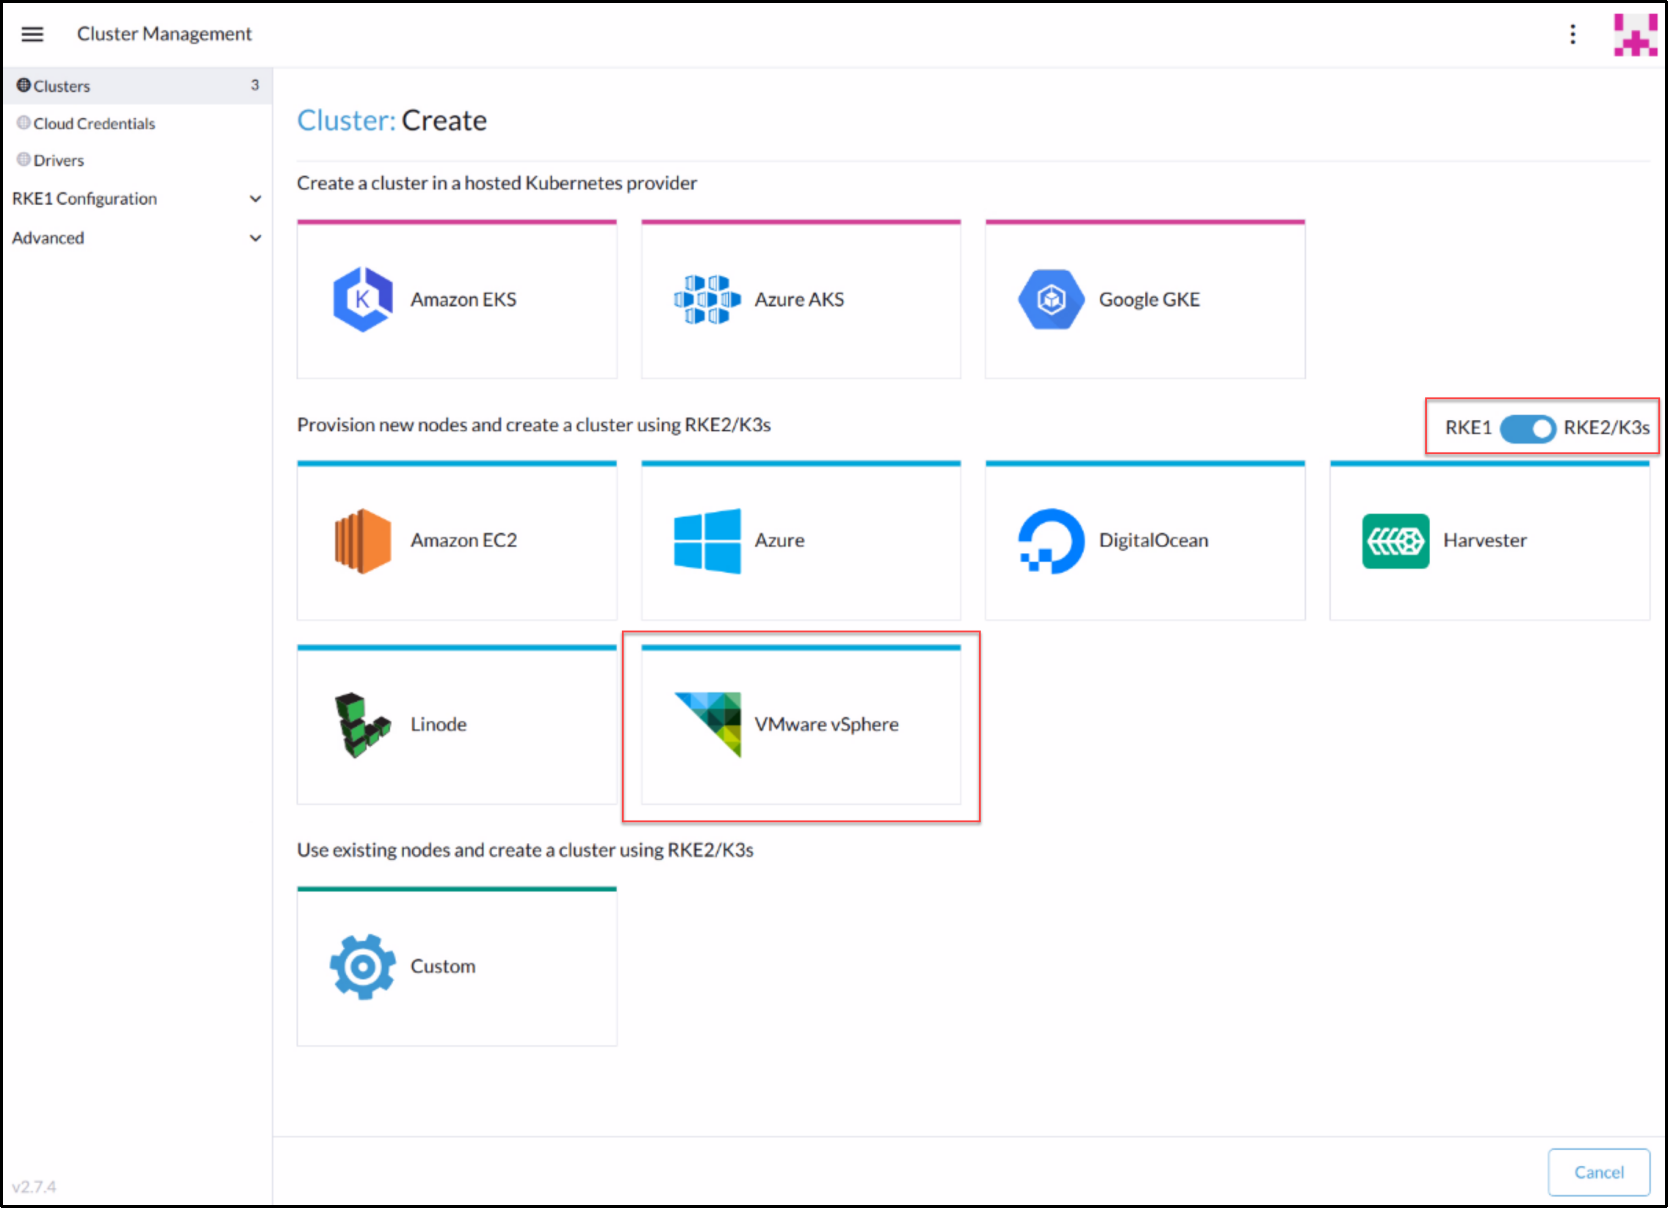
Figure 5. Cluster type and platform selection
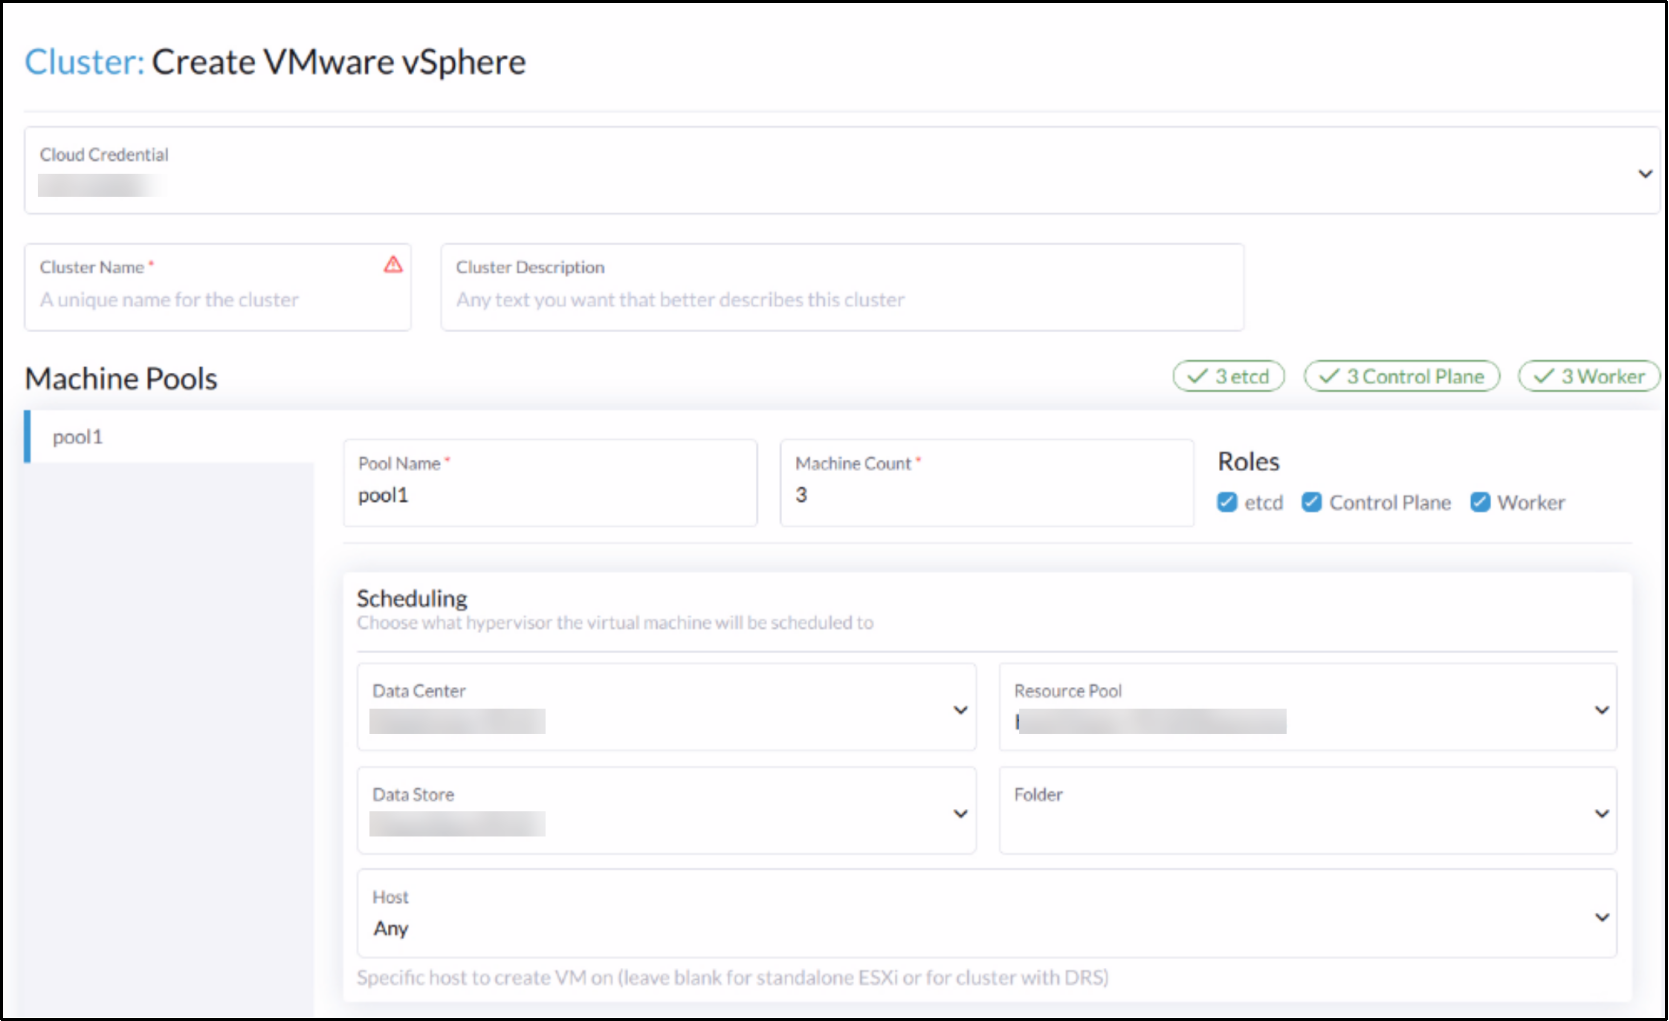
Figure 6. Define machine pool information
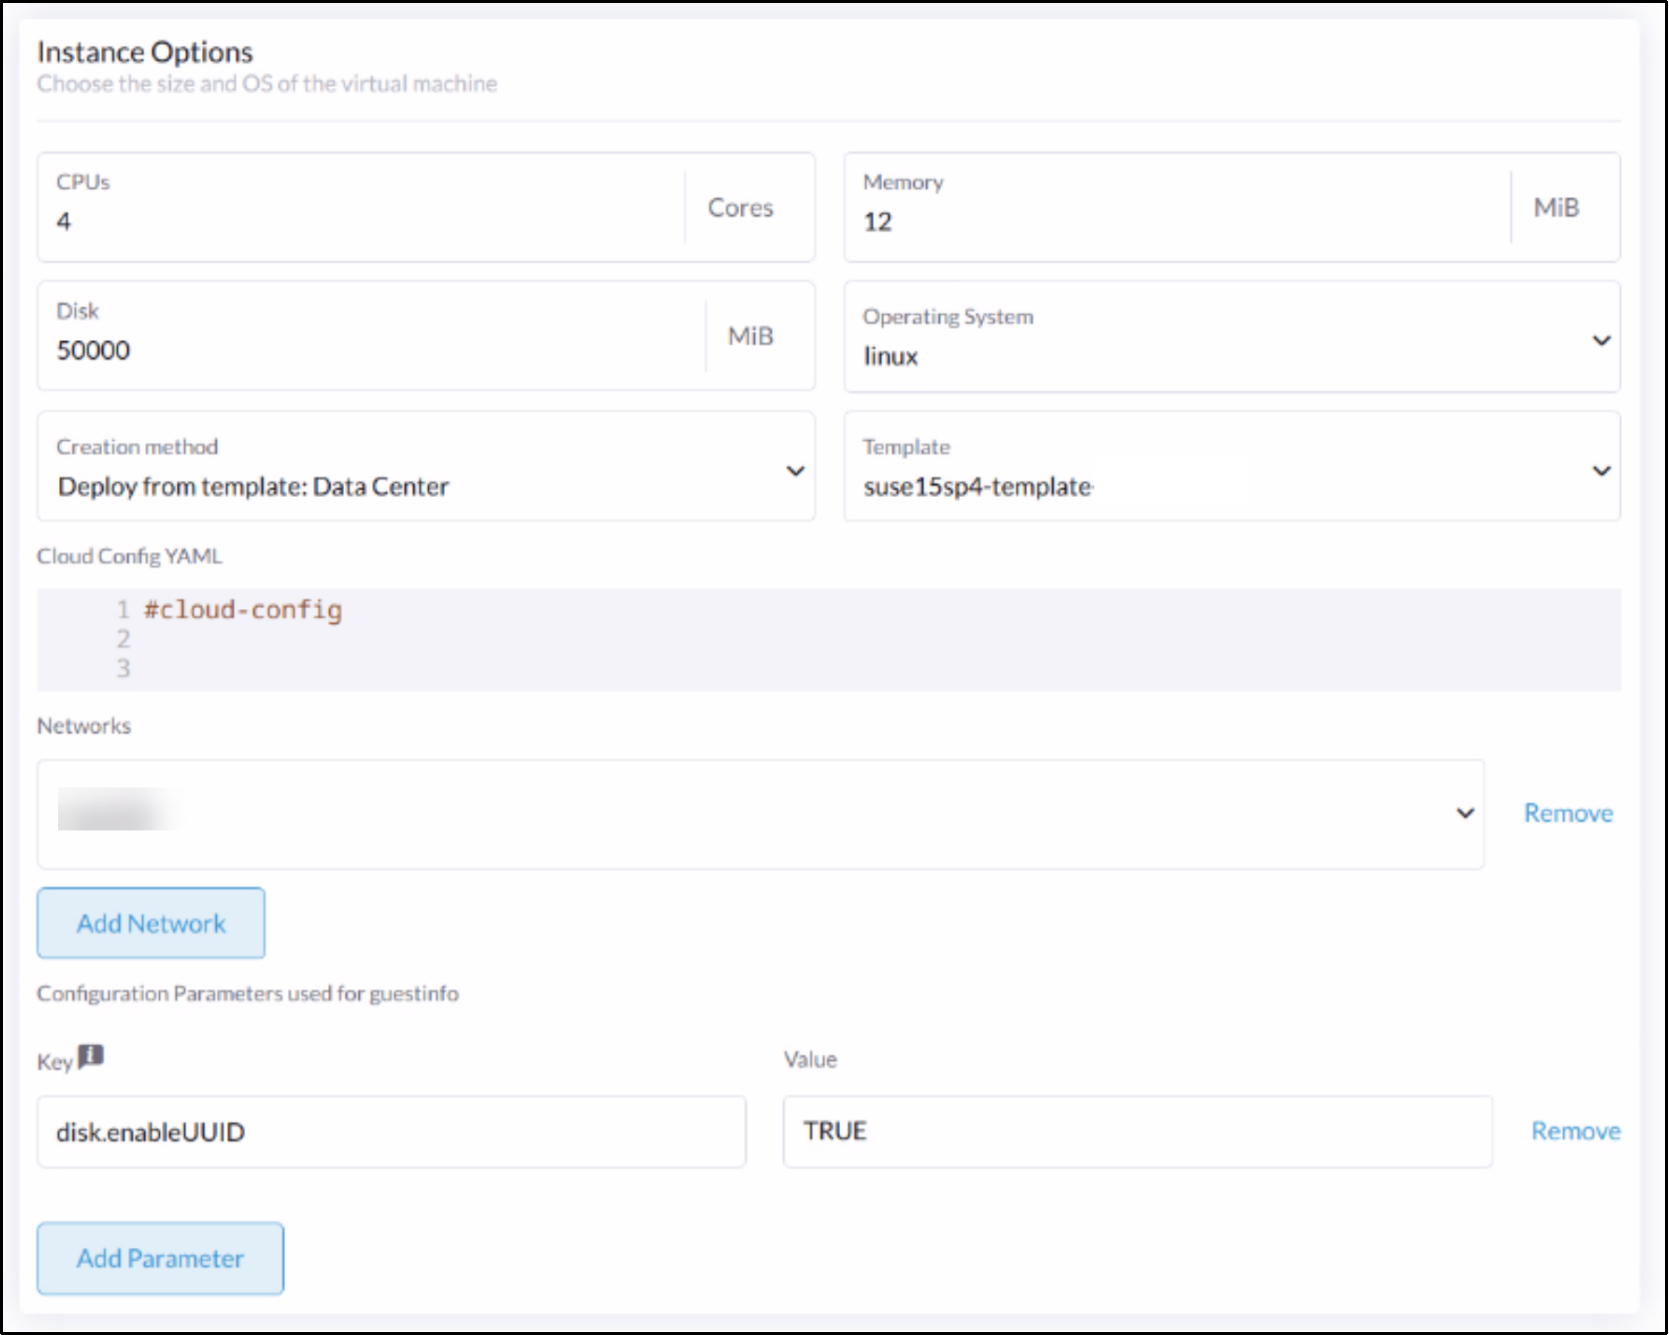
Figure 7. Define machine pool information (continued)
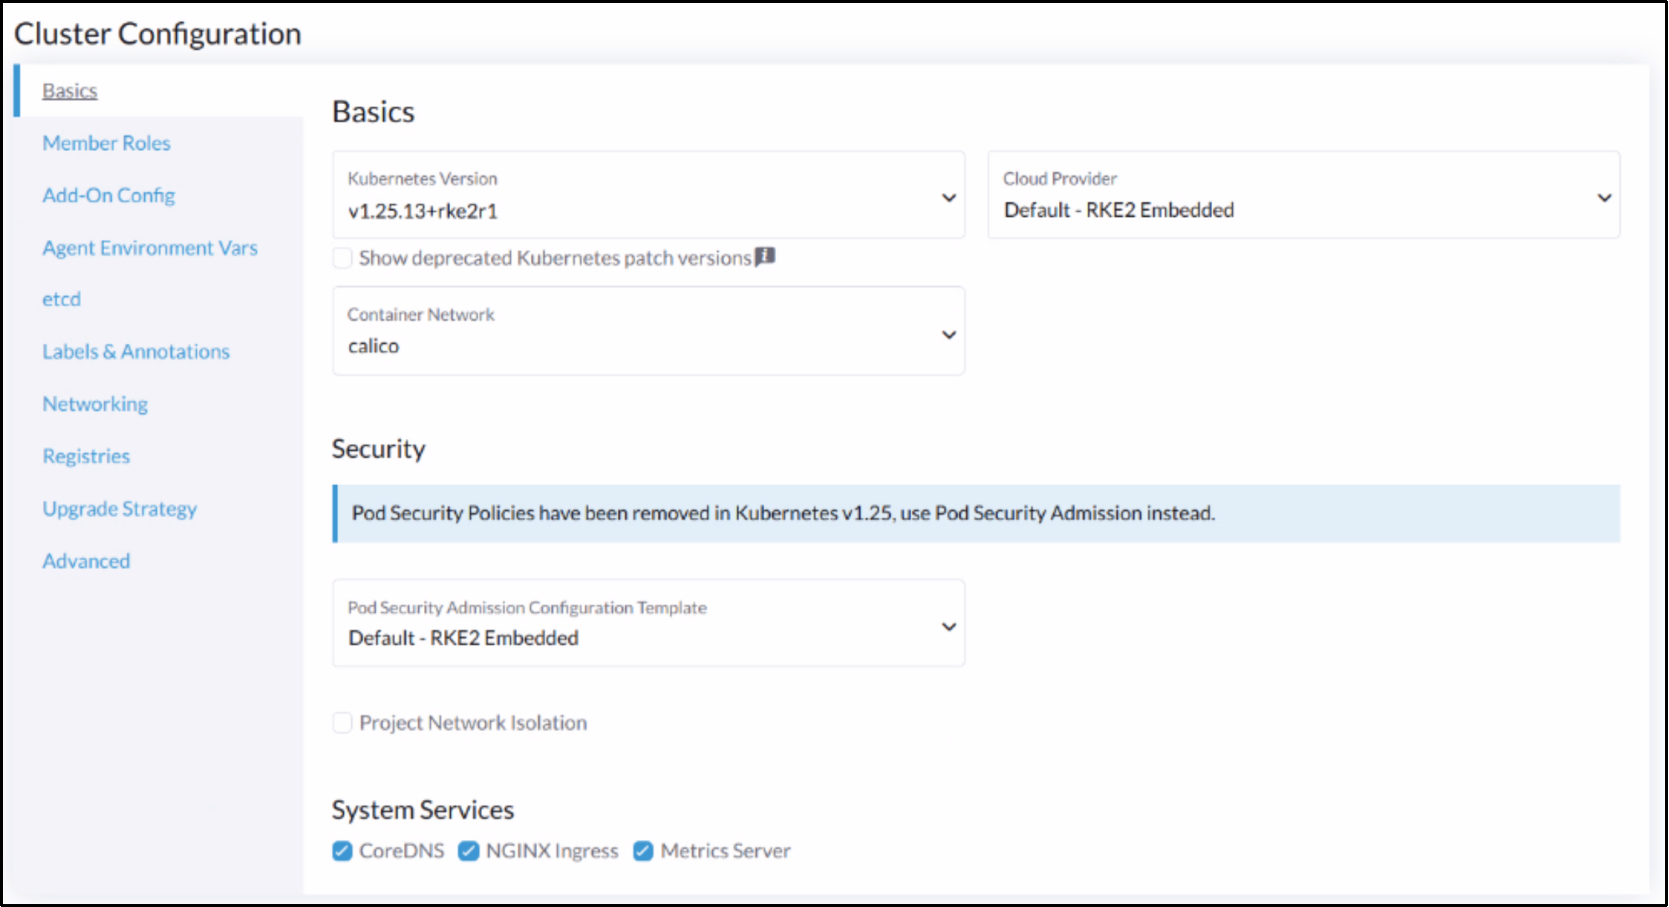
Figure 8. Define Basic Kubernetes Cluster Configuration
Some key points to consider when filling out the details are:
- Enter the Cluster Name, Pool Name, Machine Count, and Roles for the machines.
- Machine refers to the virtual machines being created in vSphere. For a production-ready environment, create at least three machines.
- Choose all three roles (etcd, control plane, worker) for the machines.
- In the Scheduling section, select your preferred vSphere Data Center, Resource Pool, Data Store, Folder, and Host.
- Define the Machine Instance Options, which include CPU, Memory, OS Disk, Operating System type, and Creation Method.
- Choose Deploy as the template creation method and select the appropriate virtual machine template.
- Choose a vSphere Data Center network interface to attach to the machines.
- If there are additional configuration parameters for the virtual machine, add them in the Configuration Parameters used for guestinfo section.
- Configure the Basics Cluster Configuration options for RKE2, using the default settings unless you have specific requirements.
- Select your preferred Kubernetes Version.
- For Container Network, calico is the default selection.
- For Cloud Provider and Pod Security Admission Configuration Template, Default – RKE2 Embedded is the default.
- Select CoreDNS, NGINX Ingress and Metrics Server system services.
- For simplicity, the default settings are sufficient for beginners. If you need more advanced customization, you can adjust the cluster options. For further details, see the RKE2 Cluster Configuration Reference.
- Click Create to begin deploying the cluster. The process might take some time because it includes multiple steps, such as creating and customizing new virtual machines, installing the RKE2 software, and initializing the RKE2 cluster. You can track the progress in real-time through the Cluster section of the Rancher UI.