
Create an IP Pool
Create an IP Pool
-
Note: Before performing the following steps, ensure that the Service Enabled is set to No in the CAVA settings.
The purpose of creating an IP pool is to facilitate the connections from anti-virus applications. A dedicated IP pool must be used for CAVA antivirus. This pool of IPs needs to be accessible by the antivirus servers. Using high performance front end interfaces is recommended.
Note: Do not mix the IP range in this dedicated IP pool with others for a regular SMB client connection.
The load balancing for the anti-virus workload is achieved by the SmartConnect zone in this IP pool. Because this is a dedicated IP pool for CAVA servers, all the anti-virus scanning workloads should be evenly distributed within the pool. To perform this action, use the following CLI command:
# isi network pools create groupnet0.subnet0.pool1 --ranges=10.7.u.v-10.7.x.y --sc-dns-zone "cavacluster1.west.isilon.com" --ifaces=1:ext-1
In this example:
- The IP pool is groupnet0.subnet0.pool1
- The IP range is 10.7.u.v to 10.7.x.y
- The SmartConnect Zone name is cavacluster1.west.isilon.com. Make sure that the DNS delegation is created for it.
- The network interface is the ext-1 from node 1
After the IP pool is created, associate it with the CAVA by using the following command. After this command, this IP pool is only available to the CAVA servers, and simultaneously, the corresponding access zone of this IP pool is changed to AvVendor.
# isi antivirus cava settings modify --ip-pool="groupnet0.subnet0.pool1"
This action will make the IP Pool unavailable to all other users except antivirus servers. Do you want to continue? (yes/[no]): yes
"
IP Pool groupnet0.subnet0.pool1 added to CAVA antivirus.
Note: The access zone of IP Pool groupnet0.subnet0.pool1 has been changed to AvVendor.
This function is also available through the WebUI, as shown in Figure 7.
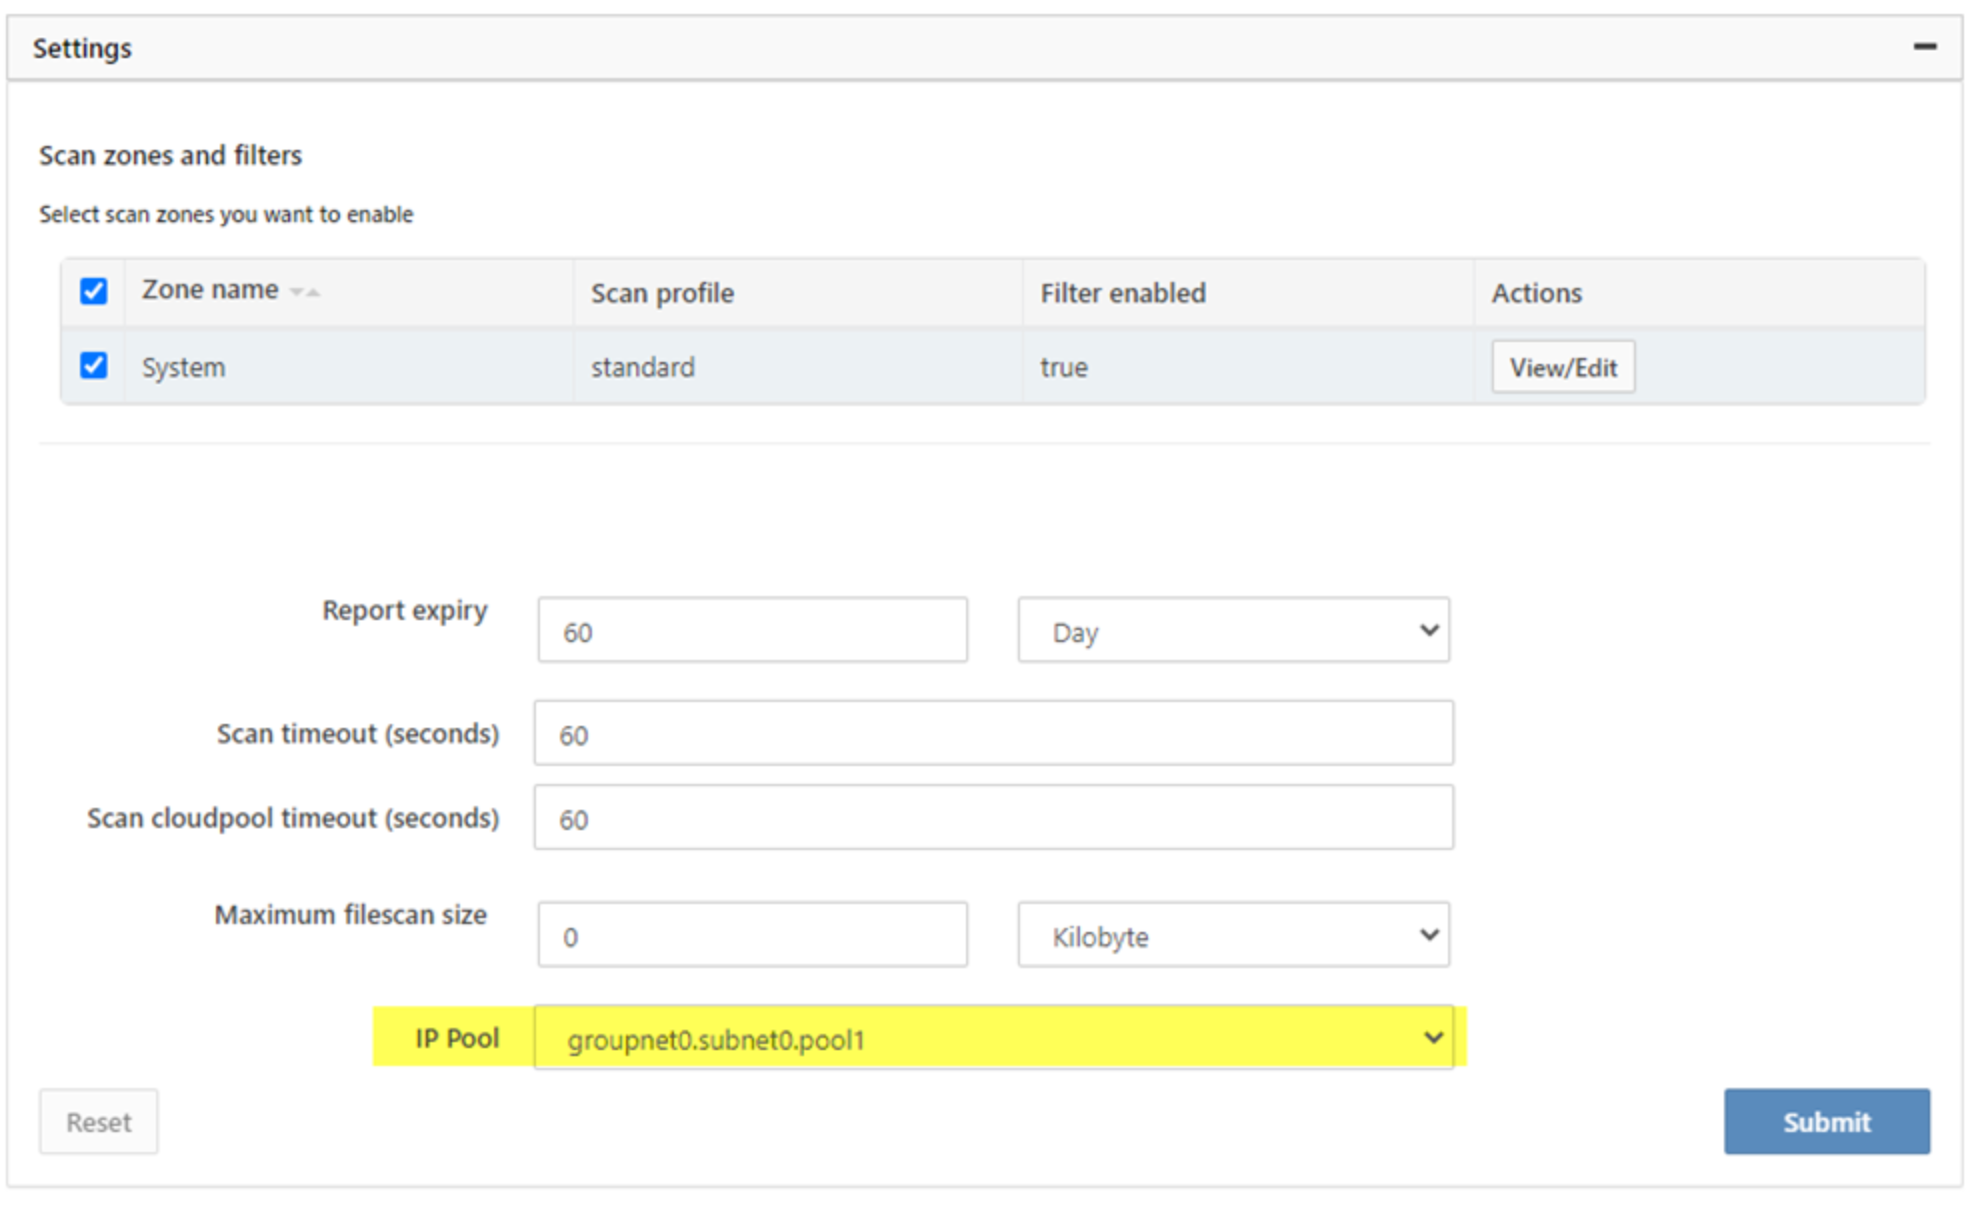
Figure 7. Associate IP pool with CAVA settings
Note: Be sure to create the DNS delegation for the zone name associated with the IP pool created in this step.