
None
None
-
This section describes an example of how to protect SmartLink files and cloud data. Ensure that you have already configured SyncIQ on the PowerScale clusters, which include the following:
- Fail over to the secondary PowerScale cluster
- Fail back to the primary PowerScale cluster
Fail over to the secondary PowerScale cluster.
This section describes the steps required to fail over to the secondary PowerScale cluster.
- Log in to the secondary OneFS WebUI and go to Data Protection > SyncIQ. Click Local Targets on the policy that you want to failover and select More > Allow Writes as shown in Figure 33. This operation will grant read/write access to the data on the primary PowerScale cluster being replicated to the secondary PowerScale cluster.
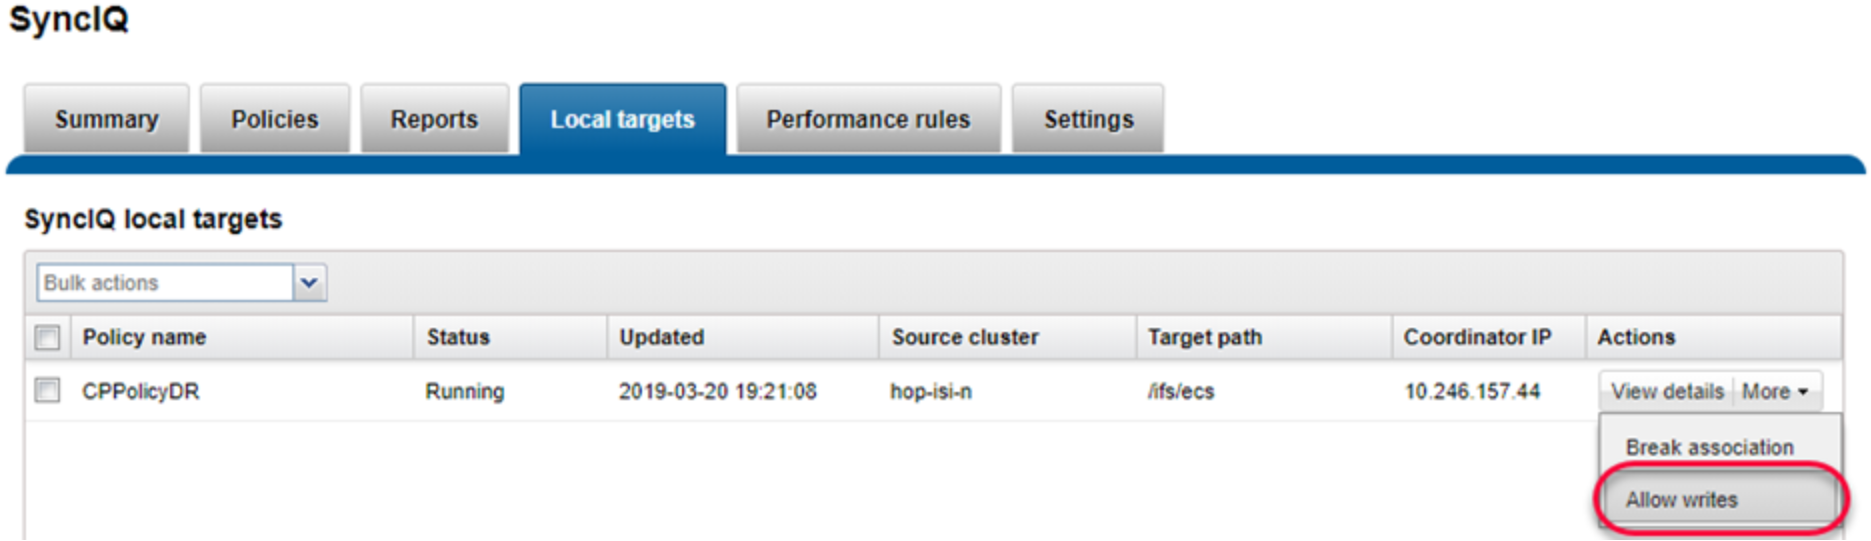
Figure 33. Allow writes on secondary cluster
Note: If the primary PowerScale cluster is still online, stop all writes to the replication policy’s directory.
- Check and change cloud access. Log in to the PowerScale clusters using SSH. To identify the CloudPools GUID, use the commands isi cloud access list and isi cloud access view <GUID>. Figure 34 shows the cloud access status on the secondary PowerScale cluster.
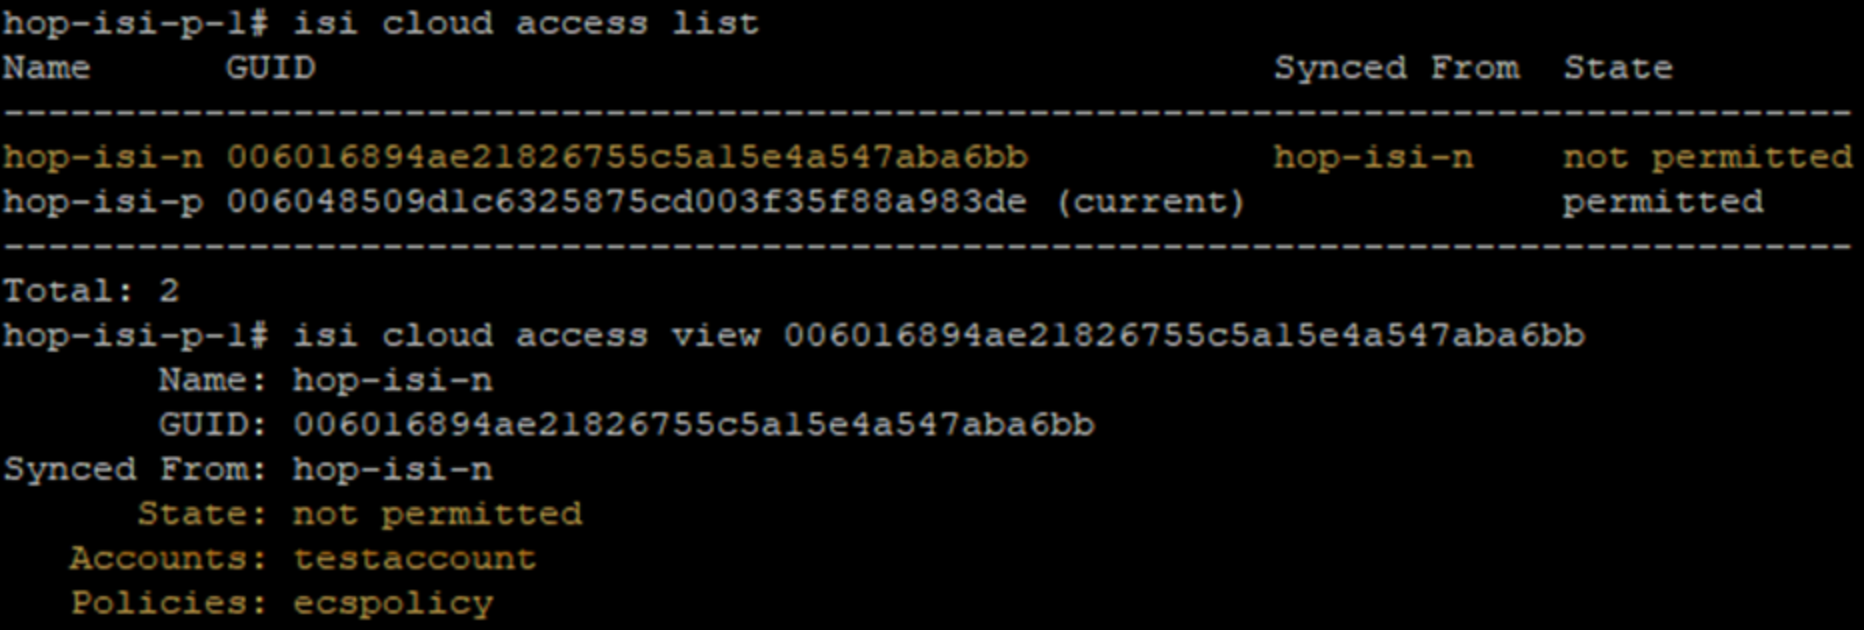
Figure 34. Identify CloudPools GUID to be transferred
- On the primary PowerScale cluster, remove the cloud write permission using the command isi cloud access remove <GUID> as shown in Figure 35. This operation disables the file pool policy, CloudPool, and cloud storage accounts on the primary PowerScale cluster.

Figure 35. Remove Cloud write access on the primary PowerScale cluster
- On the secondary PowerScale cluster, add the cloud write permission using the command isi cloud access add <GUID> as shown in Figure 36. This operation enables the file pool policy, CloudPool, and cloud storage accounts on the secondary PowerScale cluster.
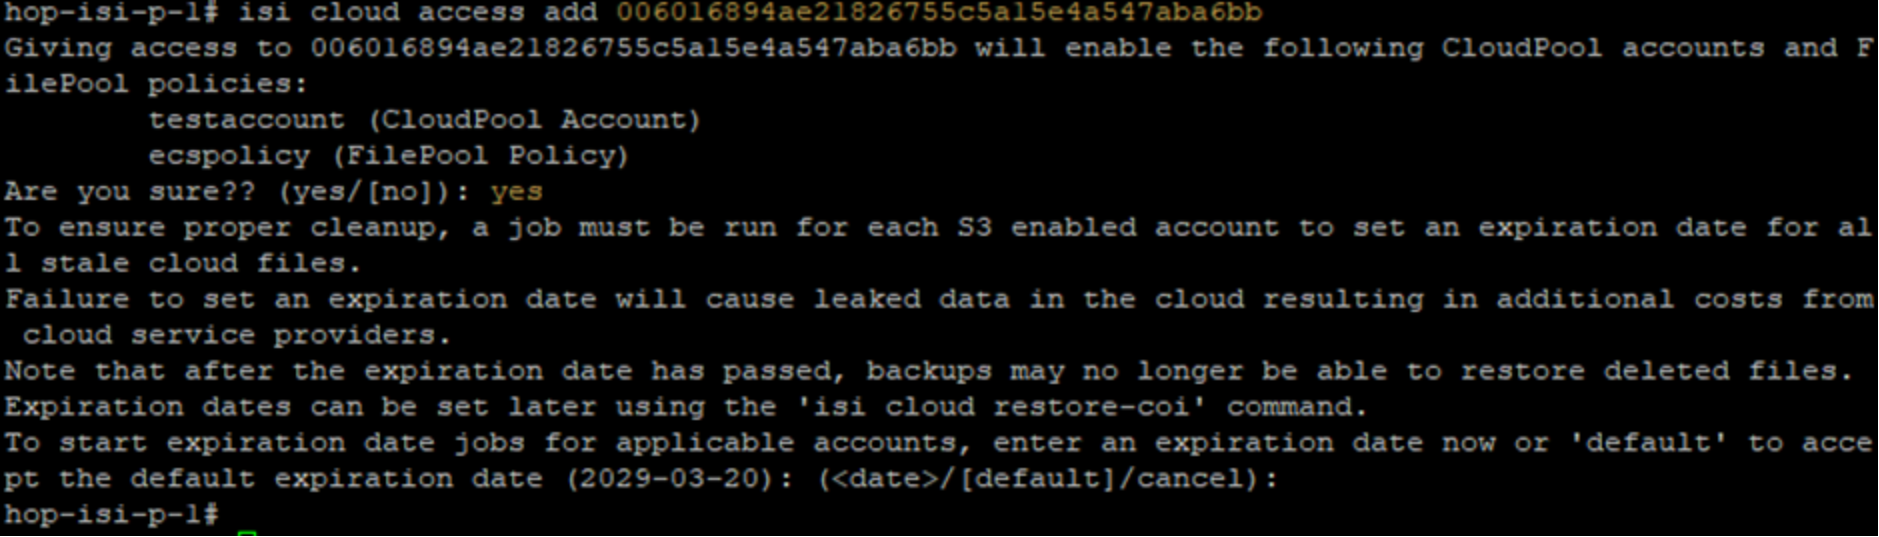
Figure 36. Add Cloud write access on the secondary PowerScale cluster
Note: Avoid adding write access to the CloudPools from more than one PowerScale cluster.
Now the SyncIQ failover is complete.
Fail back to primary PowerScale cluster
This section describes the steps required to fail back to the primary PowerScale cluster.
- Log in to the primary OneFS WebUI and go to Data Protection > SyncIQ. Click Policies on the policy that you want to failback and select More > Resync-prep as shown in Figure 37. This operation creates a SyncIQ replication mirror policy on the secondary PowerScale cluster.
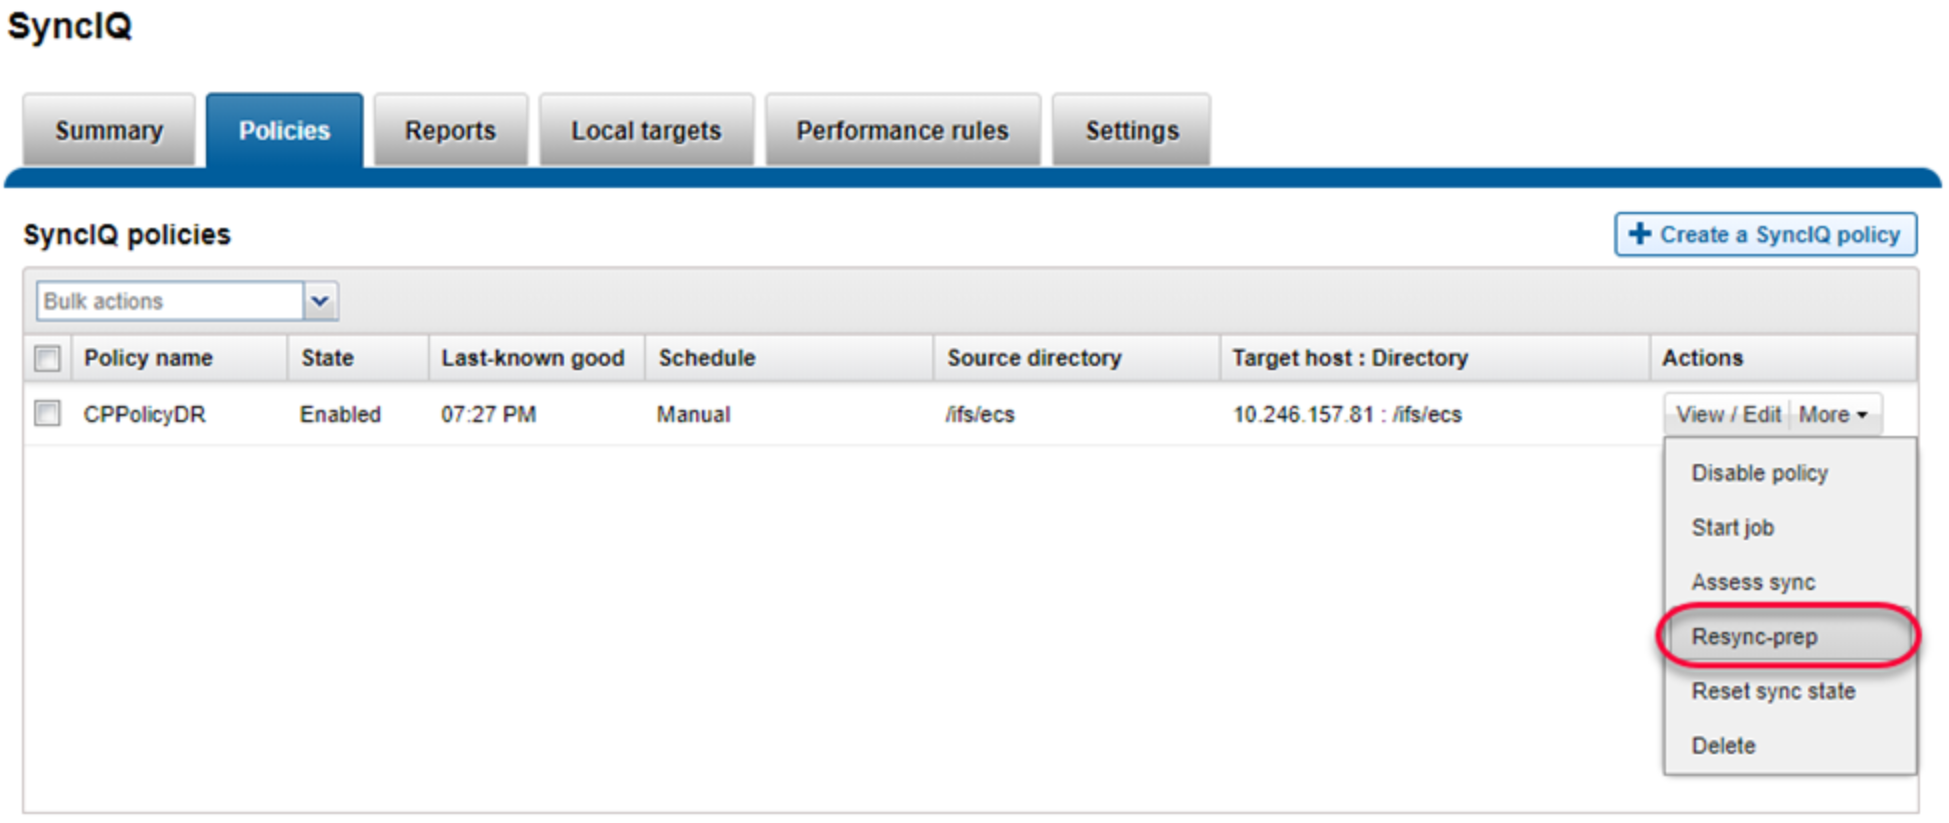
Figure 37. Resync prep SyncIQ policy on primary PowerScale cluster
- Log in to the secondary OneFS WebUI and go to Data Protection > SyncIQ > Policies. On the replication mirror policy that you want to failover and select More > Start Job as shown in Figure 38. This operation will sync any changes that have been written to the secondary PowerScale cluster back to the primary PowerScale cluster.
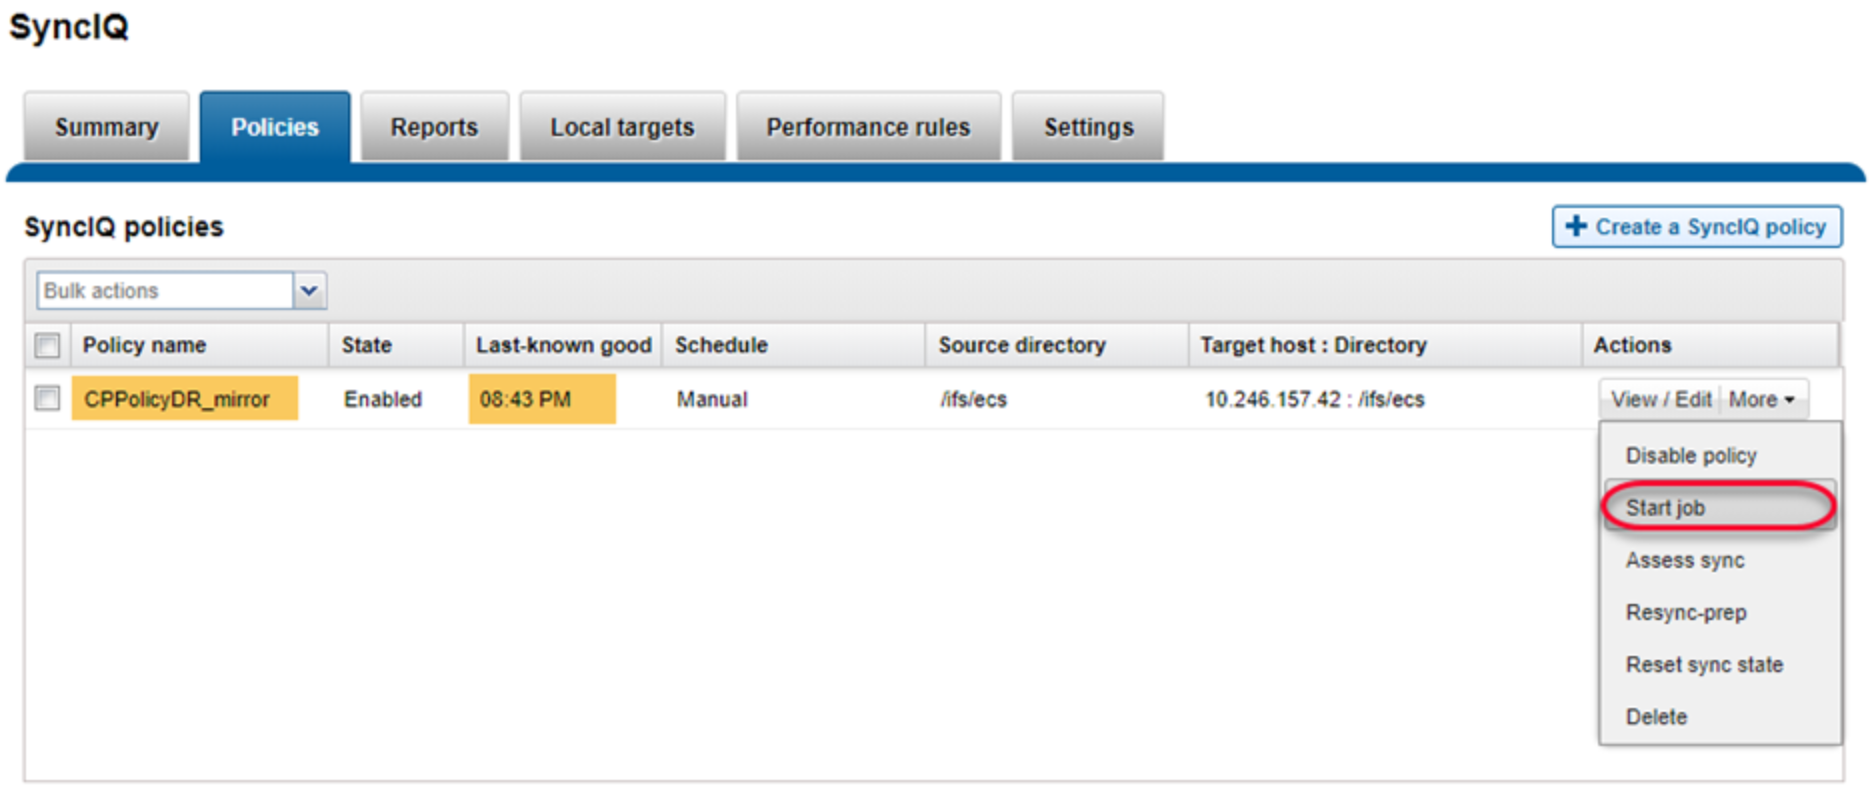
Figure 38. Sync data from secondary PowerScale cluster to primary PowerScale cluster
- Log in to the primary OneFS WebUI and go to Data Protection > SyncIQ. Click Local Targets on the policy that you want to failover and select More > Allow Writes as shown Figure 39. This operation will grant read/write access to the replication directory back to the primary PowerScale cluster and change the secondary PowerScale cluster’s access to this directory as read-only.
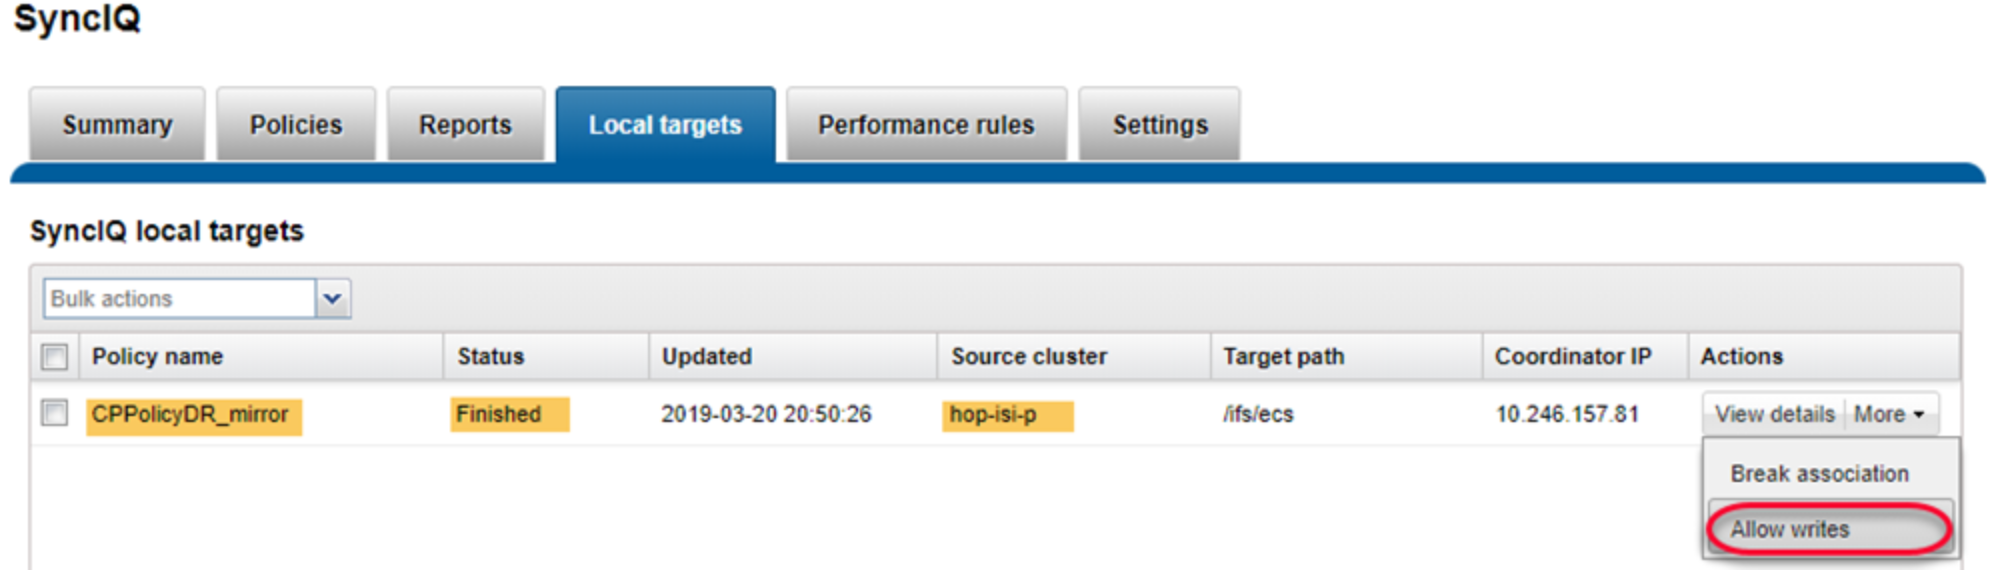
Figure 39. Allow writes on primary PowerScale cluster to SyncIQ replication directory
Note: If the secondary PowerScale cluster is still online, stop all writes to the replication policy’s directory. Perform a final replication from the secondary PowerScale cluster to the primary PowerScale cluster to ensure both sites are synchronized.
- Check and change the cloud access. Log in to the PowerScale clusters using SSH. To identify the CloudPools GUID, use the commands isi cloud access list and isi cloud access view <GUID>. Figure 40 shows the cloud access status on the secondary PowerScale cluster.
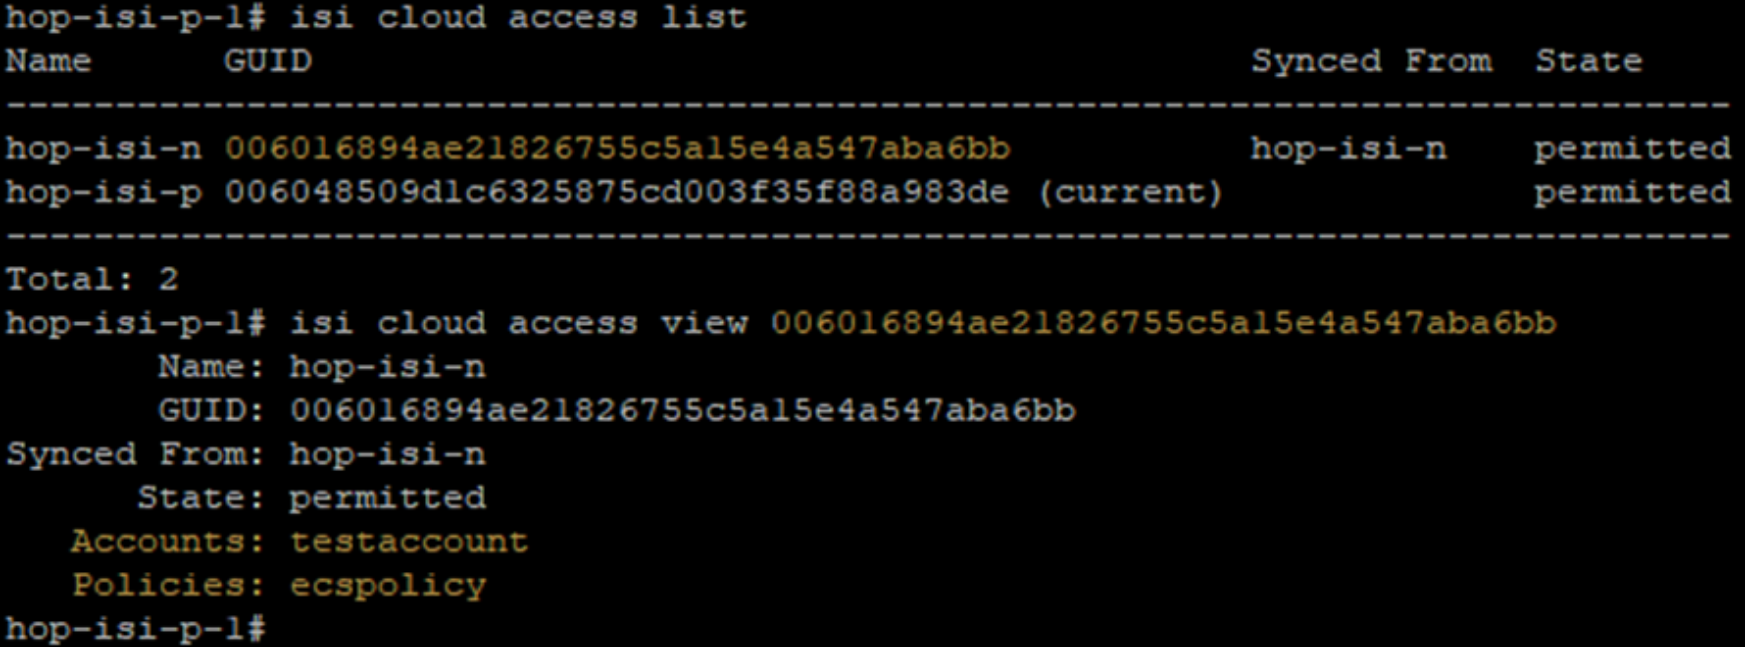
Figure 40. Identify GUID for CloudPools account and file pool policy
- On the secondary PowerScale cluster, remove the cloud write permission using the command isi cloud access remove <GUID> as shown in Figure 41. This operation disables the file pool policy, CloudPool, and cloud storage account on the secondary PowerScale cluster.

Figure 41. Remove cloud write access on the secondary PowerScale cluster
- On the primary PowerScale cluster, add the cloud write permission using the command isi cloud access add <GUID> as shown in Figure 42. This operation enables the file pool policy, CloudPool, and cloud storage account on the primary PowerScale cluster.
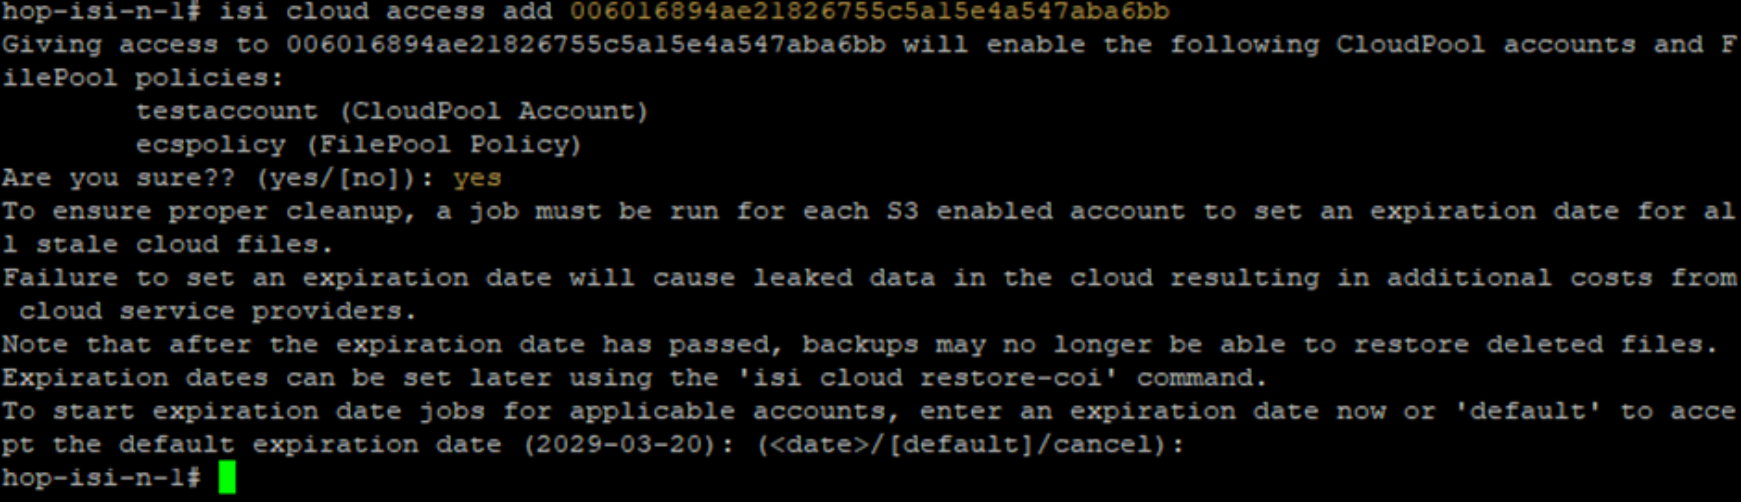
Figure 42. Give the primary PowerScale cluster cloud write access
Note: It is important to not allow write access to the CloudPools from more than one PowerScale cluster.
- Log in to the secondary OneFS WebUI and go to Data Protection > SyncIQ. Click Policies on the policy that you want to failback and select More > Resync-prep. This operation will disable the SyncIQ replication mirror policy on the secondary PowerScale cluster and place the secondary PowerScale cluster back into read-only mode. In addition, this operation will enable the SyncIQ replication policy on the primary PowerScale cluster.
The SyncIQ failback is complete.