
Adobe Premiere Pro Configuration and Optimization
Adobe Premiere Pro Configuration and Optimization
-
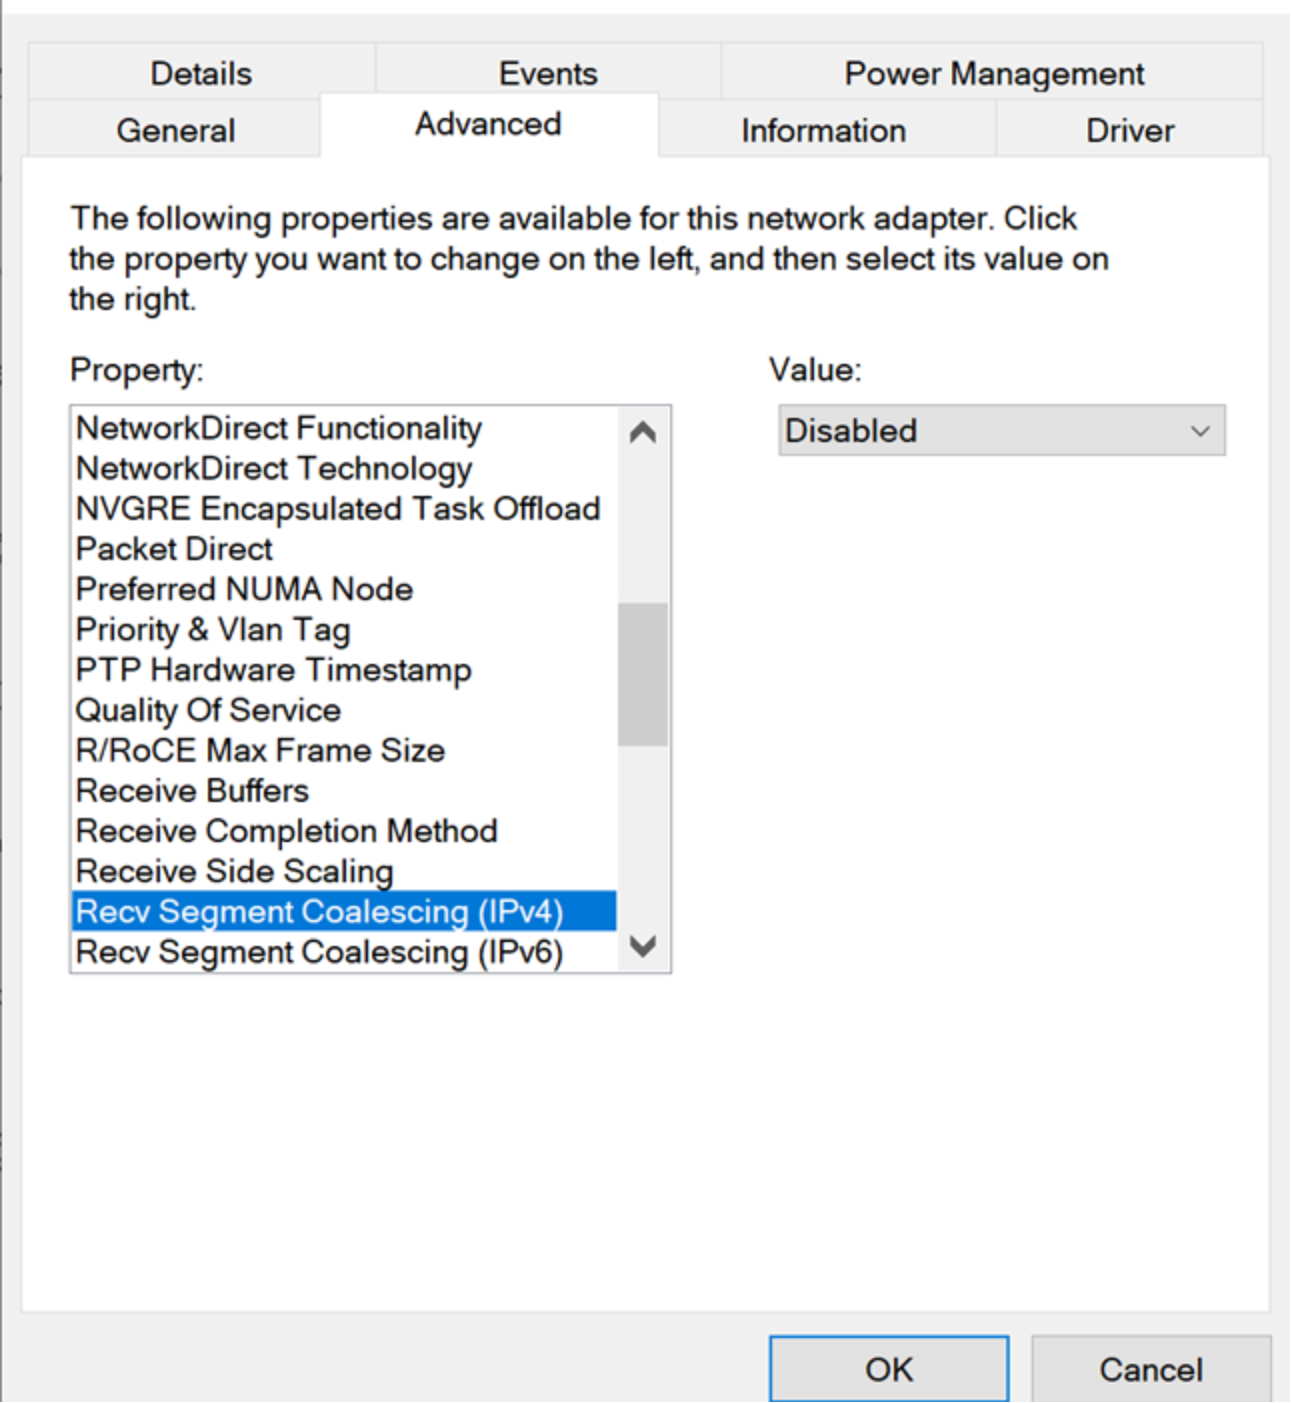
Figure 9. Disable Recv Segment Coalescing
There are several categories of settings and file locations that need to be considered when configuring Adobe Premiere Pro in an environment with PowerScale storage. These categories include:
- Project file location – location on shared storage where Premiere Pro project files are stored
- Project settings – Settings that impact individual Premiere Pro projects
- Application Preferences – Settings that impact Premiere Pro’s general behavior
Project File Location
When a new Project is created, a dialog invites the user to specify its target location. For most collaborative environments, it is appropriate to select a location on the PowerScale shared storage.
The location on the PowerScale shared storage should be protected using standard authentication and authorization methods (for example, Active Directory binding, and Access Control Lists). For example, a System Administrator could:
In a shared collaborative environment, create a directory or share on the PowerScale shared storage, and assign read/write privileges to all required users or groups.
- In a private environment, create a directory or share on the PowerScale shared storage that is assigned only to a specified user or group.
When multiple projects are saved to shared storage, it is critical to implement a strict naming convention. This convention avoids naming collisions and makes projects easier to find in the future.
Project Settings
Project settings can be accessed by selecting File à Project Settings from the main Premiere Pro window.
Project Settings: Scratch Disks
When a new project is created, Adobe Premiere Pro will default to writing most files in subdirectories of the file path of the project.
Premiere Pro allows the user to target different storage paths and volumes when writing different files. When working in a collaborative environment, for most settings, it is most appropriate to target the same location as the project, on the PowerScale shared storage. The exception is Project Autosave which typically should be targeted at the workstation’s local storage.

Figure 10. Project Settings, Scratch Disks
Below is a summary of these settings and their recommended locations:
- Captured Video – Same a project (on PowerScale shared storage)
- Captured Audio – Same as project (on PowerScale shared storage)
- Video Previews – Same as project (on PowerScale shared storage)
- Audio Previews – Same as project (on PowerScale shared storage)
- Project Auto-Save – Workstation local storage (this location is where project backup is autosaved)
- CC Libraries Download – Same as project (on PowerScale shared storage)
- Motion Graphics Template Media – Same as project (on PowerScale shared storage)
The Scratch Disks panel
Project Settings: Ingest Settings
The Premiere Pro Ingest settings affect the way that the application deals with media that are imported.
If media is written to the PowerScale shared storage by some other device or process (for example, live capture devices, MAM solutions, or manually copied), then that media should be used “in place”, and the Ingest option should be cleared.
If media is to be brought into the environment from an external source (for example, a USB drive or camera card) then selecting the Copy option will copy the media to a specified source. Using MD5 verification will consume more system resources but will confirm the validity of the copy.
When selecting the copy option, it is often best practice to select the Primary Destination (and proxy destination, if used) to be the same as project.
Selecting Transcode - will consume more system resources but may be desirable if the source material comes from multiple sources in different formats.

Figure 11. Premiere Pro Ingest Settings
Premiere Pro Application Preferences
The Premiere Pro Application Preferences can be adjusted to vary the behavior of the application and its interaction with storage. Application settings are accessed on macOS using the Premiere Pro > Preferences menu item and in Windows using Edit > Preferences.
The application settings may be set on each client and stored locally as part of the configuration for the logged-in user. Alternatively, the settings may be stored as part of the configuration for the Adobe Creative Cloud account for the logged-in user.
Finally, it is possible to store the optimal settings in a single “primary” Adobe Creative Cloud account, and for each logged-in user to download and use those settings in preference to their own. This is a useful feature for large organizations with multiple users working in a collaborative environment.
The settings may be downloaded from the “primary” Adobe Creative Cloud account by clicking the small Creative Cloud logo at the bottom left of the application window. Application preferences: Audio

Figure 12. Using settings from a primary Adobe Creative Cloud Account
The two critical settings in this dialog are Play audio while scrubbing and Generate waveforms automatically during import.
In testing for this paper, Premiere Pro user interface performance while scrubbing through long video files with audio tracks was improved by clearing Play audio while scrubbing. As always, testing is key, and depending on the PowerScale storage platform, workstation resources and media within the Premiere Pro project file, the relative impact of this optimization will vary.
Audio waveforms are a visual representation of audio and are overlaid on audio tracks on the timeline. The creation of the waveforms consumes processor overhead and storage bandwidth. Premiere Pro provides a configuration option to specify when the waveforms are created.
When enabled, Generate waveforms automatically during import will create audio waveforms automatically in the background:
- When a file is first imported to the project, or
- When a new project containing existing audio assets is first opened on a user’s system.
When the option is cleared, audio waveforms will not be generated for an audio asset until that asset is played or scrubbed, or where the creation of the waveforms is requested by the user by the Generate Audio Waveform option in the Clip menu.
When waveforms are generated automatically, system resources are consumed “up front”, and before the waveforms being required. Where the waveforms are not generated automatically, system resources are consumed at the point of first accessing an audio asset.
The optimal setting for any environment, project, or user will depend on the nature of the project, the number of audio assets in the project, and the available system resources. It is recommended to consider the most optimal setting for every situation.
Audio waveforms are stored as .pek files in a location specified in the Media Cache settings detailed later in this document.
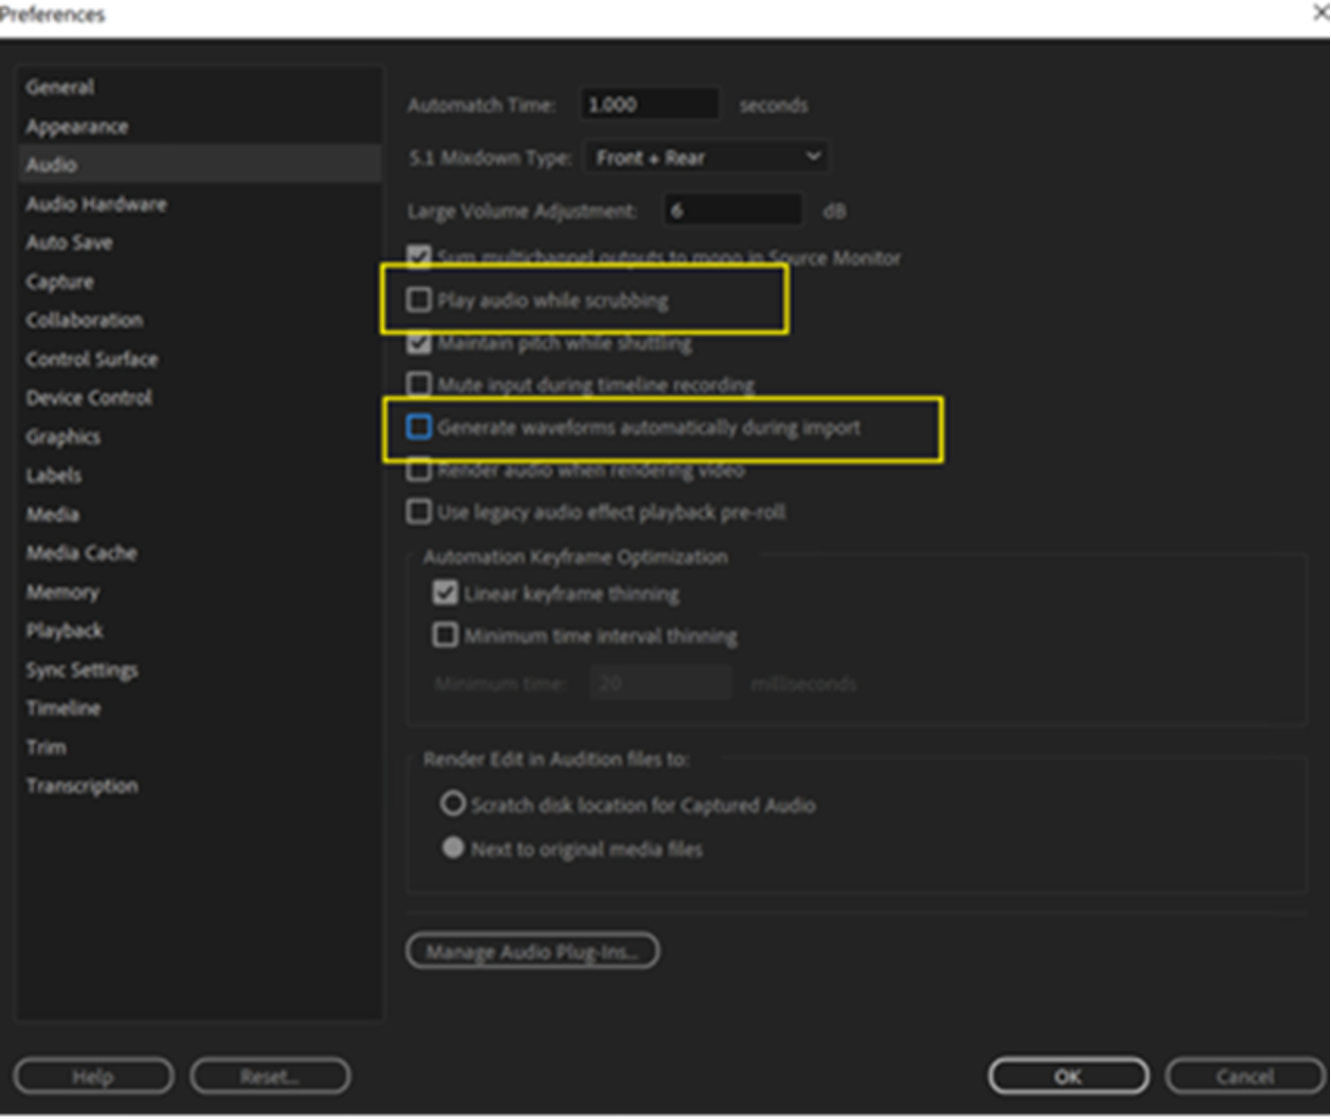
Figure 13. Audio Settings Window