
NDM environment creation
NDM environment creation
-
The Environment Create step configures the migration environment that will be required to migrate any application from the source array to the target array. This step is the same regardless of the underlying NDM Technology in use for the actual migration.
During environment Create, the operation checks confirm that both the source and target arrays can support the NDM operations. This includes ensuring that a usable replication pathway for data migration is available between the source and target arrays and creating an SRDF group for the migration. The Create is run once only. When the migration pathways and SRDF group are configured, all storage groups on the source array can be migrated until all migrations from the source to the target have been completed.
Creating an NDM Environment with Unisphere for PowerMax
To setup the migration environment from Unisphere for PowerMax:
- Select Data Protection from the left panel.
- Click Migrations.
- Select the Environment tab which displays any existing environments already configured.
- To create an environment, select Create.
- The Setup Migration Environment pop-up window is populated with suitable arrays. If you do not see your chosen array, verify the RDF zoning and that the intended target array is suitable and the current code level is included in the support matrix. If Role Based Access or Access Controls are enabled, ensure that the controlling Unisphere Server and user have been granted Storage Admin permissions. Select the relevant array.
- Click Run Now.
The following screens describes the steps.

Figure 5. Creating Migration Environment with Unisphere
Once Run Now executes, the run window displays all events occurring automatically on the arrays.
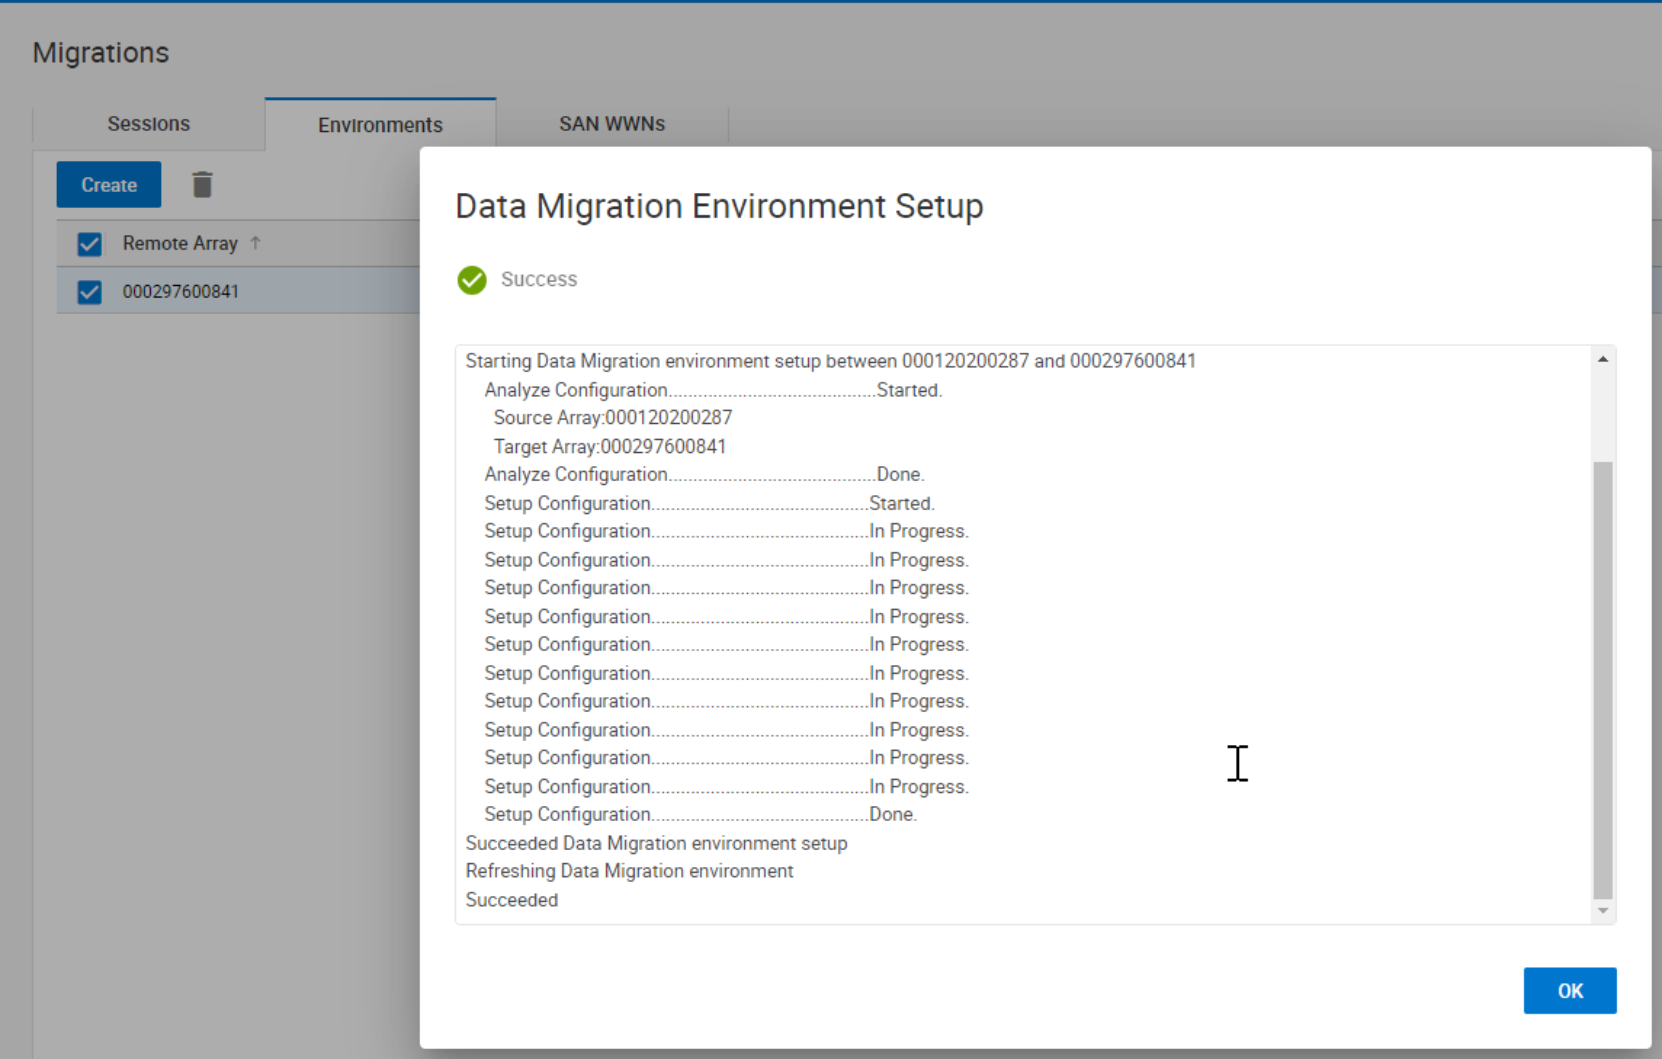
Figure 6. Migration Environment Creation Summary

Figure 7. Listing Migration Environments in Unisphere for PowerMax
Examine the migration environment from the Data Protection dashboards.
- Select Dashboard.
- Select the Protection card on the right panel.
- Select Migration Environments from the dropdown menu.
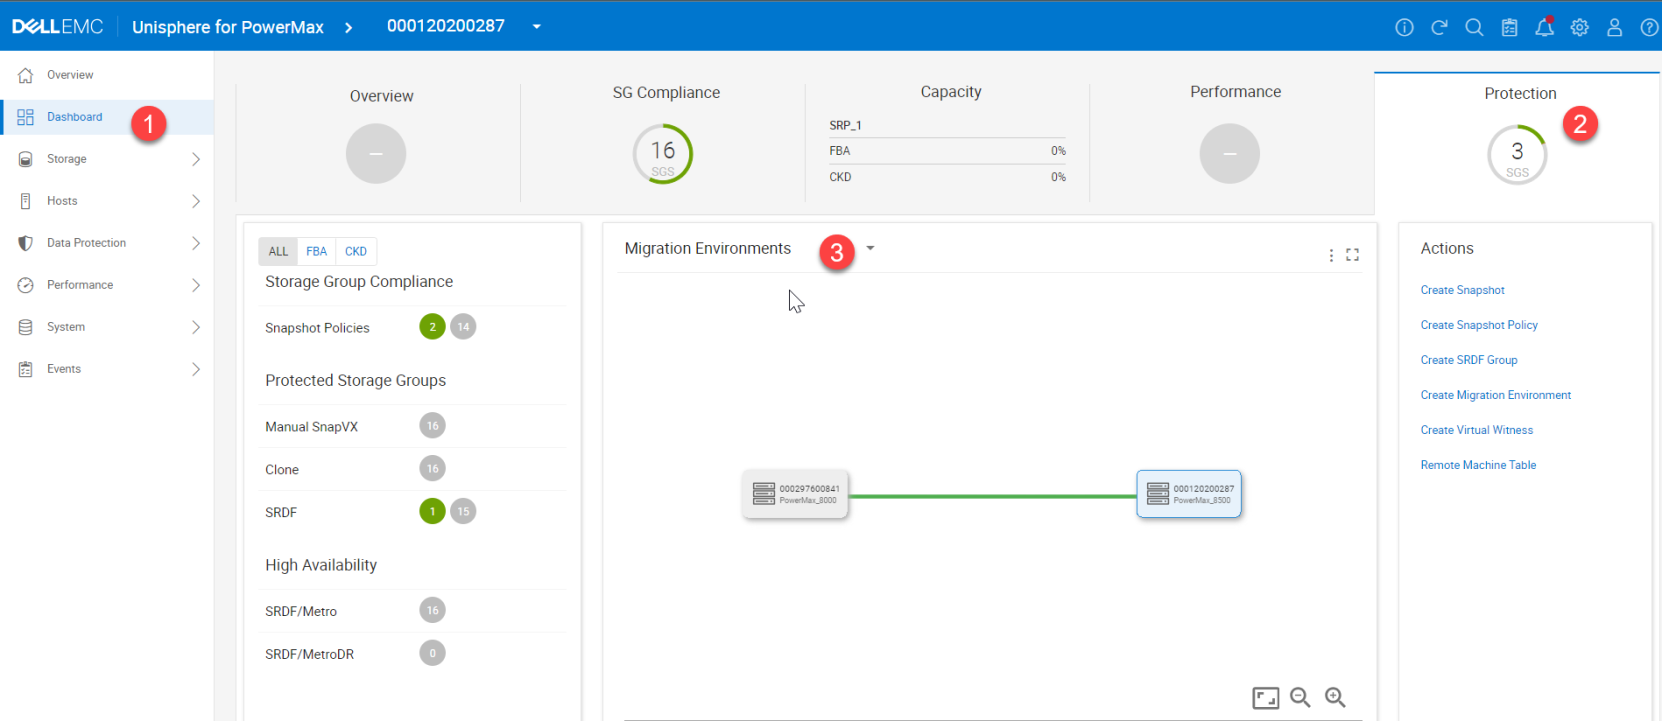
Figure 8. Examining Migration Topology from Protection Dashboard
Now that the environment is in place, you can continue with the NDM Create for the SG containing the application to be migrated.
Creating and Validating an NDM environment with Solutions Enabler
Some users may prefer to use a command line approach, Solutions Enabler provides all of the same functionality as Unipshere via the symdm command set.
To set up a new environment, use the command syntax below.
symdm environment –src_sid <SN of Source> -tgt_sid <SN of target> -setup

Figure 9. NDM Environment setup with solutions Enabler
To validate the environment is working correctly, the validate command can be run at any point. The syntax below shows the command. The following figure displays a real example of this command running.
symdm environment –src_sid <SN of Source> -tgt_sid <SN of target> -validate

Figure 10. Validating an NDM Environment with Solutions Enabler
To view all the environments currently configured as well as their status from all available local and remote arrays connected run the following:
symdm –environment list
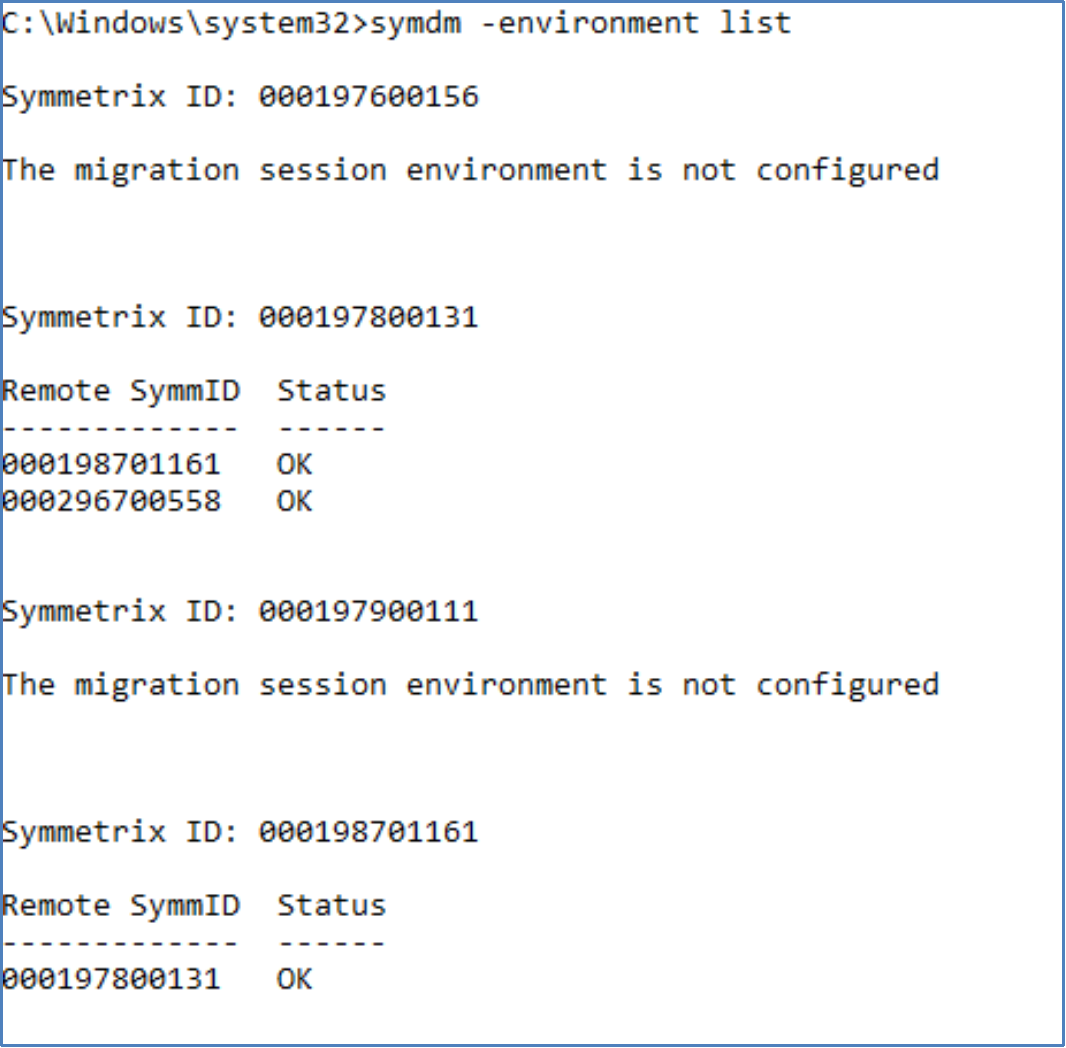
Figure 11. Listing Migration Environment with symdm -environment list command
Once the environment setup is complete, the migration sessions can be created.
Note: NDM Environment setup creates RDF links between the Source and Target using one port per Director for each zoned link. However, post-setup the user has the ability to add extra links manually using: symrdf modifygrp –rdfg 249 –add -dir xx –remote_dir xx or through the Unisphere wizards and REST API
Creating an NDM Environment Via REST API
In many environments customers may design their own tools and processes to further automate the steps involved in data mobility with NDM. The PowerMax REST API provides a comprehensive set of REST API POST/PUT/GET calls for all the Create, Read, Update and Delete (CRUD) actions for managing Non-Disruptive Migrations. See Dell PowerMax API documentation for the API calls. The REST API provides the same functionality for all options as the Unisphere for PowerMax wizards and uses the same options as described in the walkthroughs for CLI and Unisphere.
Creating a Migration Environment is a POST Operation.
https://Unisphere:8443/univmax/restapi/101/mobility/symmetrix/{symmetrixId} (POST)
Example JSON payload
{
"otherArrayId": "000197900256"
}
Example JSON Response
{
"arrayId": "000197900256",
"storageGroupCount": 32,
"migrationSessionCount": 0,
"local": true
}To Check the Environment at any point
https://Unisphere:8443/univmax/restapi/101/mobility/symmetrix/{symmetrixId}/environment/{remoteArrayId} (GET)
Example JSON response
{
"symmetrixId": "000197900049",
"otherSymmetrixId": "000197900256",
"invalid": false,
"state": "OK"
}