
None
None
-
This section describes how to add regions, zones, pods, clusters, hosts, storage, and networks to the CloudStack environment for day-to-day operations.
Note: For more information about the CloudStack infrastructure, see CloudStack Architecture.
For detailed information about CloudStack configuration, see Configuring CloudStack Installation.- Log in to CloudStack UI. Navigate to the left and choose Infrastructure.
- On the Zones section, click Add Zone. The zone creation wizard appears.
- Choose the Zone type as Core and click Next.
- Select Basic networking type, as all the host are configured to use basic network configuration. See the Network architecture section for networking information. Click Next.
- Enter the following zone details and click Next:
- Name: A name for the zone.
- DNS: This is the DNS servers for use by guest VMs in the zone.
- Internal DNS: This is DNS servers for use by system VMs in the zone. These DNS servers are accessed by the management traffic network interface of the System VMs.
- Hypervisor: Choose the hypervisor for the first cluster in the zone.
- Network Offering: Select offering for shared network.
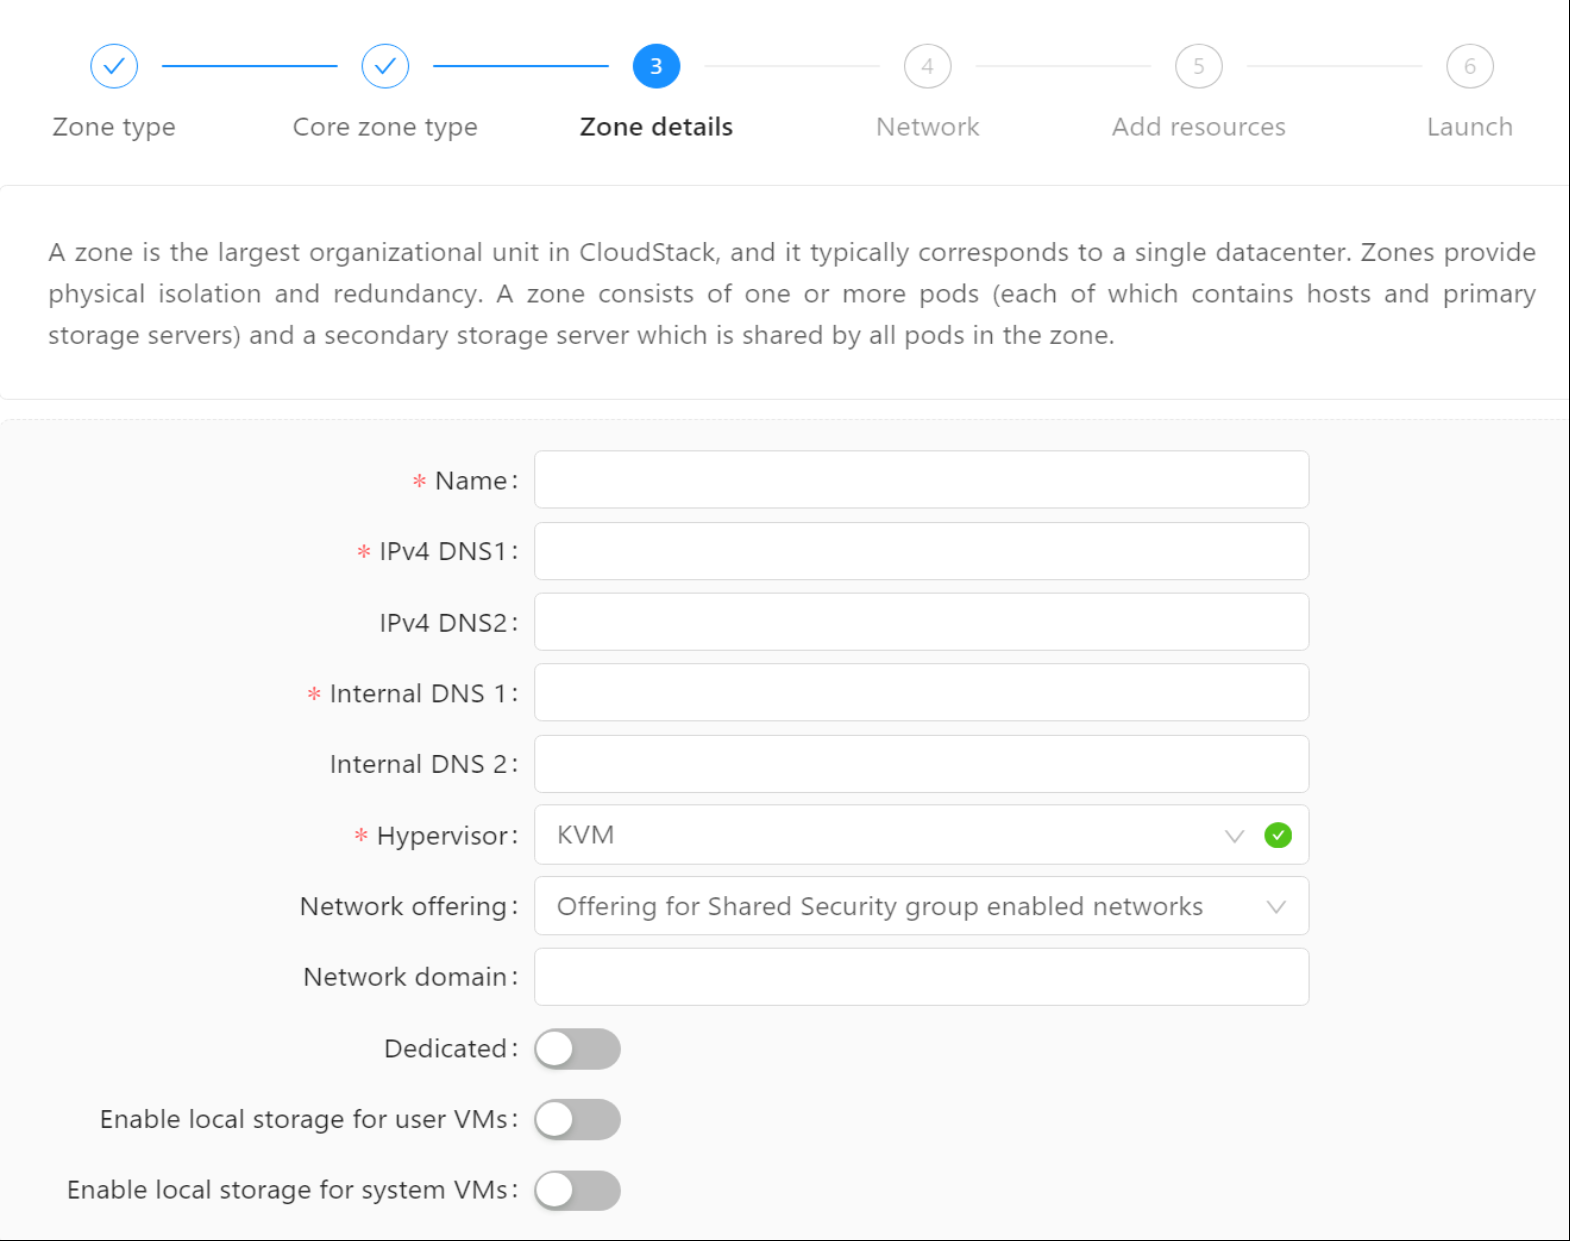
Figure 11. Zone details
- Update the network details.
- Choose the traffic types which will be carried by the physical network such as Guest and Management. Click the Edit button under the traffic type icon and update traffic label to cloudbr0. These labels must match the labels which are already defined on the hypervisor host which carries the respective traffic. Click Next.
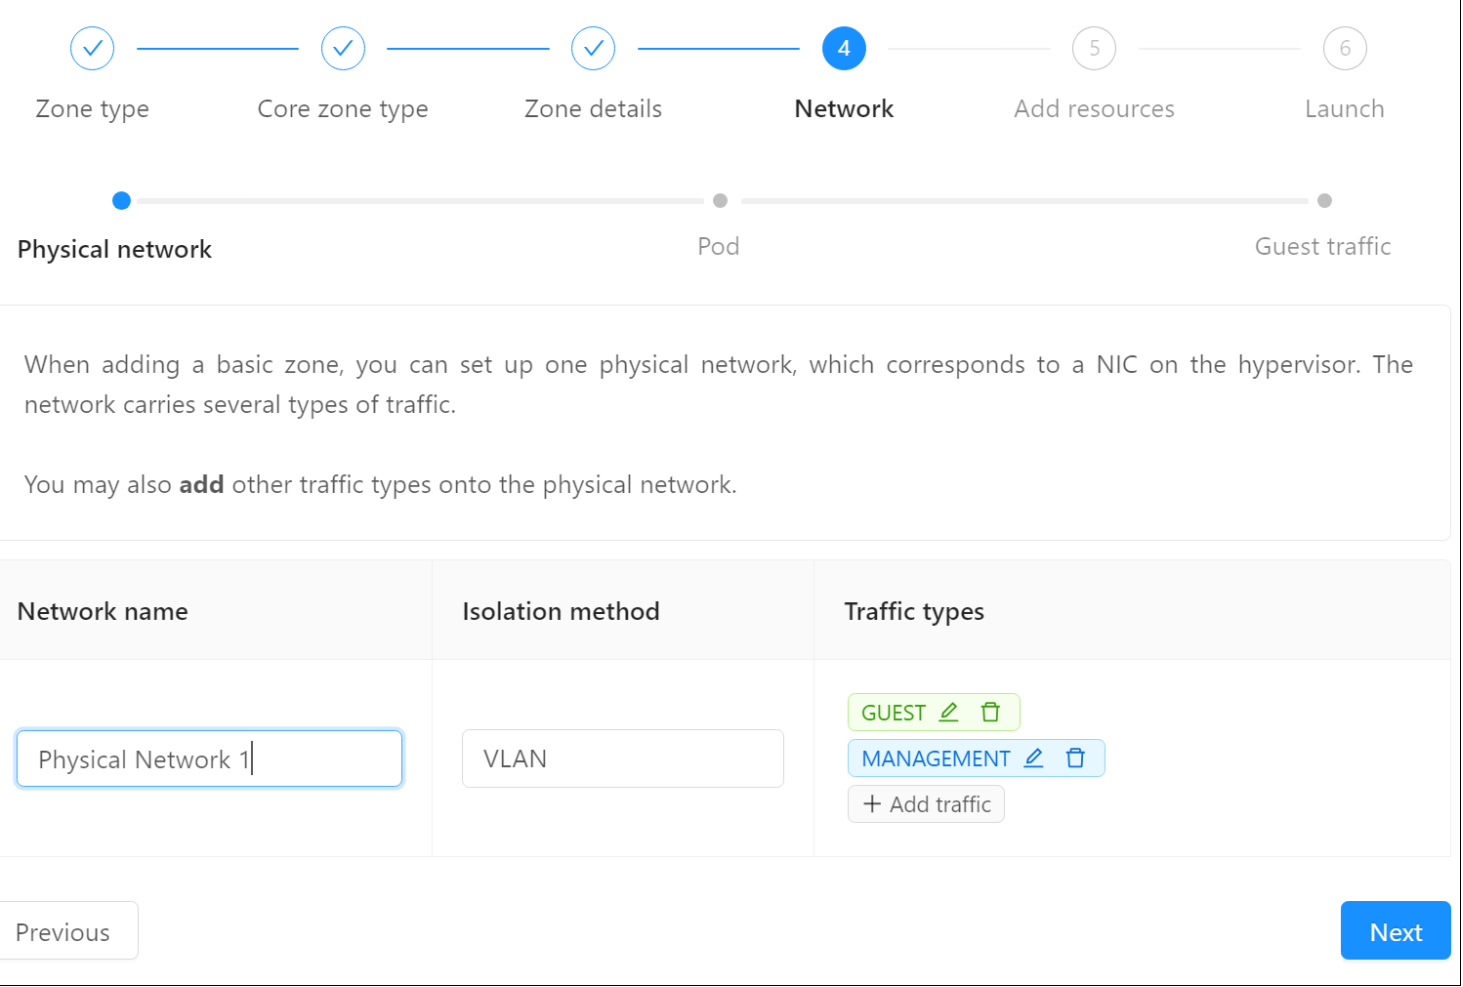
Figure 12. Network update
- In a new zone, CloudStack adds the first pod and multiple pods can be added later. Enter the following details for the Pod and click Next.
- Pod Name: A name for the pod.
- Reserved system gateway: The gateway for the hosts in that pod.
- Reserved system netmask: The network prefix that defines the pod’s subnet.
- Start/End Reserved System IP: The IP range in the management network that CloudStack uses to manage various system VMs, such as Secondary Storage VMs, Console
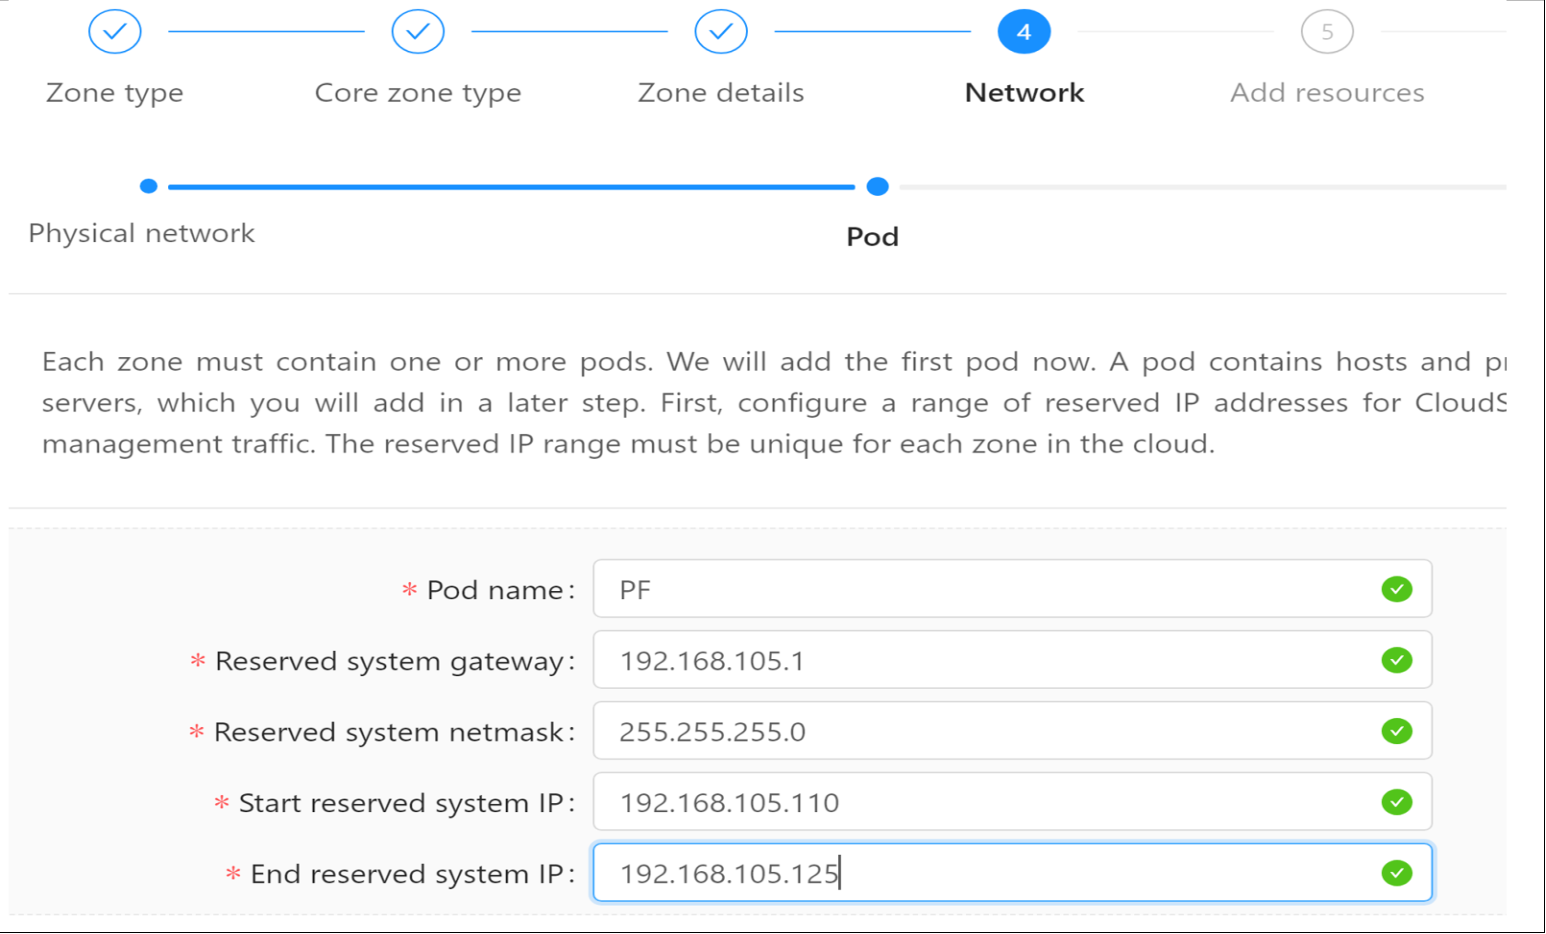
Figure 13. Pod details
- Configure the network for guest traffic. Provide the following details and then click Next:
- Guest gateway: The gateway that the guests should use.
- Guest netmask: The netmask in use on the subnet that the guests use.
- Guest starts IP/End IP: Enter the first and last IP addresses that define a range that CloudStack
Note: Since the basic network type is selected with a shared network model, the same gateway has been used for both management and guest network. Provide different IP ranges for management and guest networks to ensure that there is no network conflict.
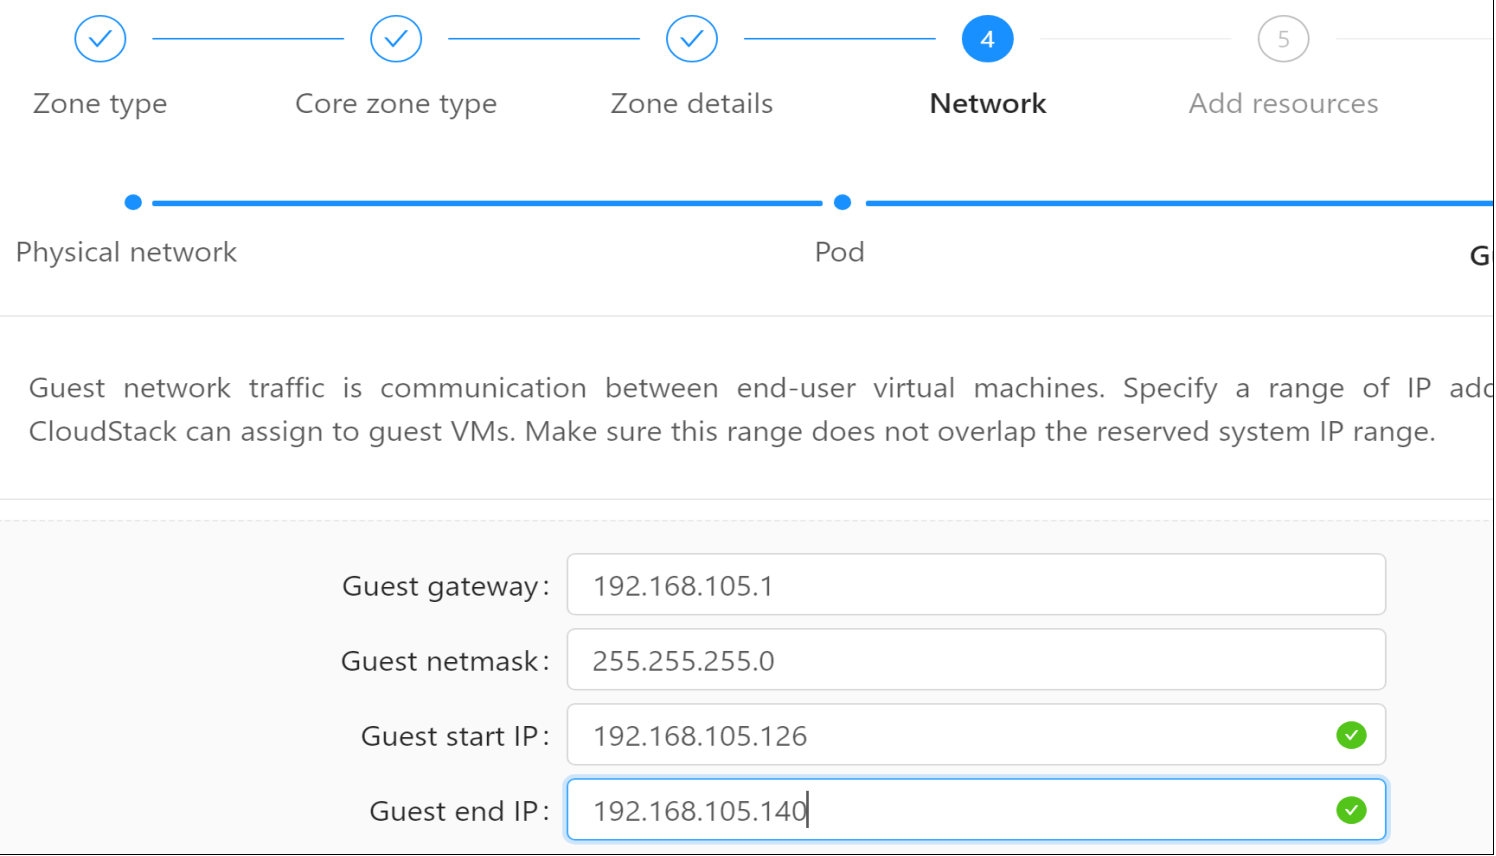
Figure 14. Guest network details
- Provide a Cluster name and Click Next.
- To configure the first host, enter the host IP, its credentials, and tag if required. Click Next.
Note: When adding a hypervisor host to CloudStack, the host must not have any VMs already running.
- In a new cluster, CloudStack adds the first primary storage server. One can always add more servers later. For adding PowerFlex as primary storage provide the following details and click Next:
- Name: Enter a name for storage.
- Scope: Define the scope for the storage, whether it serves the cluster or zone level.
- Protocol: For PowerFlex storage, select custom.
- Provider: Select PowerFlex as provider.
- Gateway: Provide the PowerFlex Manager IP.
- Gateway username and password: Provide the PowerFlex Manager UI credentials.
- Storage pool: Provide PowerFlex storage pool name.
Note: Make sure storage pool is already defined in the PowerFlex storage and the KVM host can access the storage pool.
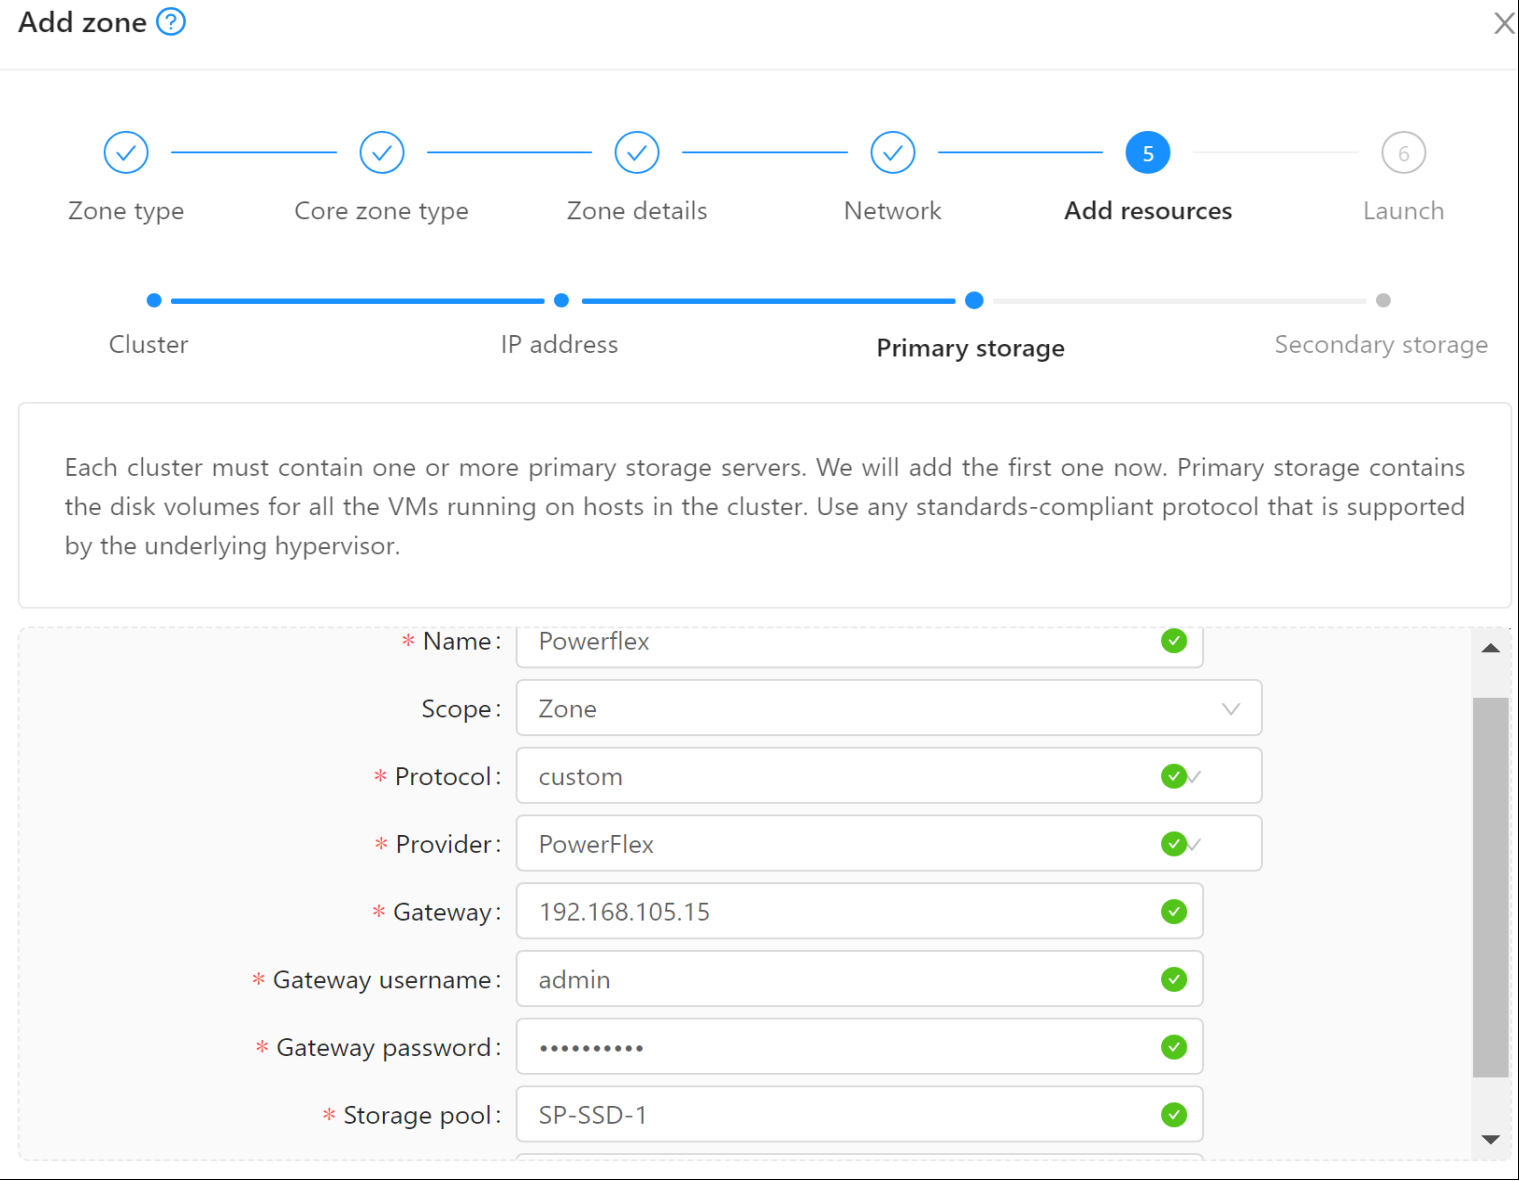
Figure 15. Primary storage details
- Adding secondary storage. Since the secondary storage/NFS is already defined in the CloudStack Management Server, update the details here and click Next.
Note: For secondary storage, see Setting up secondary storage section.
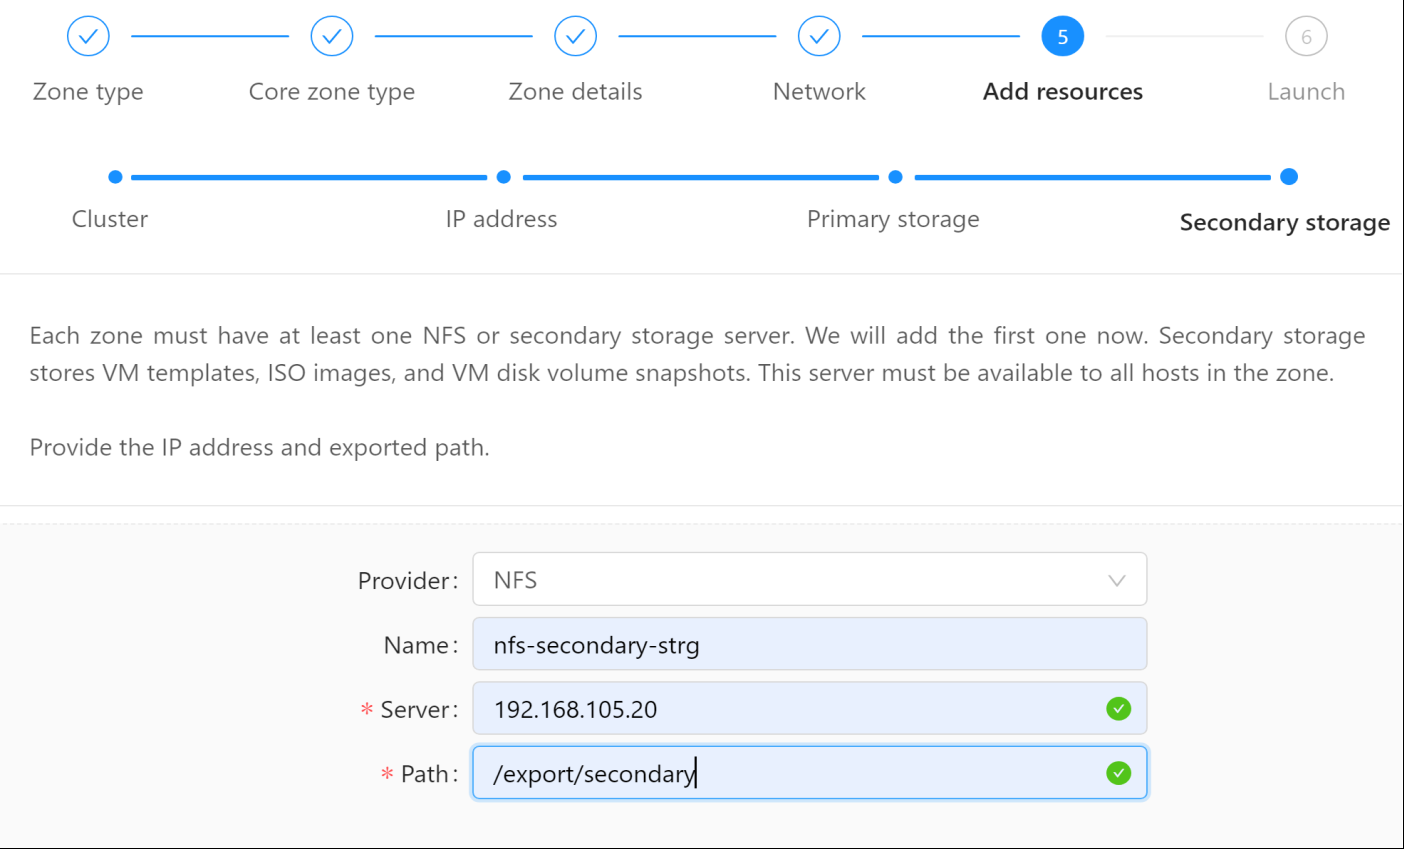
Figure 16. Secondary storage details
- After updating everything correctly, a Zone is ready to launch message appears. Click on the Launch zone button.
- The configuration takes time to complete. Once it is done, all the configurations can be viewed by navigating to Infrastructure > Summary.
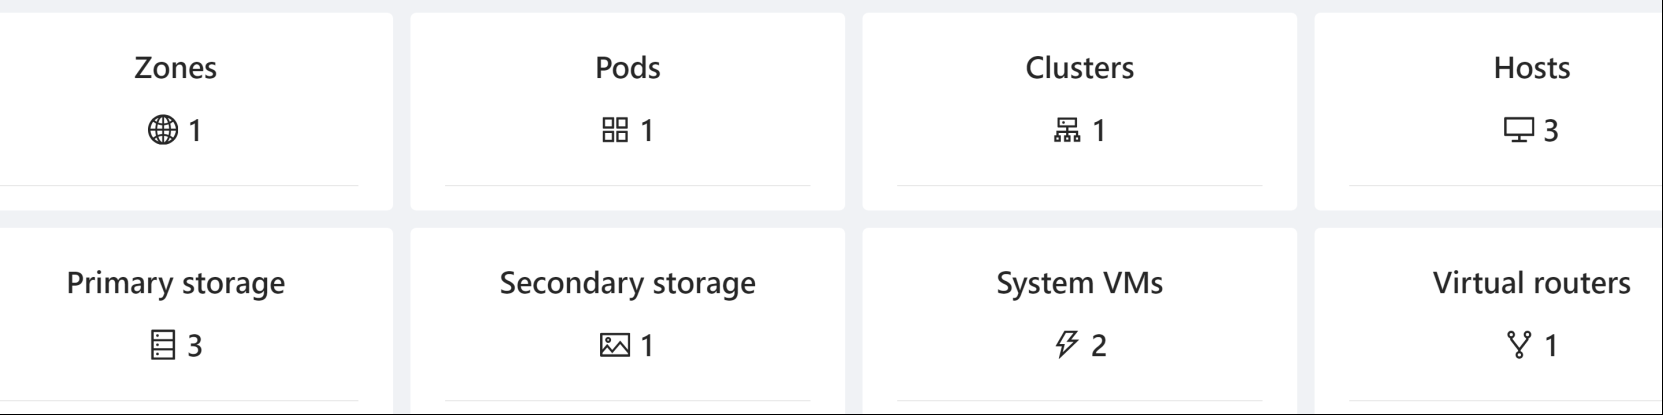
Figure 17. Summary of the infrastructure
Follow these steps if the VMs are not running or failed to run on the PowerFlex storage for the first time:
- Navigate to Infrastructure > Zone > click Disable zone.
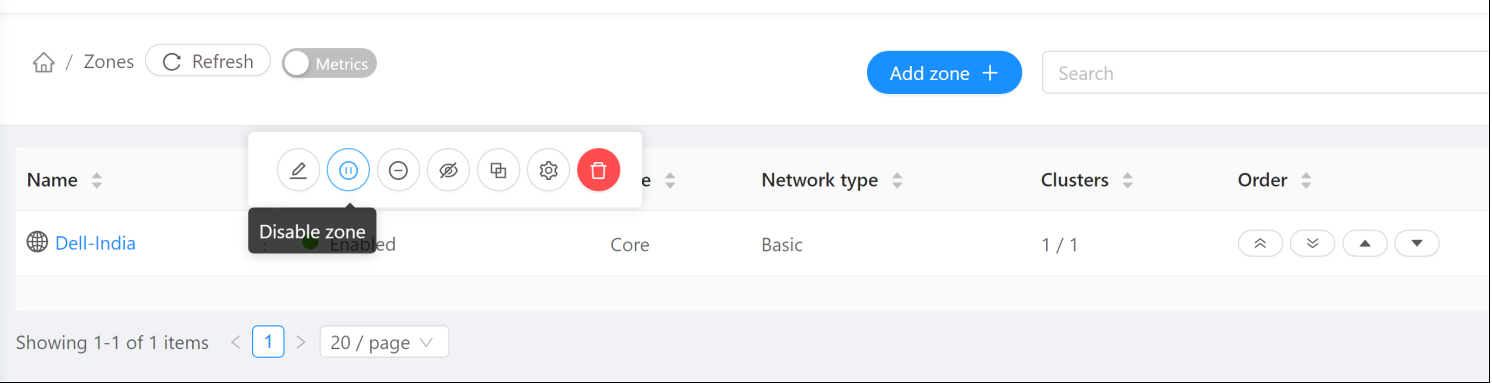
Figure 18. Disabling the zone
- Disable the primary storage pool by selecting the storage pool, Infrastructure > Primary storage > select storage pool > Disable storage pool.
- Next, navigate to Infrastructure > System VMs > select VM (secondary storage VM and console proxy VM) > Destroy the System VMs.
- Enable the Zone and CloudStack automatically creates a new System VM. Since primary storage is disable, now VMs can use the default secondary storage.
- Once the VMs come up, navigate to Infrastructure > Primary storage > select storage pool > Enable storage pool. The System VMs are automatically migrated to use Primary storage.
Note: When creating a new zone, CloudStack provides an option to create other configurations as well such as pod, cluster, adding host, storage pool and so on. However, pods/cluster/host can be added anytime later by directly navigating to the respective section in the UI.