
Installation and configuration steps
Installation and configuration steps
-
Use the following steps to configure ECS as an Elasticsearch S3 repository.
Step 1: Create a bucket in ECS to store the snapshot data
The first step is to create a bucket to store the snapshots. To do this, you can use the ECS Web Portal, ECS API, or an S3 client such as the S3 Browser. For detailed information about creating buckets, see the ECS Administration Guide.
Step 2: Install the S3 plugin
The S3 repository plugin adds support to use ECS as the repository for Snapshots and Restores. For instructions about installing the plugin, see the Elasticsearch S3 Repository Plugin documentation.
To verify that the plugin has been installed, make the following API call:

Figure 3. Elasticsearch S3 plugin
Step 3: Register ECS as a repository
Elasticsearch provides REST APIs to register an S3 repository. The following example registers ECS as a repository using the _snapshot API.
Create the S3 repository
curl -X PUT "localhost:9200/_snapshot/ecs" -H 'Content-Type: application/json' - d'
{
"type": "s3",
"settings": {
"bucket": "<ECS Bucket>",
"base_path": "snapshots",
"endpoint": "<ECS Endpoint>",
access_key: <ECS Object User>,
"secret_key": "<ECS S3 Secret Key>",
"protocol": "http"
}
}
'
Here are some additional details about these settings:
- bucket: This is the name of the bucket that was created in Step 1 to store snapshot data.
- base_path: [optional] This specifies the path within the bucket to store data.
- endpoint: A load balancer is required with ECS. This specifies the endpoint of the load balancer in front of the ECS nodes.
- access_key: Specifies the ECS object user to use for authentication.
- secret_key: The secret s3 key of the ECS object user.
- protocol: Specifies whether HTTP or HTTPS is used.
Note: Large files can be broken down into chunks if needed. The default setting is 1gb which should not need to be adjusted for ECS.
Additional settings can be specified for the repository. These are described in the Elasticsearch Repository settings documentation.
To verify that our repository was successfully created, use the ‘POST /_snapshot/ecs/_verify’ call.
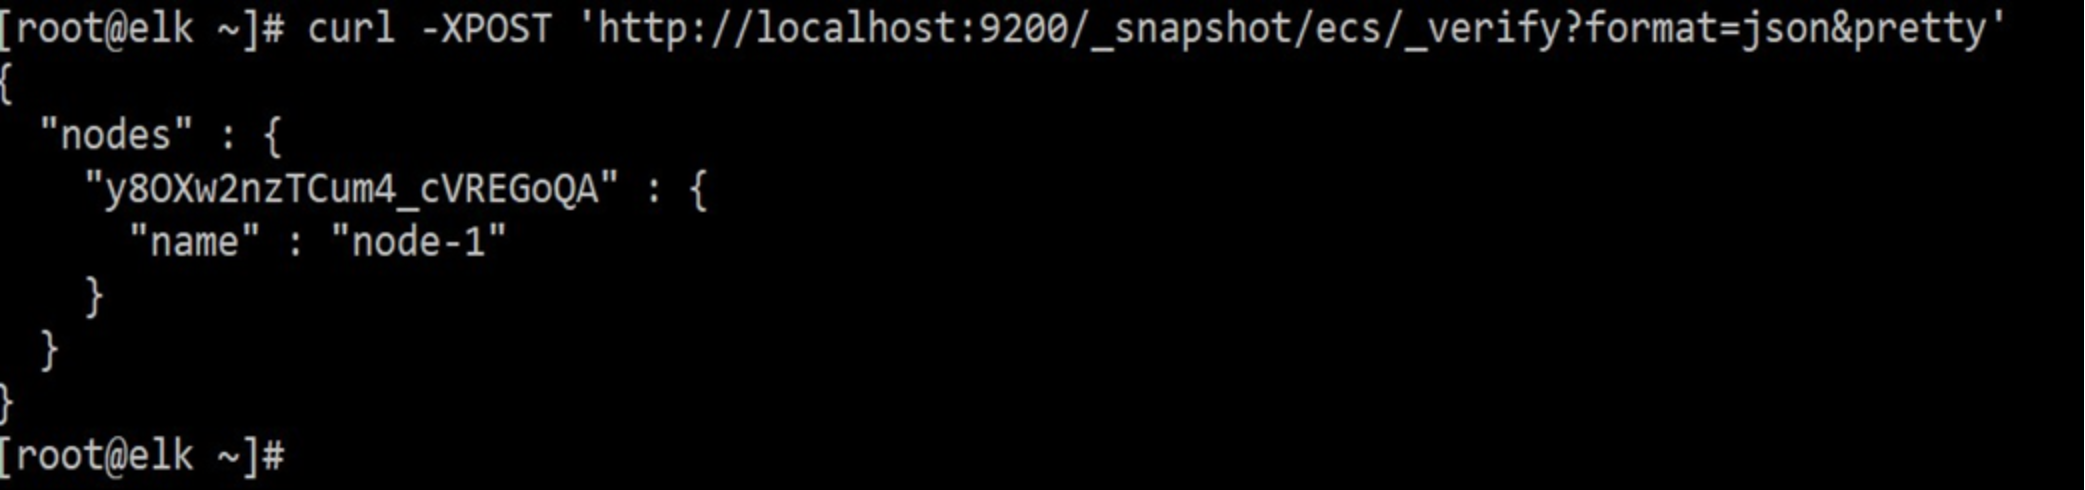
Figure 4. S3 repository verification
Step 4: Take a snapshot (backup) of an index
The next step is to take a snapshot of the logstash index which contains the ECS data access log events. Our index is named logstash-2019.07.01-000001.
Index snapshot
curl -X PUT "localhost:9200/_snapshot/ecs/snapshot_1" -H 'Content-Type: application/json' -d'
{
"indices": "logstash-2019.07.01-000001", "ignore_unavailable": true, "include_global_state": false
}
'
To verify the status of the snapshot, make the following API call:

To verify that snapshot data exists in the ECS bucket, use an S3 client such as s3cmd, s3curl, or the S3 Browser. The following figure shows the properties of our bucket storing the snapshot data.
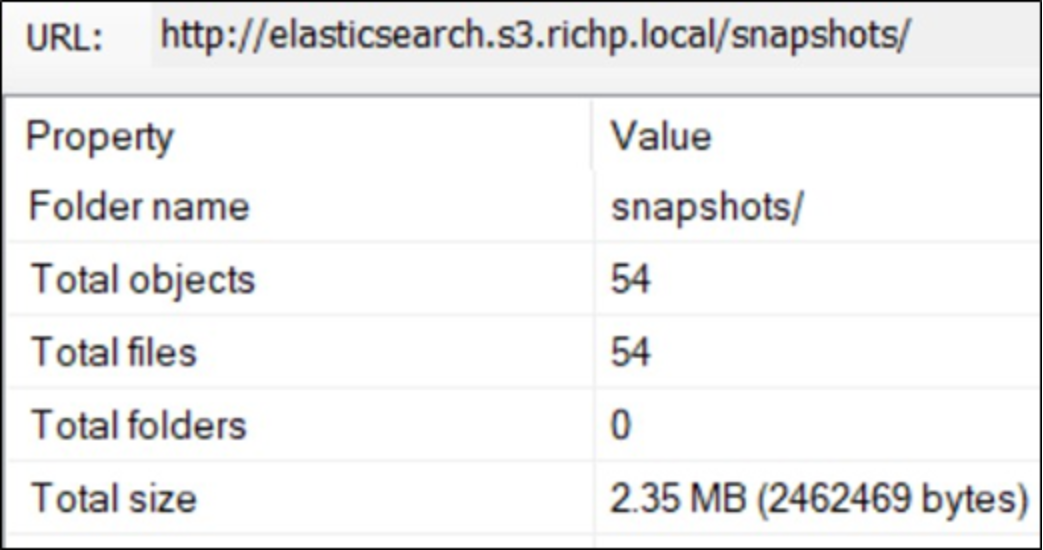
Figure 5. Snapshot data
Step 5: Restore a snapshot to the same cluster
To restore a snapshot, use the following command:
POST /_snapshot/ecs/snapshot_x/_restore
This example restores one of our snapshots to the same cluster. Because an existing index can be only restored if it is closed, and has the same number of shards as the index in the snapshot, we will restore our snapshot to a new index.
Note: See the Elasticsearch Snapshot and Restore documentation for detailed information about restoring indices.
To list the snapshots in the ECS repository, use the following API call:

The following is the API call used to restore snapshot_1 to a new index:
curl -X POST "localhost:9200/_snapshot/ecs/snapshot_1/_restore" -H 'Content- Type: application/json' -d'{
"indices": "logstash-2019.07.01-000001", "ignore_unavailable": true, "include_global_state": true, "include_aliases": false, "rename_pattern": "logstash(.+)", "rename_replacement": "restored_index_$1"
}
Verify that the snapshot was restored to a new index:
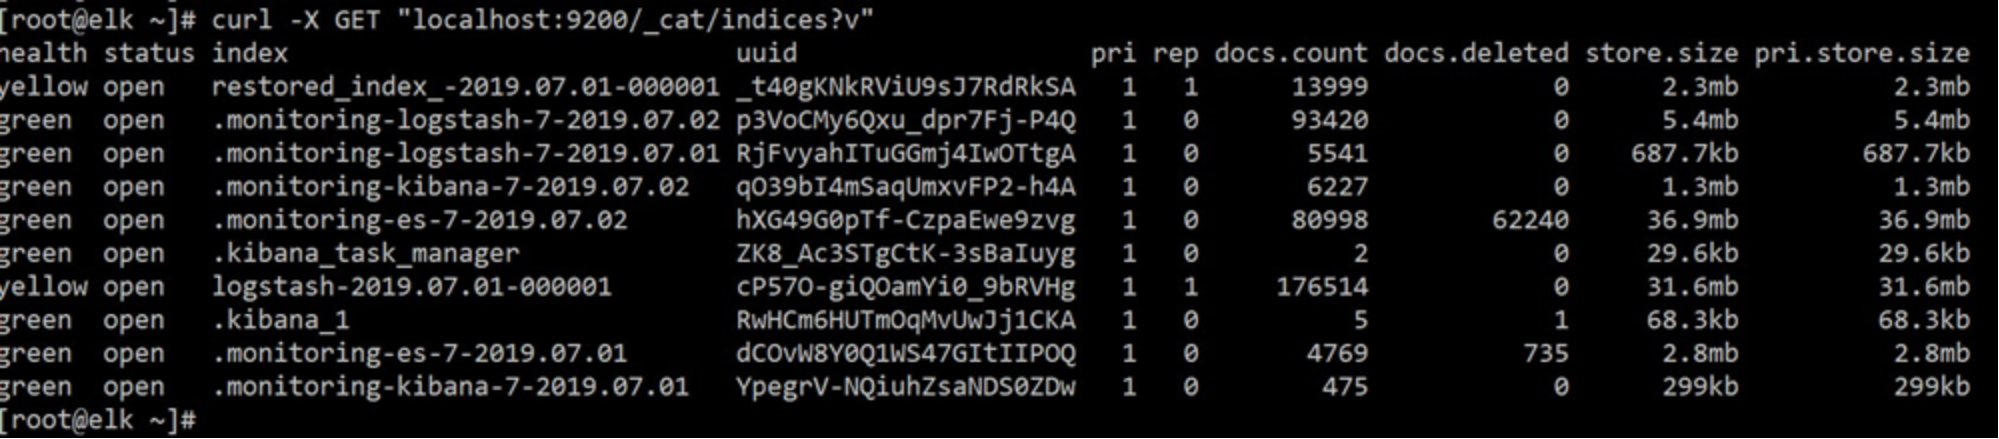
Note: Our index health is yellow because the current cluster only consists of a single node, so the replicas remain unassigned simply because no other node is available to contain them.