
Latest supported feature set
Latest supported feature set
-
AppSync versions 3.9 and later support discovering, mapping, protecting, and repurposing Oracle Container Databases or CDBs. The same workflows are supported with CDBs as with standalone databases, the only exception being RecoverPoint environments. See the latest AppSync Support Matrix for up-to-date information. The figure below shows the Container Database column with the Yes or No status. AppSync versions 3.9 and later allow the user to view the PDBs or Pluggable Databases contained within the CDB or Container Database. If you highlight the database line, you can see the details of the related PDBs on the right-side pane if applicable.
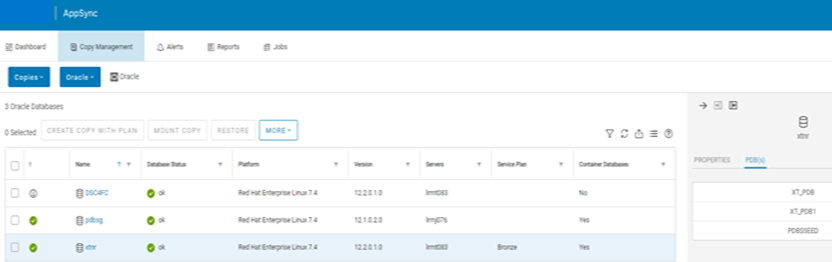
Figure 6. Container database or pluggable database
AppSync does require that all PDBs of a CDB reside on the same storage array. All PDBs within a CDB must be in Read_Write mode for hot backup. This requirement includes all PDB instances on all RAC nodes, otherwise no hot backup option can be used. PDB$SEED is the exception and is always protected, which is mandatory for recovery purposes. Affected entities are detected by AppSync at the CDB level.
For example: If pdb1 on CDB1 shares a file system with pdb2 on CDB2, when AppSync attempts to restore CDB1, it detects that the second CDB is an affected entity and requires it to be shut down manually before a restore.
Note: It is best to not share file systems between different PDBs/CDBs.
Workflows at the PDB granularity level are not supported with the AppSync 4.0 release but are at the CDB level. AppSync versions 4.1 and later offer the ability to restore at the pluggable database (PDB) level. This ability allows restoring one or more PDBs at a time.
The figure below shows the ability to restore at both the CDB and PDB level. If PDB is selected, you will see the available PDBs that AppSync has discovered to restore, and one or more at a time can be checked. Note that Oracle 12cR2 is the minimum version of Oracle required for AppSync to support a PDB restore. Check the AppSync Support Matrix for the latest details.

Figure 7. PDB level
AppSync versions 3.9 and later can discover FlexASM type instances. They require at least one available RAC node of an ASM instance in order to place the database in hot backup mode. If an ASM instance is down on one node, AppSync detects another node for a running ASM instance and then sets it for further processing. AppSync only supports creating copies on nodes where both the database and ASM instance are available. Mount and recovery only work if the ASM instance is up and running. You have the option to clear any node or nodes selected during mount that do not have both the database and ASM instances running.
- If standalone, ASM must be up and running on at least that one node.
- If using Grid, an ASM instance can run on any of the RAC nodes as long as cluster services are online on all remote nodes—cluster services must be running on all nodes.
Clear any node selection during mount that does not have both database and ASM instances running. As shown in the figure below, you can choose to have AppSync mount on All servers in cluster or select only a few servers.
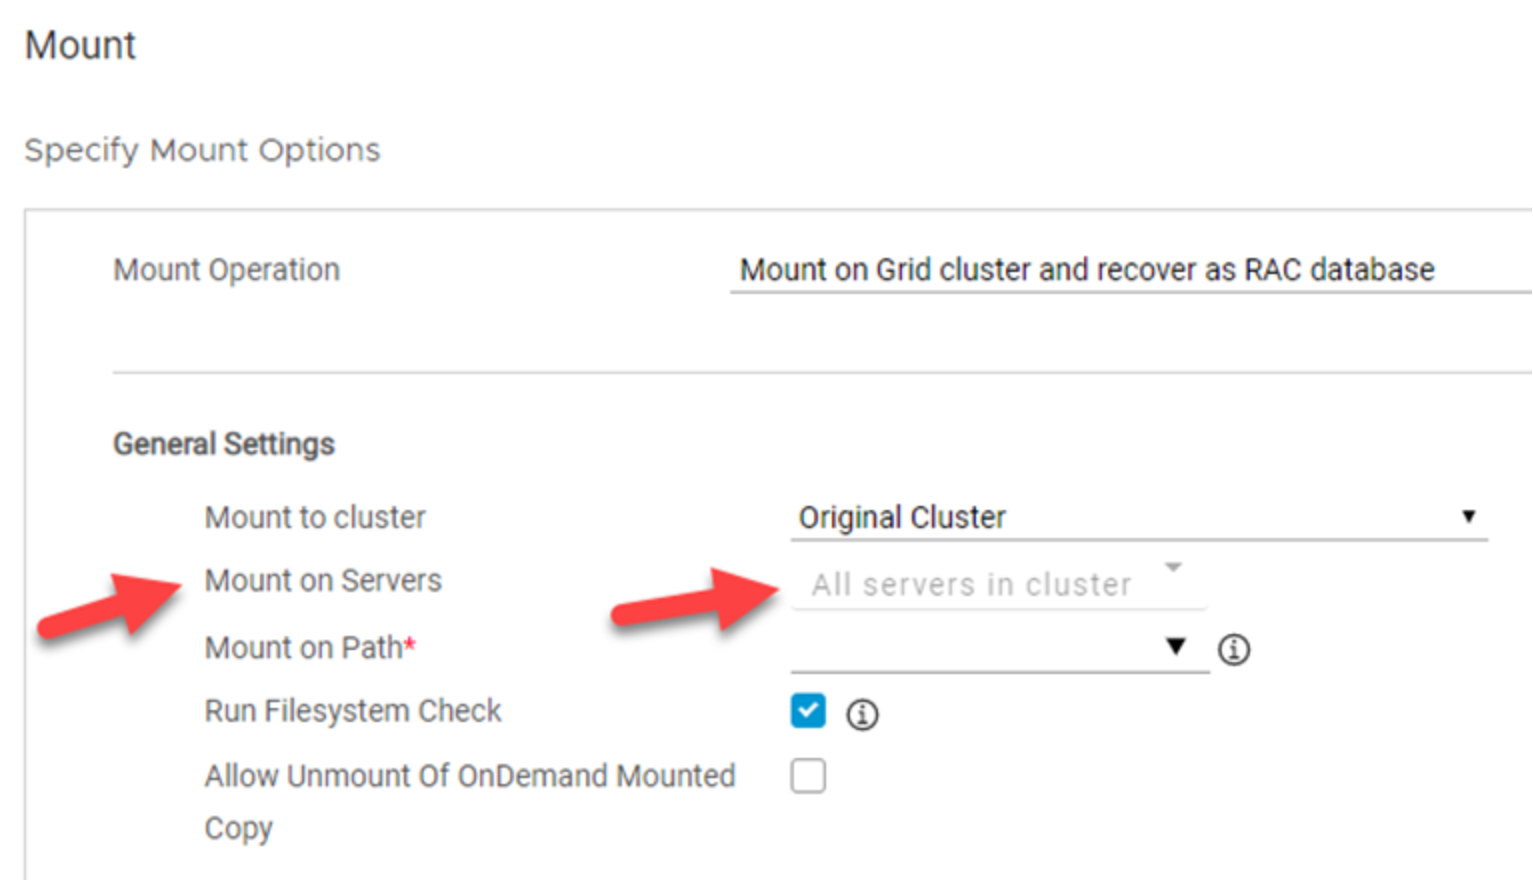
Figure 8. Mount on Servers
AppSync versions 3.9 and later support Oracle databases that are created on advanced format 4K ASM storage devices. This support includes XtremIO and SC Series arrays, but always check the AppSync Support Matrix for the latest information.
AppSync versions 4.0 and later support the ability to restore an Oracle database to a selected node of Oracle RAC. Previous versions of AppSync supported only restoring to the same node on which the copy was created. This feature is important because it allows the user to recover in an environment where the source node could have gone offline. The figure below shows the restore option in the UI.
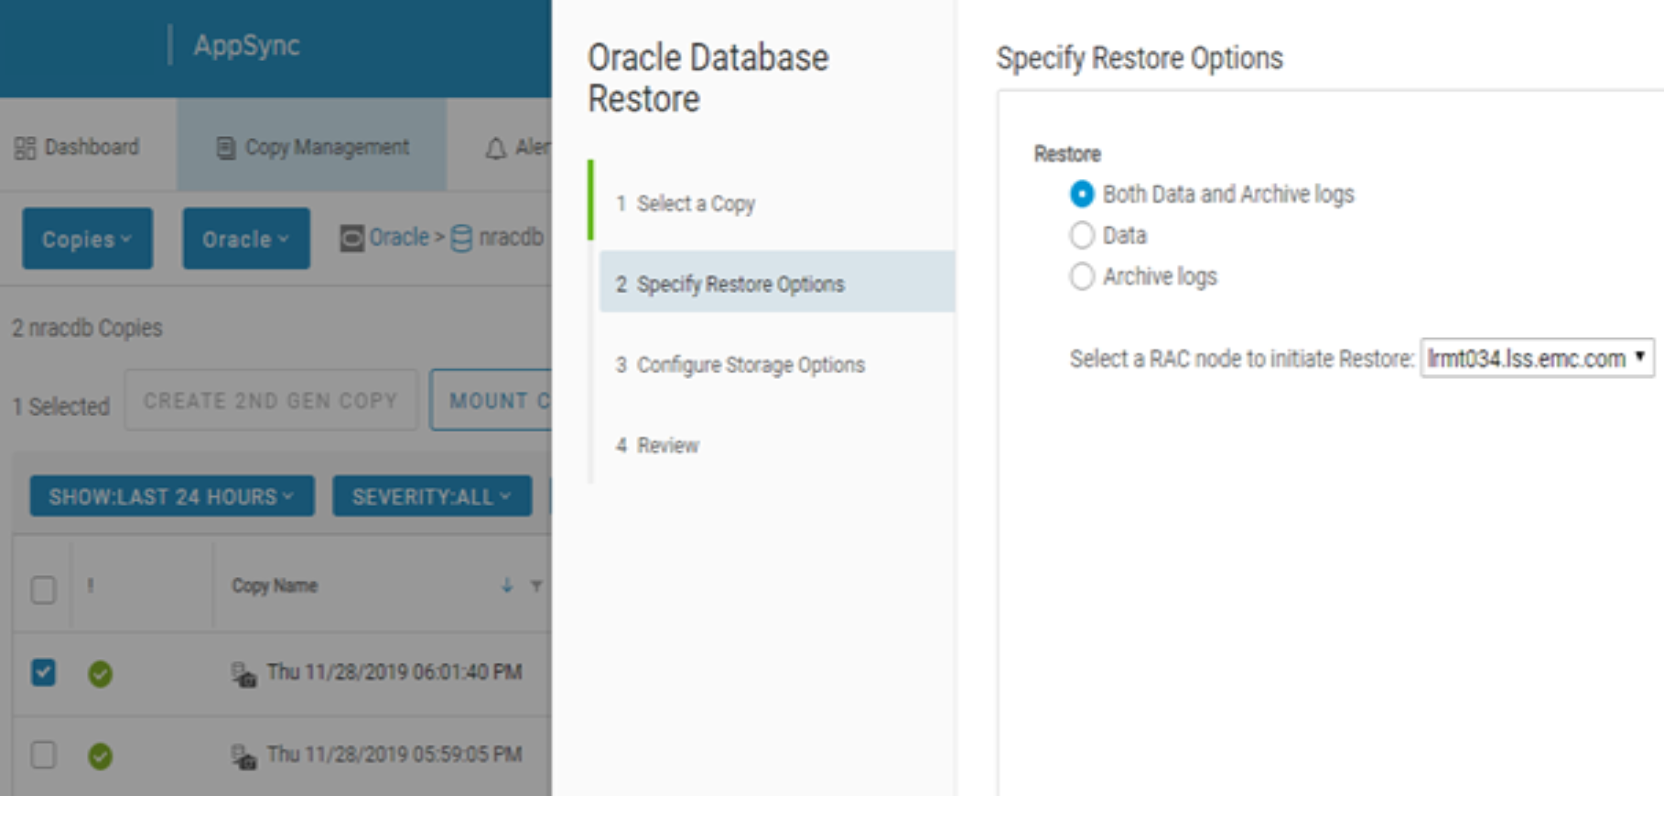
Figure 9. Restore options
AppSync 4.2 and higher Oracle service plan settings allow the user to choose which Oracle RAC (real application cluster) host or node the AppSync copy is taken on. This ability can be very beneficial if users want to offload busy hosts or have certain hosts undergoing maintenance. The UI now shows which host the service plan will run on in the details pain in the subscriber’s section. After highlighting the bronze service plan line (Figure 10) and on the subscriber’s pane, there are two servers that are taking the copy of the racdb database (Figure 11). Shown in Figure 11, AppSync is able to take copies on either host 52 or 51. If you click edit after checking the box, you can choose any host or any of the selected hosts (Figure 12). If you choose any host AppSync will decide the node to run the protection on based on which one responds faster. If any of the selected hosts is chosen and both hosts have been selected manually, the arrow keys can be clicked to change the priority. This allows the user to determine the host priority AppSync uses for the copy protection. Note you can only see the priority of which host will take the copy in the edit menu. The details pain just shows what hosts are available to take the copy and not the priority that you defined.
As shown in Figure 13, when creating a repurposing workflow, you have the same options on host priority for Oracle copies.
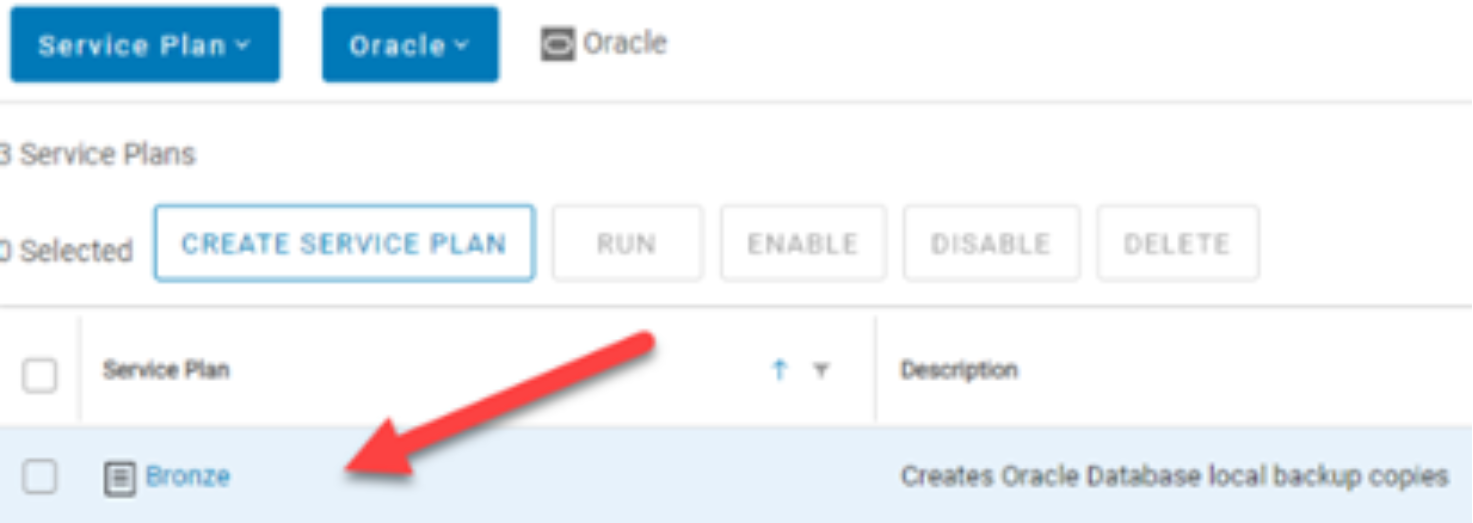
Figure 10. Service Plan
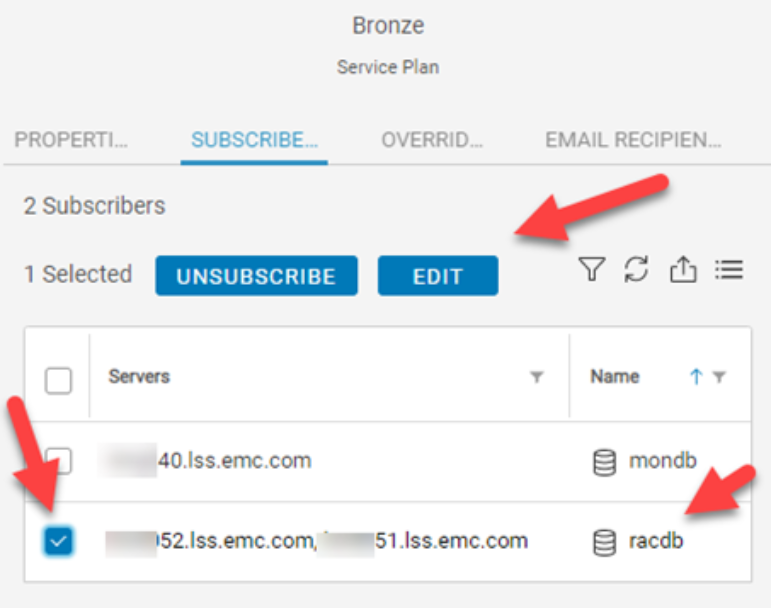
Figure 11. Subscribers
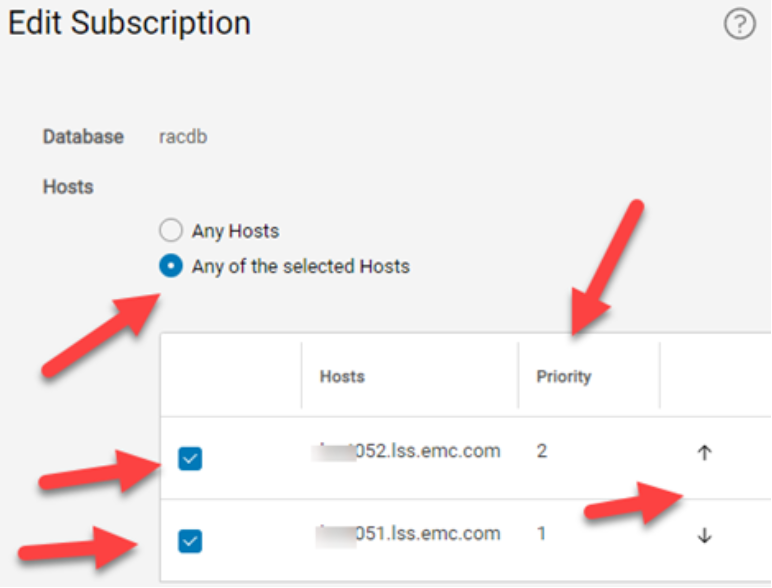
Figure 12. Edit subscription

Figure 13. Repurposing priority
AppSync versions 4.2 and later show the Automatic Storage Management (ASM) disk groups on the right-side pane of AppSync when a particular Oracle database is selected, if it uses ASM. This makes it easy to determine the back-end layout for your particular Oracle databases from within the AppSync UI. Notice the ASM Disk Group tab and associated names in the following figure.
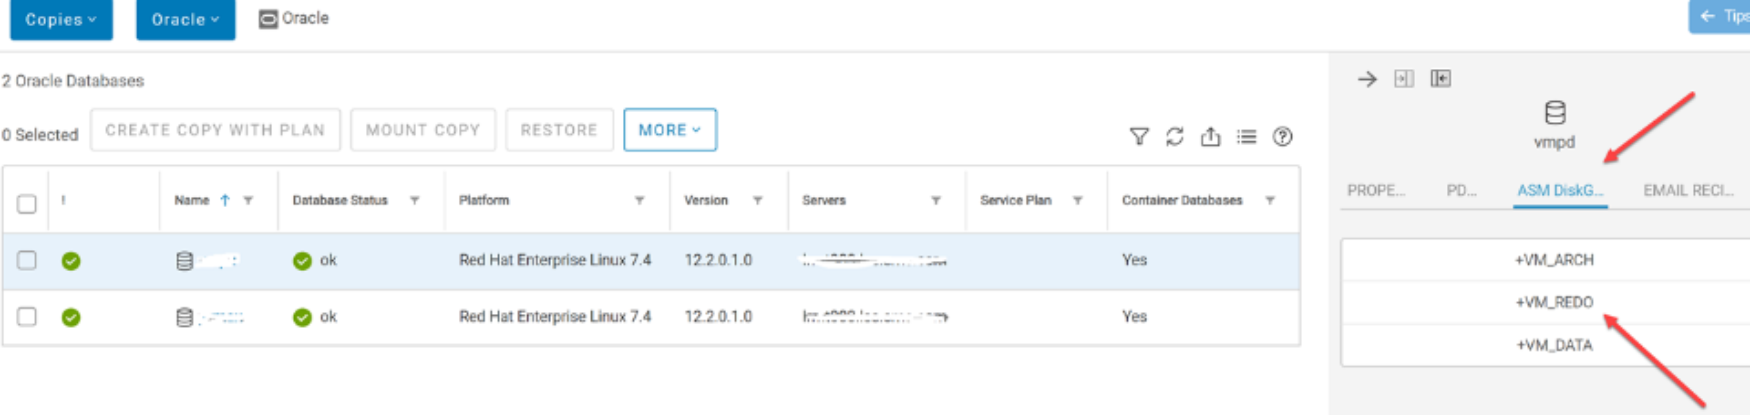
Figure 14. ASM
AppSync versions 4.3 and later allow AppSync to work with Oracle without requiring the oratab file. This oratab file is a requirement that Oracle themselves have moved away lately with their newer releases. Oracle database upgrades sometimes even modified the oratab file and this caused issues for some AppSync users. AppSync now has a new wizard that is presented when the user clicks Discover Databases as shown in the following figures.
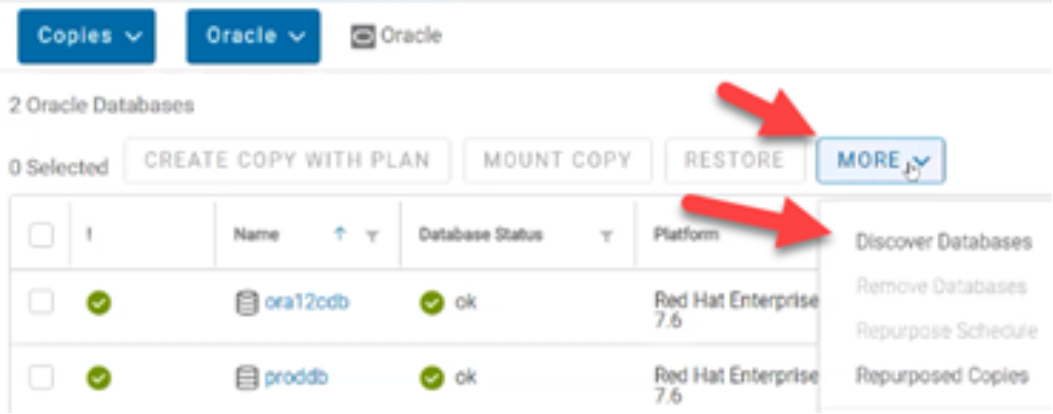
Figure 15. Discover database
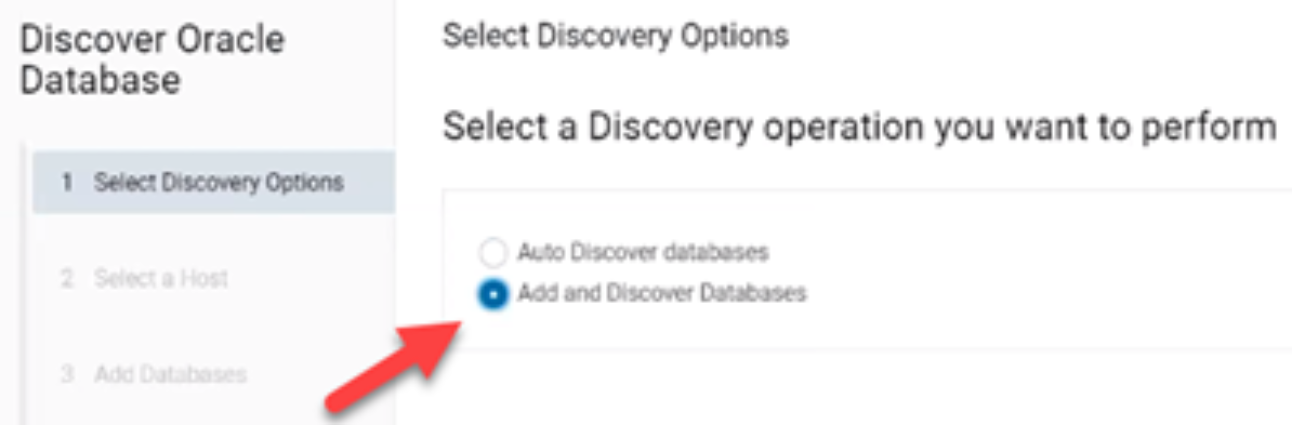
Figure 16. New wizard
If you do not want to rely on the oratab file, select the Add and Discover Databases option as shown in the above figure.
Next, select a host to perform the Oracle database discovery on, shown in the following figure.
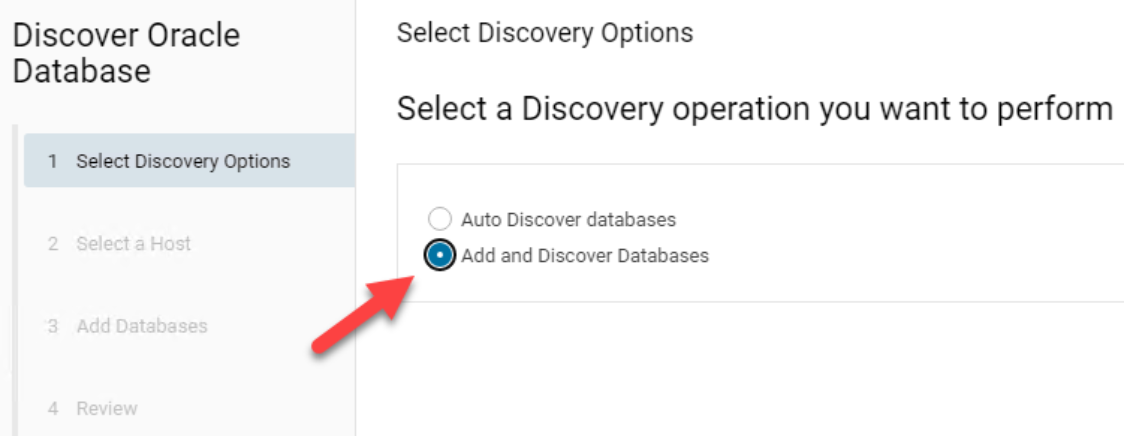
Figure 17. Select Oracle host
Next, click the ADD DATABASES button, and enter in the Oracle/ASM Sid and Oracle or Grid home location as shown in the following figure.
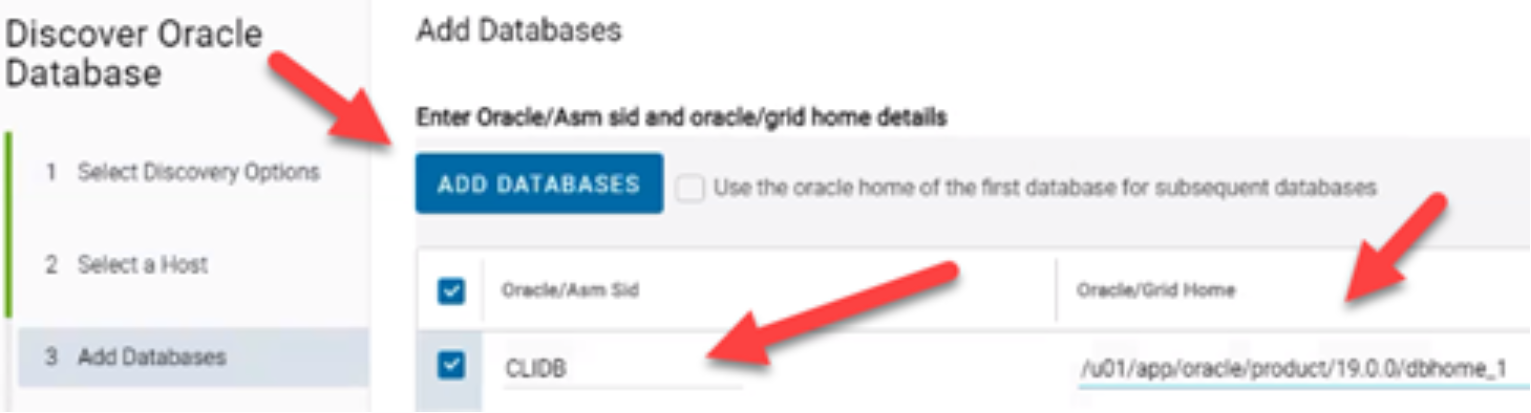
Figure 18. Add databases
Lastly, you can review your entries and click Finish.
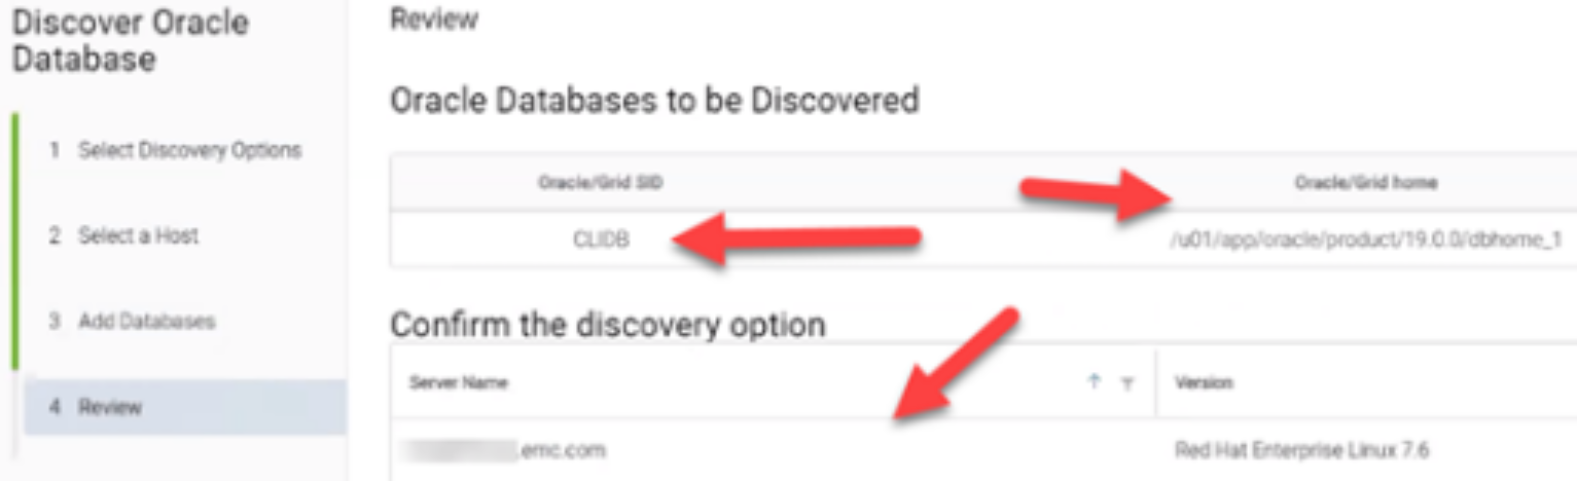
Figure 19. Review
After the discovery finishes, the CLIDB database was successfully added to AppSync.
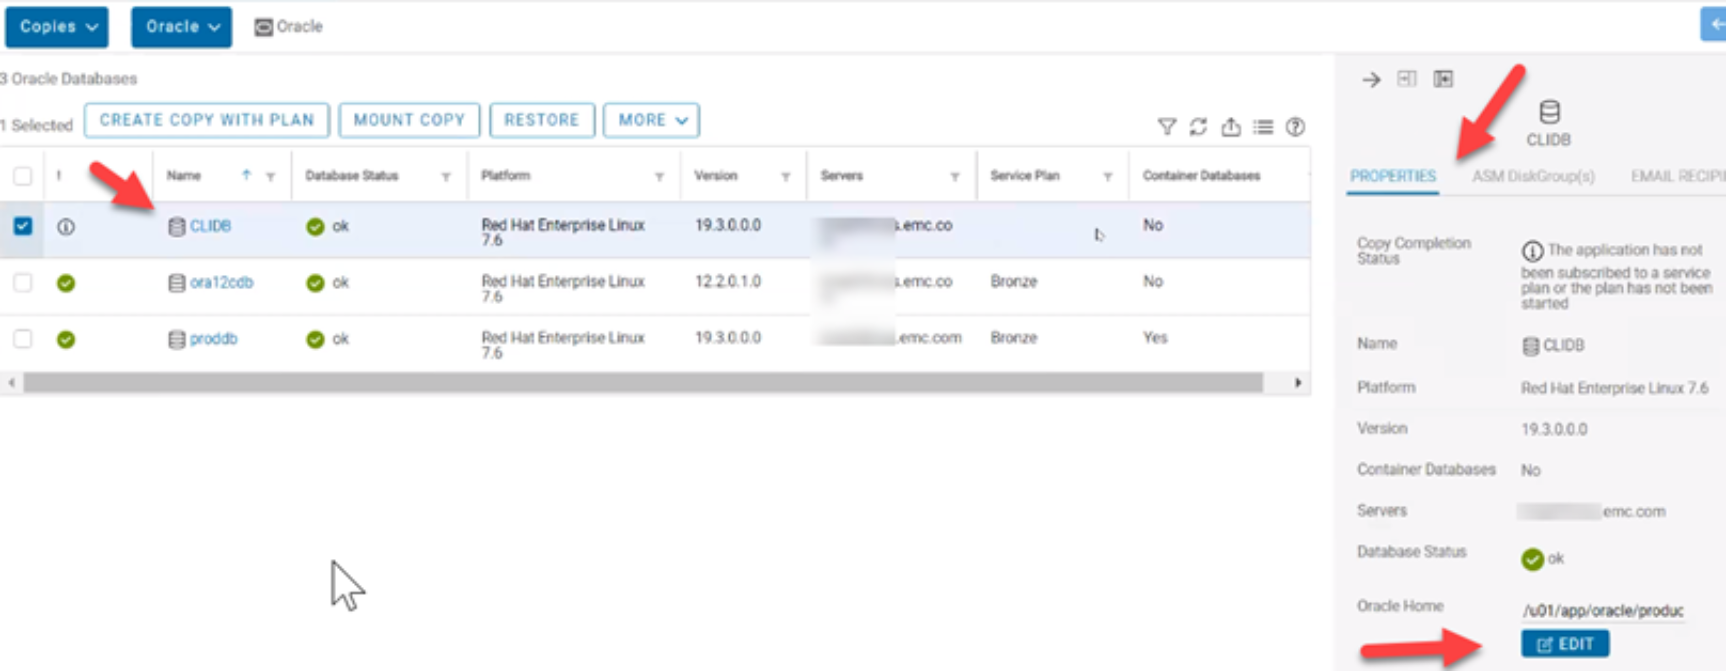
Figure 20. Finished
To conclude this feature, by selecting the host server that the database is running on and entering the SID and home directory location, AppSync can discover the databases without relying on the oratab file. If you click the b button, you can modify the Oracle home directory to update it.
Note the details show that the database was not discovered automatically on the pane on the right side of the above figure. You can remove manually added databases using the remove option from the More dropdown box. This action will not work if the database is subscribed to a service plan. Auto-discovered Oracle databases are automatically removed if the entries are deleted from the oratab file, the copies are expired, and the associated databases are unsubscribed from the service plan.
AppSync versions 4.3 and later offer users more granular recovery so they can recover to a specific point in time if wanted. The easiest way to explain this feature is to use the following example: A user wants to back up their database once a day at 3:00 am. After two days, they have two copies. One copy is for July 3, and one copy is for July 4, both at 3: 00 am. The customer wants to recover the database to July 3 at 6: 00 pm. Neither AppSync copy would help in this scenario in previous versions.
With AppSync versions 4.3 and later, you can mount the data volume from July 3 at 3:00 am and then mount the archive logs from July 4. Once the volumes are mounted the user replays, the archive logs the data files to bring the database forward to 6:00 pm on July 3. This is a manual process of recovery on the host and will only work with on-demand mounts, this will not work with a service plan automatic mount. This feature also requires that the data, archive, and redo logs do not share any underlying storage.
The following figure shows that AppSync enables mounting the data logs if that is the only required step. The selectable check boxes allow the user to decide what filesystems they want to mount. This feature is useful for filesystem-based databases, the mount on a standalone server option would not be beneficial with Oracle ASM and disk groups, because only the storage devices would be mounted by AppSync and not the disk groups.
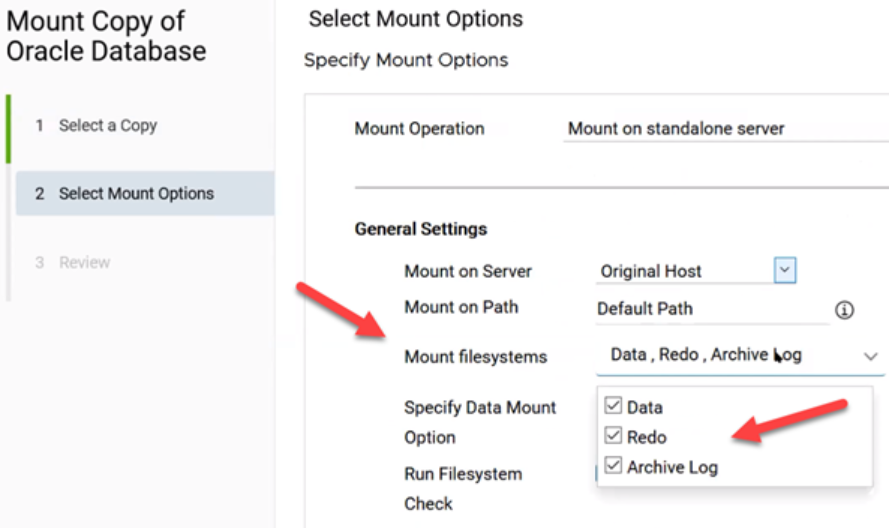
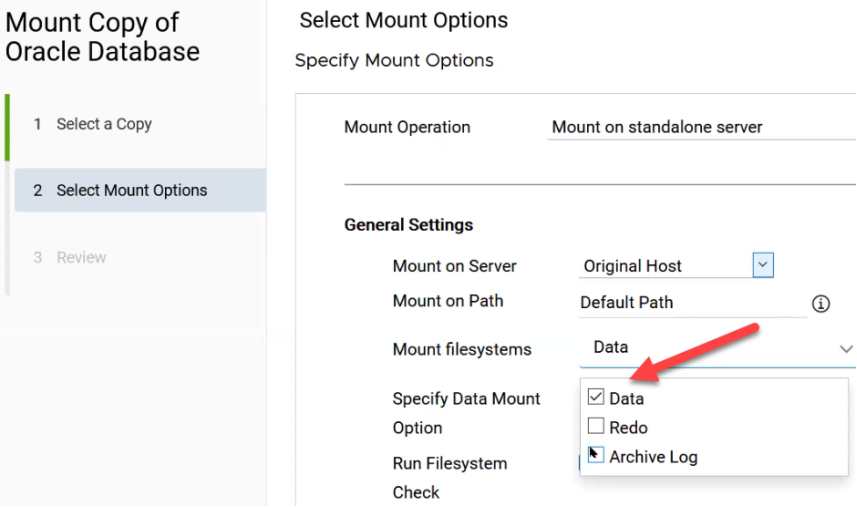
Figure 21. Oracle granular recovery
AppSync versions 4.3 and later can Restore a copy, excluding the redo logs as shown in the following figure. Once the copy has been mounted by AppSync, the user would manually start the Oracle database with SQL*PLUS as shown in Figure 23. Once the database is started, recovered, and opened, it is ready for use. To omit the redo logs from the restore, they must be on separate disk, or the option will not be available as shown in the following figure.
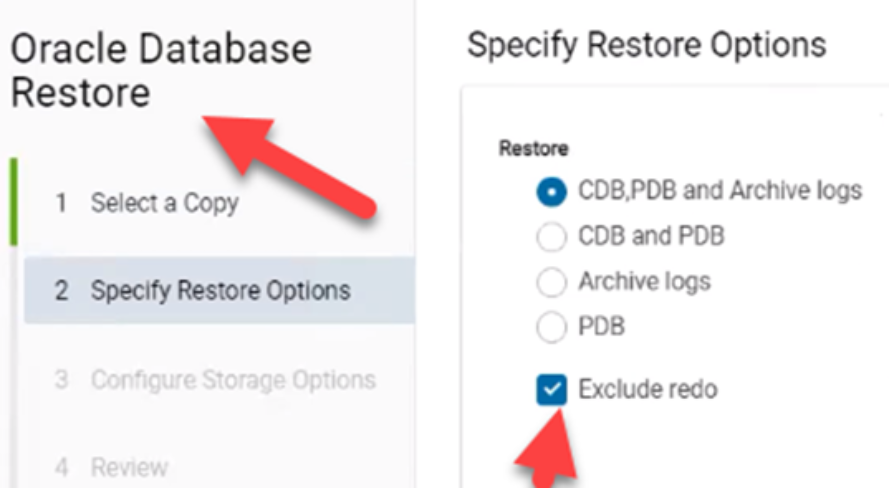
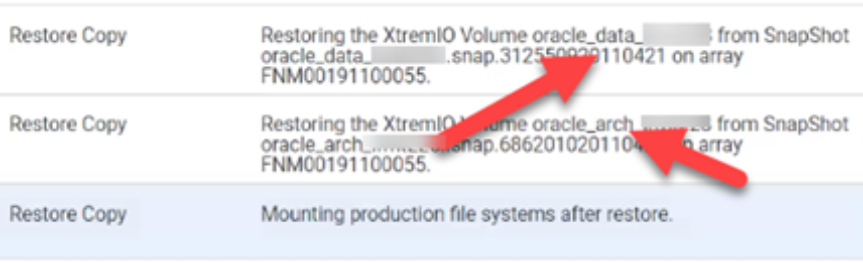
Figure 22. Oracle restore
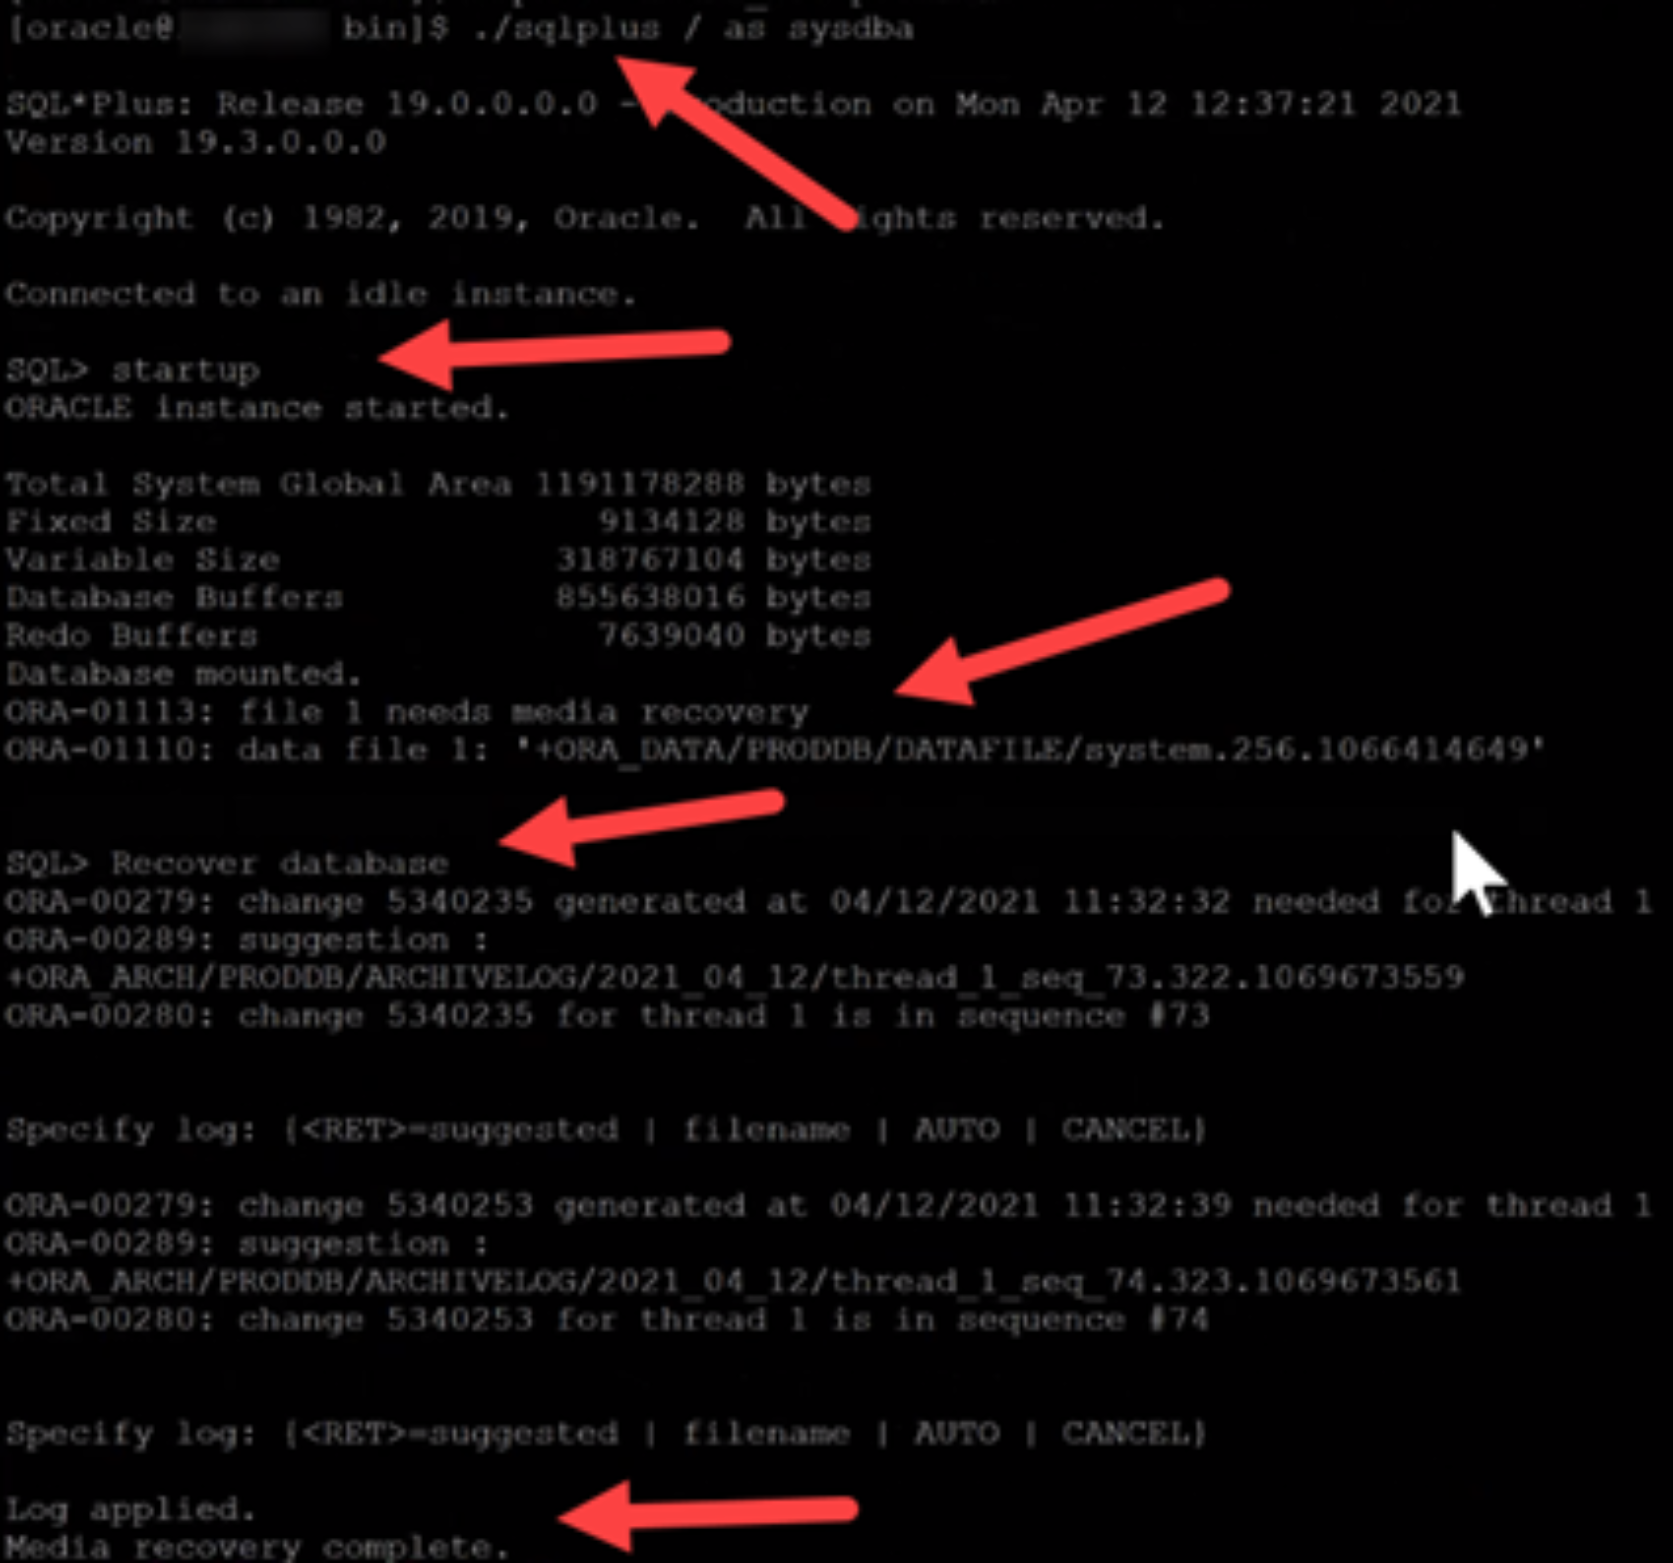
Figure 23. SQL*PLUS
AppSync versions 4.4 and later allow end users to take frequent independent archive log backups, for Oracle databases. This can help reduce the RPO or recovery point objective. In Figure 24, when you create the copy part of the service plan wizard, you check the box enable archive log backup and set the options below. These options include scheduling the archive log backup to run immediately after the database backup or on a schedule, such as every four hours as shown in the example. You also choose the minimum retention period, which in this example is 7, the default value. This means that AppSync will keep the archive log for 7 days, and this can be adjusted up or down to meet user’s needs. This feature is available for hot backup and no-hot backup, Oracle types.
As shown in Figure 26, in the Oracle copies menu, you now have a new Archive Log Backups tab, outlined in green. This option allows you to click the Create Archive Log Backup Using Plan button, also in a green box, to start the wizard and create the copy.
Once this process has completed, you can create further on-demand copies from either this wizard or from the service plan page. Selecting the option to Run Archive Log Backups from the More menu, shown in Figure 27. Figure 26 also shows how you can select an archive log copy, and expire, mount, or unmount it.
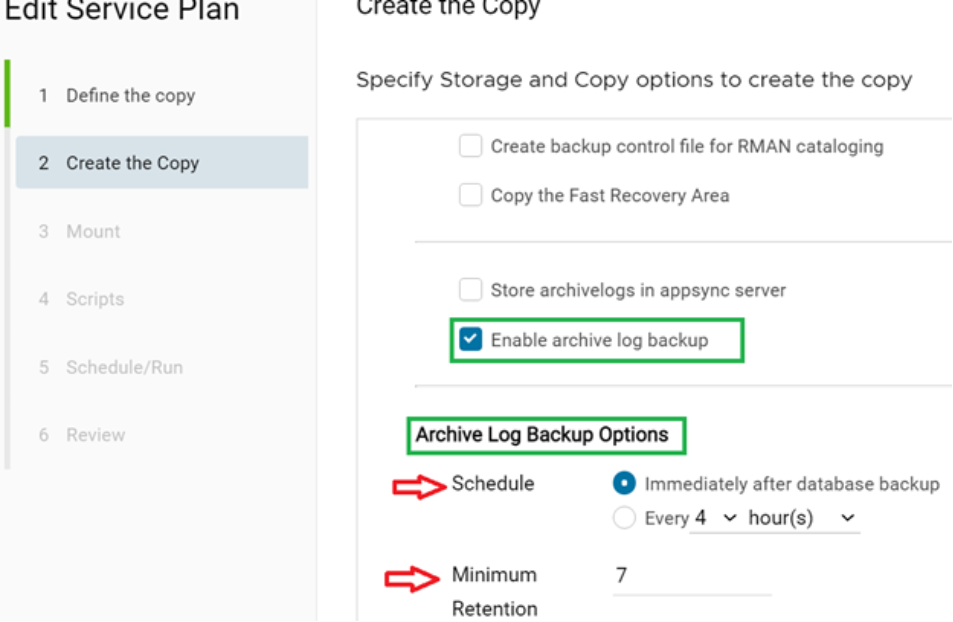
Figure 24. Archive log
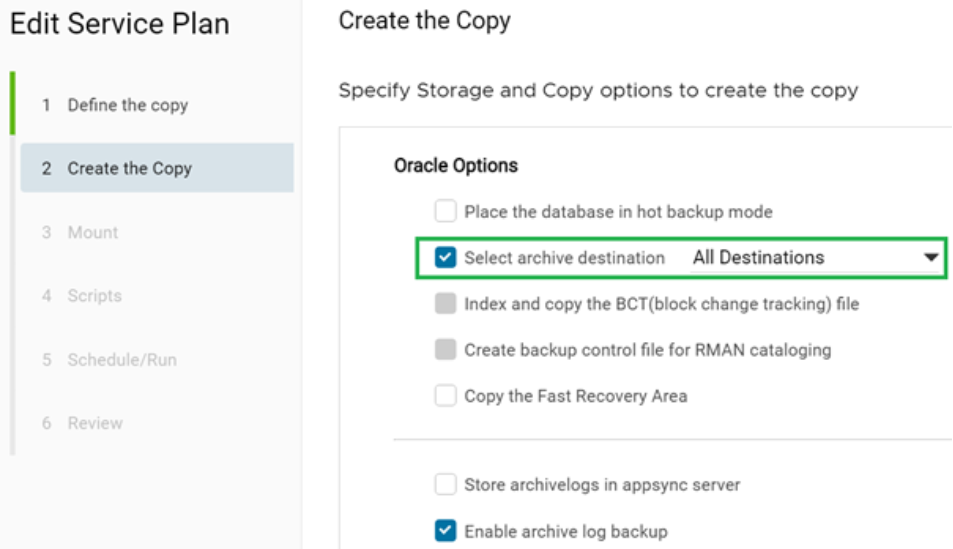
Figure 25. Protect archive
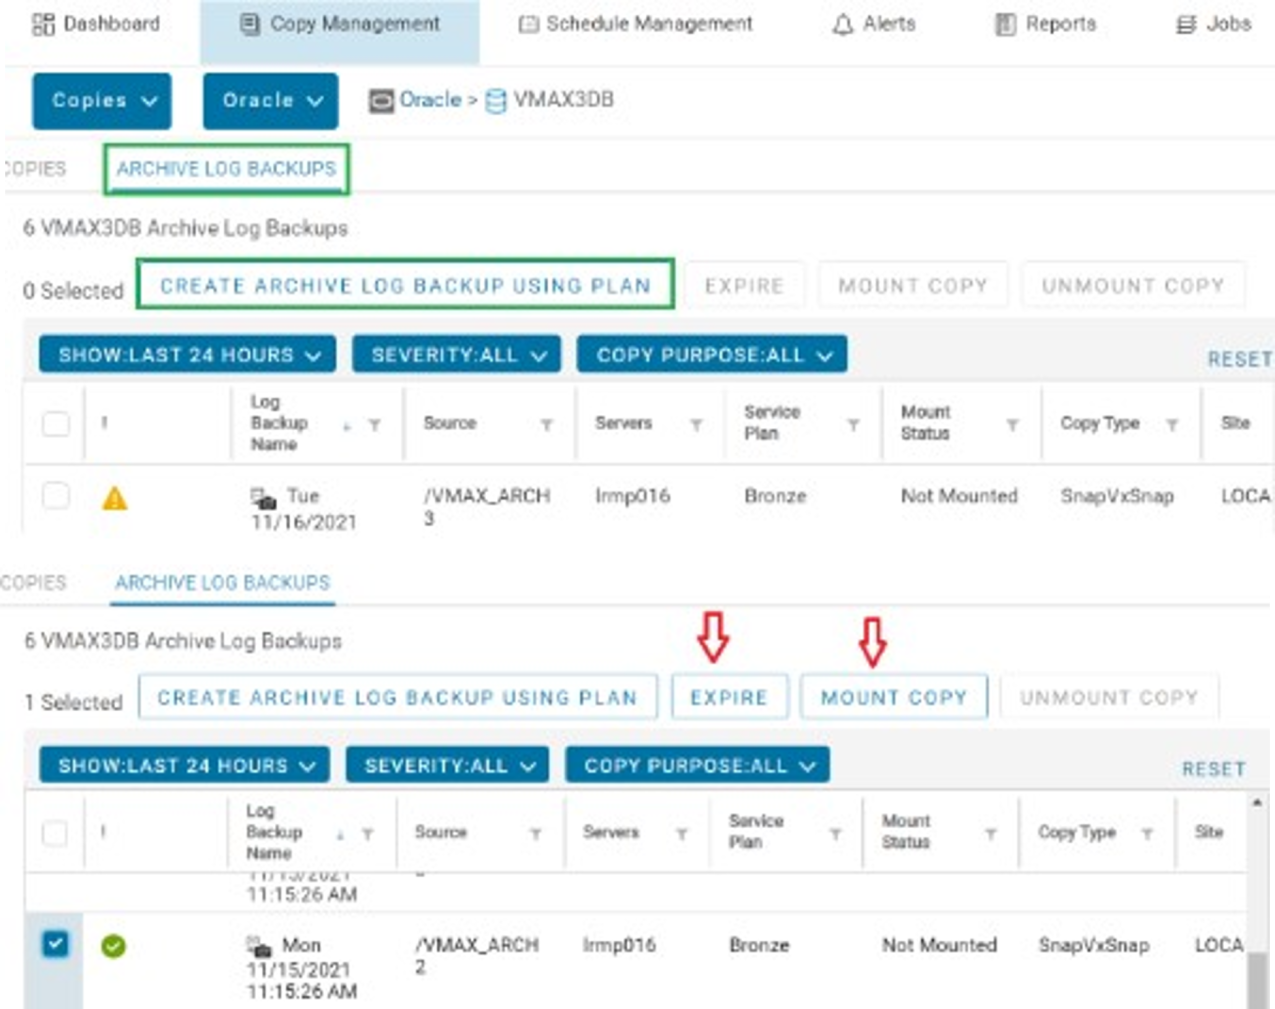
Figure 26. Copies menu

Figure 27. Archive log backups
AppSync versions 4.4 and later allow you to take Oracle archive log backups independent of the database copy. For example, you could take an Oracle database copy once a day, and take incremental archive log copies every four hours. This configuration allows you to bring the database copy to any point in time by first mounting the data volume from the full copy and then mounting the chosen archive log copy. This action results in getting the chosen point in time, with as much granularity as possible, for the recovery. AppSync now also shows the options for From SCN, To SCN, and From Timestamp to To Timestamp. This denotes the availability of archive logs in the volume. The system change number (SCN) stands is the Oracle internal clock. When you select an Oracle copy in AppSync, from the created copies page, you can view the detailed properties pane on the right side of the UI. The following figure shows an example of this feature.
In another use case, if you decide to use crash-consistent copies instead of putting the Oracle database into hot backup mode, the archive log will not be protected by AppSync by default. AppSync versions 4.4 and later allow you to enable the archive log backups along with the crash-consistent copy.
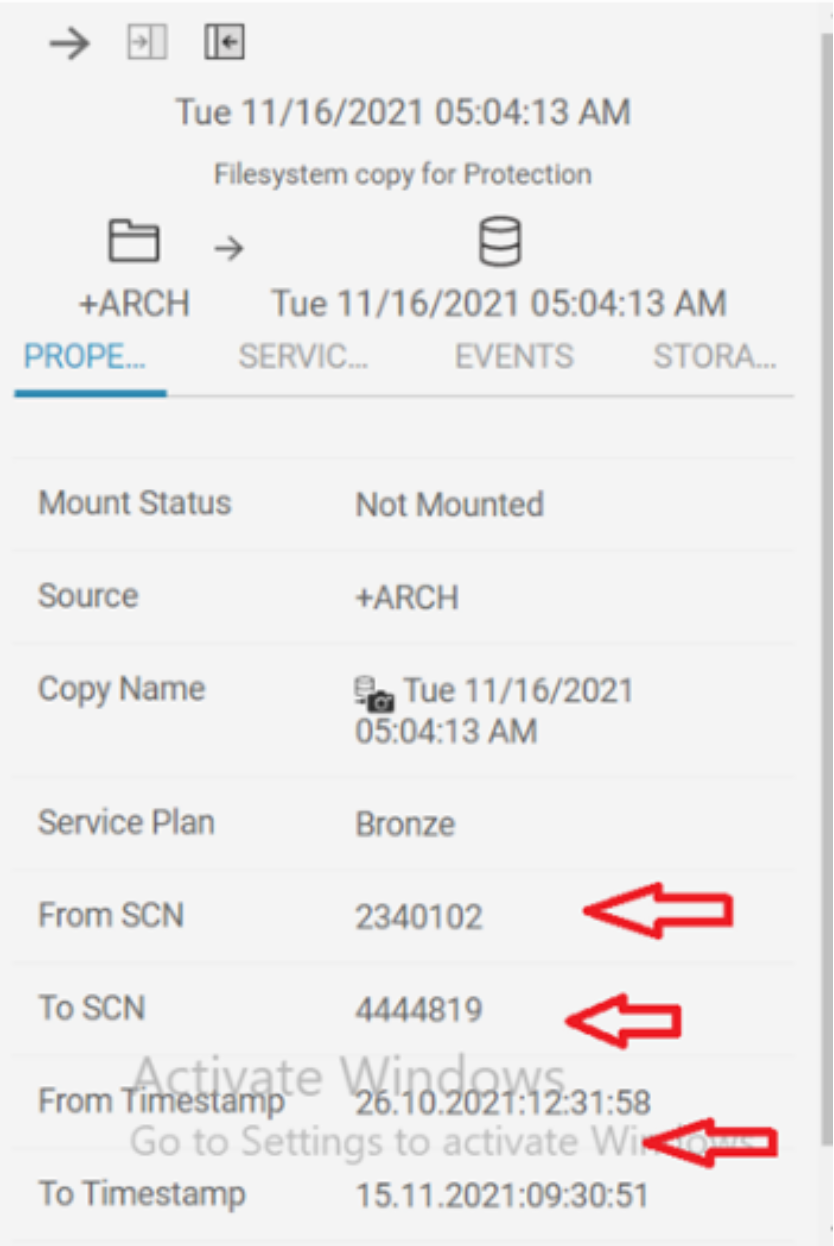
Figure 28. SCN