
Dell AppSync Integration with Microsoft SQL Server
Details of restoring to a primary replica
Details of restoring to a primary replica
-
The following explains the steps that AppSync performs when restoring to a primary replica, and the steps that you should perform after the restore is complete.
While restoring to a primary replica, AppSync performs the following:
- Suspends data movement for all replicas
- Removes the database and all its replicas from the availability group
- If the replica being restored is a secondary replica and option Failover the Availability Group if the current role is Secondary, is selected, AppSync will failover the availability group.
Note: The other database replicas in the availability group must be healthy, or the restore does not take place.
- Takes the database offline and detaches it.
- Restore the volumes to the recovery state selected from the Restore wizard: RECOVERY, NORECOVERY, or STANDBY. If there are transaction log backups that must be restored, use NORECOVERY or STANDBY.
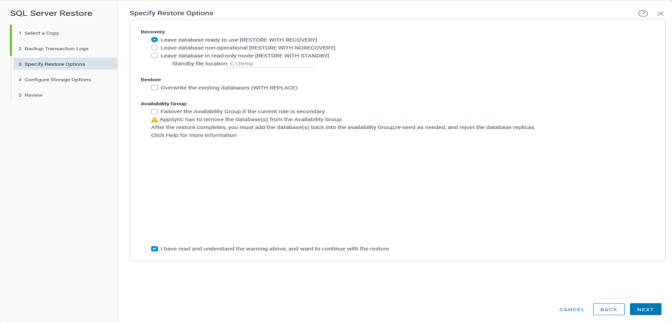
Figure 9. SQL Server restore options
After AppSync recovers the database, manually perform the following steps:
- Restore any log backups that are required, and recover the database.
- To re-seed secondary databases using the Add Database to Availability Group wizard full synchronization option, delete the secondary databases.

Figure 10. SQL Management studio restoring
- Add the primary database back into the availability group using the SQL Server Management Studio.
- Connect to the server instance hosting the primary replica.
- Expand the Always On High Availability node and the Availability Groups node.
- Right-click the availability group and select Add Database to launch the Add Database to Availability Group wizard.
- Select the database on the Select Databases page. If a database does not meet all the prerequisites, the Status hyperlink provides a brief explanation of why the database is not eligible. For more information, click the hyperlink.
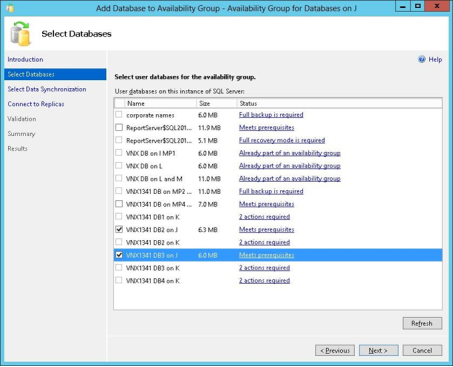
Figure 11. Select databases for availability group
- Select the data synchronization preference on the Select Initial Data Synchronization page.
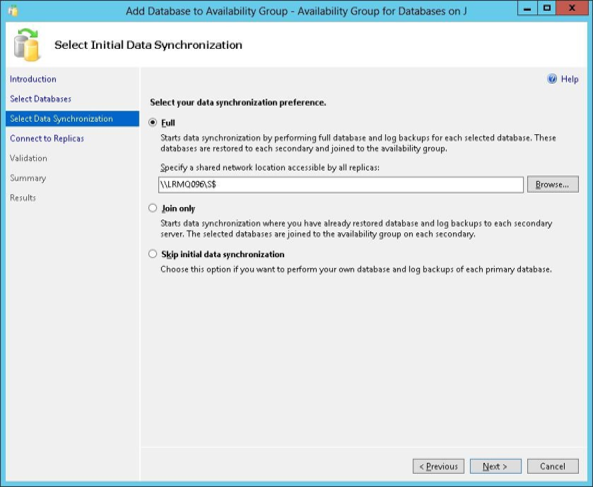
Figure 12. Select data synchronization
- Connect to the secondary SQL Server instances on the next page and click Next.
- If the validation is successful, click Next, else correct the problem, and click Re-run Validation.
- Review the summary and click Finish.
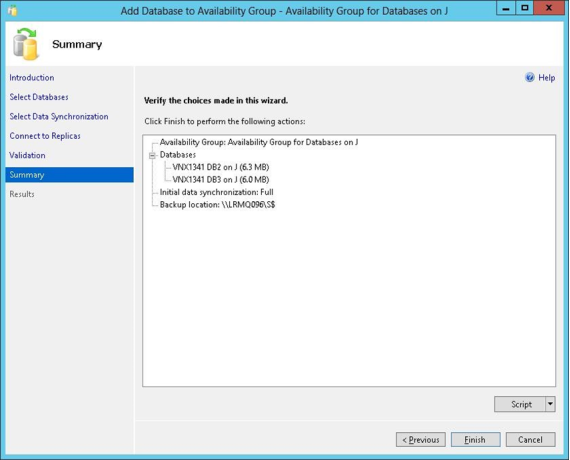
Figure 13. Add Database to Availability Group summary
- If selecting the Full or Join only synchronization options, the primary and secondary databases should be added again to the availability group. If selecting to Skip initial data synchronization, see Books Online for SQL Server for details on how to start data movement to the secondary database.
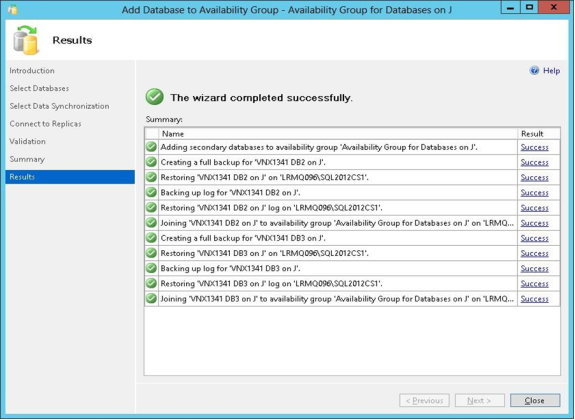
Figure 14. Add Database to Availability Group results