
Dell APEX Block Storage for Azure: SQL Server 2022 Multi-Subnet Failover Clustering Deployment and Resiliency
None
None
-
This section describes the installation of SQL Server 2022 failover clustered instance, which is integrated with Windows Server Failover Cluster. The installation process is run on the first node of cluster SQLNODE-01.
- Run setup.exe from the SQL Server 2022 installation media to launch SQL Server Installation Center. Click the Installation link on the bottom left side.
- Click the New SQL Server failover cluster installation link. This runs the SQL Server 2022 Setup wizard as shown in the following figure:
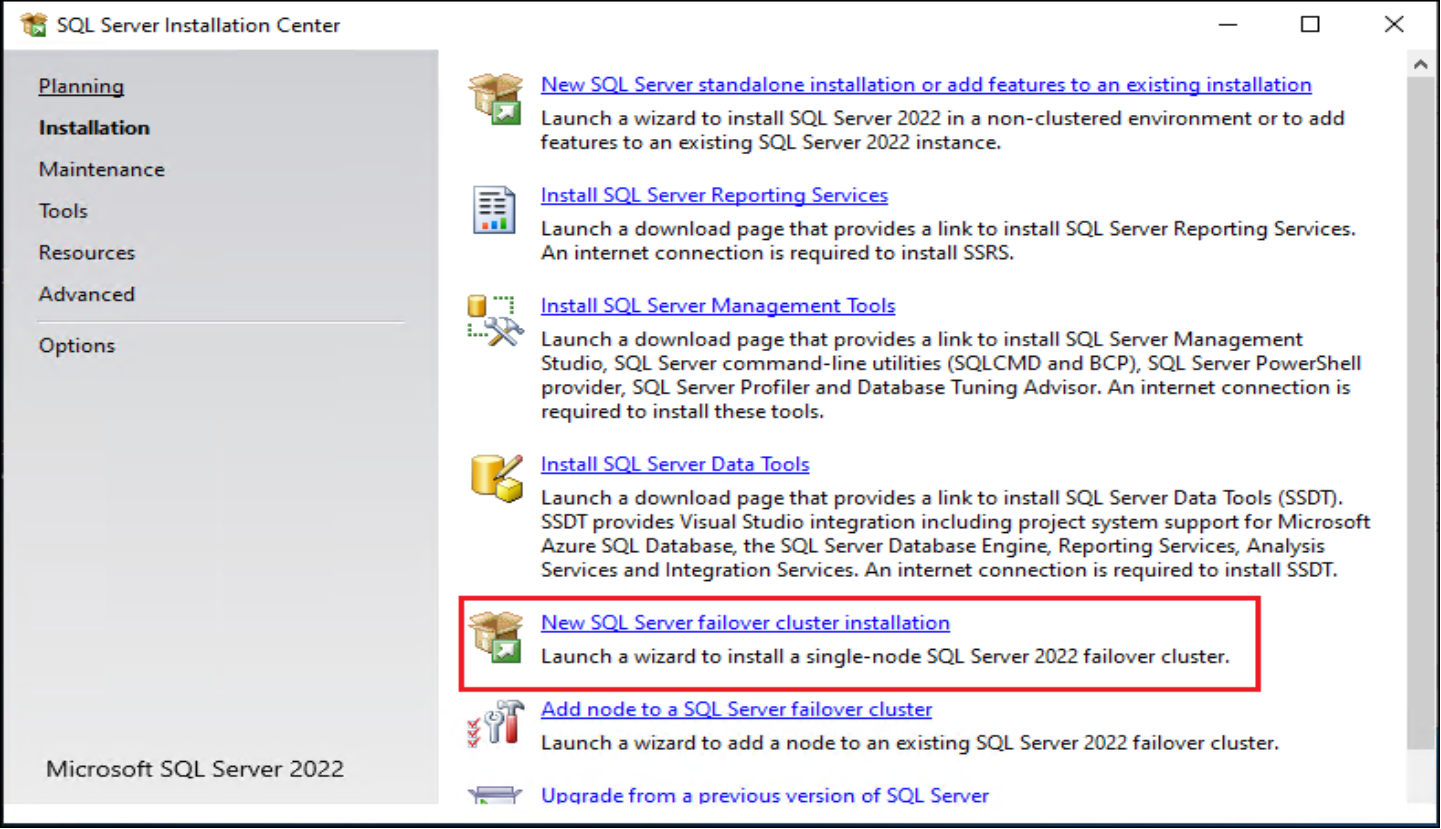
Figure 23. New SQL Server installation
- In the Product Key dialog box, enter the product key that came with your installation media and click Next.
- In the License Terms dialog box, go through the license details and click the I accept the license terms check box and click Next.
- In the Global Rules dialog box, validate that the checks return successful results and click Next.
- In the Microsoft Update dialog box, click Next. In the Install Failover Cluster Rules dialog box, validate that the checks return successful results. If the checks returned a few warnings, make sure that you fix them before proceeding with the installation. Click Next.
- In the Setup Role dialog box, select the SQL Server Feature Installation option and click Next.
- In the Feature Selection dialog box, select the following component: Database Engine Services and Click Next as shown in the following figure:
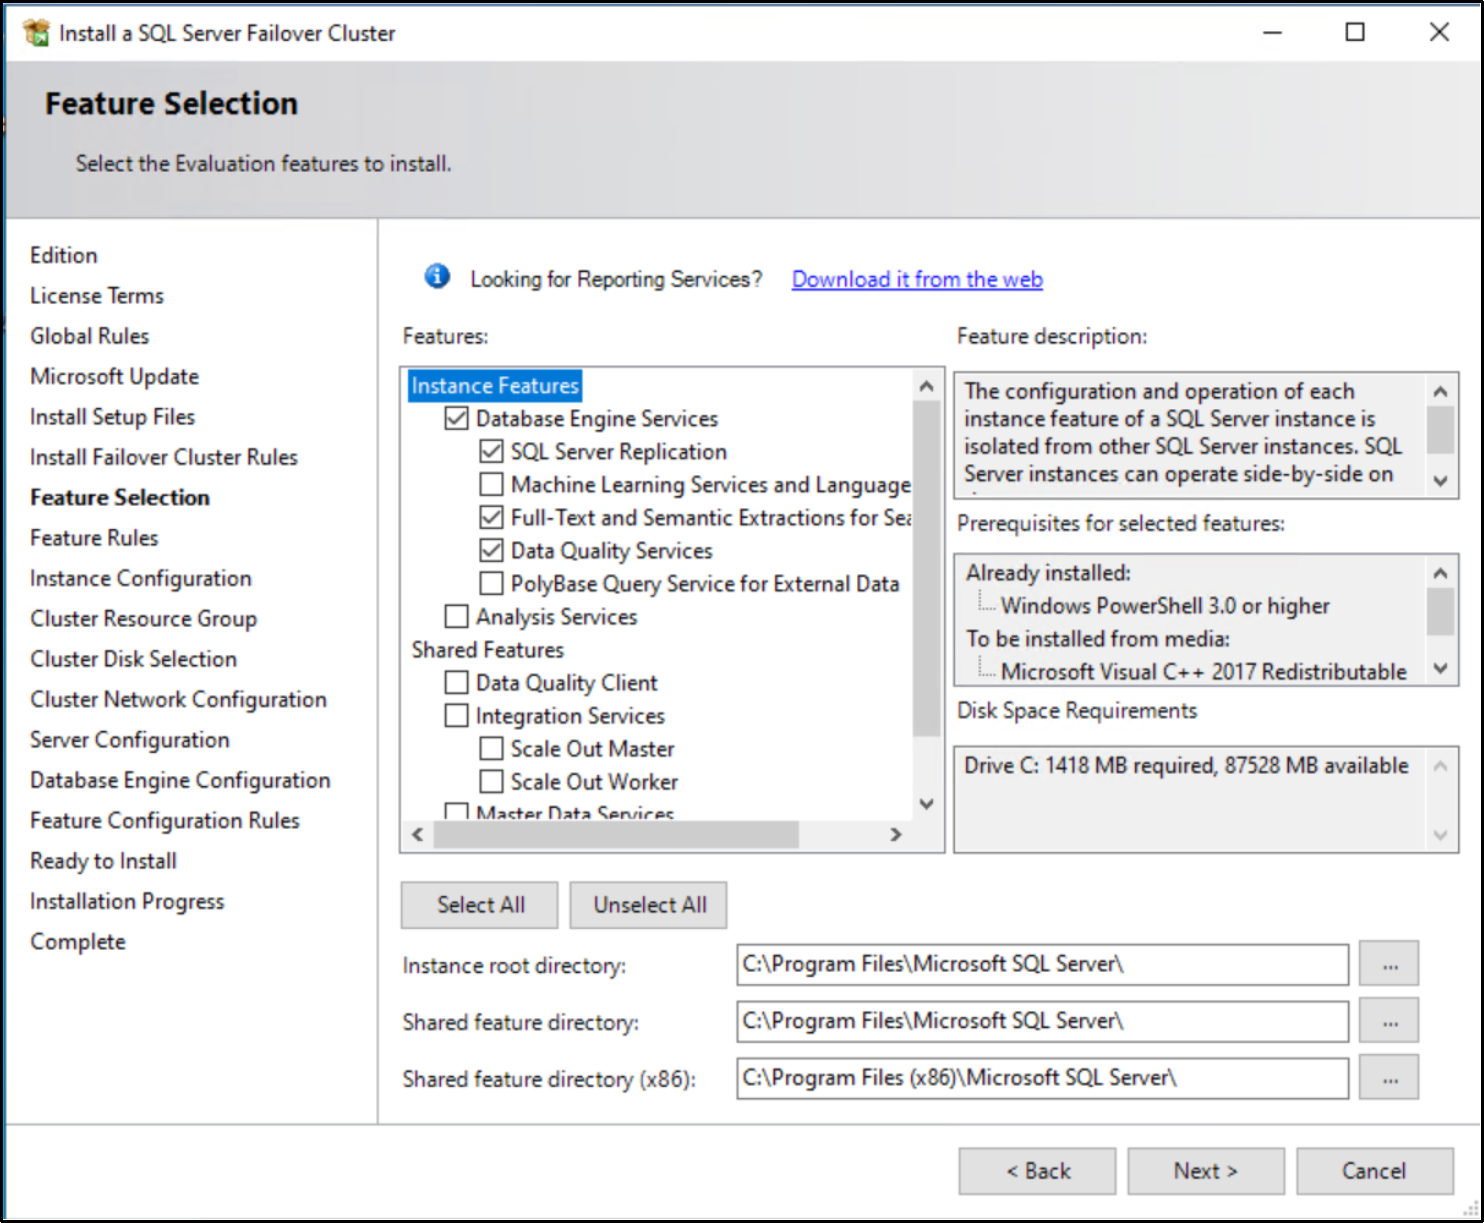
Figure 24. Selecting the features
- In the Feature Rules dialog box, verify that all the rules have passed. If the rules returned a few warnings, make sure that you fix them before proceeding with the installation. Click Next.
- In the Instance Configuration dialog box, enter the following parameters and click Next:
- SQL Server Network Name: SQLFCI
- Instance ID: SQLDBFCI
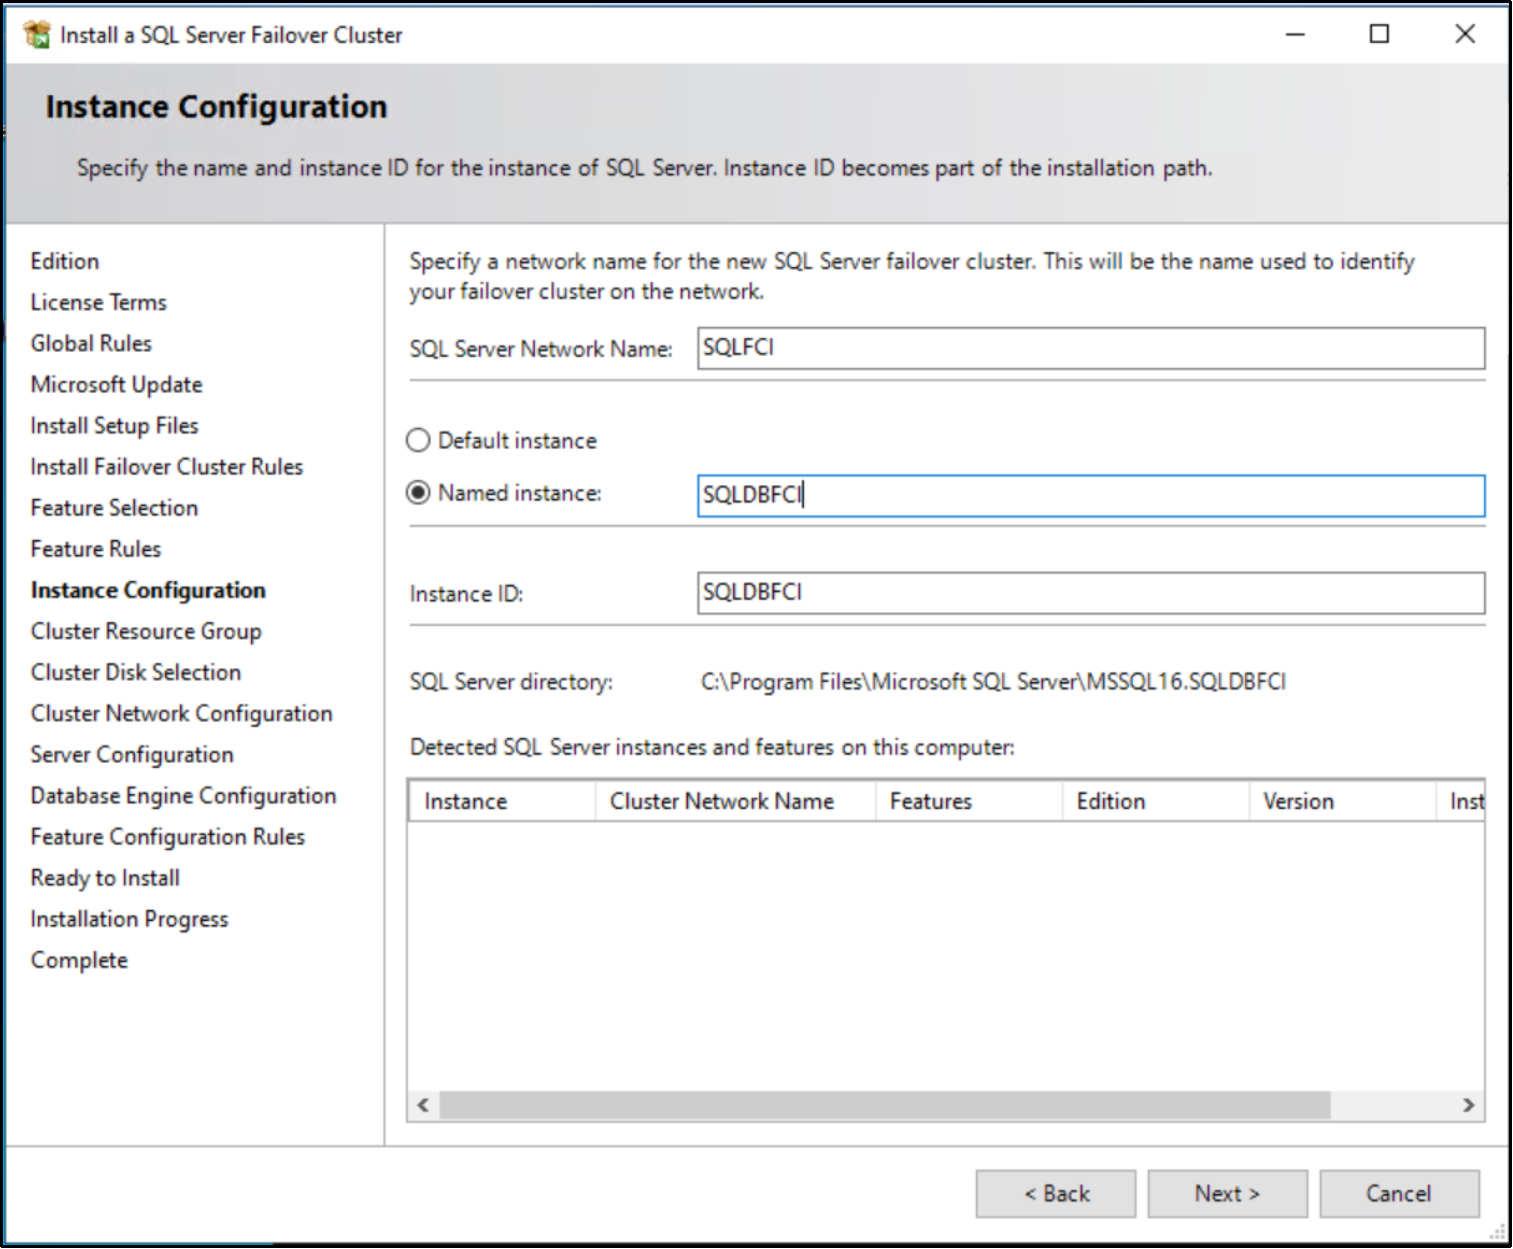
Figure 25. Instance configuration
- In the Cluster Resource Group dialog box, check the resources available on your Windows Server Failover Cluster. This tells you that a new Resource Group will be created on your cluster for the SQL Server instance. To specify the SQL Server CRG name, you can either use the drop-down box to specify an existing group to use or type the name of a new group to create it. Accept all the defaults and click Next as shown in the following figure:
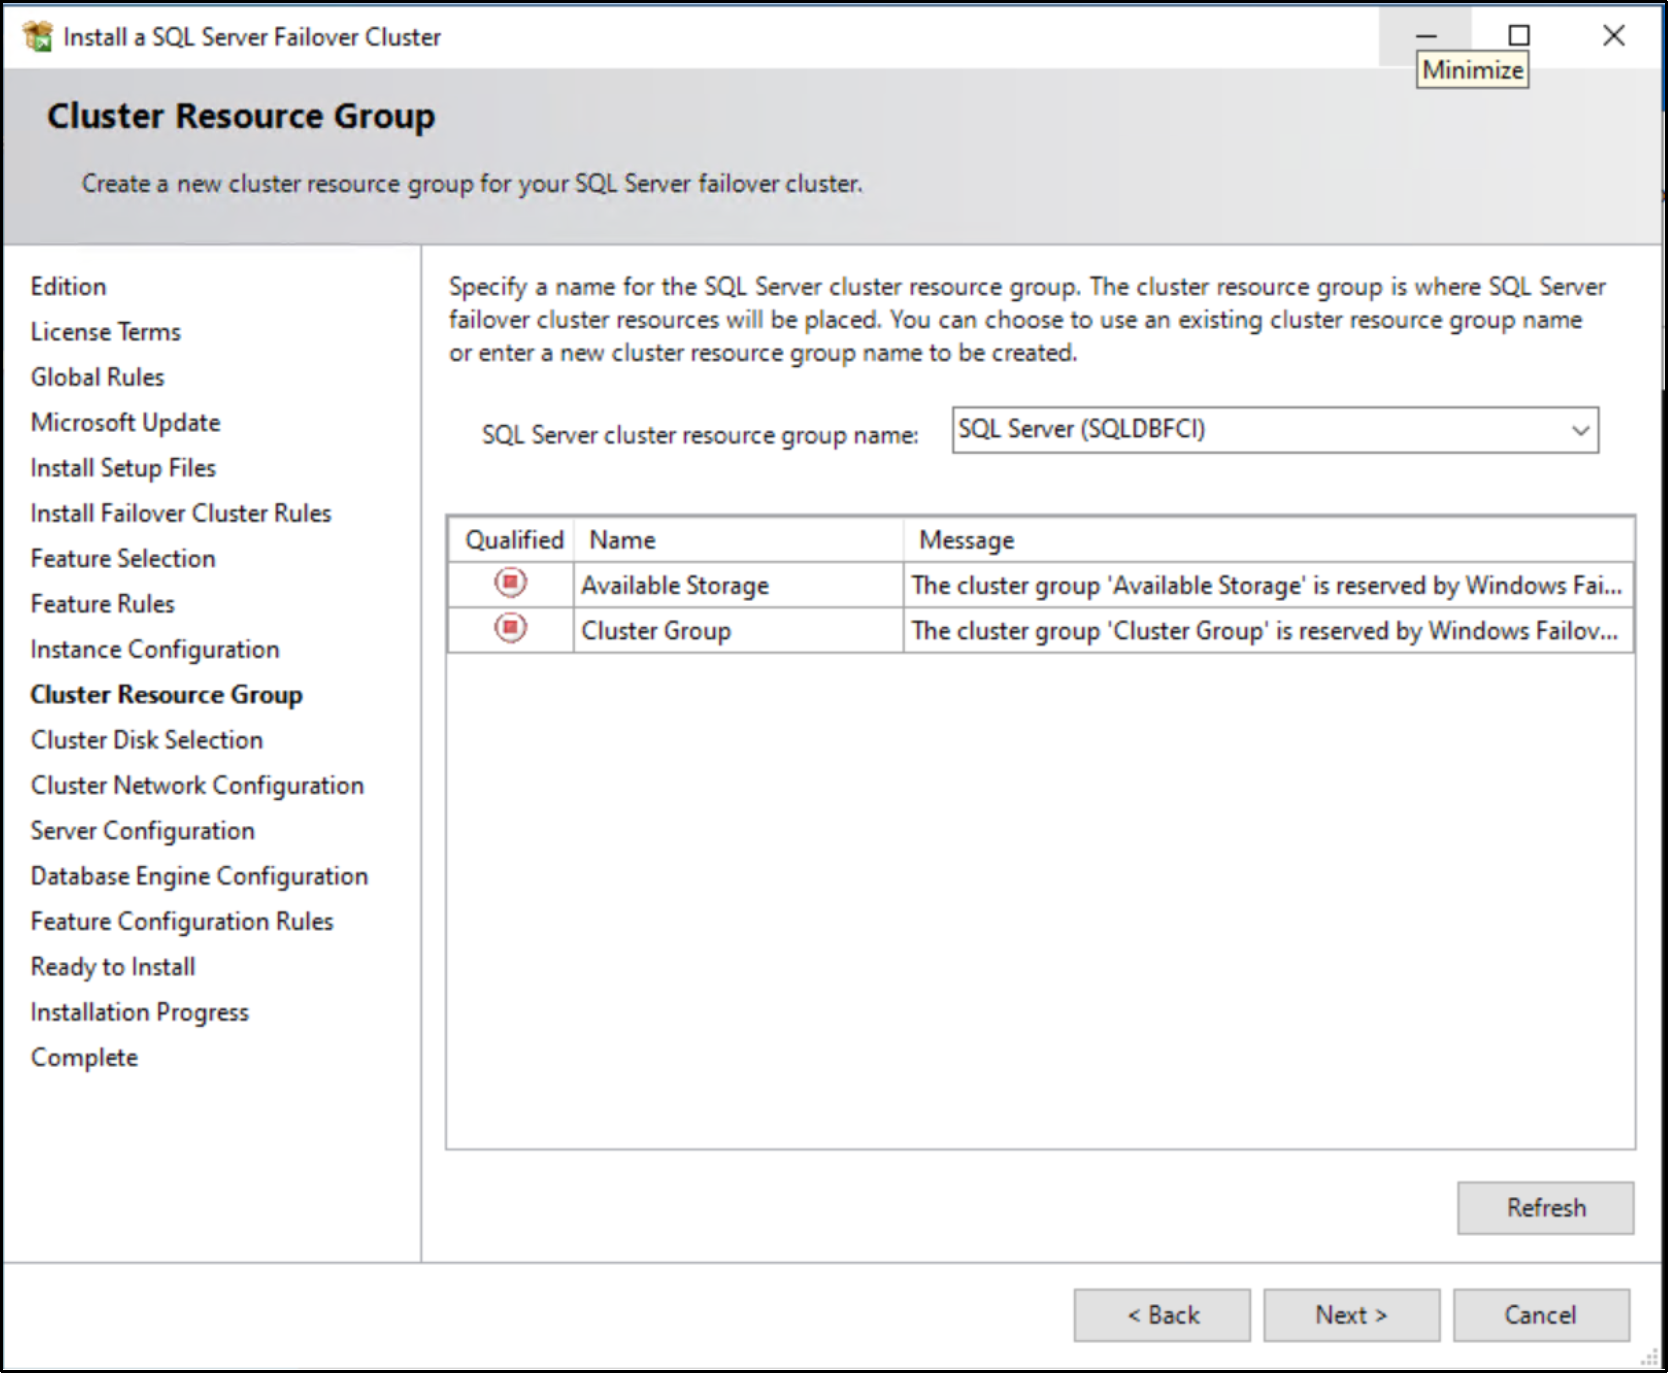
Figure 26. Cluster Resource Group configuration
- In the Cluster Disk Selection dialog box, select the available disks (the shared volumes mapped earlier to the Windows Server Failover Cluster nodes) as shown in the following figure. These disks can be made available to SQL Server 2022 to use. Click Next.
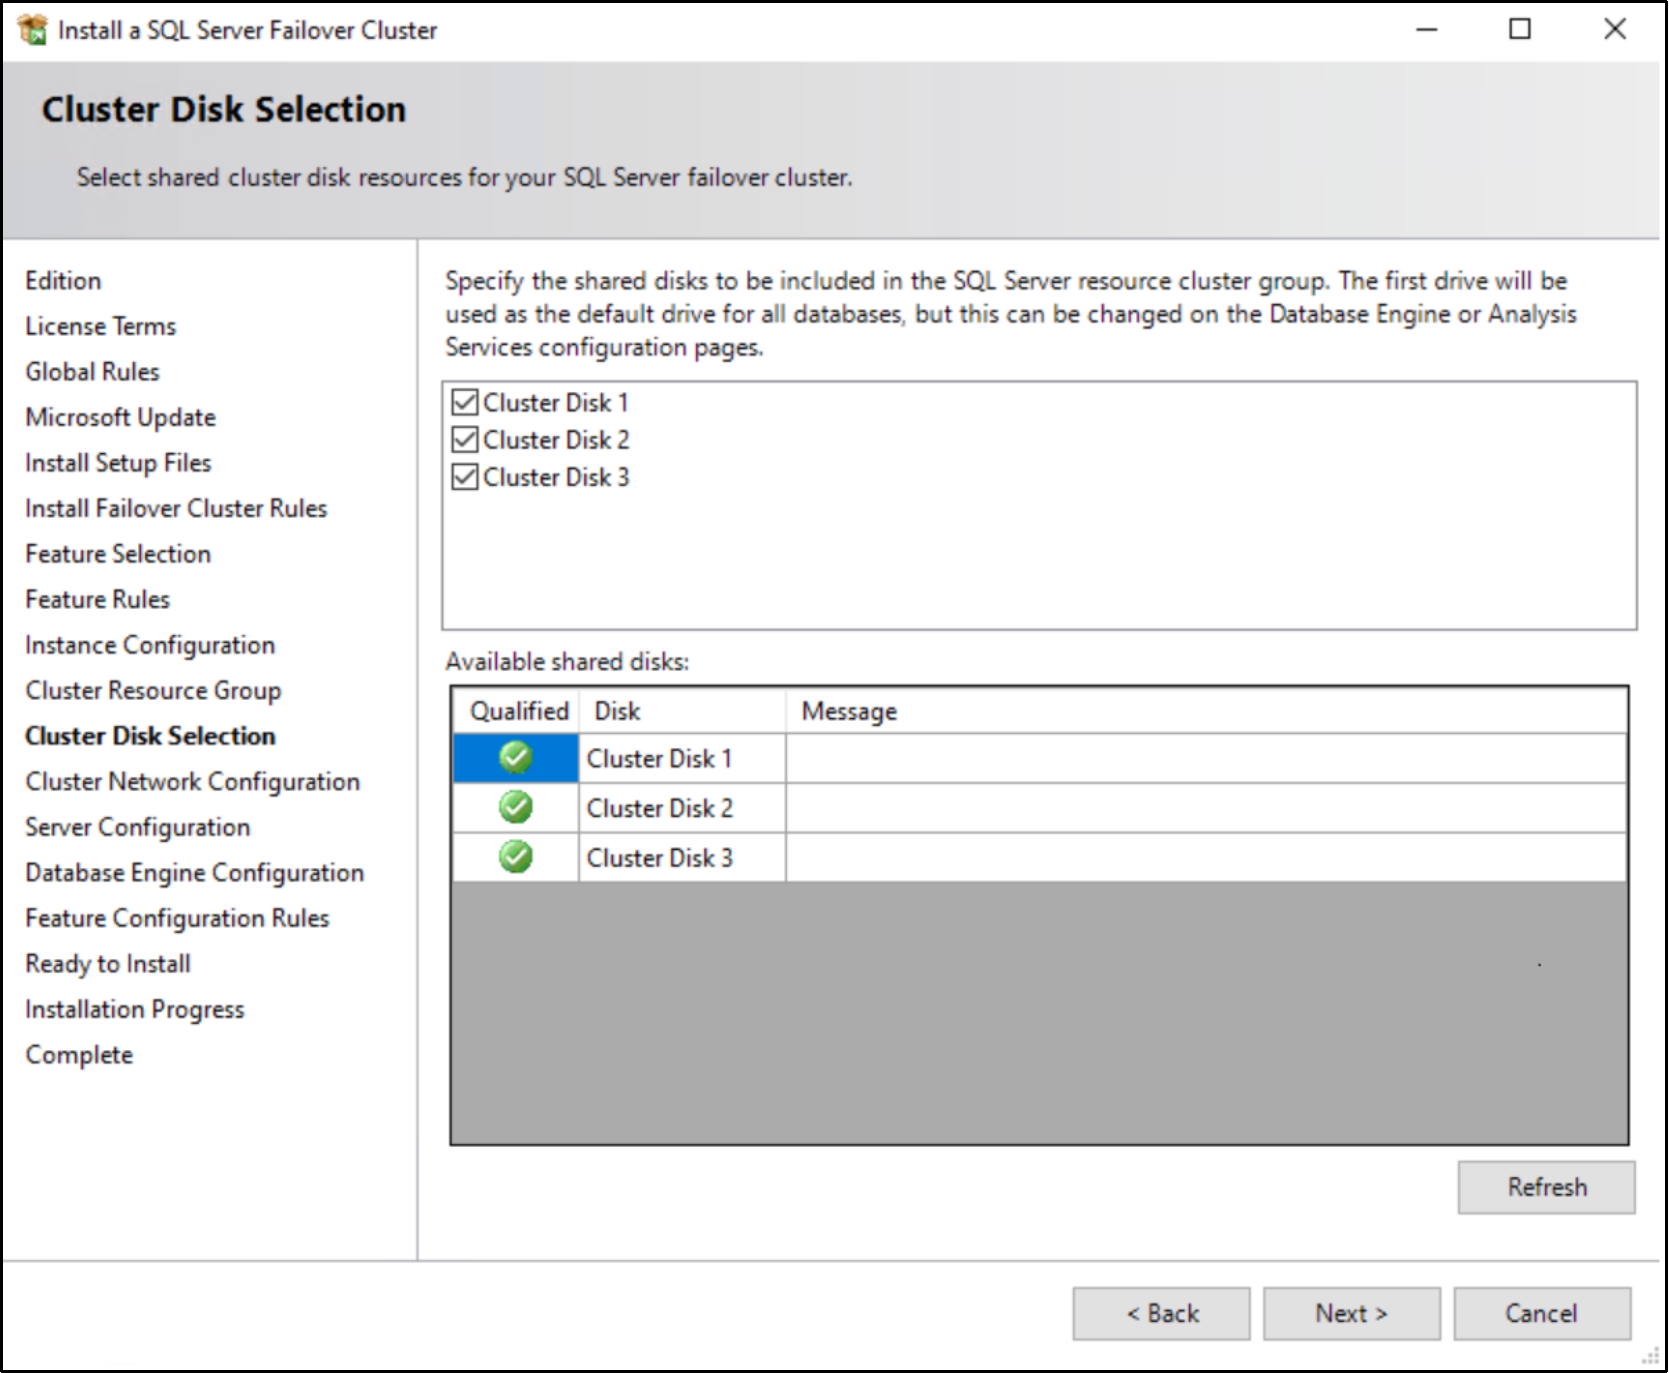
Figure 27. Cluster disk selection
- In the Cluster Network Configuration dialog box, enter the virtual IP address and subnet mask that the SQL Server 2022 cluster will use as shown in the following figure:
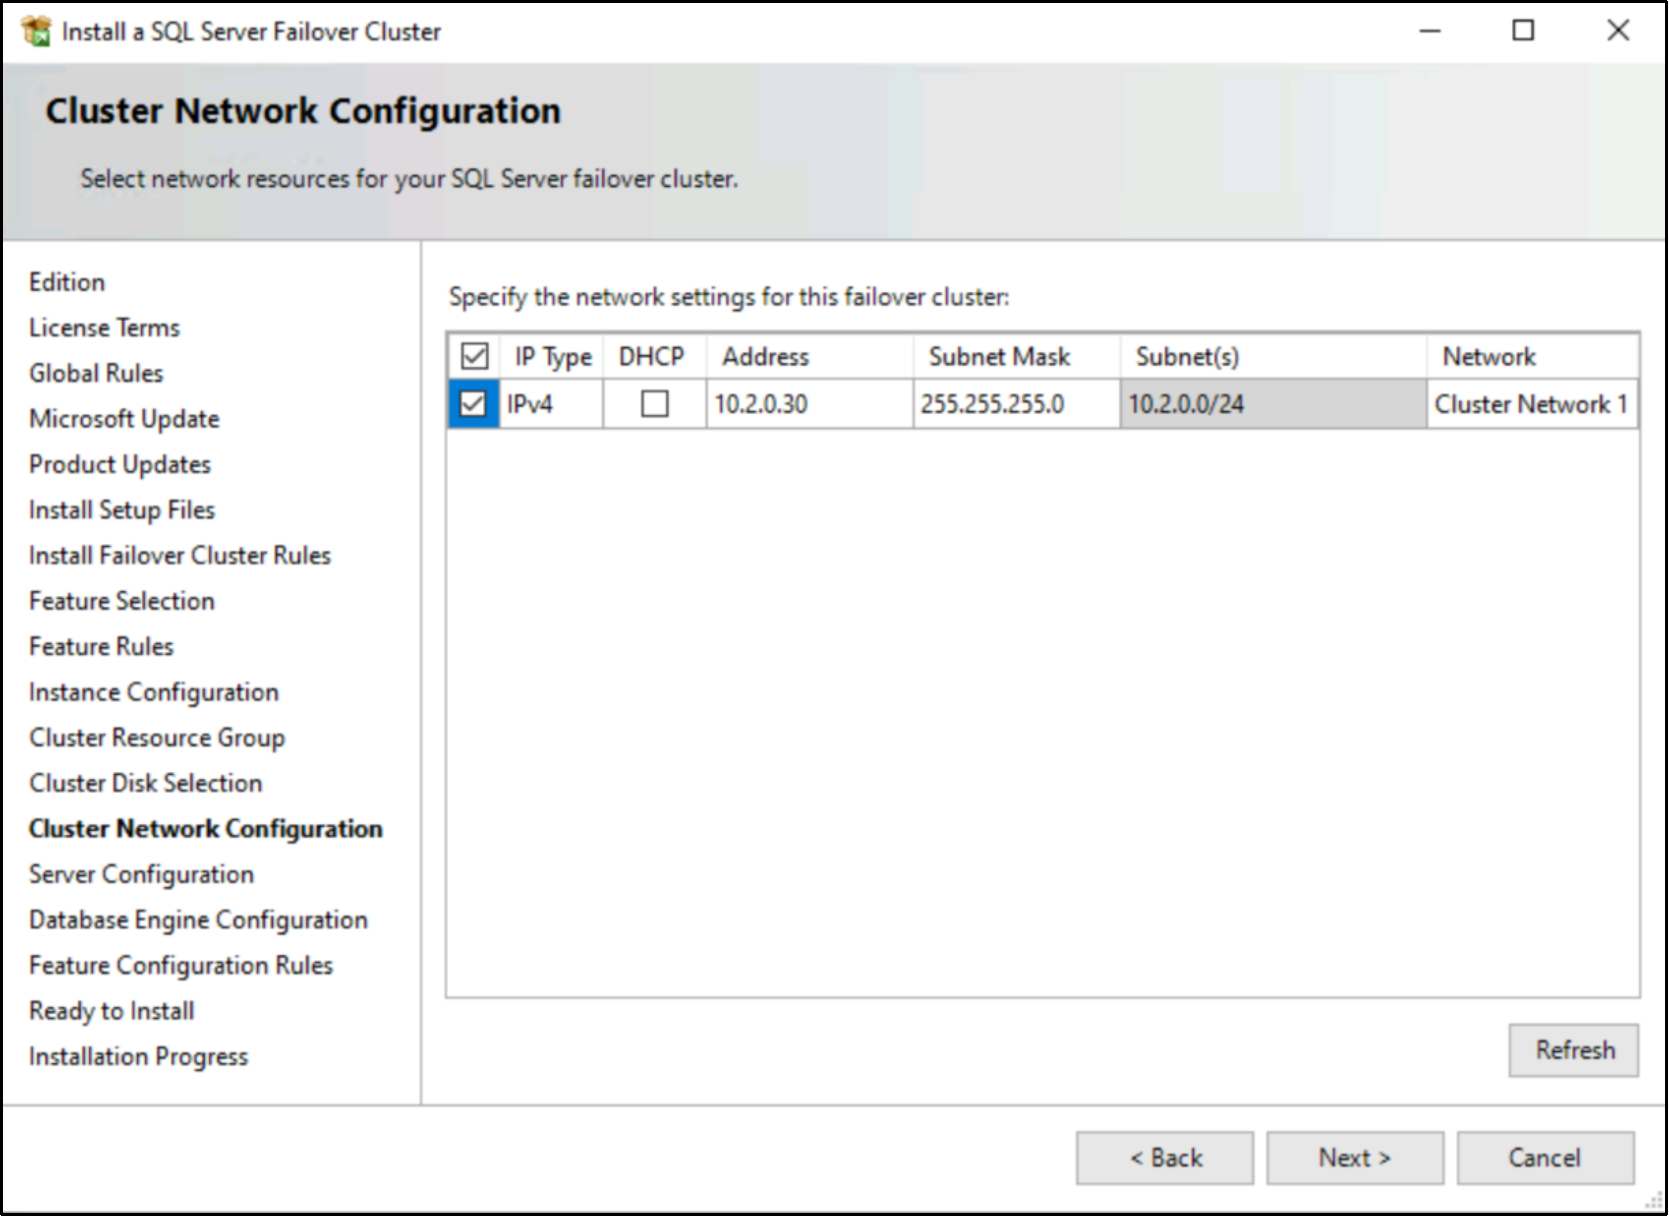
Figure 28. Cluster Network configuration
Select the checkbox beside the IPv4 column as a static IP address will be used and click Next.
- In the Server Configuration dialog box, set the credentials for the SQL Server service accounts in the Service Accounts tab. Make sure that both the SQL Server Agent and SQL Server Database Engine services have a Startup Type of Manual. SQL Full-text Filer Daemon Launcher and SQL Server Browser are build-in accounts that do not require a password. The Windows Server Failover Cluster takes care of stopping and starting the service. Also, set the Collation property for the instance according to your application requirement as shown in the following figure and click Next.
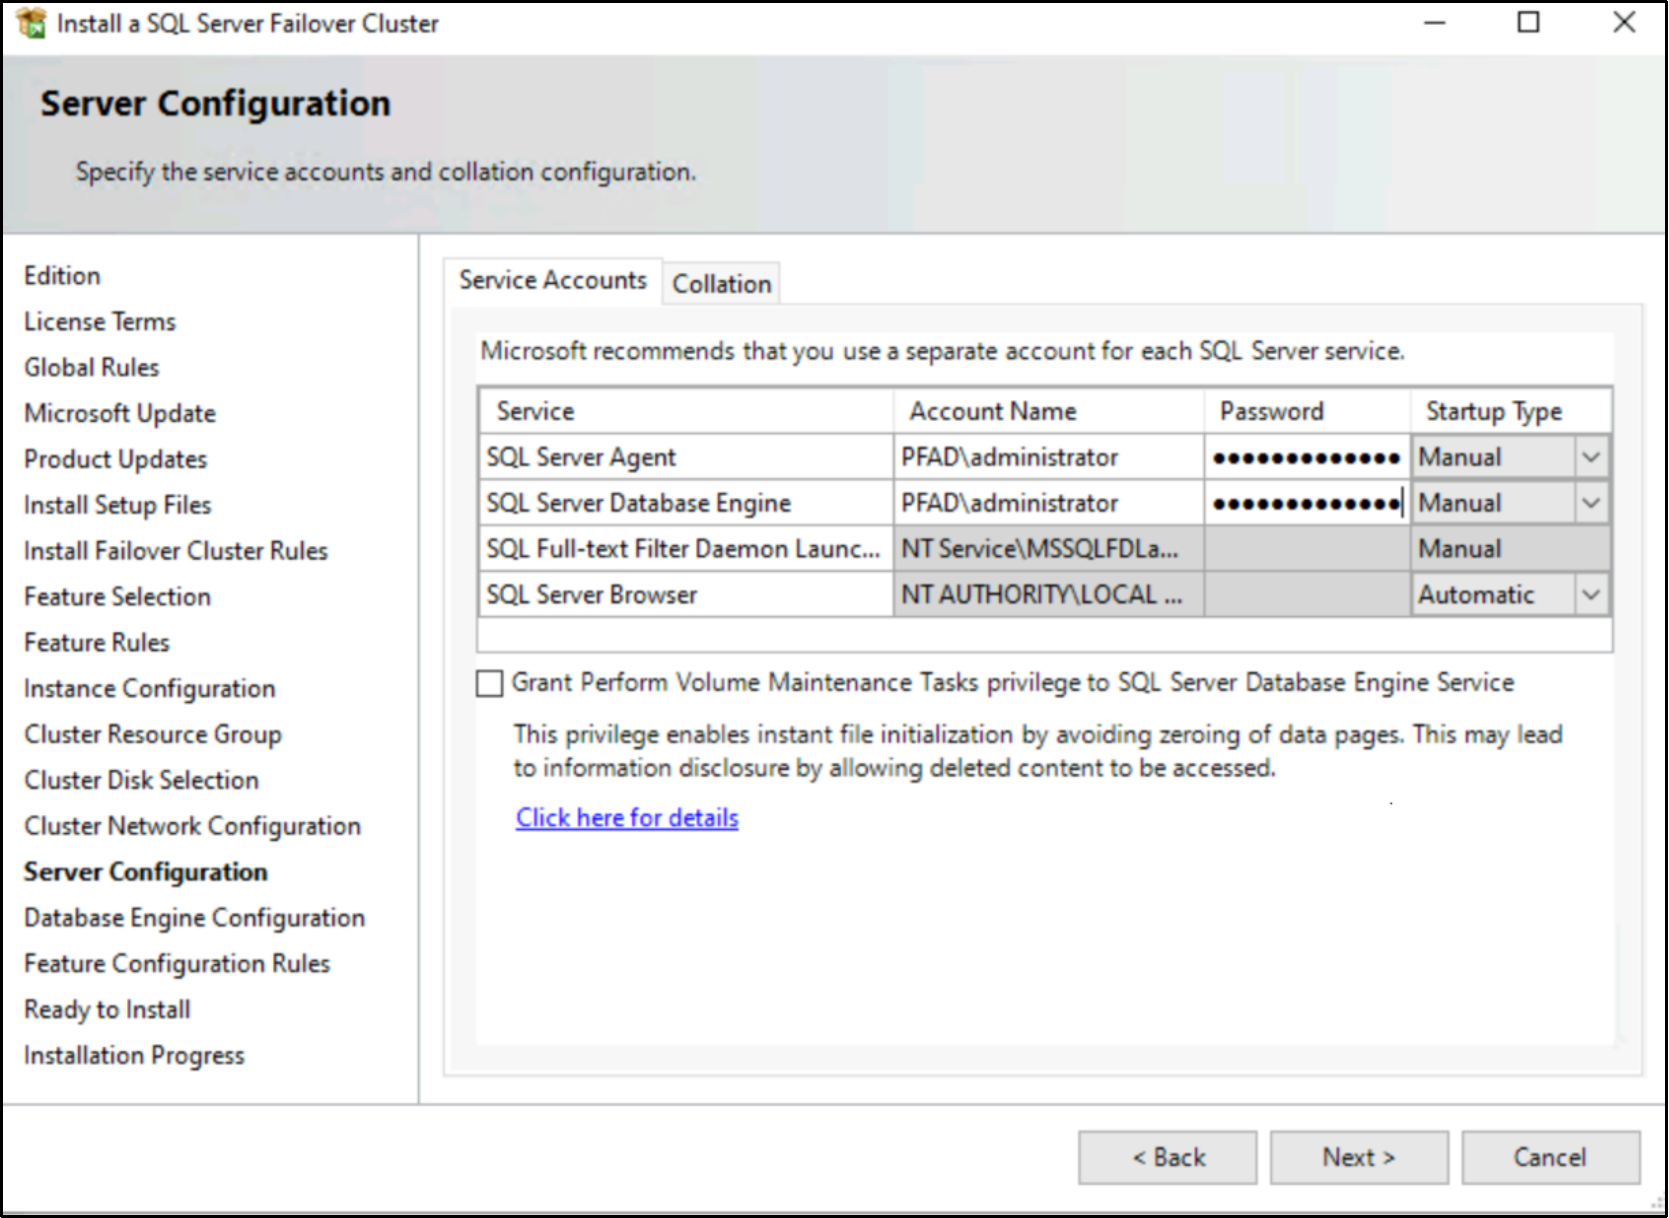
Figure 29. Server configuration
- In the Database Engine Configuration dialog box, select the appropriate Authentication Mode in the Server Authentication tab. If you want to add the currently logged on user to be a part of the SQL Server administrators group, click the Add Current User button. Otherwise, you can add the appropriate domain accounts or security groups.

Figure 30. Database engine configuration
- In the Feature Configuration Rules dialog box click Next.
- In the Ready to Install dialog box, verify that all configurations are correct and click Next as shown in the following figure:

Figure 31. Cluster installation progress window
- Once the installation finishes, in the Complete dialog box, click Close as shown in the following figure:
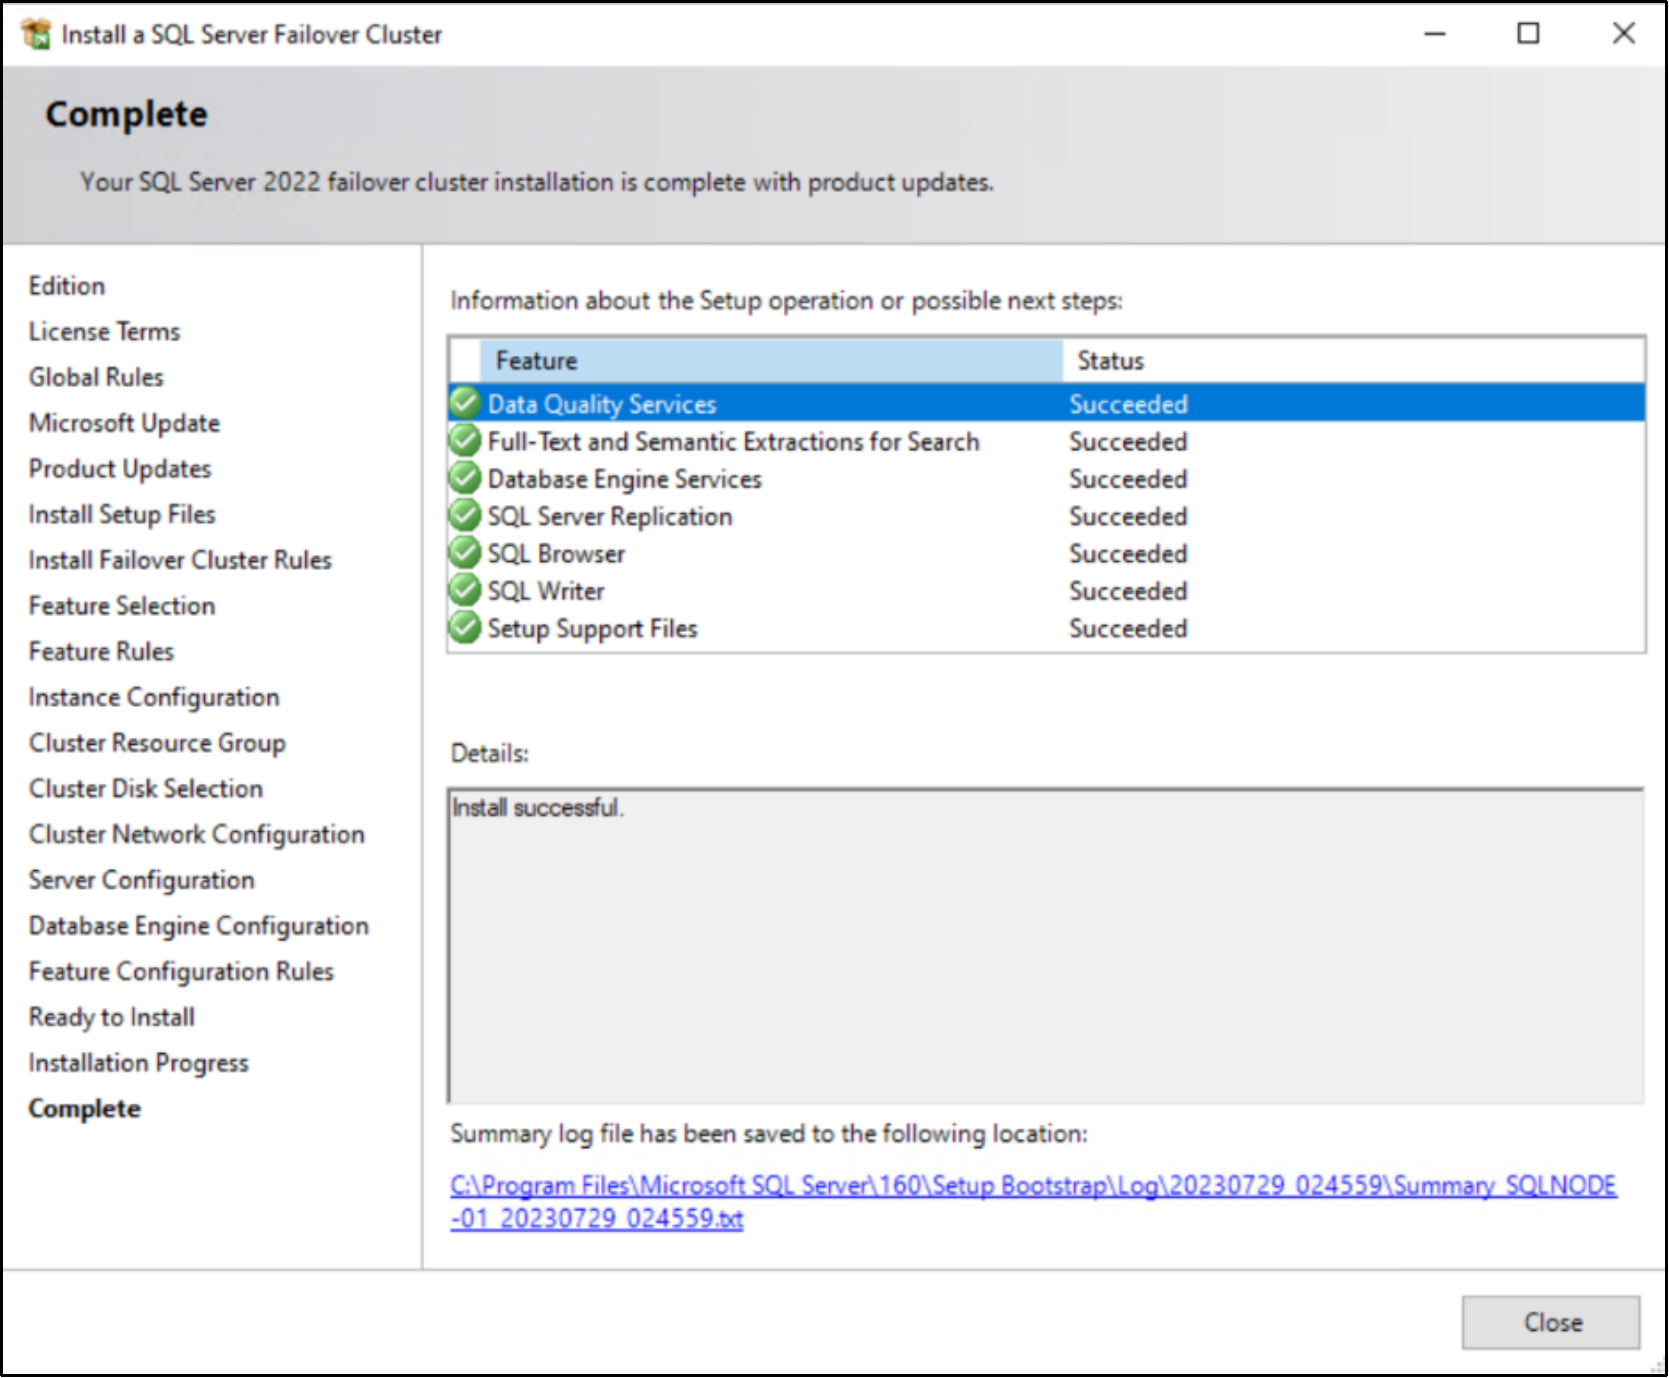
Figure 32. Installation complete