
None
None
-
This section describes the prerequisites that you should fulfill before using the Terraform module to deploy APEX File Storage for Microsoft Azure.
Prerequisites on Azure
Azure subscription
APEX File Storage for Microsoft Azure requires an Azure subscription. Users are required to provide their subscription. When a subscription has been created and configured to the user’s company policies, a user account is required. Dell Technologies recommends that this user account be added at least to a Contributor role.
If users are unable to be added as a Contributor role, an administrator must create a role with the following permissions:
- Microsoft.Compute/availabilitySets/delete
- Microsoft.Compute/availabilitySets/read
- Microsoft.Compute/availabilitySets/write
- Microsoft.Compute/disks/delete
- Microsoft.Compute/disks/read
- Microsoft.Compute/disks/write
- Microsoft.Compute/images/read
- Microsoft.Compute/images/write
- Microsoft.Compute/proximityPlacementGroups/delete
- Microsoft.Compute/proximityPlacementGroups/read
- Microsoft.Compute/proximityPlacementGroups/write
- Microsoft.Compute/virtualMachines/delete
- Microsoft.Compute/virtualMachines/read
- Microsoft.Compute/virtualMachines/write
- Microsoft.Network/networkInterfaces/delete
- Microsoft.Network/networkInterfaces/read
- Microsoft.Network/networkInterfaces/write
- Microsoft.Network/networkSecurityGroups/delete
- Microsoft.Network/networkSecurityGroups/read
- Microsoft.Network/networkSecurityGroups/write
- Microsoft.Network/virtualNetworks/read
- Microsoft.Network/virtualNetworks/subnets/read
- Microsoft.Resources/subscriptions/resourceGroups/read
- Microsoft.Resources/subscriptions/resourceGroups/write
Azure Resource Group
Although APEX File Storage for Microsoft Azure can live in an existing resource group, it is recommended to create a resource group for management purposes. A resource group allows the cluster to be contained as a single resource and easily kept track of and disposed of when its use is no longer required.
To create a resource group, follow these steps:
- Select your subscription and enter the home page of the subscription in the UI.
- In the left panel, select resource groups.
- Click the Create button in the menu bar.
- Enter the subscription, resource group name, and Azure location for the new resource group, then click review and create, and finally create the resource group.
When you have created the resource group, you are ready to create Azure resources that the APEX File Storage for Microsoft Azure will use.
Azure Virtual Network and Subnets
APEX File Storage for Microsoft Azure requires two different Azure subnets which must be in the same Azure virtual network:
- A dedicated internal subnet for the cluster's internal network. The subnet is only used by backend communication between nodes and cannot be shared with other instances or services.
- An external subnet for the cluster’s external network.
To create an Azure virtual network and two subnets, follow these steps:
- In the portal, search for and select Virtual networks.
- On the Virtual networks page, select + Create.
- On the Basics tab of Create virtual network, enter and select the information for Subscription, Resource group, Name, and Region.
- In the IP Addresses tab, create one internal subset and one external subset.
Note: We recommend at least a /26 network mask for each Azure subnet.
- Select Save.
- Select Review + create at the bottom of the window. When validation passes, select Create.
Note: IPv6 is not currently supported.
Azure Network Security Groups
You should create two Azure Network Security Groups (NSG):
- Internal NSG for internal network interface cards only
- External NSG for external network interface cards
To create an Azure NSG, follow these steps:
- In the search box at the top of the Azure portal, enter network security group. Select Network security groups in the search results.
- Click + Create.
- In the Create network security group page, under the Basics tab, enter or select the values for Subscription, Resource group, Network security group name and Region.
- Select Review + create.
- After you see the Validation passed message, select Create.
Note: Configuration on ports in Azure NSG relies on the feature you will use. See the white paper Network port usage - PowerScale OneFS Security Configuration Guide for more details.
Azure Managed Identity
If you intend to use OneFS SmartConnect, dynamic network pool, or other network failover features, you must first configure Azure Managed Identity.
- In the search box at the top of the Azure portal, enter identities. Select Managed Identities.
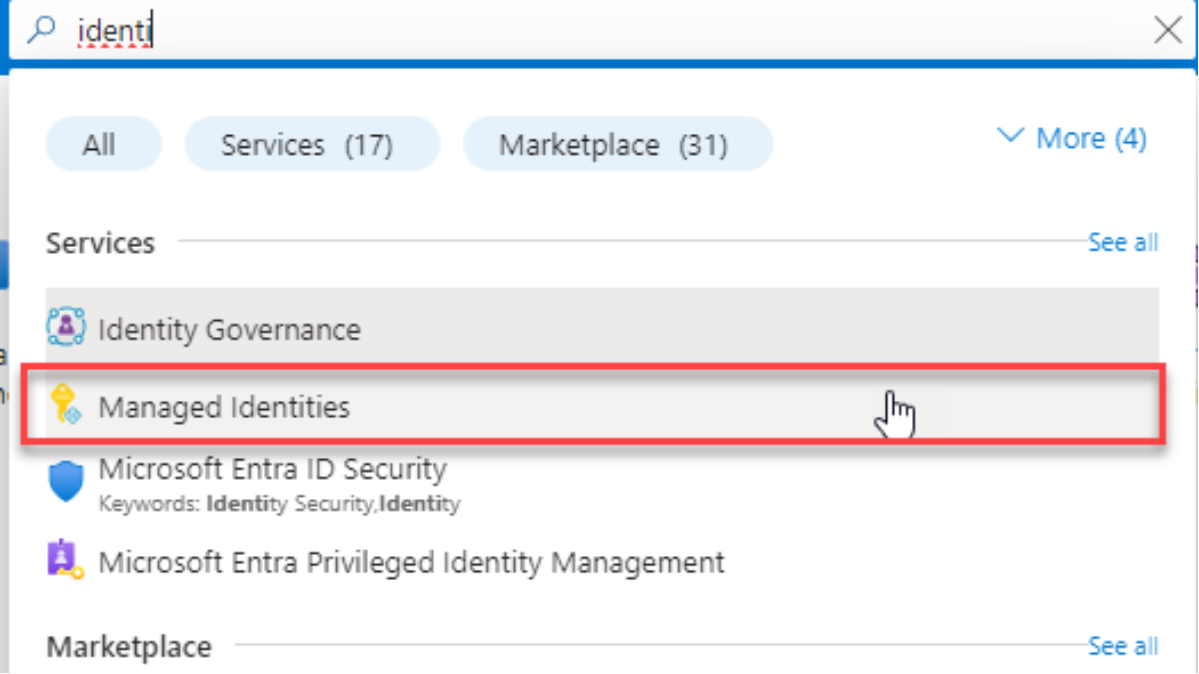
Figure 2. Managed Identities
- Click Create.
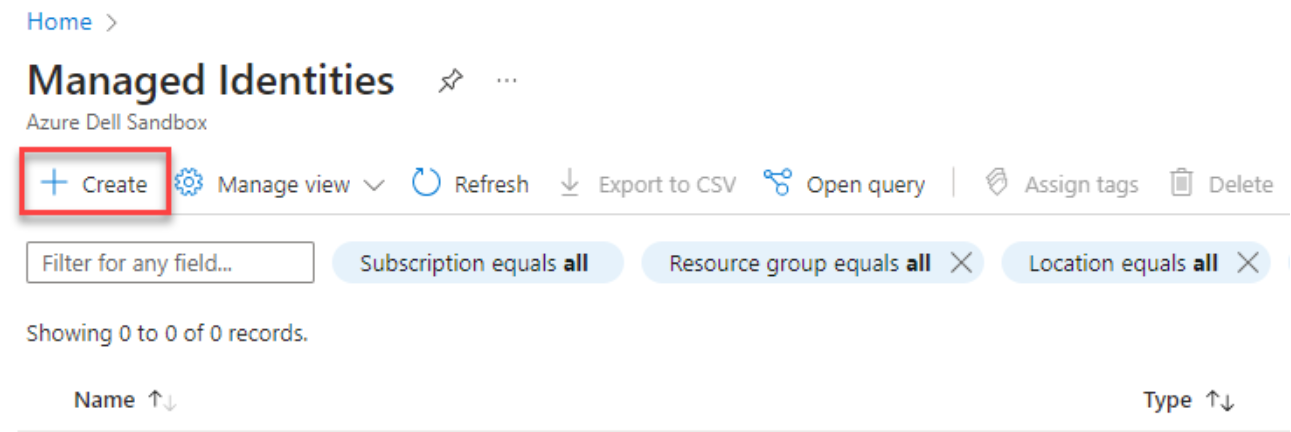
Figure 3. Create Managed Identities
- Choose your Subscription, Resource group, Region, and type Name.
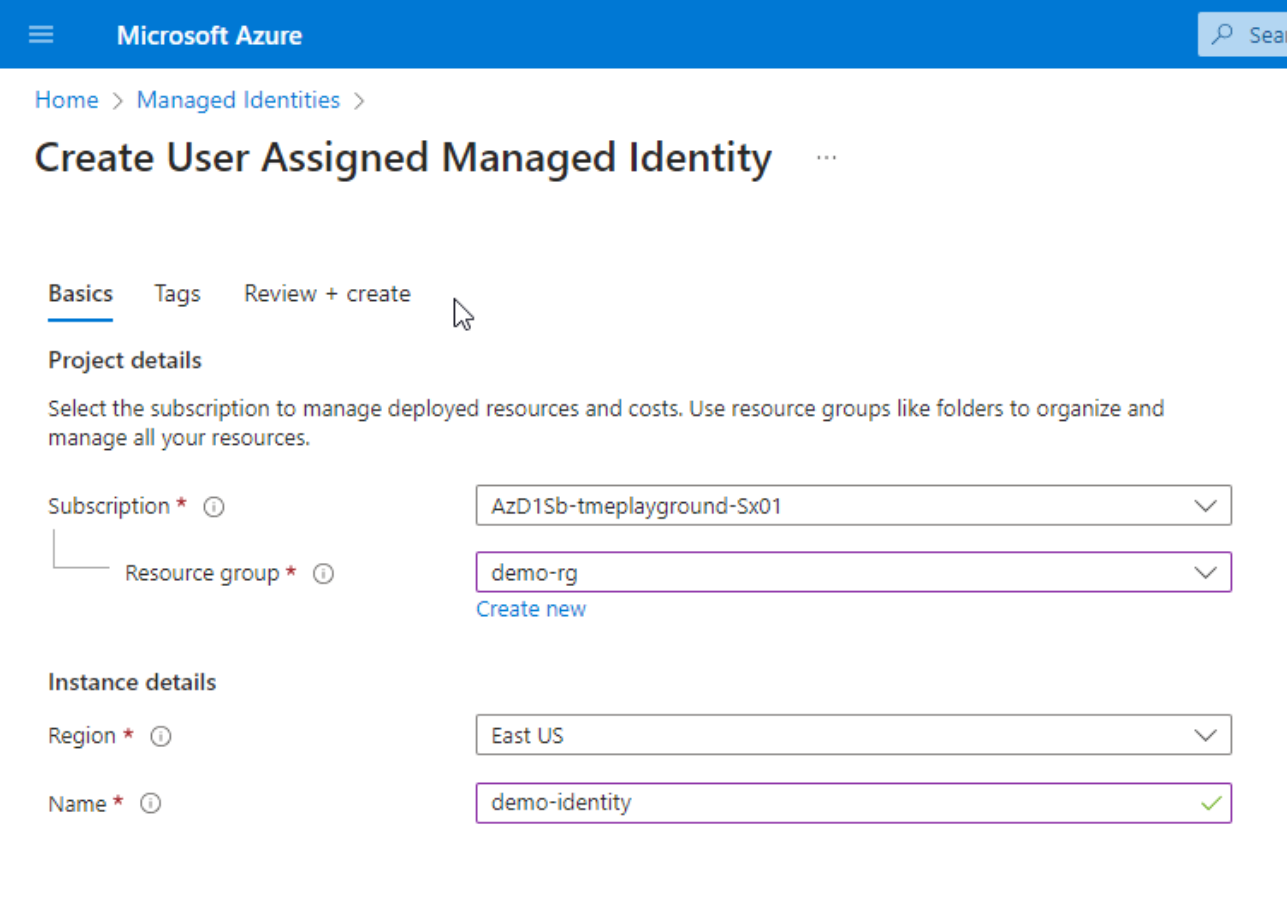
Figure 4. Create User Assigned Managed Identity
- Click Review + create and then click Create.
- In your subscription, click Access Control(IAM) in the left navigation bar.
- Click Add, and choose Add custom role in the drop down menu.
- Create a role with the following permissions
Microsoft.Network/networkInterfaces/read
Microsoft.Network/networkInterfaces/write
Microsoft.Network/virtualNetworks/subnets/join/action
Microsoft.Network/networkSecurityGroups/join/action
Microsoft.Compute/virtualMachines/vmSizes/read
Microsoft.Compute/virtualMachines/read
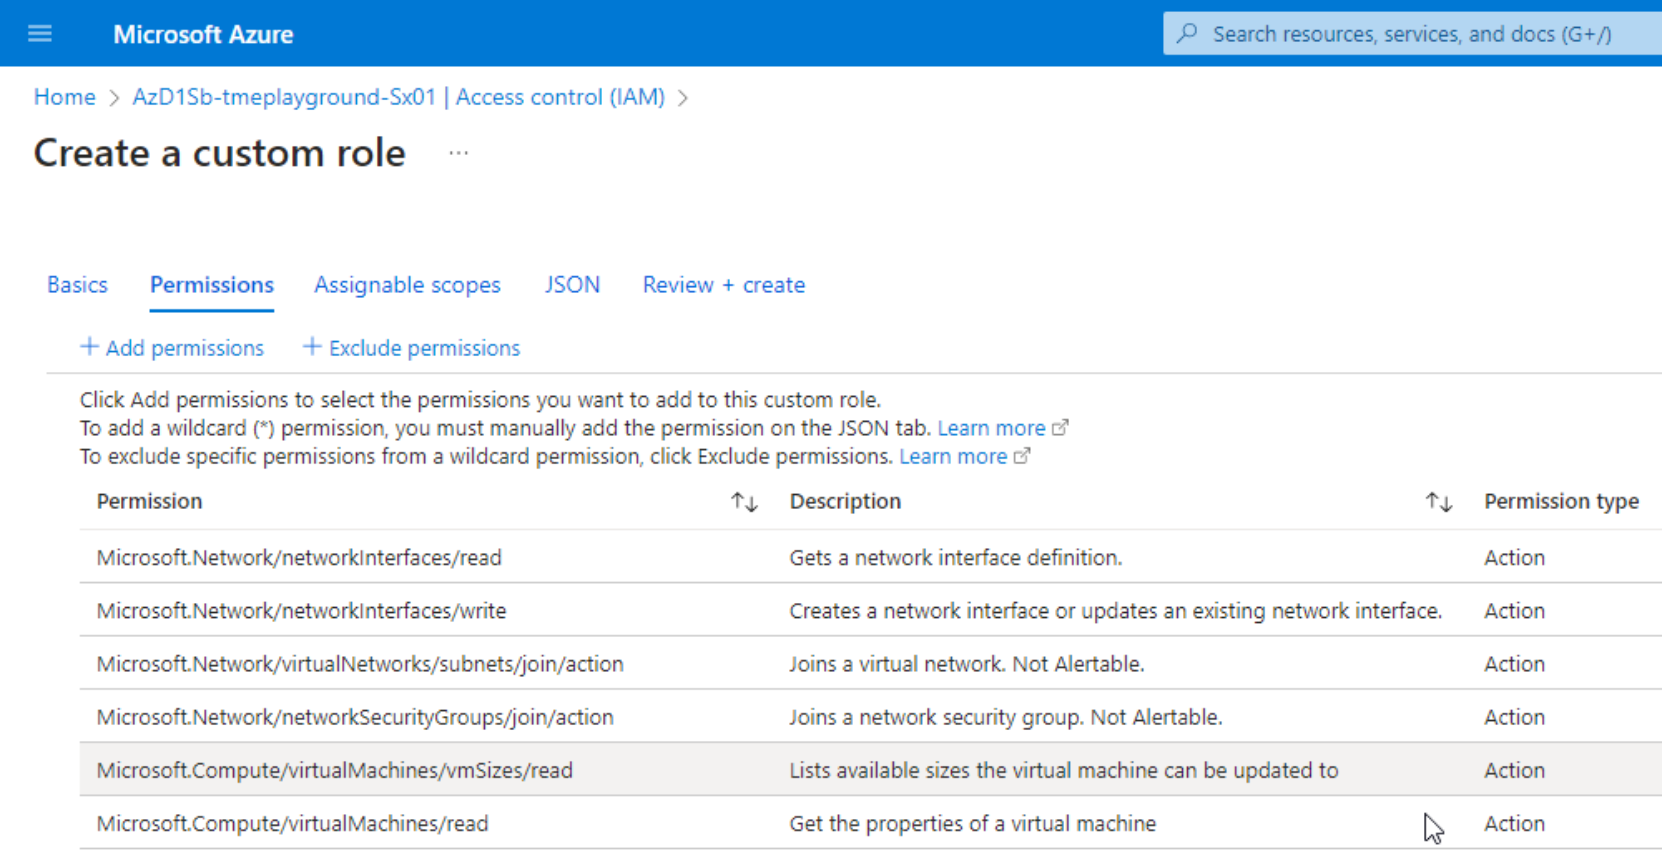
Figure 5. Create a custom role with permissions
- Click Review + create and then click Create.
- After the custom role is created, bind the role to the managed identity by clicking Add and choosing Add role assignment.
- In the Role tab, choose the custom role just created and click Next.
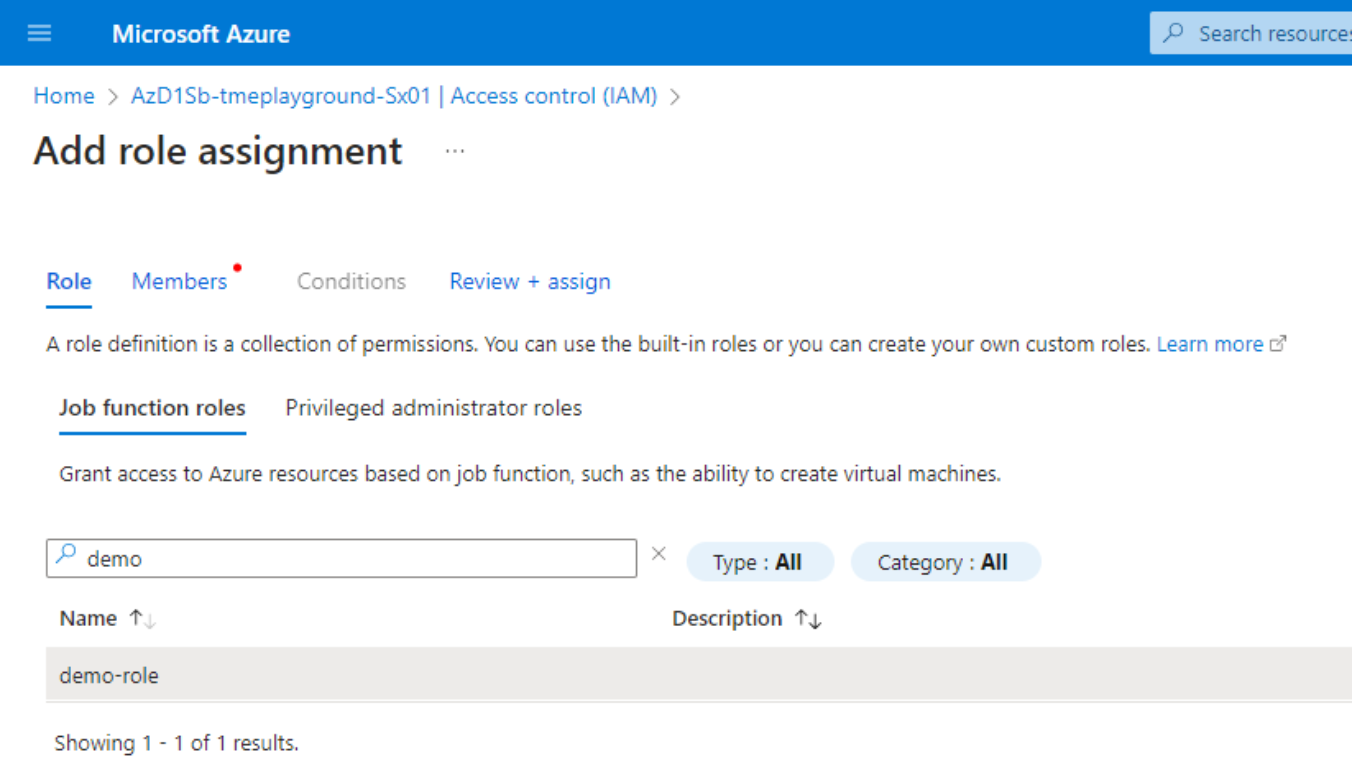
Figure 6. Add role assignment - Role
- In the Members tab, choose Managed identity in the Assign access to field. In the pop-up Select managed identities window, choose the identity created in the previous step. Click Select then, click Review + assign. Click Assign.

Figure 7. Add role assignmen
Prerequisites for the host machine
Overview
A host machine is used to run the Terraform script for provisioning, scale-out, and destroy.
This can be any machine that has access to the Azure portal. Make sure the following components are installed on this machine:
- Python 3.8 and above
- Azure CLI
- Terraform (1.3.6 and above)
Download the OneFS image file for APEX File Storage for Microsoft Azure
Users can choose to either download the VHD image file from FTP or they can use the image in the marketplace directly:
If this image file is used for a proof of concept (PoC), follow these steps:
- Go to the Software Evaluation License Agreement website, and input the value for Email, Name, Title, and Company.
- Click Continue to Contract.
- Review the Software Evaluation License Agreement and if you agree with it, click Agree.
- You will receive an email with an FTP link where you can download the image file.
If the end user has already purchased APEX File Storage for Microsoft Azure, they can also directly use the image file in the Azure Marketplace. Follow the steps below:
- Go to the Azure Marketplace.
- Click APEX File Storage for Microsoft Azure – Customer Managed.
- Click the link Get started which is beside Want to deploy programmatically?
- Enable your Azure subscription for this offer.
Note: Deploying APEX File Storage for Microsoft Azure using the image in the marketplace requires custom deployment scripts. For details, contact PowerScale.Azure@dell.com.