
Use PowerStore to create gold images
Use PowerStore to create gold images
-
An administrator can create a base operating-system image (gold image) by using PowerStore snapshots and thin clones. This method can accelerate and simplify the process of deploying new servers.
Gold images provide the following benefits:
- Server provisioning is quicker with minimal reconfiguration required.
- When a host is provisioned from a thin clone of a gold image, only new data written to the thin clone consumes SAN space. Data that has not changed is read from the source volume.
The steps to configure a Windows Server boot-from-SAN gold image are as follows:
- Create and map a PowerStore volume to a Windows host server or Hyper-V server that is configured to boot-from SAN.
- Build the base operating-system image and install the wanted roles and features such as the Hyper-V role, failover clustering, and MPIO.
- Configure the server, including MPIO, and patch the operating system. This action minimizes the changes that are required for each new server that is deployed from the gold image.
- Once the operating system is fully staged, power off the operating system to put it into a consistent state. Then, take a manual PowerStore snapshot of the volume and select No Automatic Deletion. Use intuitive naming to simplify identifying the purpose of these snapshots later.
This snapshot represents the point in time before running the Microsoft system preparation tool Sysprep. The administrator can restore the parent volume using this snapshot if the system preparation process encounters an issue or needs updating later. You do not have to create an image from the beginning.
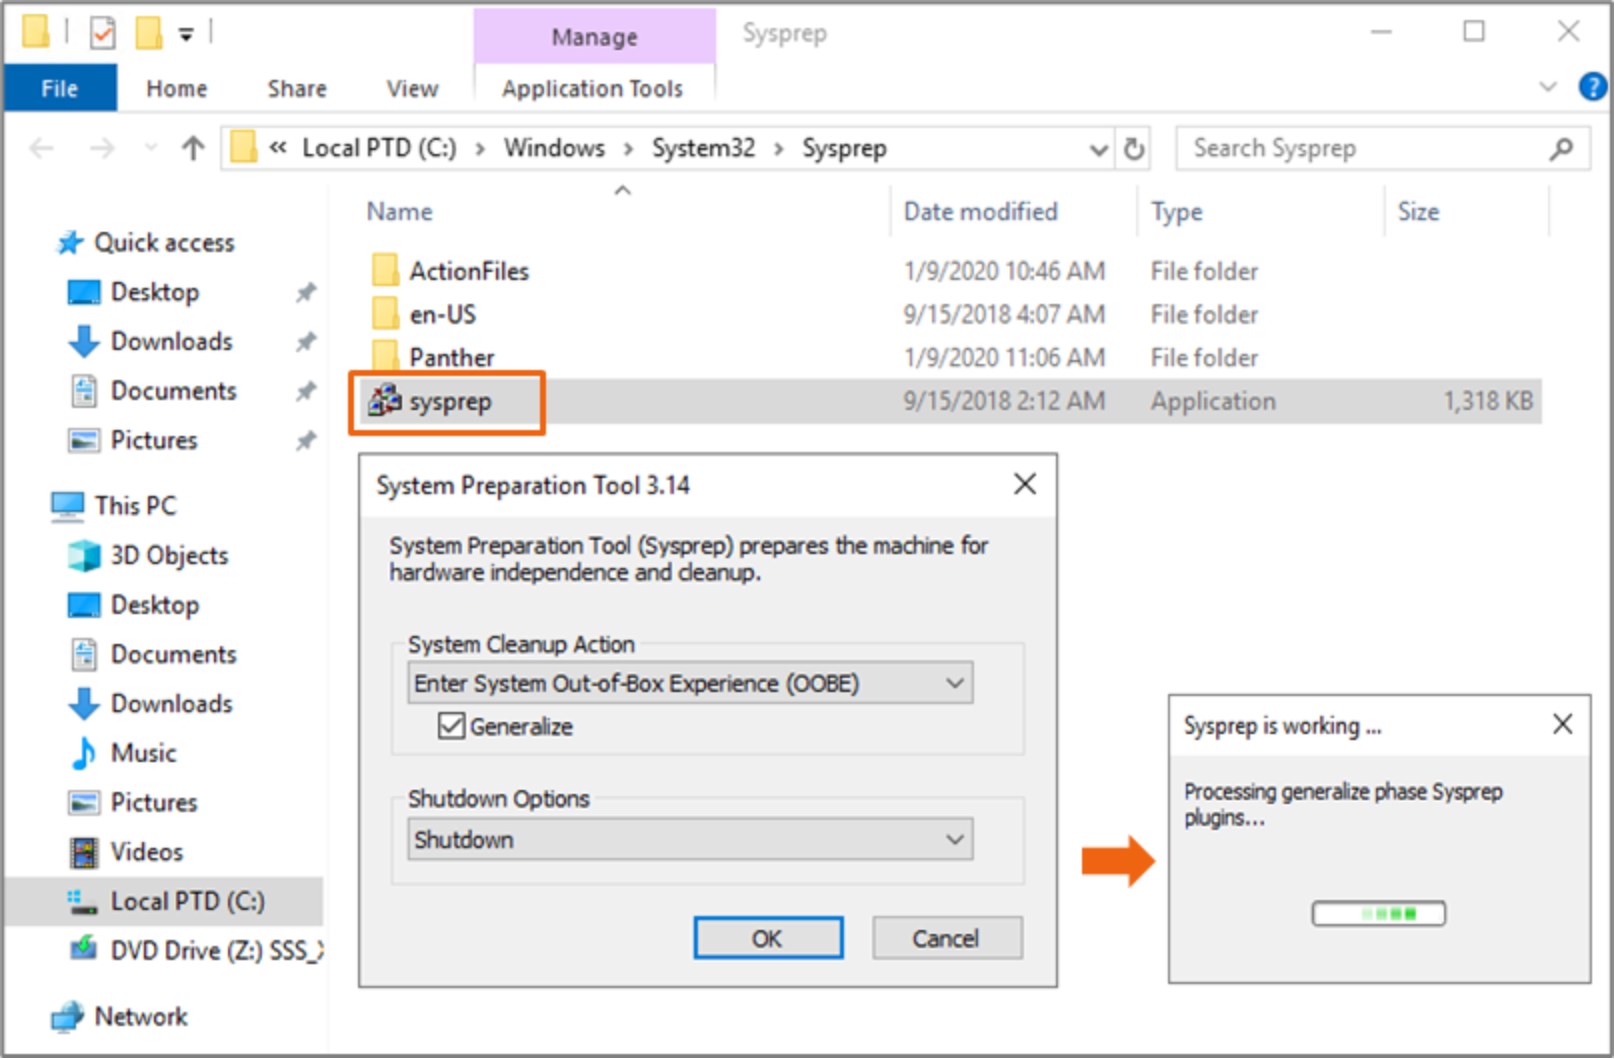
Power on the server and run Sysprep. Select the options Generalize, Out-of-box Experience, and Shutdown. Click OK.
- Once Sysprep completes and the server powers off (which ensures that it is in a consistent state), manually create another PowerStore snapshot of the volume. As before, select No Automatic Deletion. Add a description if required to help identify the purpose of this snapshot later.
- Select the snapshot, and click More Actions > Create Thin Clone Using Snapshot.
- To view the thin clone, view the volumes list under Storage.
Note: If the thin clone was created from a cluster disk and is mapped back to the same cluster, change the disk signature of the thin clone. This action avoids having a disk signature conflict with the original disk. See Change a disk ID with diskpart for details about changing the disk signature of a Windows Server cluster disk.
- Map the thin clone to the specified host or host group. Use LUN 0 if it is a boot-from-SAN volume for a physical Hyper-V host.
- Boot the host and allow the initial boot process to complete.
- Customize the server configuration as required.
Note: Do not use Microsoft System Center Virtual Machine Manager (SCVMM) to delete the guest VM. It also deletes the VHD. Use Hyper-V Manager instead.
- Copy the gold source VHD file in safe location.
- Create a VM. Make a copy of the gold VHD, and place it in the chosen location to serve as the boot disk for the VM.
- Rename the VHD to reflect the new name of the VM or its purpose, and attach the VHD to the new VM as the boot disk.
- Power on the VM, and customize the VM as needed.
Note: The appliance and node that owns a volume also owns all snapshots and thin clones that are created from the volume. This behavior usually does not cause significant resource-balancing issues unless many thin clones are created from the same source volume. Monitor PowerStore for imbalances, for example, if thin clones are used to configure many hosts to boot-from-SAN using a gold image.