
Migrate content
Migrate content
-
The procedure used to migrate content from the Centera to ECS system depends on the toolset used by the migration service. Possible toolsets include the following:
- Dell ecs-sync
- Datadobi Dobiminer
- Interlock Xspedient
All are similar in the sense that they all provide the capability to migrate content from the Centera to ECS system using an external Migration Server which does the actual copying/cloning of the content.
All tools provide a level of audit tracing to confirm what has been migrated, and highlights any failures or retries.
ECS-SYNC example
The following diagram shows an example of the ecs-sync migration.

Generate a C-Clip List
First generate a list of all C-Clips to be migrated from Centera to ECS. This can be done in a number of ways. For this example, we are using jcasscript to get a list of all Content Addresses of C-Clips in a Centera Virtual Pool written to a file on the ecs-sync server being used.
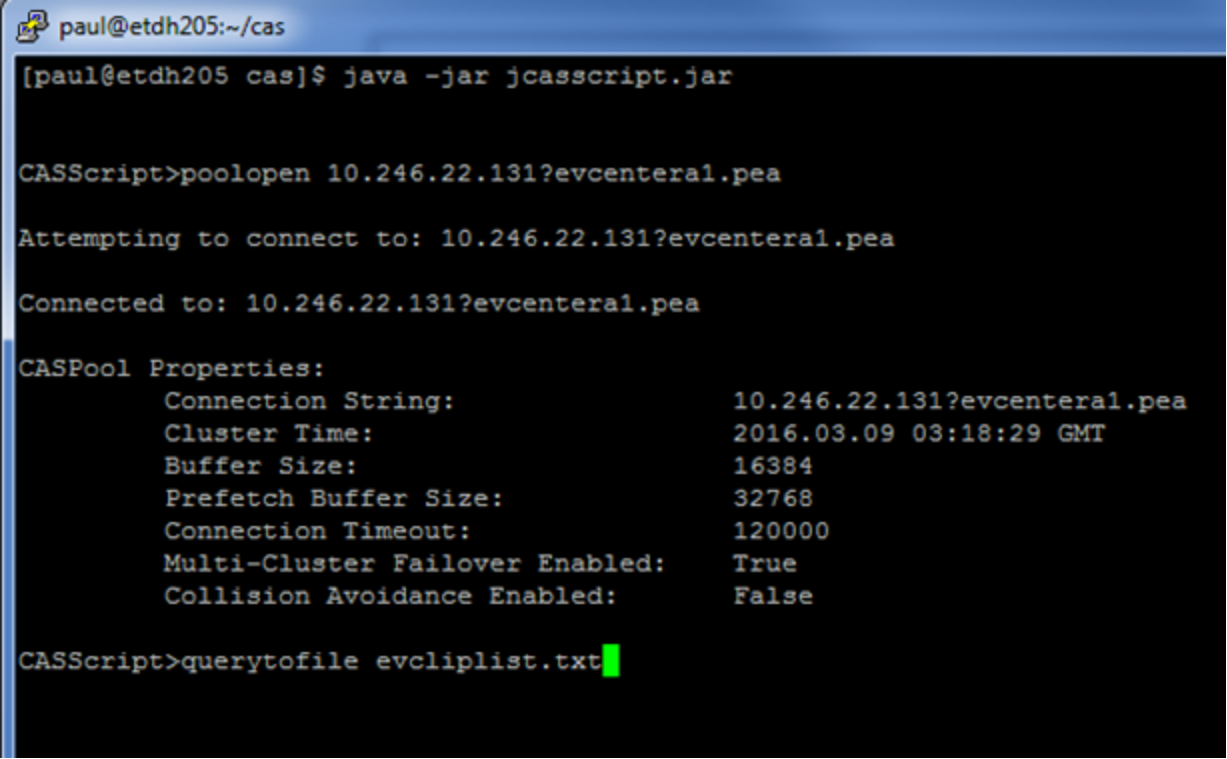
This generates a filename named evcliplist.txt with a list of all the Content Addresses of all C-Clips in the Virtual Pool on Centera with the IP address of 10.246.22.131, as accessed by the Application Profile indicated by the PEA file evcentera1.pea.
Migrate C-Clips from Centera to ECS
On the ecs-sync migration server, run the following command:
java -jar ecs-sync-2.1.jar --source cas://10.246.22.131?evcentera1.pea --source- clip-list evcliplist.txt --target cas://10.246.22.151?name=casevmigration,secret=secret
This migrates all the C-Clips referenced in the evcliplist.txt file from the source Centera to the target ECS system.
The following commands can control the execution of ecs-sync:
Command
Description
ecs-sync-cli-2.1.jar --list-jobs
This shows all ecs-jobs running, such as job #1
ecs-sync-cli-2.1.jar --status 1
Shows the status of job #1
ecs-sync-ctl-2.1.jar --set-threads 1 -- sync-threads 24
Sets the number of sync threads in job #1 to 24
Audit/confirm migration
At this stage, the migration user should confirm that all of the clips that were on the source Centera system are now on the target ECS cluster.
The simplest way to do this would be to generate a list of C-Clips using the jcasscript utility (as shown in the section Generate a C-Clip List), but this time from the target ECS. Then, use a tool (such as Linux diff) to compare the two files. If there are any differences, these can be investigated.
Note: Because the order of the C-Clip Content Addresses might be different, sort the files into alphabetical order before using diff to compare them.
Other toolsets might have a more sophisticated methodology for auditing the migration.
Change Centera EV partition IPs
In the Enterprise Vault VAC, change the IPs of the Centera partition to be those of the ECS CAS cluster.
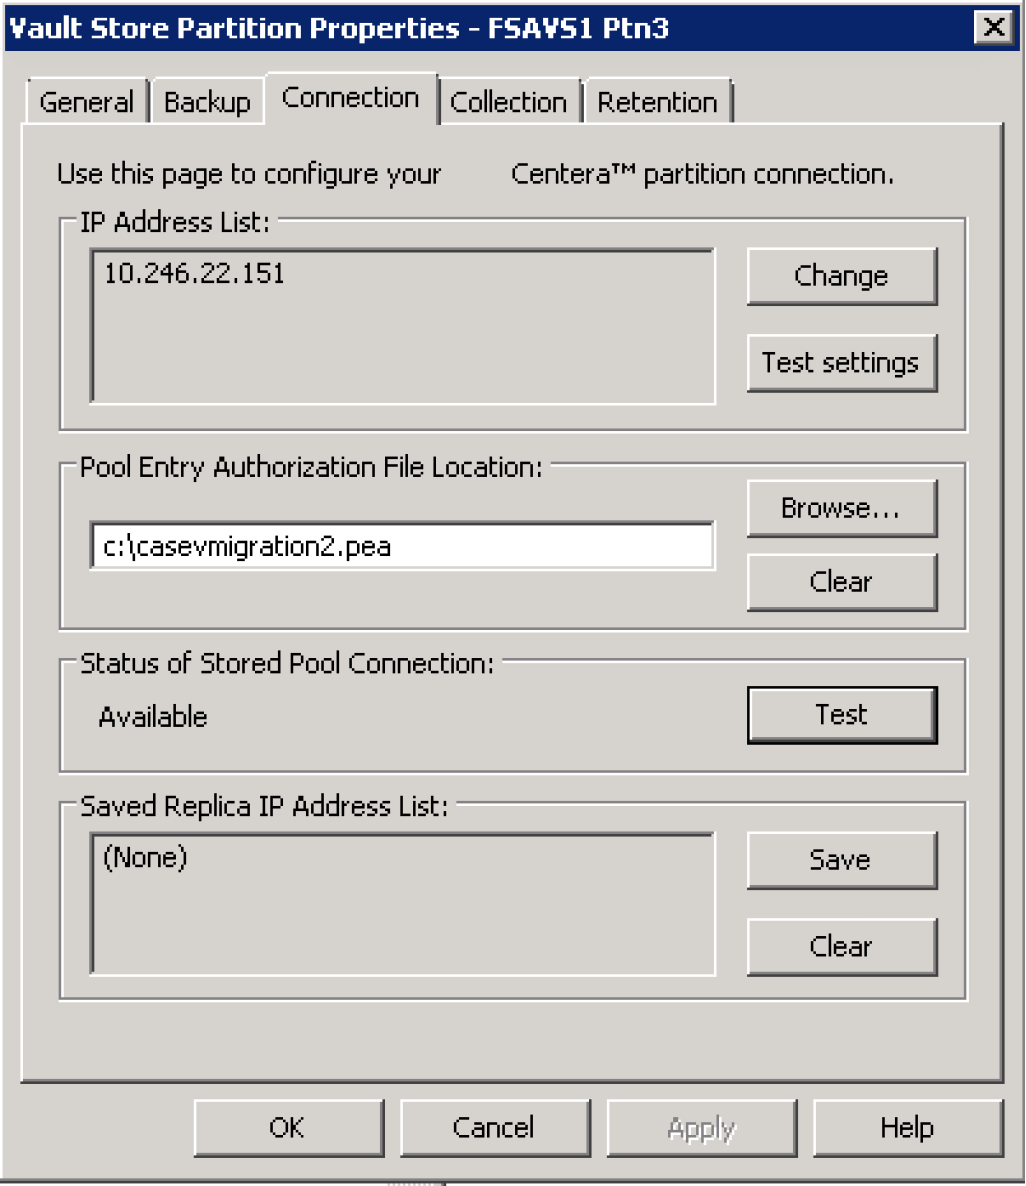
In this example, the IP address and the PEA file pertain to the new ECS CAS user/bucket.
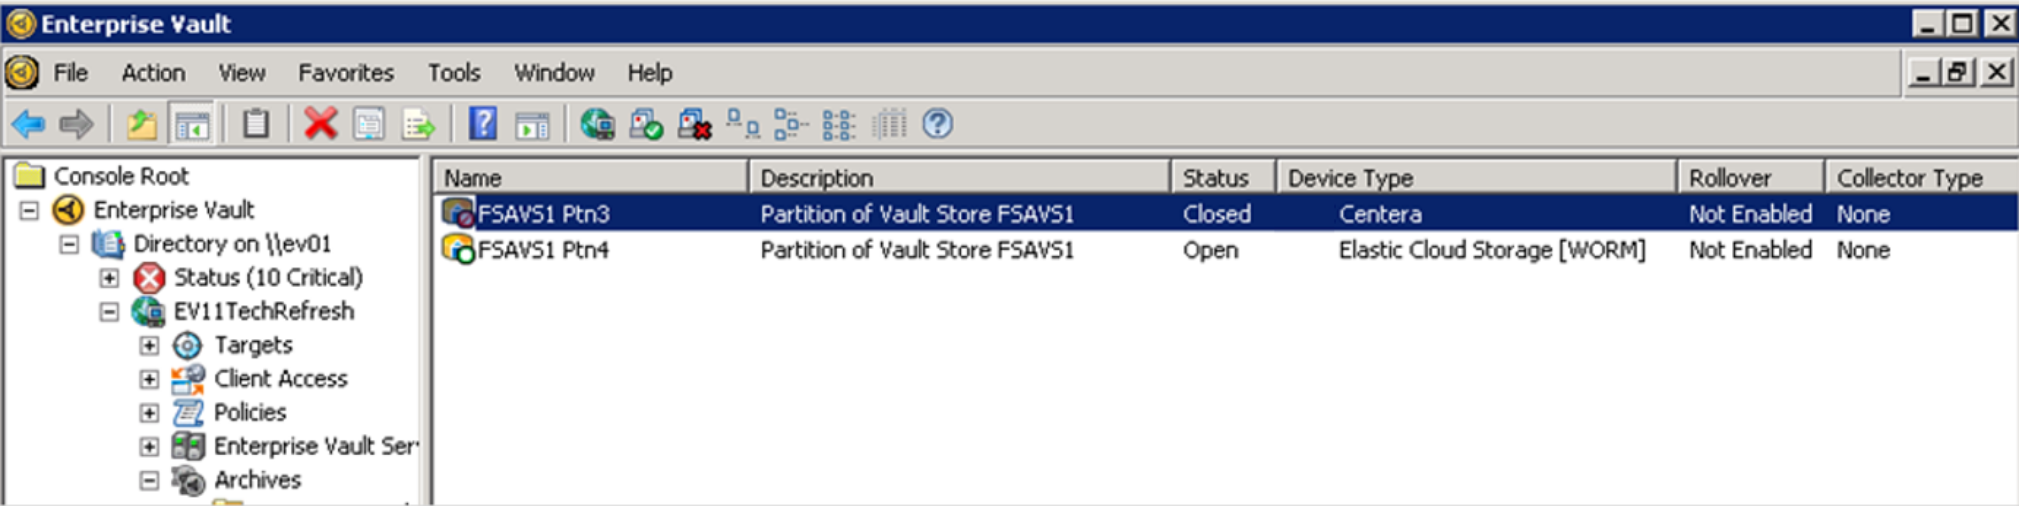
Create new ECS Streamer partition
In this final step, a new ECS Streamer type partition is created for the Vault Store. The creation of the new partition will close the Centera partition. This means that all new ingest into the Vault Store will be to the new ECS partition but content will still be able to be read from the Centera partition.
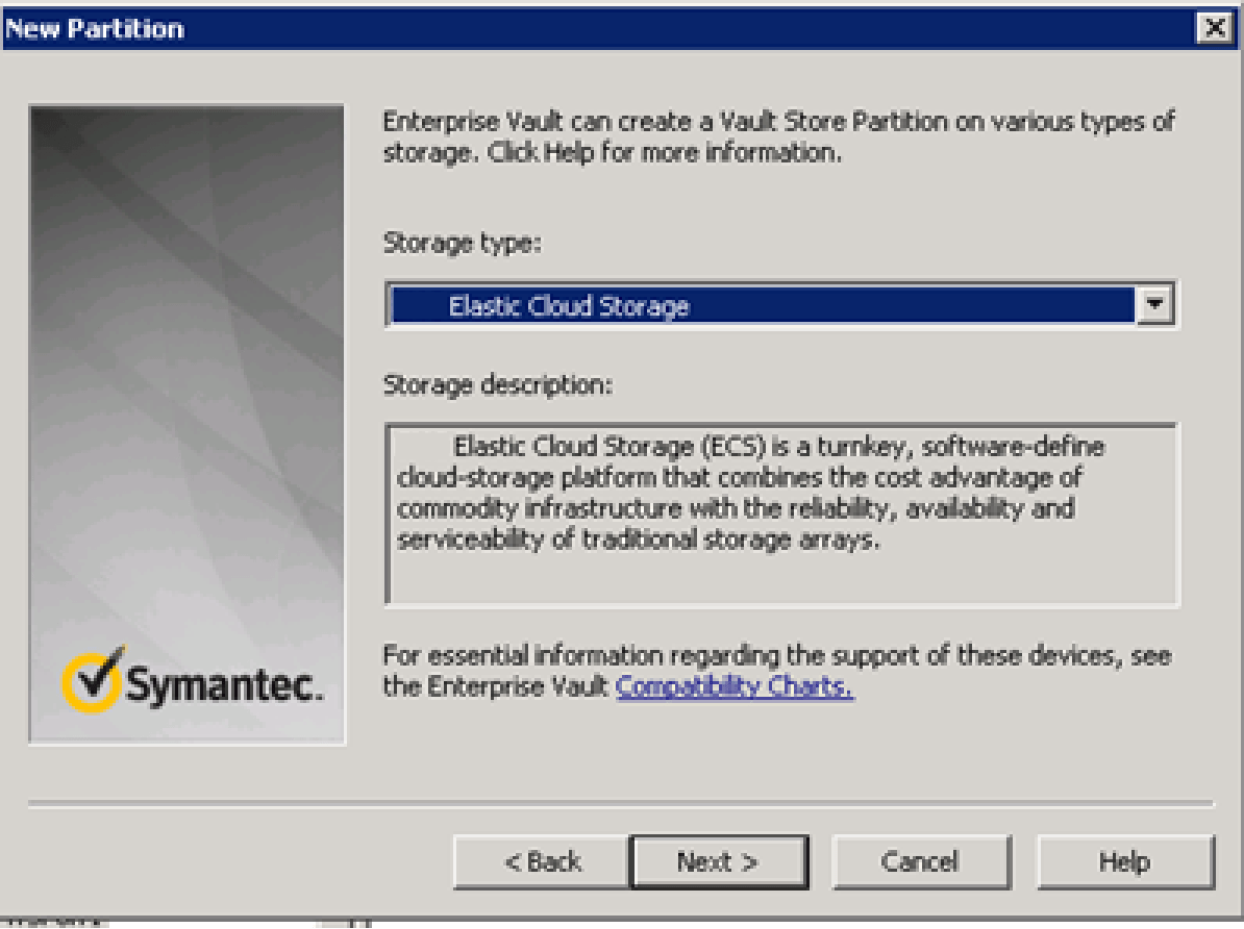
The ECS partition is created with the following properties.
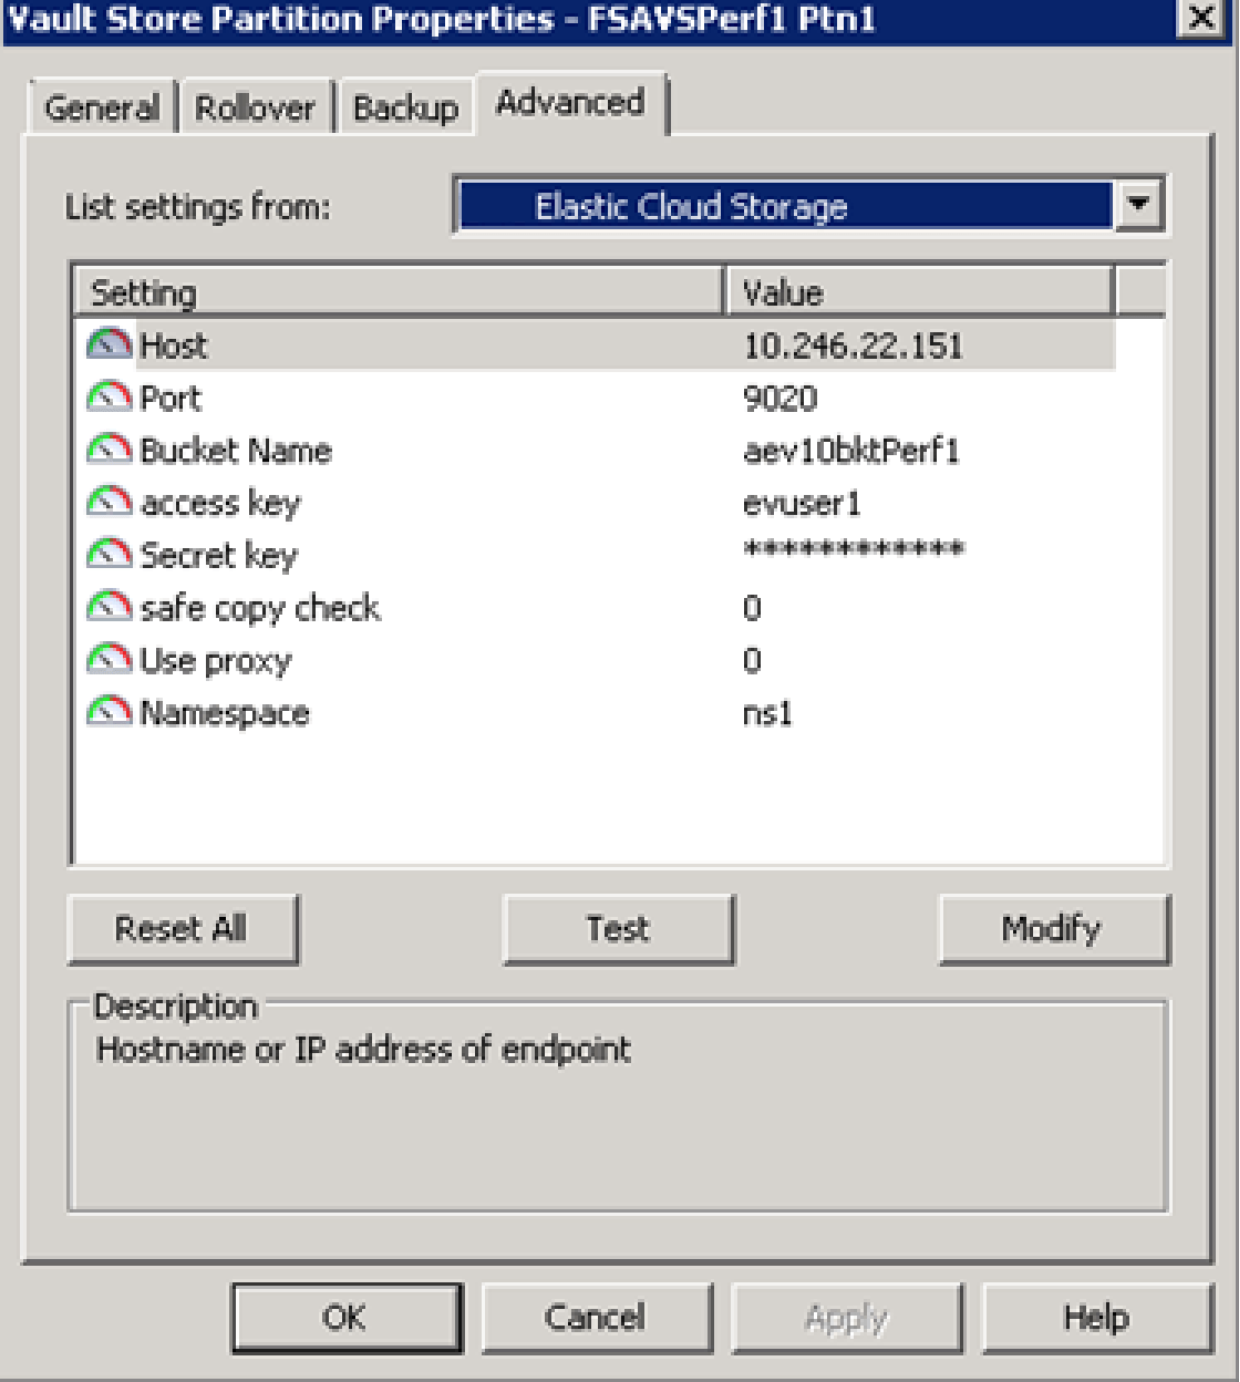
See the document Dell ECS: Using Veritas Enterprise Vault for details about the settings in the partition definition GUI.
Confirm ECS CAS partition content accessible
After you have successfully migrated the Centera content to ECS and configured the EV Partition to access ECS (and not Centera), check that the content can be successfully accessed as before.
You can perform a number of tests to confirm this:
- Run EVSVR.EXE before and after the migration – Count Files
You should run the EV tool EVSVR.EXE on the Centera before the migration to count all objects in all Vault Stores/Partitions.
You can run this after the migration to ECS to produce the same report for a before-and-after comparison.
- Run EVSVR.EXE – Verify Archive Objects
You can run the EV tool EVSVR.EXE to check the consistency of Archive Objects in EV Partitions, and then check the log file output for any errors.
- Run EVSVR.EXE – Verify Database References
You can run the EV tool EVSVR.EXE to check whether the EV Database is consistent with what is on the EV Partitions, and then check the log file output for any errors.