
Sample application: WordPress
Sample application: WordPress
-
In this example, we are deploying a WordPress application, which is a platform for creating websites and blogs. WordPress uses MySQL single instance as its database with persistent volumes dynamically provisioned by PowerFlex CSI driver. The storage class used by PowerFlex CSI is vxflexos. Since the application is already in the Google marketplace, deploying WordPress application requires just a few mouse clicks.
For more information about WordPress, see WordPress.
Deploying WordPress
- Log in to Google Cloud Platform.
- Select Kubernetes Engine > Marketplace.
- Go to Kubernetes apps, select your deployment environment and search for WordPress as shown in the following figure:
Note: Since this is a sample workload, the free WordPress application is used for demonstration purposes.
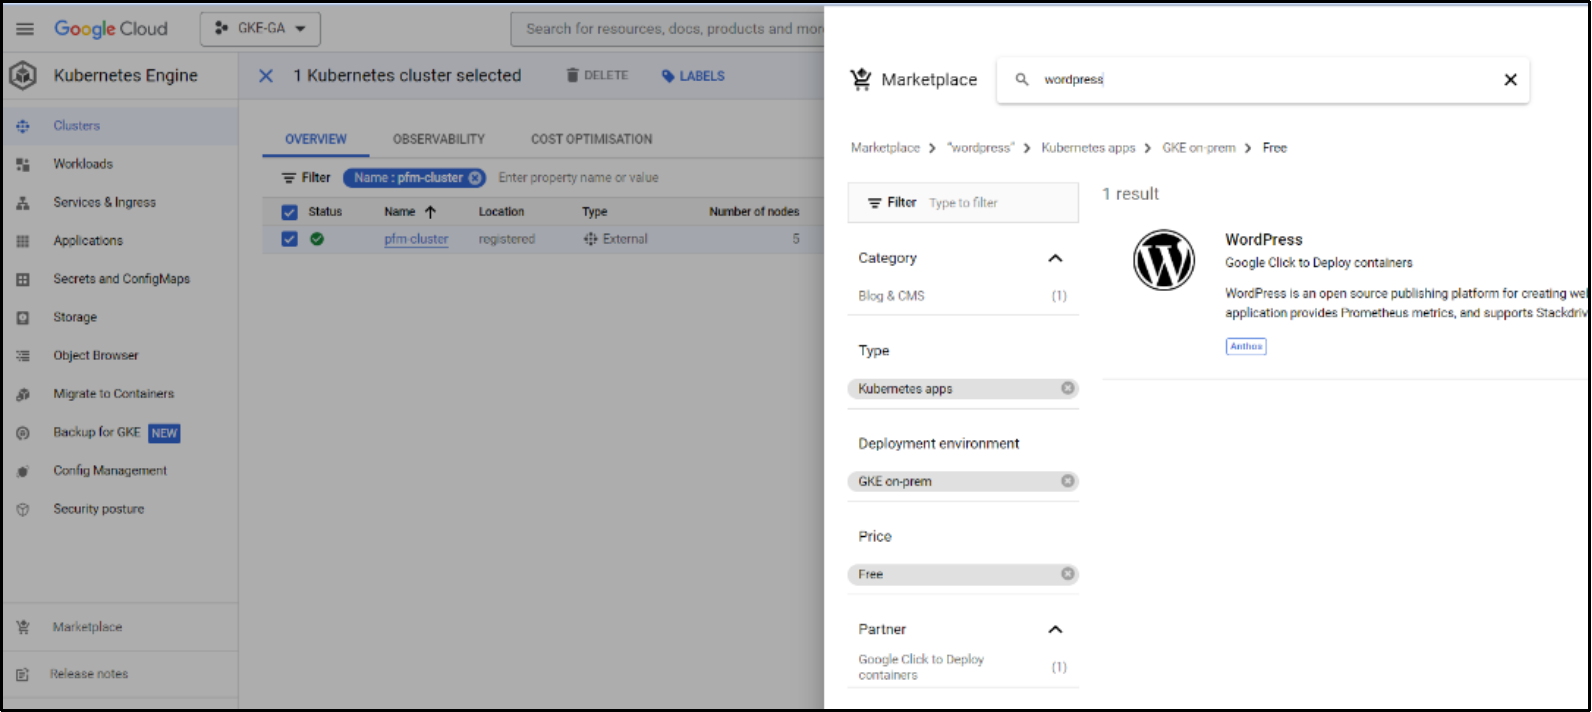 Figure 10: WordPress selection wizard
- Select WordPress and click Configure and then enter the namespace PowerFlex storage class as vxflexos and the configuration details. In this example, the Enable public IP access is selected with create a NodePort service for WordPress web URL access by the Node IP and NodePort details.
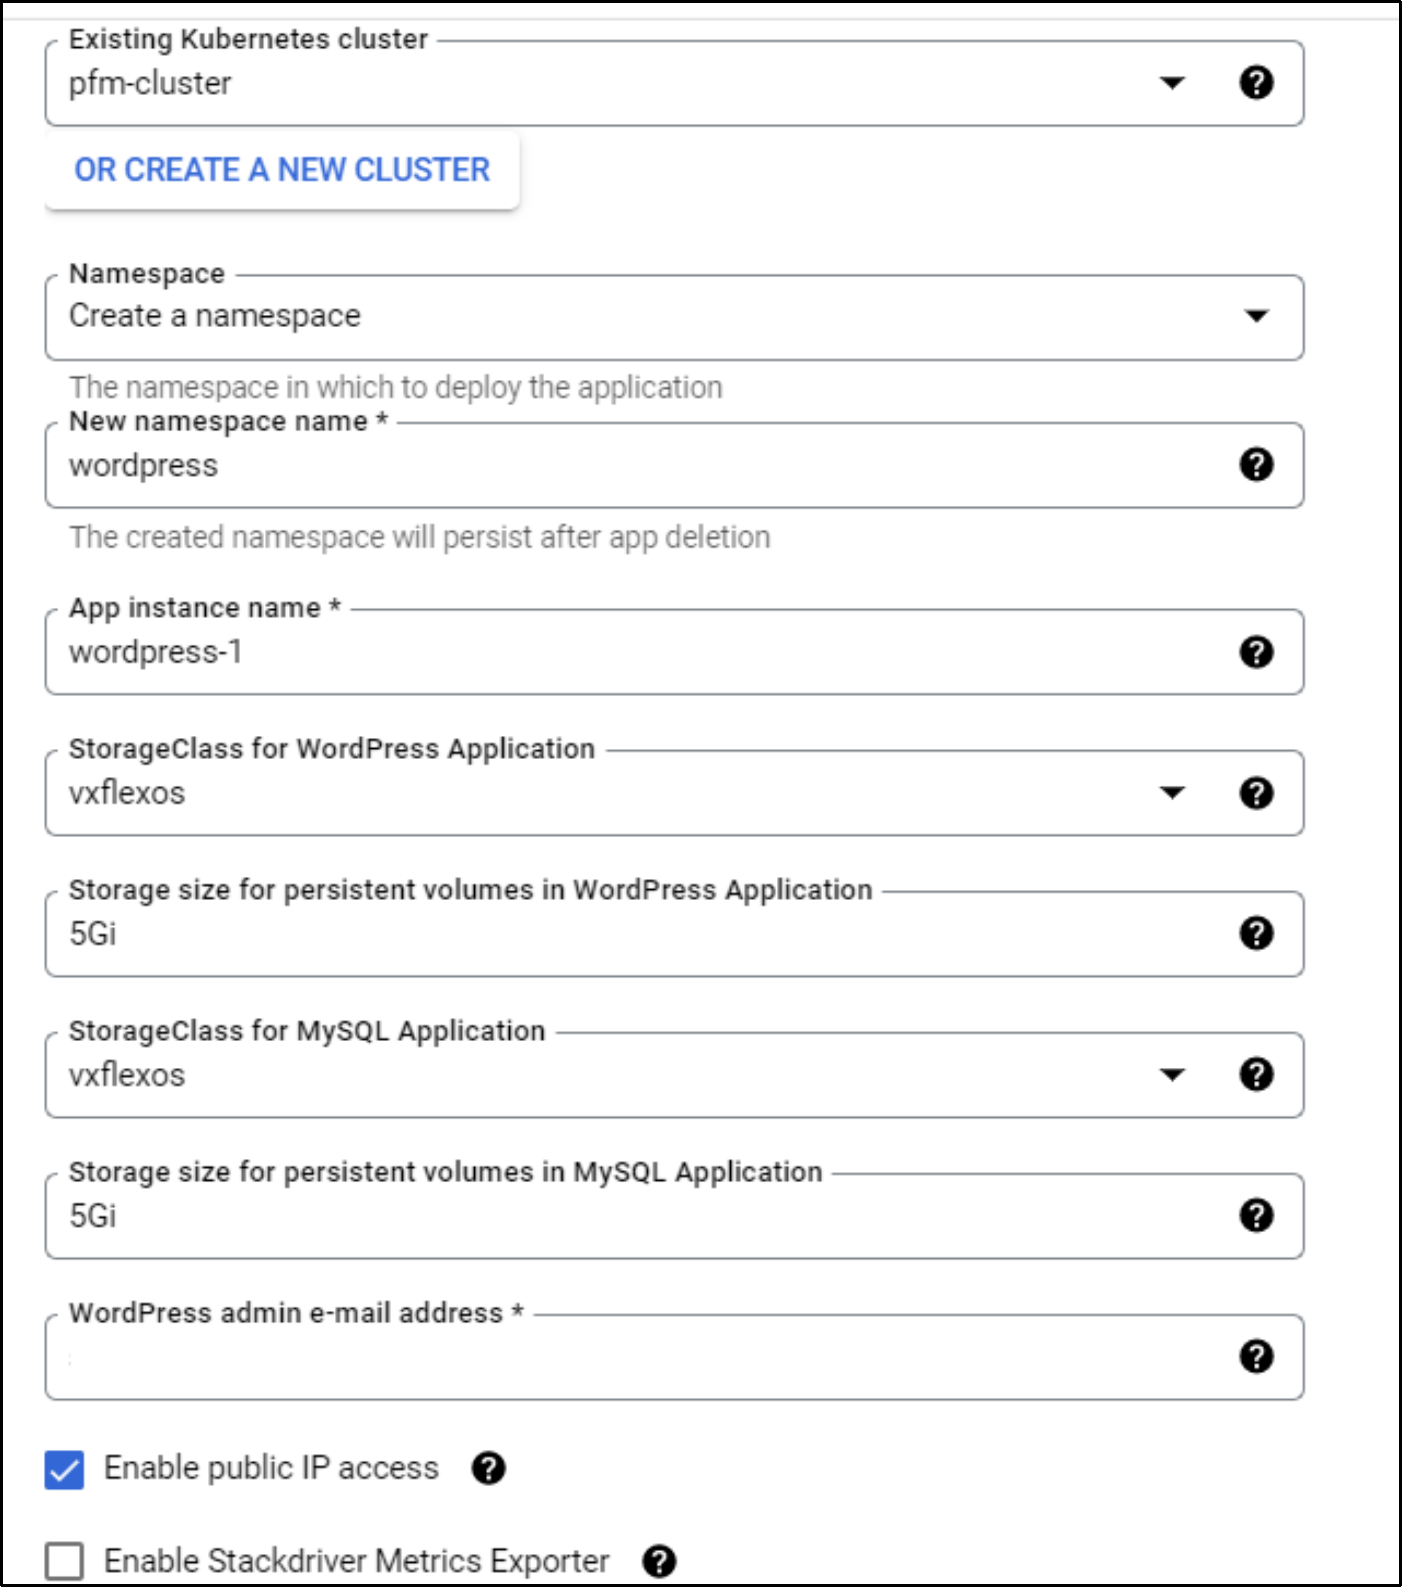 Figure 11: Application configuration
Examples to enter details:
- Application Instance Name ─ wordpress-1
- Namespace─ WordPress
- StorageClass for Application: Vxflexos
- Storage size of PV in application: 5Gi
- Click Deploy to start the deployment.
- Verify if the application is deployed. Select Kubernetes Engine > Applications as shown in the following figure:
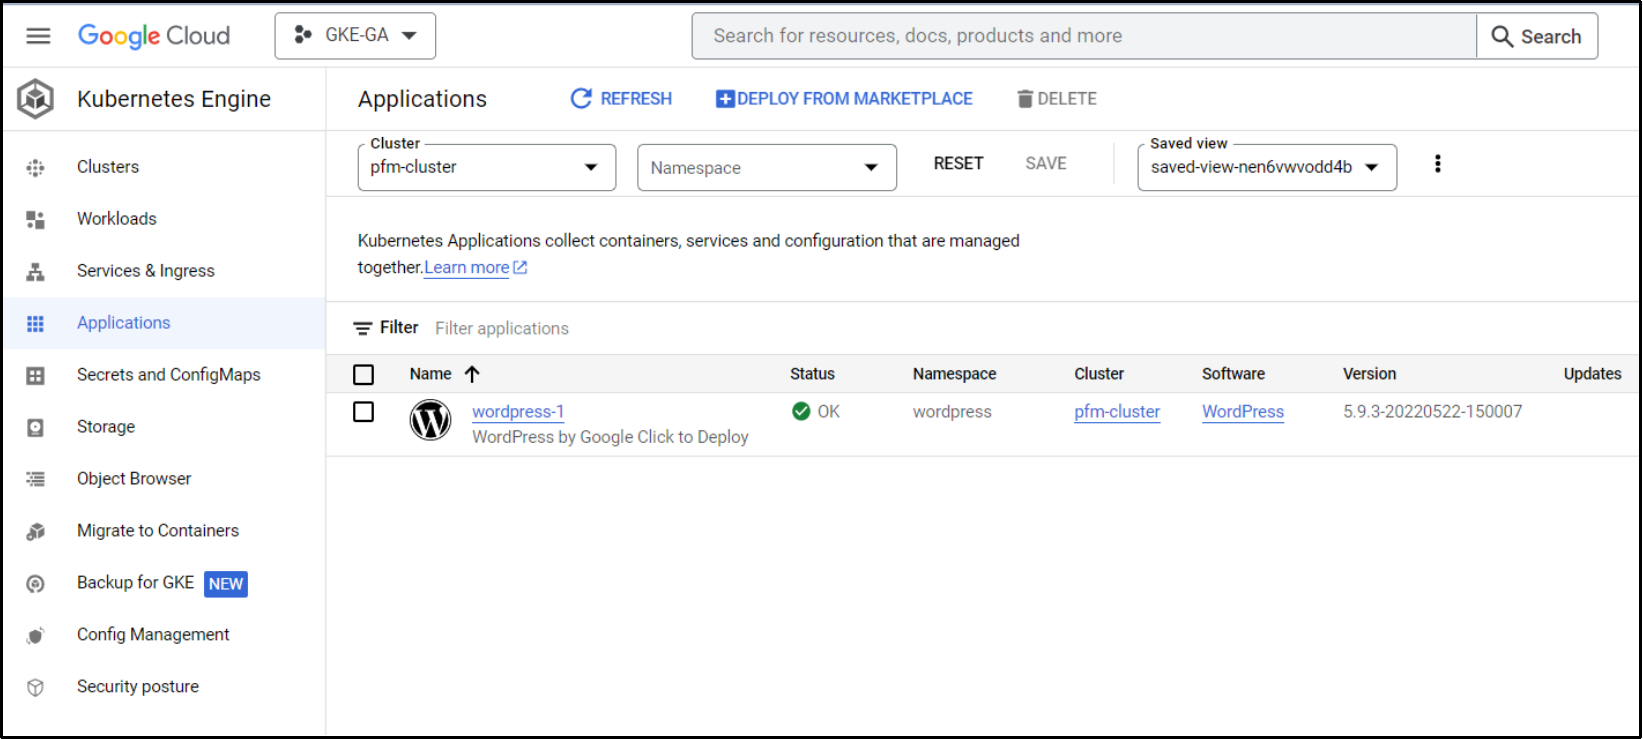 Figure 12: Successful deployment of WordPress application
 Note: Since the WordPress pods run inside the GKE on-premises cluster VMs, you will not see any additional VMs in vCenter when this application is deployed on a VMware based Anthos cluster.
- Verify if the deployment has created persistent volumes dynamically in the given storage class as shown in the following figure:
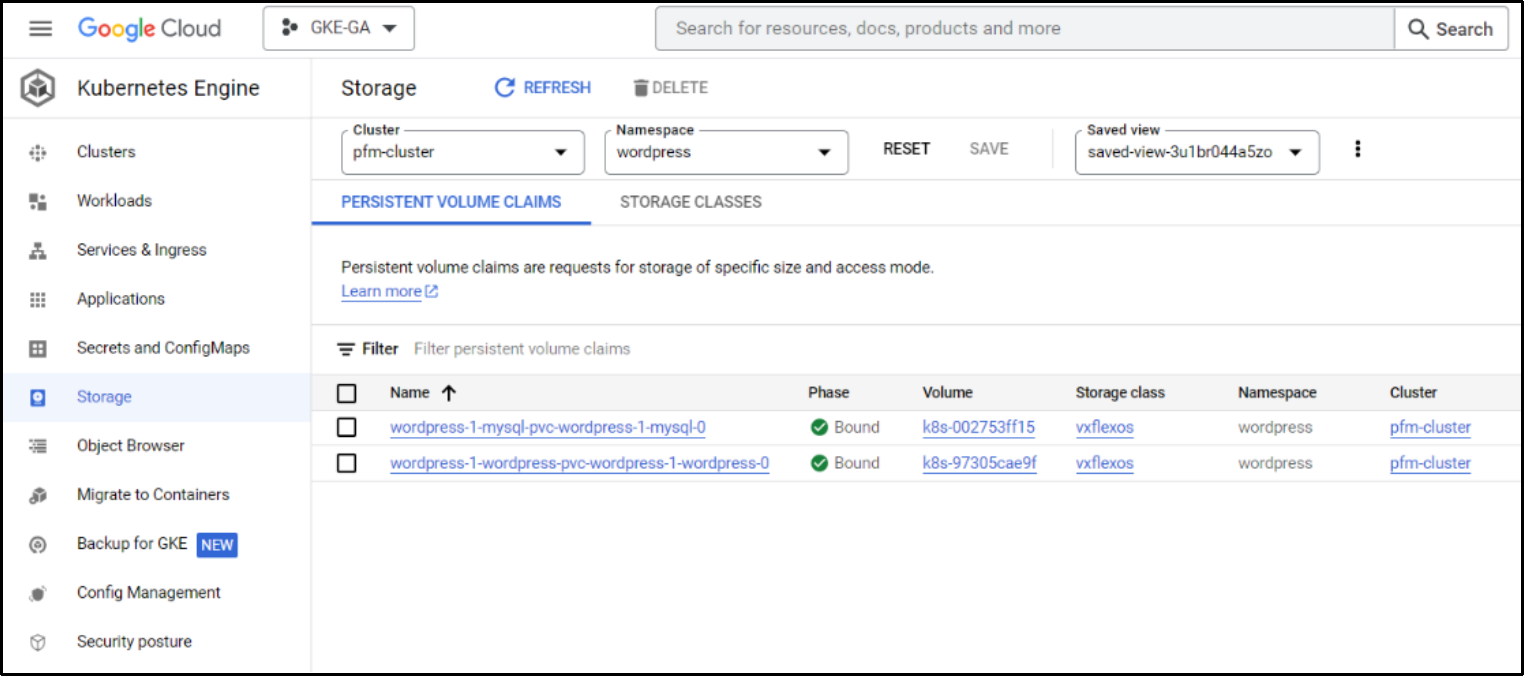 Figure 13: Persistent volume verification
 - Since the NodePort service is configured during deployment, verify the service details as follows:

- You can access the WordPress application webUI as shown in the following figure:
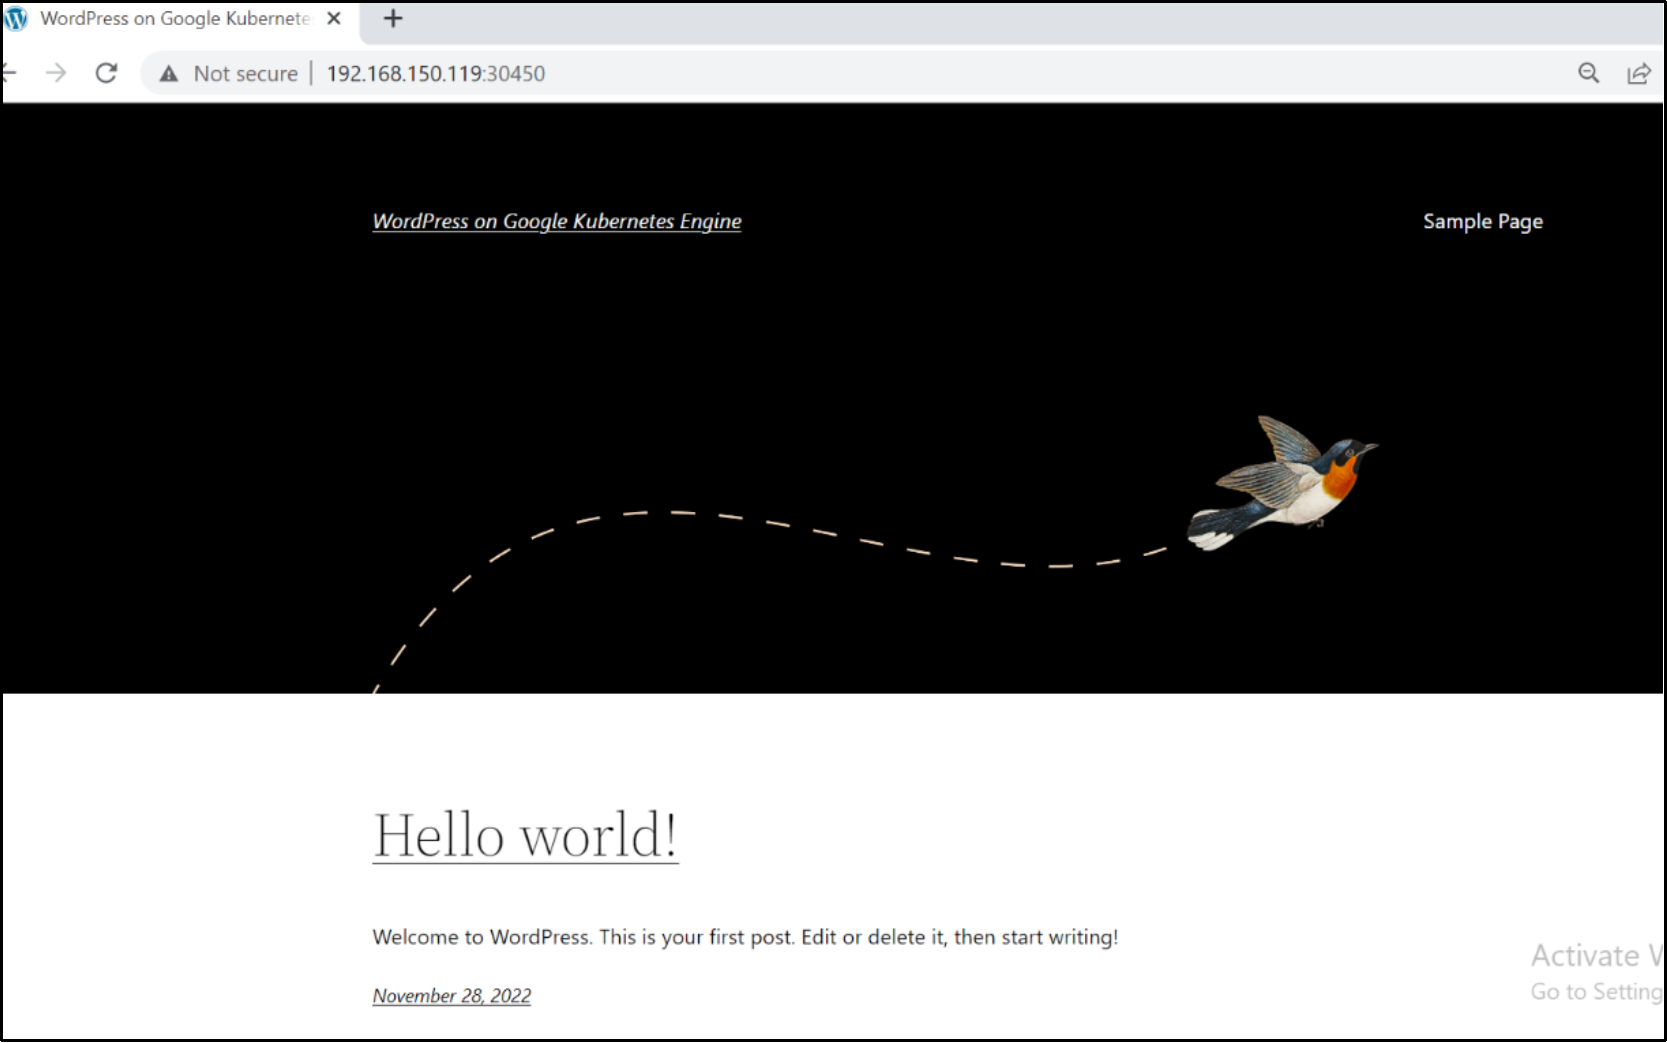 Figure 14: WordPress Application WebUI
- To scale application deployment, select Kubernetes Engine > Applications.
Select the deployed application and edit it to change the value of replica set. In this example WordPress application is a stateful set, and replica set value is edited to 5 for WordPress and MySQL deployment. The default sample application deployed one replica each for the WordPress and MySQL stateful sets.
- After editing the application for five replica sets, verify that the deployment is complete, and application is scaled as shown in the following figure:
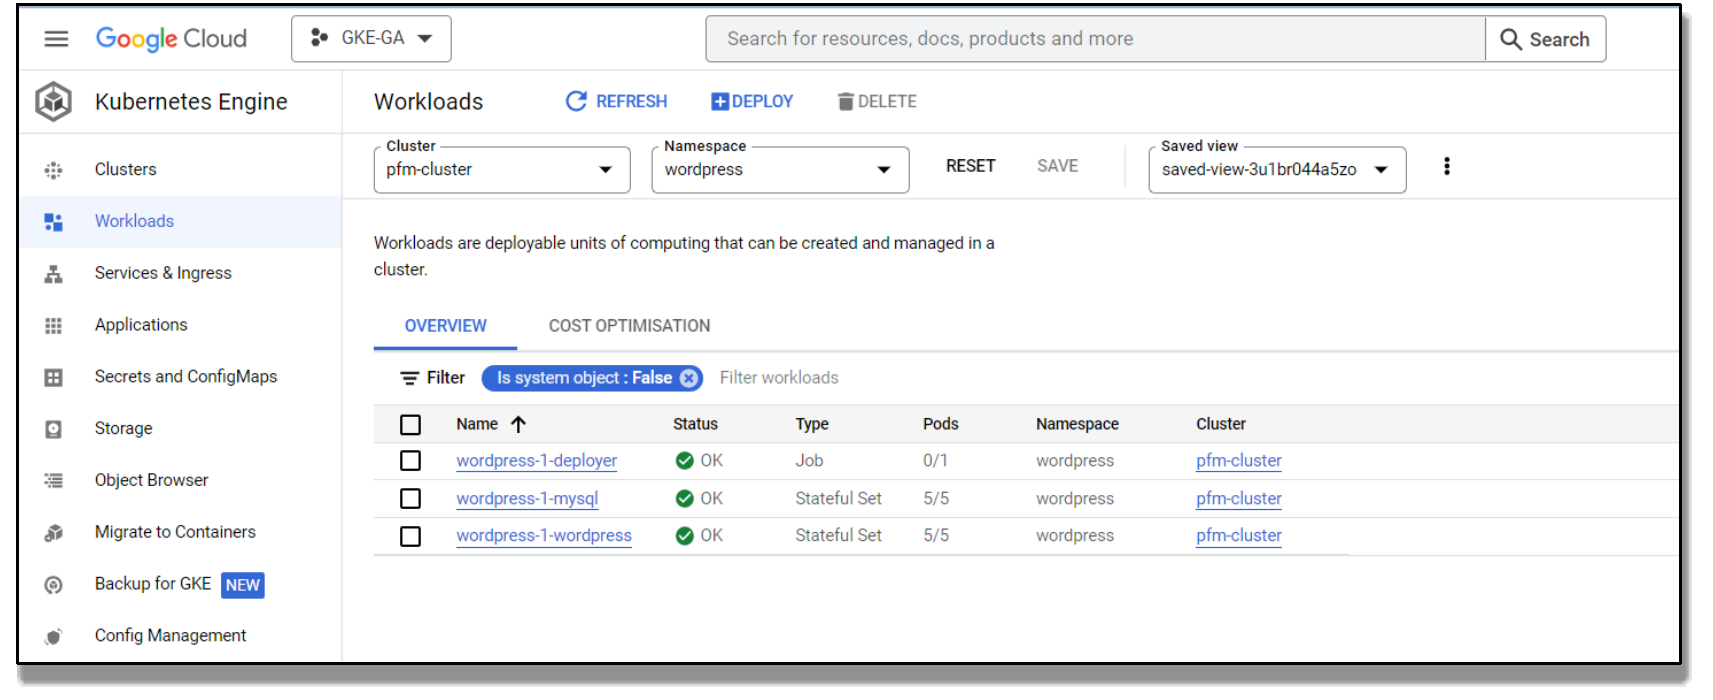 Figure 15: Application scaling
 The Persistent volumes for new instances were dynamically scaled based on the replica set inputs as shown in the following figure:
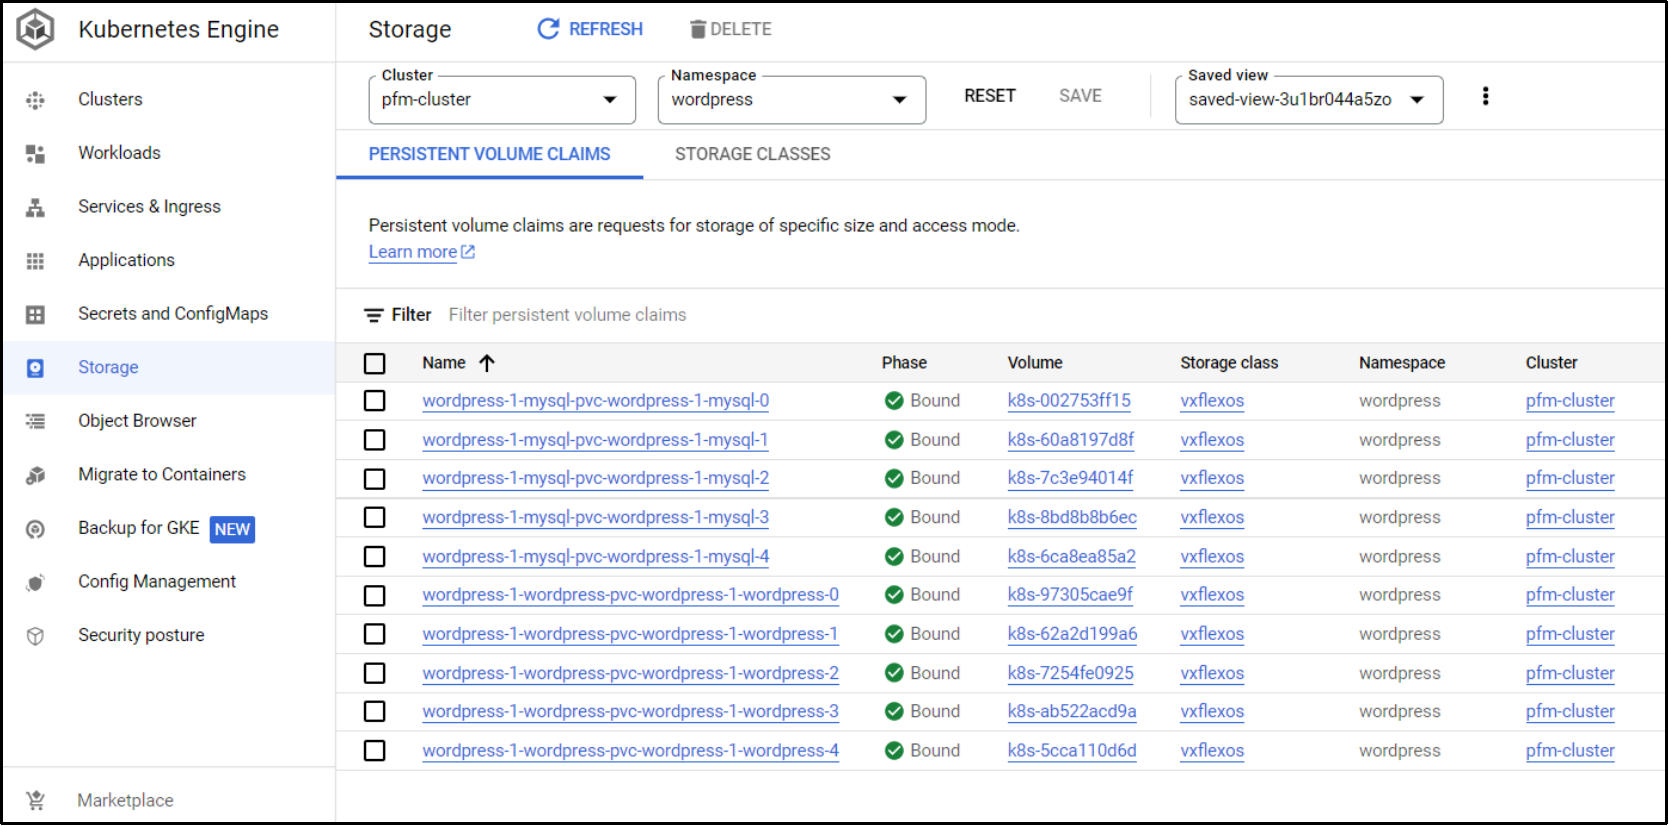 Figure 16: Persistent volumes scaled as per application