This topic describes license generation in the Dell Digital Locker/Software Licensing Center.
You must have the Bare Metal Orchestrator software downloaded to your system.
Install the Bare Metal Orchestrator software.
Note: See the Bare Metal Orchestrator Installation Guide for detailed installation instructions.
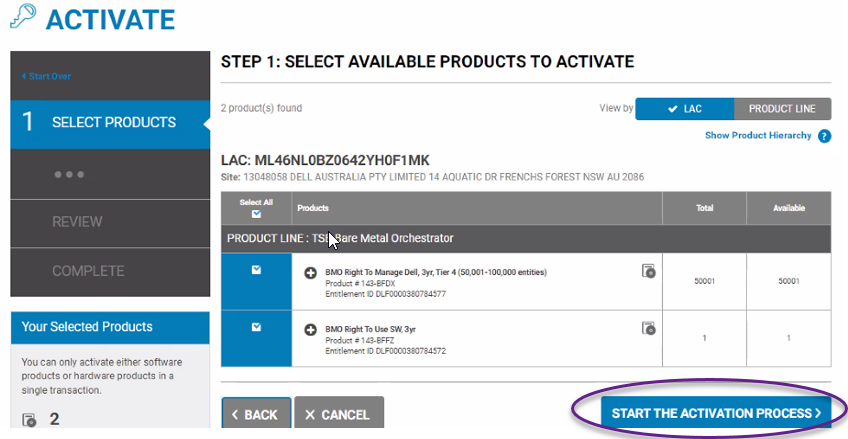
Click Activate Now.
The Activate window opens.
Select Right To Manage and Right To Use.
Figure 8. Activate page
Click Start The Activation Process.
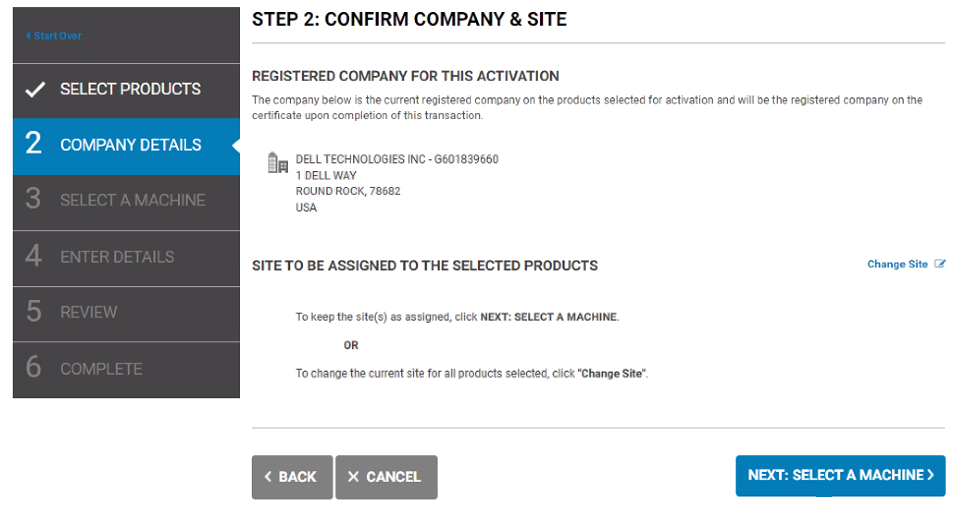
The Confirm Company & Site page opens. You can keep the site or change it for all selected products. In this example, the assigned site stays the same. Figure 9. Confirm company and site
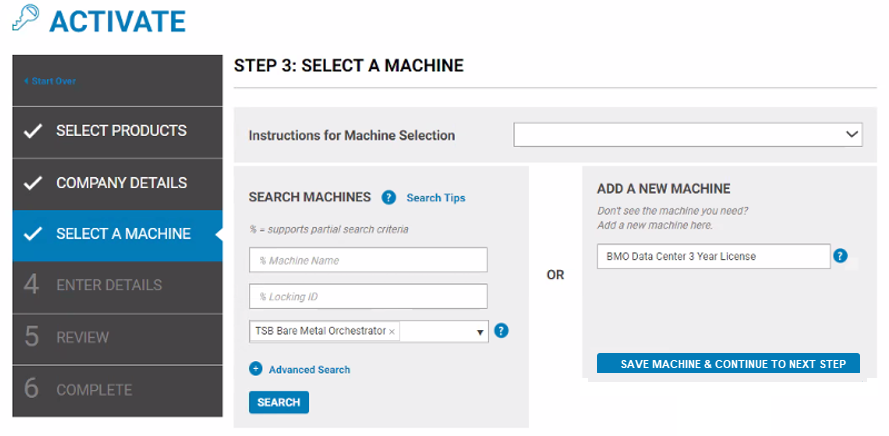
Click Select a Machine to add a new server name.
The Select A Machine window opens. Figure 10. Select a machine You can search for a server name if it was previously created, or add a new server. For new servers, set a name that identifies your specific Bare Metal Orchestrator license installation.
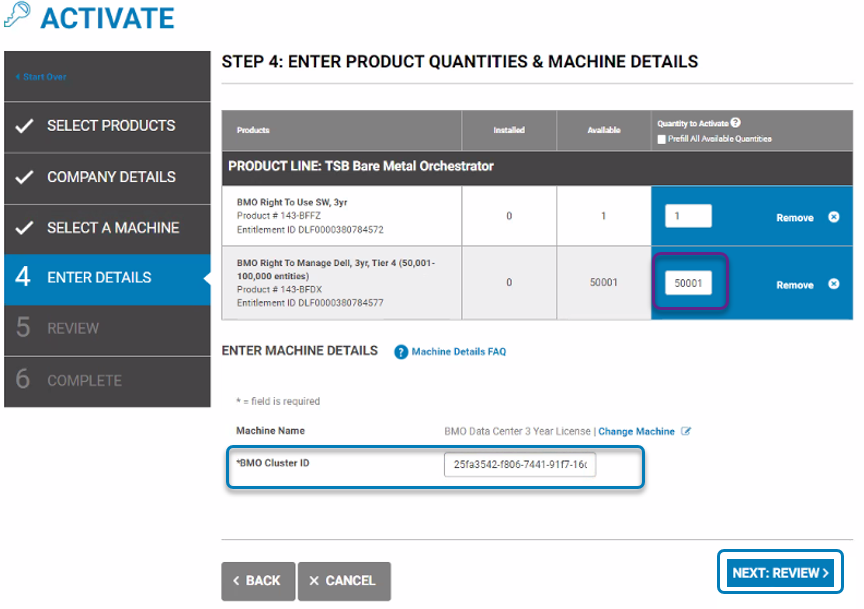
Enter the BMO Cluster ID (Unique Cluster ID). To determine the ID:
Establish a CLI session on the Bare Metal Orchestrator VM and log in. For high availability configurations, establish a CLI session using the virtual IP (VIP) of the Load Balancers for the Bare Metal Orchestrator cluster.
Run:
bmo version -b
Note: See the Bare Metal Orchestrator Installation Guide for more information.
Click Next: Review.
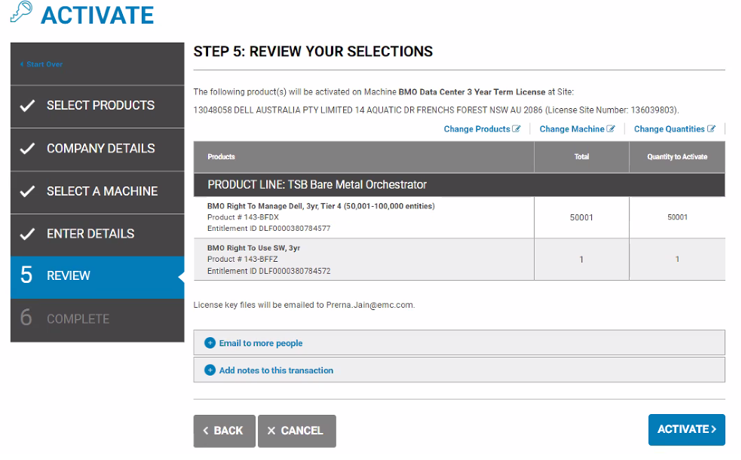
The Review Selections window opens. Figure 12. Review selections
Review the displayed information. You can add email addresses or notes to the license key email.
Click Activate.
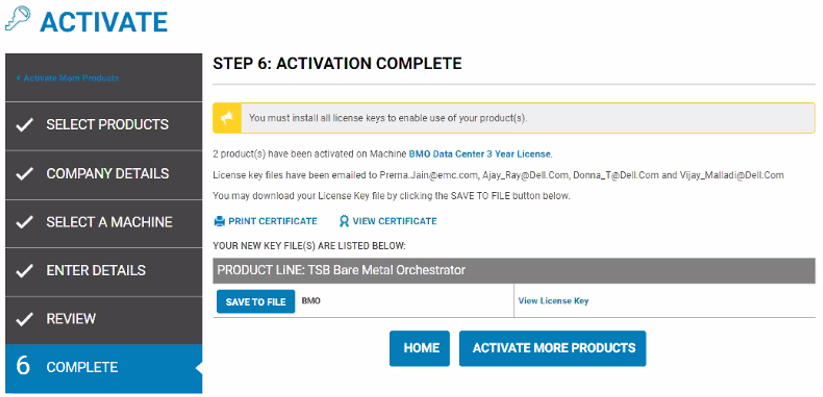
The Activation Complete window opens.
You will receive an email with the license file. You can also save the license to a file.
Figure 13. Activation complete
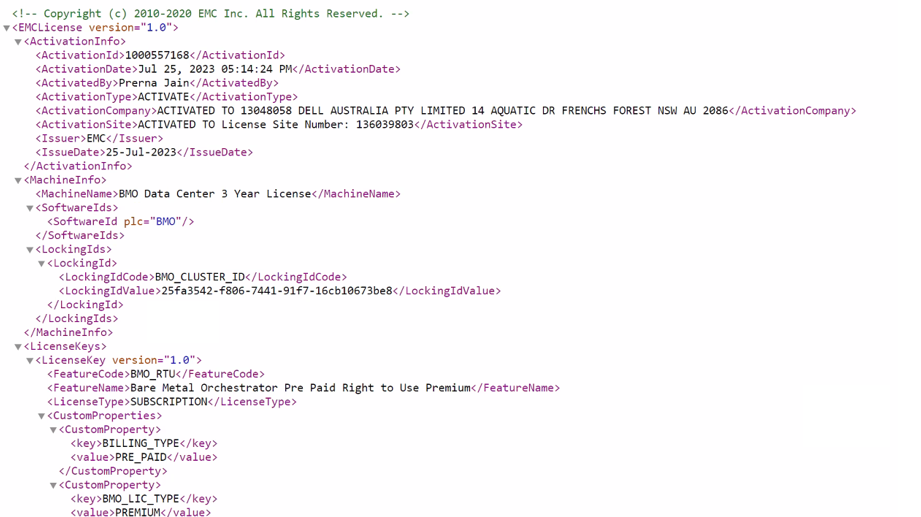
Click View License Key to see the license contents.